How to remove a reducer or a plumbing coupling piece

The friendliest place on the web for anyone who enjoys boating.
If you have answers, please help by responding to the unanswered posts.

paulga

Guru
Joined
May 28, 2018
Messages
1,019
Location
United States
Vessel Name
DD
Vessel Make
Marine Trader Sundeck 40'
I heard pliers should be avoided whenever possible, a wrench is always preferred on nuts. There is a reducer on the cold water supply to the hot water tank that I need to remove. It looks like a 3/4 to 1/2 reducer. This coupling piece does not have a hex side. Is there a tool supposed to be used on this piece?

IMG_20231129_200926.jpg
 
Pipe wrench. Not sure why you need to remove the reducing coupler?
 

Attachments

  • Pipe wrench.jpg
    Pipe wrench.jpg
    29.8 KB · Views: 12
Doesn't look like you have a choice but a pipe wrench, if it is round.
 
This is to add a ball valve for potential use.

I heard pliers should be avoided whenever possible, a wrench is always preferred on nuts. There is a reducer on the cold water supply to the hot water tank that I need to remove. It looks like a 3/4 to 1/2 reducer. This coupling piece does not have a hex side. Is there a tool supposed to be used on this piece?

View attachment 143920
 
Due to how close it is to a bulkhead, a crescent wrench can be used if set snug
and used against the raised bosses of that fitting. Sometimes that fits better
than a pipe wrench. Channel lock pliers also work if it's not on there too tight.
 
No, it's pretty far away from the bulkhead. I think channel lock pliers= groove joint pliers, this is what I have, so I'll try from that

Due to how close it is to a bulkhead, a crescent wrench can be used if set snug
and used against the raised bosses of that fitting. Sometimes that fits better
than a pipe wrench. Channel lock pliers also work if it's not on there too tight.
 
Greetings,
Mr./Ms. p. You may get lucky if you remove the hose and put a wrench on the flat sides of the elbow. On the other hand, why not simply remove the elbow with the hose barb and replace it with a street elbow and put the ball valve on that.


iu
 
Last edited:
Does the 3/4 to 1/2 reducer connect between the 3/4 ball valveand the flexible hose head?

Oftentimes I see FIP , NPT, MHT, and they are said to work together. So does this one also work as the coupler?
 
Last edited:
Use a big crescent wrench on the elbow, a pipe wrench on everything else. Pretty straightforward if you have them in the right sizes.

David
 
I didn't get what is good about the street elbow? You still need a coupler or nipple from the ball valve to the rubber hose

Greetings,
Mr./Ms. p. You may get lucky if you remove the hose and put a wrench on the flat sides of the elbow. On the other hand, why not simply remove the elbow with the hose barb and replace it with a street elbow and put the ball valve on that.


iu
 
As you continue your journey into boat maintenance and repair your tool collection will grow.

Some I find useful for piping and plumbing are Irwin's vice grip quick adjusting plier, much better than generic channel lock plier.

Offset pipe wrenches this and this.

Not suggesting these vendors or wrench sizes. Match the size to the job and the vendor to how much and how hard you want to use the tool. As with anything you get what you pay for. The less expensive pipe wrenches just won't grab as well. The best have replaceable 'teeth'. Aluminum handles are nice because they are lighter.
 

Attachments

  • Irwin.png
    Irwin.png
    159 KB · Views: 14
  • Offset pipe wrench.png
    Offset pipe wrench.png
    115.1 KB · Views: 9
  • 90 pipe wrench.jpg
    90 pipe wrench.jpg
    11 KB · Views: 9
Greetings,
Mr./Ms. p. You may get lucky if you remove the hose and put a wrench on the flat sides of the elbow. On the other hand, why not simply remove the elbow with the hose barb and replace it with a street elbow and put the ball valve on that.


iu

:iagree:
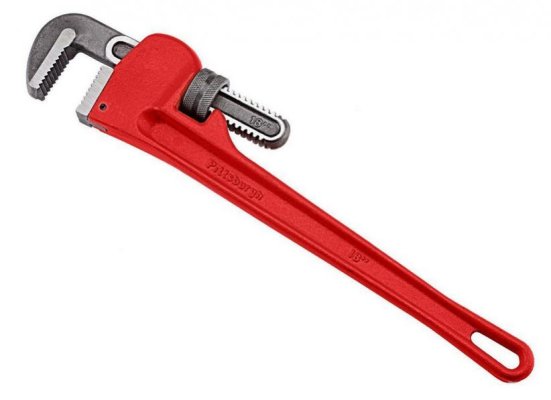
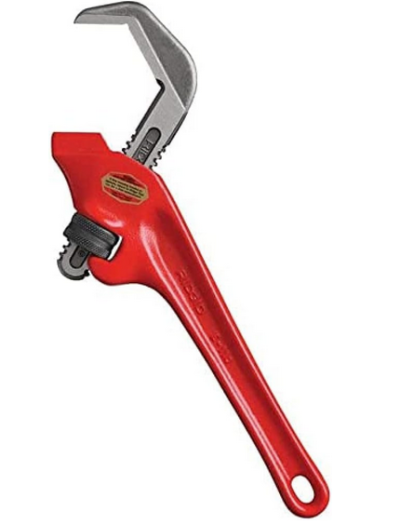
That's the way to go. Also, made for a pipe wrench.
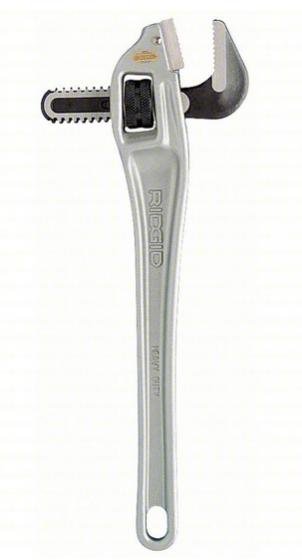
 
I purchased numerous tools last week. I felt the need to put a control on my tool budget.


As you continue


your journey into boat maintenance and repair your tool collection will grow.

Some I find useful for piping and plumbing are Irwin's vice grip quick adjusting plier, much better than generic channel lock plier.

Offset pipe wrenches this and this.

Not suggesting these vendors or wrench sizes. Match the size to the job and the vendor to how much and how hard you want to use the tool. As with anything you get what you pay for. The less expensive pipe wrenches just won't grab as well. The best have replaceable 'teeth'. Aluminum handles are nice because they are lighter.
 
Understand, buy what you need when you need it. I am pointing out tools I find useful. Not telling you to stock up.
I purchased numerous tools last week. I felt the need to put a control on my tool budget.
 
You can never have too many tools. My wife says that I have never met a tool that I didn’t need…
 
Does the 3/4 to 1/2 reducer connect between the 3/4 ball valveand the flexible hose head?

Oftentimes I see FIP , NPT, MHT, and they are said to work together. So does this one also work as the coupler?

Short answer is No
MHT is Male (garden) Hose Thread meant to adapt pipe to garden hose fitting.

It would be helpful to understand what you are attempting to do or add as functionality.
If adding a bypass, like for winterization, there are 3 way valve kits that make the install & operation EZ.
 
Last edited:
Scuse my STINKIN ignorance

But unless you live in a 3rd world country, that red thing indicates HOT OUT. my observation is confirmed by the lower port having a blue thing on it.
 
Greetings,
Mr. p. Re: Your post #11. The "advantage" with a street elbow is you don't have to remove the reducer. You're still going to need the pipe nipple but whatever you do you will need a variety of fittings. As Mr. B asks (post #17). What are you trying to achieve?
 
But unless you live in a 3rd world country, that red thing indicates HOT OUT. my observation is confirmed by the lower port having a blue thing on it.

The hot out has to be at the top and the cold in has to be at the bottom for the heater to work correctly, so you can tell even without the colored parts. Most residential heaters have both connections at the top, but the cold side has a dip tube inside that goes to the bottom.
 
But unless you live in a 3rd world country, that red thing indicates HOT OUT. my observation is confirmed by the lower port having a blue thing on it.

Thanks for pointing it out.

I thought it's intuitive to supply water from top and have hot water come out from the bottom. It actually works the other way.
 
Short answer is No
MHT is Male (garden) Hose Thread meant to adapt pipe to garden hose fitting.

It would be helpful to understand what you are attempting to do or add as functionality.
If adding a bypass, like for winterization, there are 3 way valve kits that make the install & operation EZ.

Yes, it is for winterization purpose.

Why they do not work? If the copper piece that the rubber hose connect to is 1/2" male thread, it should be compatible?

Could you give a link to the 3 way valve kits?
 
Now I get your point.
I haven't tried removing that yet. Looking at it I didn't see anything like hex surface to engage a tool, so was asking. Not saying it does not come off

Greetings,
Mr. p. Re: Your post #11. The "advantage" with a street elbow is you don't have to remove the reducer. You're still going to need the pipe nipple but whatever you do you will need a variety of fittings. As Mr. B asks (post #17). What are you trying to achieve?
 
Now I get your point.
I haven't tried removing that yet. Looking at it I didn't see anything like hex surface to engage a tool, so was asking. Not saying it does not come off

The reducer probably has two "lumps" (ridges) on its outside that will allow a firmly applied crescent wrench to undo it.

Out of curiosity, I don't understand why you want an isolation valve on the outlet of the hot water tank for winterising. Personally, I just drain the tank by shutting off the pump, opening the drain valve and opening the faucets to let air into the system.
 
Yes, it is for winterization purpose.

Why they do not work? If the copper piece that the rubber hose connect to is 1/2" male thread, it should be compatible?

Could you give a link to the 3 way valve kits?

The link you provided was for a MHT fitting to attach a garden hose female connector. The fitting you mention has pipebthread... actually NPT... national tapered pipe thread whish common household pipe thread / fittings. Look up /:search for various threads you cited and you will learn the differences..while different ones may appear to join together they are NOT compatible and can lead to leakage, breakage & worst case sinking when straight threads are joined to tapered at a seacock.

If you search RV HWH bypass kit you find examples.here is one

https://www.etrailer.com/Accessorie...BvRr6DRXetGw9cREqm5a4fy38X6v_AjkaAh0kEALw_wcB
They come with different length hoses to act as the bypass. Measure the distance between where the valves will be located to figure out what L you need. Emailer is a good source and they have many how to instructions to help if you are still unsure

They b also sell a similar one valve kit for inlet to thevwayer pump. Winterization is EZ as after installation you empty empty the tank, turn the valve, connect the short hose into a jug of pinknandbturn your pump on and open each faucet in sequence to get pink in all faucets / fixtures.
https://www.etrailer.com/RV-Fresh-W...4CkUs6YDqVdF2n4hcieAruA8D2APRxo8aApyeEALw_wcB

If you haven't performed DIY winterization before you may be waybahead to have someone that has experience do it. Best to observe, take notes & video to ensure ability to DIY next time w /o an expensive oversight. It's not difficult once you know what you are doing... fixing freeze up problems are much more difficult, more expensive and very little fun!
 
Last edited:
Looks like you are all set to drain the tank as it is.

There is a drain faucet right before the cold inlet and a shut off before that.

Shut the input, crack a hot anywhere in the boat and then open the drain valve (looks like a garden hose faucet)
 
Thanks, i never noticed the difference between tapered and straight threads.

if you look at the photo in post #1, the cold water inlet shutoff is a 3/4 ball valve, i checked several 3/4 ball valve links, they all have NPT threads.

does the 3 way T in your first link also has NPT threads? so actually most plumbing connections on boats have tapered threads, including seacock, strainer, water pump, and water supply lines to faucets? only garden hose are straight threads?

so garden hose connections are sealed with o ring, while the others are sealed with metal to metal contact or teflon tape?


The link you provided was for a MHT fitting to attach a garden hose female connector. The fitting you mention has pipebthread... actually NPT... national tapered pipe thread whish common household pipe thread / fittings. Look up /:search for various threads you cited and you will learn the differences..while different ones may appear to join together they are NOT compatible and can lead to leakage, breakage & worst case sinking when straight threads are joined to tapered at a seacock.

If you search RV HWH bypass kit you find examples.here is one

https://www.etrailer.com/Accessorie...BvRr6DRXetGw9cREqm5a4fy38X6v_AjkaAh0kEALw_wcB
They come with different length hoses to act as the bypass. Measure the distance between where the valves will be located to figure out what L you need. Emailer is a good source and they have many how to instructions to help if you are still unsure

They b also sell a similar one valve kit for inlet to thevwayer pump. Winterization is EZ as after installation you empty empty the tank, turn the valve, connect the short hose into a jug of pinknandbturn your pump on and open each faucet in sequence to get pink in all faucets / fixtures.
https://www.etrailer.com/RV-Fresh-W...4CkUs6YDqVdF2n4hcieAruA8D2APRxo8aApyeEALw_wcB

If you haven't performed DIY winterization before you may be waybahead to have someone that has experience do it. Best to observe, take notes & video to ensure ability to DIY next time w /o an expensive oversight. It's not difficult once you know what you are doing... fixing freeze up problems are much more difficult, more expensive and very little fun!
 
Thanks, i never noticed the difference between tapered and straight threads.

does the 3 way T in your first link also has NPT threads? so actually most plumbing connections on boats have tapered threads, including seacock, strainer, water pump, and water supply lines to faucets? only garden hose are straight threads?

so garden hose connections are sealed with o ring, while the others are sealed with metal to metal contact or teflon tape?

Wow - plumbing 101 !

Yes. Most fluid (liquid or gas) connections that do not get regularly disconnected have tapered threads. Those that are often disconnected (like garden hoses) have straight threads and a rubber seal. Technically this seal is a "flat washer" (because of its shape). O-rings have a different shape and are used to seal many connections (but not garden hoses).

As you stated, the tapered threads make a metal-to-metal contact - BUT (in general) the male and female halves, after tightening, still have little gaps and need some goop to plug these gaps and make the connections leaktight. In the old days, hemp string fibers were used. Today we use teflon tape or some sort of paste. The tape gets chewed up and forced into the remaining voids during joint make-up.
 

Attachments

  • Hose washer image.png
    Hose washer image.png
    35.6 KB · Views: 114
  • O-ring image.png
    O-ring image.png
    41.4 KB · Views: 115
Thanks for your confirmation
the video i watched says to apply 4 circles of teflon, hand tight all the way then add 3 turns using a wrench/pliers.
are these the common practice followed in everyday's work?

Wow - plumbing 101 !

Yes. Most fluid (liquid or gas) connections that do not get regularly disconnected have tapered threads. Those that are often disconnected (like garden hoses) have straight threads and a rubber seal. Technically this seal is a "flat washer" (because of its shape). O-rings have a different shape and are used to seal many connections (but not garden hoses).

As you stated, the tapered threads make a metal-to-metal contact - BUT (in general) the male and female halves, after tightening, still have little gaps and need some goop to plug these gaps and make the connections leaktight. In the old days, hemp string fibers were used. Today we use teflon tape or some sort of paste. The tape gets chewed up and forced into the remaining voids during joint make-up.
 
Last edited:
Back
Top Bottom