Scurvy_Dan
Member
I was unable to find any information on how to repair a diesel fuel leak on my 120hp Ford Lehman. My thirty six year old engine began to leak at the base of Delivery Valve Holders on cylinder #5 and #6. I consider any fuel leak to be a show stopper and was worried this would be the end of our boating season until repairs were made. I did some research and discovered that the service manual states the Delivery Valves can be serviced without removing the Fuel Injection Pump. I called American Diesel to find out if they sold the special tool to remove the Delivery Valve Holders as shown in the service manual. I was told they do not sell the tool and that they do not recommend owners making this repair. I was given the name of some Diesel Injection Pump Repair Shops and started calling around for a price quote on this repair. Every shop I called wanted me to remove the entire pump and send it to them. One shop even told me that they would not repair my leaking pump without also rebuilding my injectors. I was looking at a minimum price quote of $2,000 for a pump rebuild and $100 per injector rebuild - OUCH!!
There are many websites that show people how to make this repair on a leaking Mercedes Benz but nothing on a Minnimec Pump. I knew this was not a complicated repair and would not require my pump to be re-timed or calibrated. I just need to stop the leaking seals. I was able to find an online store that sold the special socket and a rebuild kit for the Minnimec Pump. Believe it or not, they are in France - autodiesel13.com/en - and they ship parts internationally! I was able to purchase the socket (ED0422) for $70 and the gaskets and seals (ED1109111) for $14 and shipping to the US was $35. Everything arrived in less than one week and I was ready to begin fixing the fuel leaks.
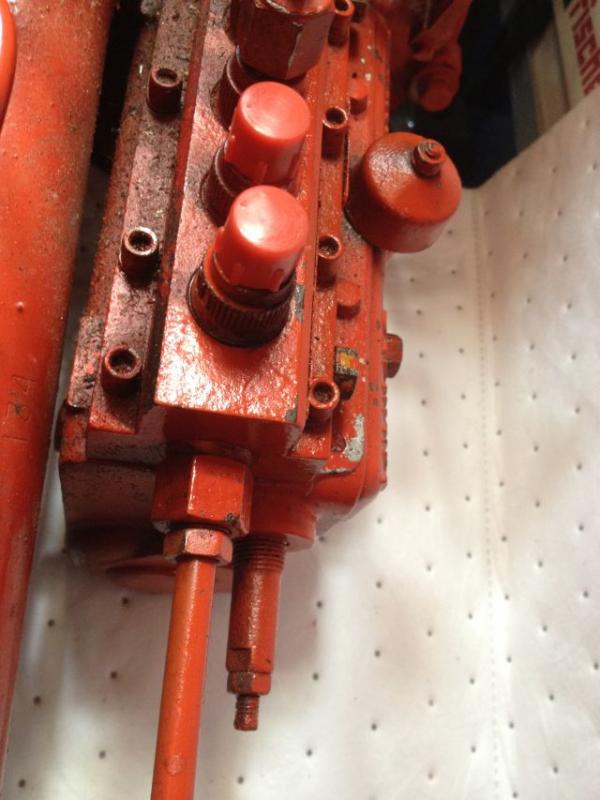
Before I began to make this repair I made sure the work area was clean and I added a mat underneath the pump to catch any pieces that may try to run away. I loosened/removed the fuel lines from the injection pump to the injectors just enough to access the Delivery Valve Holders on #5 and #6 (back of the pump). Once the lines were out of the way I placed the caps that were provided in the seal kit on top of each Delivery Valve Holder.
Now it was time to remove the Delivery Valve Guide. Once the guide was out i simply removed the rest of the components in order. If your pump is like mine you will have seven pieces when you are said and done. Do one Delivery Valve at a time and NEVER mix parts! Take great care to keep everything in the exact order it came out so that you put it back together correctly. Here are the photos of my pump during the removal of these seven components.
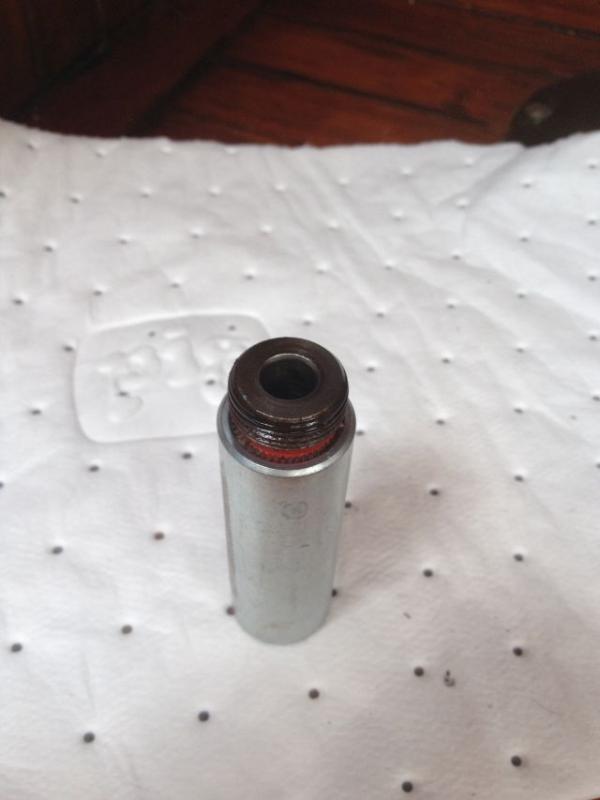
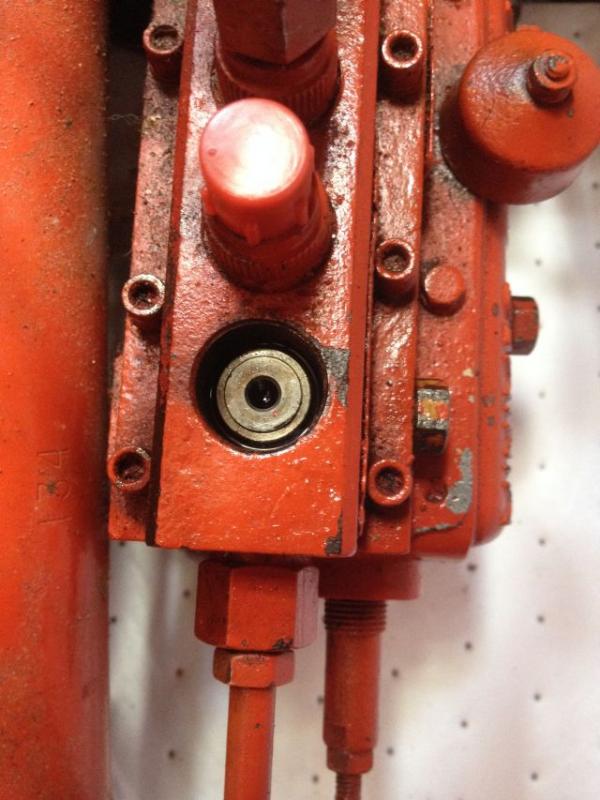

If you look at the last picture above it has all the components laid out on a mat. From left to right the parts are:
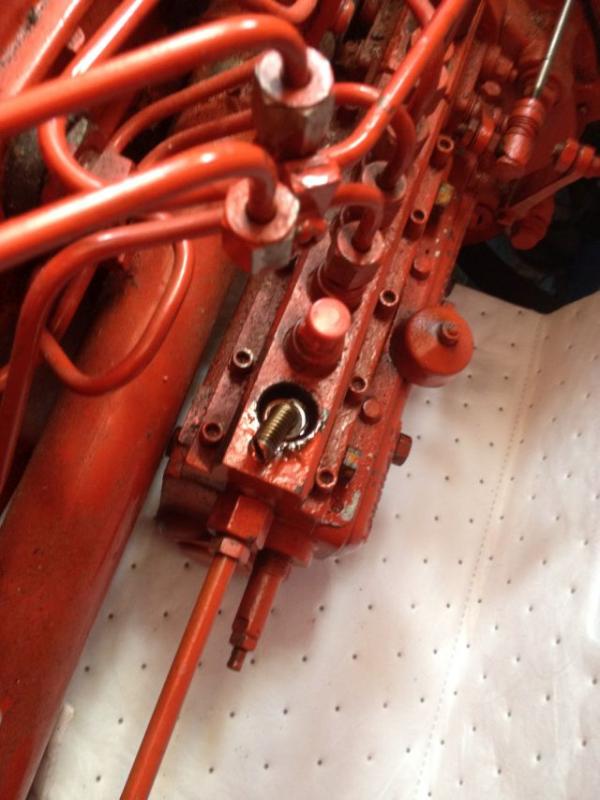
You need to replace #1 and #3 with new components from the gasket and seal kit. Make sure you use the Steel Crush Washers and not the Brass Crush Washers that are in the kit. After you have swapped out these two parts you simply need to reverse the removal process taking care to put everything back together the way you found it. I placed the O-Ring in first followed by the Delivery Valve Guide and the Delivery Valve. After these components were in I placed the Steel Crush Washer in place making sure to keep it centered as best as possible. Then the Spring and Volume Reducer went back in and I re-installed the Delivery Valve Holder. Using a torque wrench each Delivery Valve Holder was torqued to 26 ft/lb.
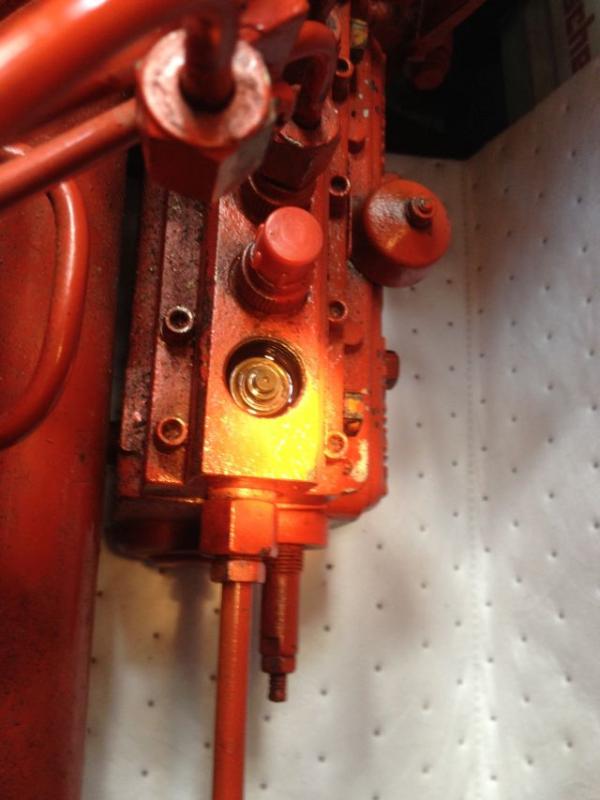
I repeated the process for the #5 cylinder and re-installed my fuel lines. The Delivery Valve Guide on #5 did have some corrosion were the Steel Crush Washer met it's top surface. I used 320 grit and paper and cleaned it up before reassembly. The entire job took less than two hours but I would plan on 4-6 hours if you were doing all six cylinders. Before I fired up my engine I drained one of my primary fuel filters and filled it up with Hot Shots Diesel Extreme Fuel Detergent & Booster. This may have been unnecessary but since the one shop I called recommended rebuilding my injectors I figured why not? I fired up the engine and after it warmed up I ran it hard for 20 minutes. NO MORE LEAKS!!
A $2,600 dollar repair for $119. Where will I spend the other $2,481? Oops - I forgot the injector cleaner was $10 so there is only $2,471 left. Darn!!
Hope this helps!
There are many websites that show people how to make this repair on a leaking Mercedes Benz but nothing on a Minnimec Pump. I knew this was not a complicated repair and would not require my pump to be re-timed or calibrated. I just need to stop the leaking seals. I was able to find an online store that sold the special socket and a rebuild kit for the Minnimec Pump. Believe it or not, they are in France - autodiesel13.com/en - and they ship parts internationally! I was able to purchase the socket (ED0422) for $70 and the gaskets and seals (ED1109111) for $14 and shipping to the US was $35. Everything arrived in less than one week and I was ready to begin fixing the fuel leaks.
Before I began to make this repair I made sure the work area was clean and I added a mat underneath the pump to catch any pieces that may try to run away. I loosened/removed the fuel lines from the injection pump to the injectors just enough to access the Delivery Valve Holders on #5 and #6 (back of the pump). Once the lines were out of the way I placed the caps that were provided in the seal kit on top of each Delivery Valve Holder.
Now it was time to remove the Delivery Valve Guide. Once the guide was out i simply removed the rest of the components in order. If your pump is like mine you will have seven pieces when you are said and done. Do one Delivery Valve at a time and NEVER mix parts! Take great care to keep everything in the exact order it came out so that you put it back together correctly. Here are the photos of my pump during the removal of these seven components.
If you look at the last picture above it has all the components laid out on a mat. From left to right the parts are:
- O-Ring
- Delivery Valve Guide
- Steel Crush Washer
- Delivery Valve
- Spring
- Volume Reducer
- Delivery Valve Holder
You need to replace #1 and #3 with new components from the gasket and seal kit. Make sure you use the Steel Crush Washers and not the Brass Crush Washers that are in the kit. After you have swapped out these two parts you simply need to reverse the removal process taking care to put everything back together the way you found it. I placed the O-Ring in first followed by the Delivery Valve Guide and the Delivery Valve. After these components were in I placed the Steel Crush Washer in place making sure to keep it centered as best as possible. Then the Spring and Volume Reducer went back in and I re-installed the Delivery Valve Holder. Using a torque wrench each Delivery Valve Holder was torqued to 26 ft/lb.
I repeated the process for the #5 cylinder and re-installed my fuel lines. The Delivery Valve Guide on #5 did have some corrosion were the Steel Crush Washer met it's top surface. I used 320 grit and paper and cleaned it up before reassembly. The entire job took less than two hours but I would plan on 4-6 hours if you were doing all six cylinders. Before I fired up my engine I drained one of my primary fuel filters and filled it up with Hot Shots Diesel Extreme Fuel Detergent & Booster. This may have been unnecessary but since the one shop I called recommended rebuilding my injectors I figured why not? I fired up the engine and after it warmed up I ran it hard for 20 minutes. NO MORE LEAKS!!
A $2,600 dollar repair for $119. Where will I spend the other $2,481? Oops - I forgot the injector cleaner was $10 so there is only $2,471 left. Darn!!
Hope this helps!


") !!
!!