DIY Breaker Panel Build

The friendliest place on the web for anyone who enjoys boating.
If you have answers, please help by responding to the unanswered posts.

SeaBoy

Veteran Member
Joined
Nov 4, 2021
Messages
77
Vessel Make
1982 Albin 40 DC
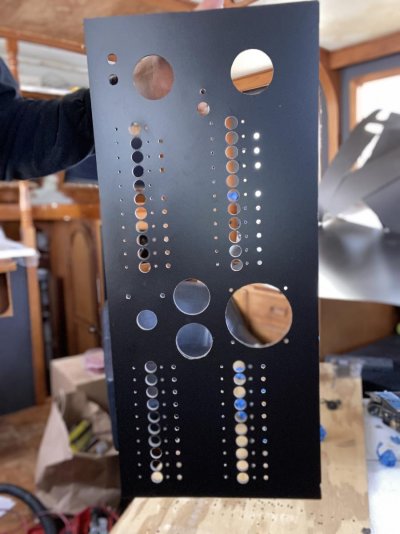
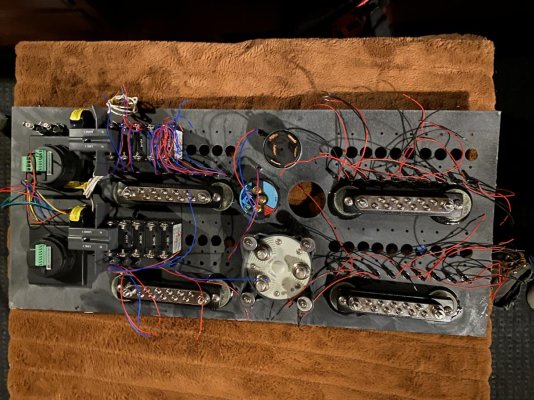
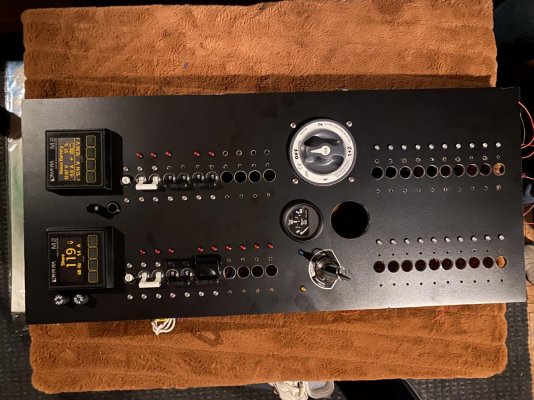
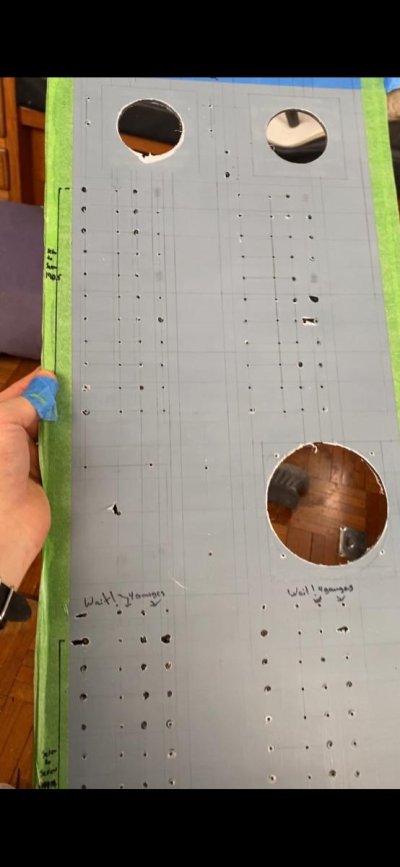
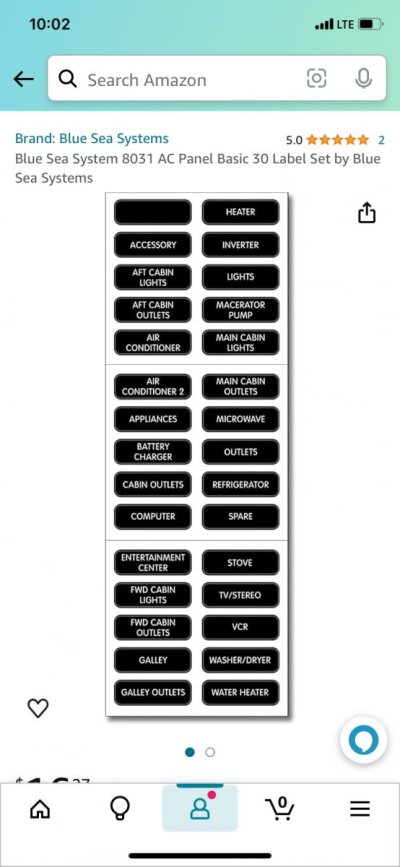
Figured I’d post my breaker panel built. This was a tough project and I didn’t get any ideas on other peoples builds because it’s not a very common thing to do and now I know why… I spent countless hours researching, finding the right components, making sure everything fits blah blah blah. Most of the components are Blue Sea Systems and some other less important things I bought on Amazon. I can answer questions as they come. This setup should give me exactly what I need, but I still have more work to do.

I wanted to think those who wait in on a few electrical issues I had in the past as well. Here are those links.
https://www.trawlerforum.com/forums/s32/diy-weld-mount-panel-fastening-71104.html#post1218732

https://www.trawlerforum.com/forums/s4/isolation-transformer-neutral-ground-connections-70843.html
 

Attachments

  • IMG_2415.jpg
    IMG_2415.jpg
    96.4 KB · Views: 16
  • IMG_2430.jpg
    IMG_2430.jpg
    192.6 KB · Views: 14
  • IMG_2431.jpg
    IMG_2431.jpg
    170.4 KB · Views: 17
yes, very nice. How did you layout and cut the panel?

Very carefully…. I worked in millimeters with a metal scale always starting at the 10mm line. Made my marks on the poly carbonate. Every whole was drilled with 1/16” bit. Then contact cemented Formica on top. Flipped the panel and drilled all the 1/16” holes again through the Formica. Then used a combination of drill bits(for small screw holes), paddle bits(for switch holes), and hole saws for the big stuff. For the big holes, I did drill them to the correct dimension on the polycarbonate. Then I used a dremel with a small drum sander attachment to sand the Formica out to the edges so I didn’t risk damaging the Formica with a big hole saw.

Here’s a picture of all my lines I drew in the polycarbonate
 

Attachments

  • IMG_2432.jpg
    IMG_2432.jpg
    51 KB · Views: 14
Looks very tidy. What are you planning for labels?
 
Looks very tidy. What are you planning for labels?

Unfortunately I chose not to figure a way to make them back lit, but Blue Sea has packs of them. I think I ended up with 100 labels for AC/DC that I will make do with. I’m way too picky about mismatching panels like my old panel had. It’ll look good. I added a motorcycle license plate light with a push button to light the panel at night when night vision is not required
 

Attachments

  • IMG_2434.jpg
    IMG_2434.jpg
    73.1 KB · Views: 5
  • IMG_2433.jpg
    IMG_2433.jpg
    63.9 KB · Views: 6
That's pretty neat work for a hand job. The breaker holes are close enough together that you cannot afford much of a positioning error. Also, I'd hate to make a mistake on the last hole I drilled! CNC makes this much less stressful.
 
For anyone else attempting this in the future. I recommend using Front Panel Express for making the panel face. I did a custom panel for my old Uniflite 42. I did it in aluminum and had it powder coated white. FPE has a great layout program that made it very simple. Now mounting all the hardware and running all the wire is still difficult.
 
Rather than use Blue Sea labels, which often don't have the text I want, I have used Carolina Laser (https://www.legend-plates.com/) for eight years and hundreds of labels on Fintry and Morning Light. They're fast and accurate. Their 3/4" labels match 3/4" breakers and if you use white letters, backlights show through.


Or, they will make custom labels. Everything with text on it in the pic is from Carolina. The five black strips under the breakers are one piece. They will also drill the custom sheets if needed, so they could make the whole panel in one piece.


Jim


Sweetwater - Swan 57 sloop - circumnavigated 1995-98
Fintry - x Royal Navy Fleet Tender 2003-22 20k miles including x-Atlantic The Fleet Tender Fintry
Morning Light -- Webbers Cove 42 trawler 2021- 23
[FONT=&quot]Going back to sailing now that Morning Light is sold.[/FONT]


Main AC Distribution Panel.jpg
 
Last edited:
For anyone else attempting this in the future. I recommend using Front Panel Express for making the panel face. I did a custom panel for my old Uniflite 42. I did it in aluminum and had it powder coated white. FPE has a great layout program that made it very simple. Now mounting all the hardware and running all the wire is still difficult.

How much did you pay for this?
 
Very carefully…. I worked in millimeters with a metal scale always starting at the 10mm line. Made my marks on the poly carbonate. Every whole was drilled with 1/16” bit. Then contact cemented Formica on top. Flipped the panel and drilled all the 1/16” holes again through the Formica. Then used a combination of drill bits(for small screw holes), paddle bits(for switch holes), and hole saws for the big stuff. For the big holes, I did drill them to the correct dimension on the polycarbonate. Then I used a dremel with a small drum sander attachment to sand the Formica out to the edges so I didn’t risk damaging the Formica with a big hole saw.

Here’s a picture of all my lines I drew in the polycarbonate

Wow. I was expecting to hear about CAD software and some supplier of laser-cut panels.
 
SeaBoy, I agree with everyone else, that's a nice piece of craftsmanship. We bought our Albin about the same time you bought yours and , as a matter of fact, yours was a contender, as I spoke to the PO about it. It seemed to have some nice mechanical upgrades already done to it, IIRC.
Is the battery selector switch you've incorporated into your panel, is it a selector for the panel source, the engine or both? On ours, the engine is on the other end of the engine room as opposed to the panel, so it would be impractical to run the large gauge start cable for that run. Just curious, since it's always fun to hear what other owners of the same model have done.
 
I paid $200 but we are talking 10 years ago. My panel was 18”x18” and had art work incorporated in the design.

I gotta say, I don’t recommend what I did either, but I did it for $32 and some left over Formica. My panel is like 26”x11”.
 
SeaBoy, I agree with everyone else, that's a nice piece of craftsmanship. We bought our Albin about the same time you bought yours and , as a matter of fact, yours was a contender, as I spoke to the PO about it. It seemed to have some nice mechanical upgrades already done to it, IIRC.
Is the battery selector switch you've incorporated into your panel, is it a selector for the panel source, the engine or both? On ours, the engine is on the other end of the engine room as opposed to the panel, so it would be impractical to run the large gauge start cable for that run. Just curious, since it's always fun to hear what other owners of the same model have done.


Ahh yes, count yourself lucky I bought mine before you got to it….its been tough.

The battery selector is for feeding everything on the panel.

The engine starts off the port side house bank. I have a dumb “battery crossover” push button that I can use to start off the stbd bank. I plan on changing this setup to start/house banks in lieu of my current port house/stbd house banks. The stbd bank consists of 2 8D batteries which I believe is why I have a permanent stbd list….
 
Back
Top Bottom