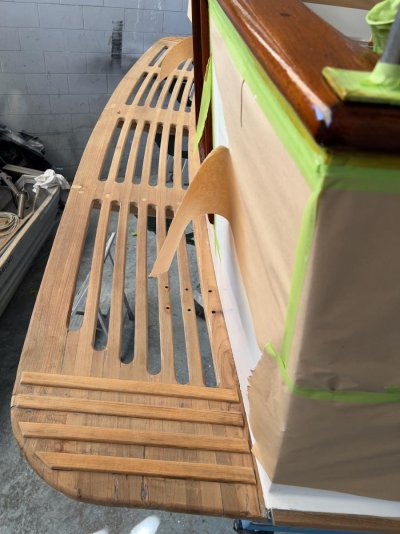
Project update. All of the rotted wood has been removed and will be replaced with new teak. The entire unit has been pulled apart and new pieces of teak scarfed into place where required. Has now been re-assembled with epoxy holding it together, but will also replace the stainless rods passing through each piece.
Working on the finish now before it goes back on the boat. Will be left raw teak to weather naturally.
Is not perfect, but a lot better than it was and cheaper than replacing.
Wow, a very different look than your original photos.
It is not too late to add some depth, thus making your swim grid MUCH more useful. With what you have invested in the cleanup to date, you can still add several inches, if not doubling the depth, by adding on teak of the same thickness and design, against the hull, to extend your swim grid out as far as you want to go.
In my own case I added 5 slats with spaces, a total of 13" of depth. If I had any regrets, it would be that I only added 13" and not more. My supports were originally re-used, but with an oak 2x6 on top to support the extra load. One of the original bronze supports failed under that additional load, so I replaced the whole set of 5 with new, custom fabricated SS supports. All this is now over 20 years in and performing well.
I re-used the failed bronze support by melting it and making support hooks for a new boarding ladder.
I haven't completely ruled this out, but for now I have moved onto other jobs. May come back at the end and do this once the duckboard has been put back onto the boat. Today I sanded the teak rubbing strakes on the stern quarter that join onto the sides of the duckboard so they now match.
Wow, a very different look than your original photos.
It is not too late to add some depth, thus making your swim grid MUCH more useful. With what you have invested in the cleanup to date, you can still add several inches, if not doubling the depth, by adding on teak of the same thickness and design, against the hull, to extend your swim grid out as far as you want to go.
We were going to increase the area if we were to replace it with a new unit, but with the refurbishment I haven't spoken with the shipwright about adding extra slats. Will do so on Monday because it is rather narrow.
I also have this type of extension, without this the exhaust fume goes up following the hull and soon you will have a grey area on your nice shiny hull.