Solar Bimini project

The friendliest place on the web for anyone who enjoys boating.
If you have answers, please help by responding to the unanswered posts.

Snapdragon III

Senior Member
Joined
Sep 1, 2016
Messages
421
Location
USA
Vessel Name
Snapdragon
Vessel Make
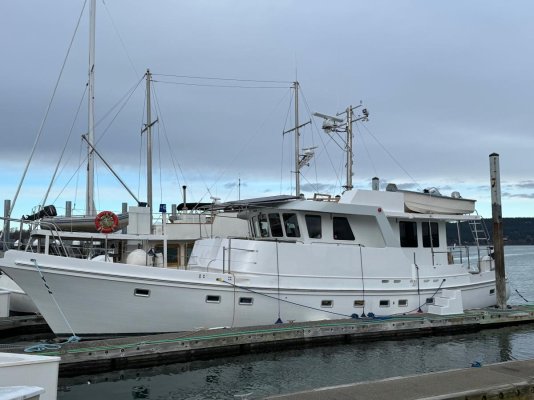
Custom 56' Skookum trawler
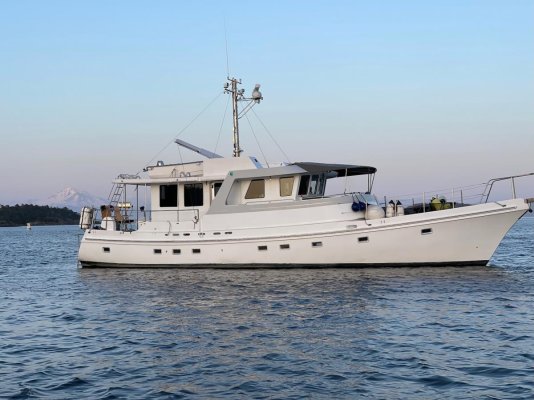
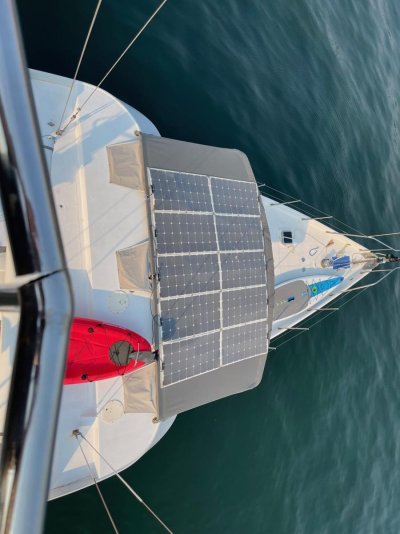
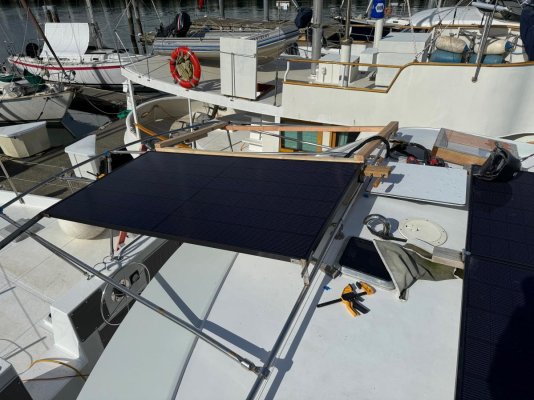
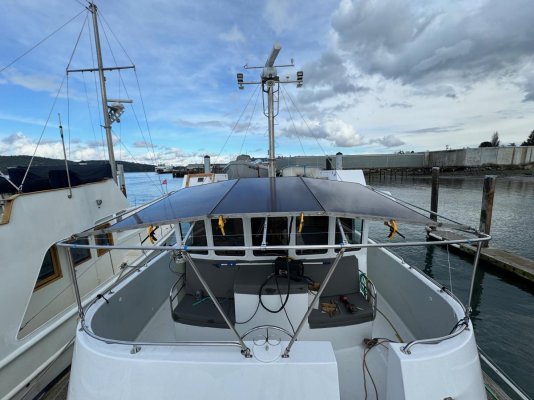
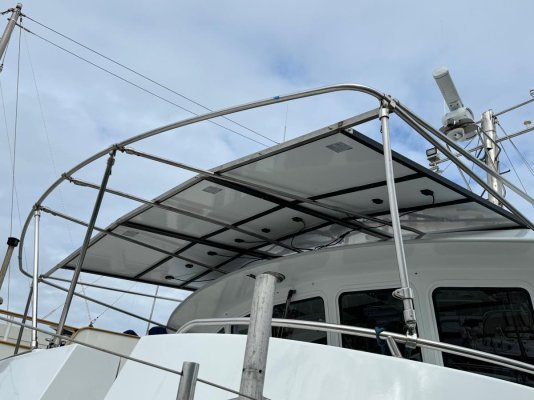
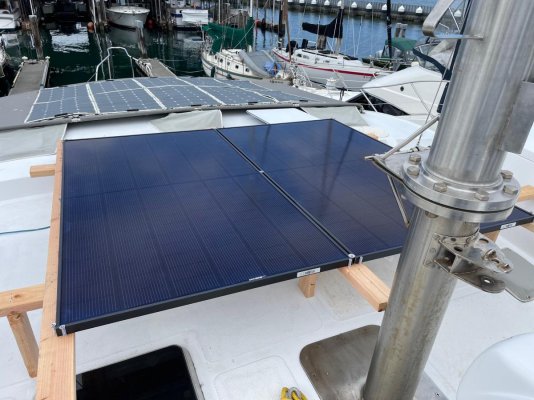
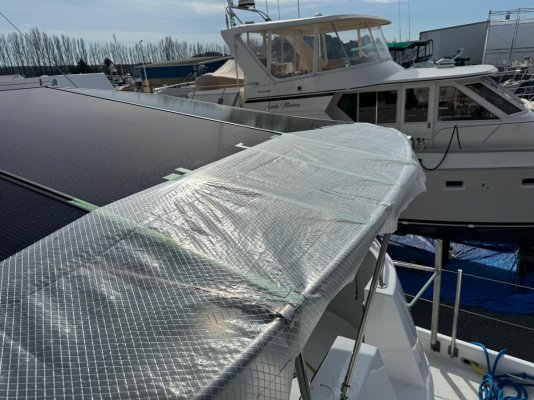
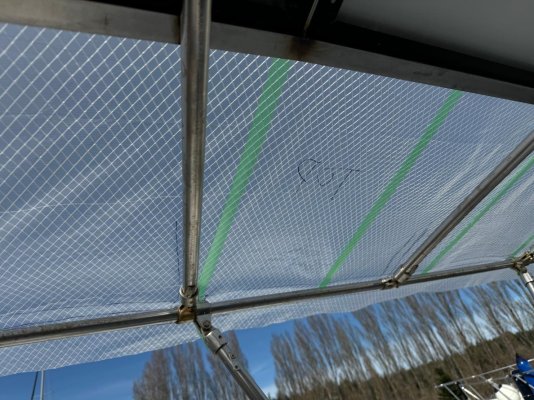
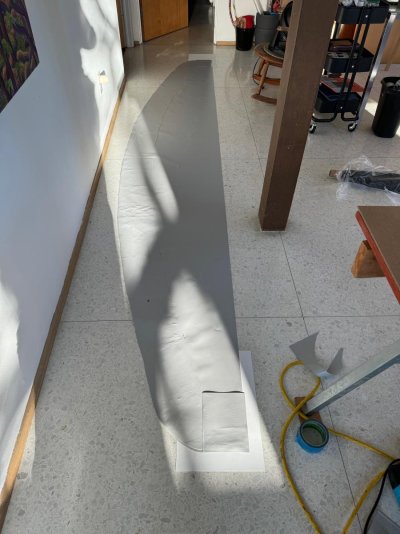
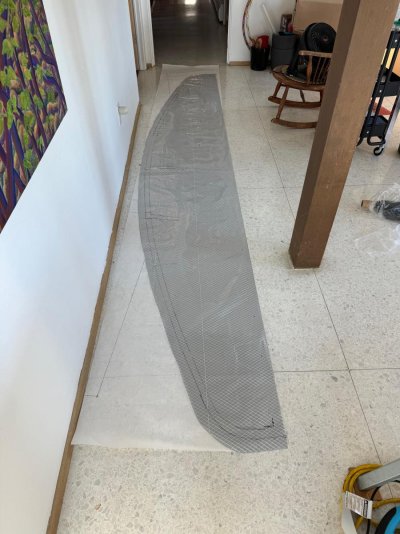
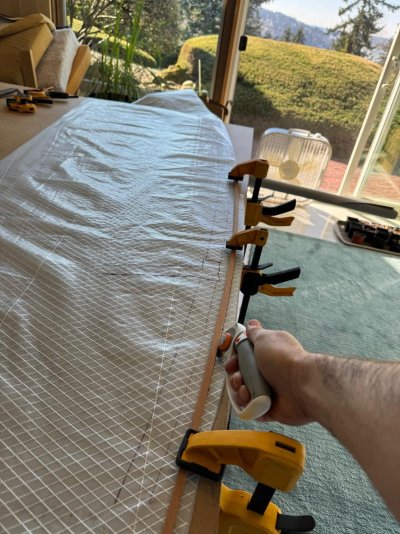
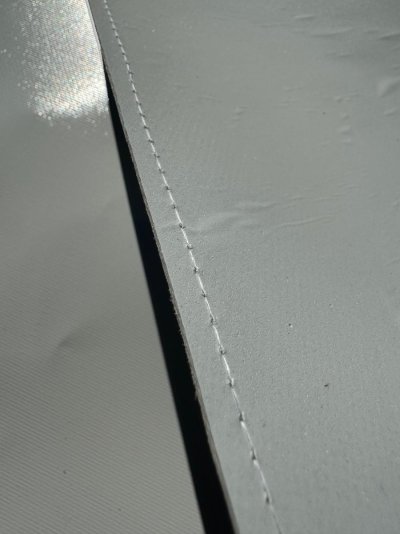
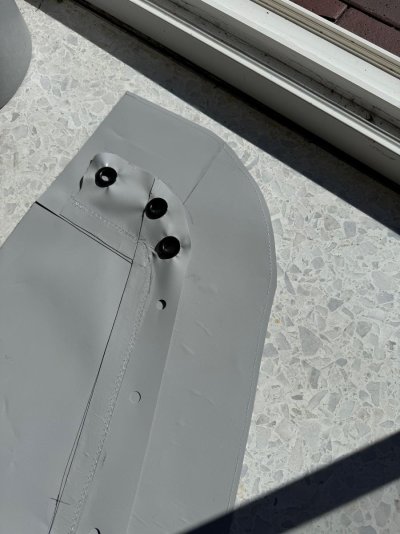
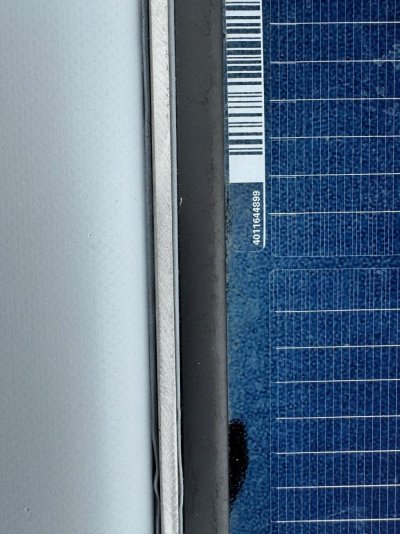
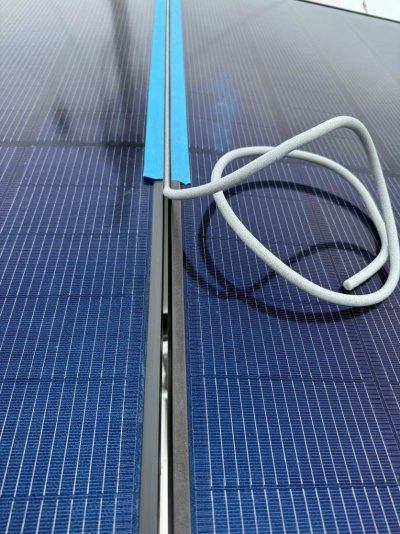
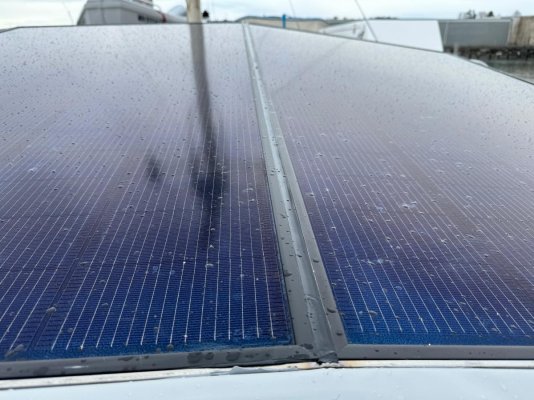
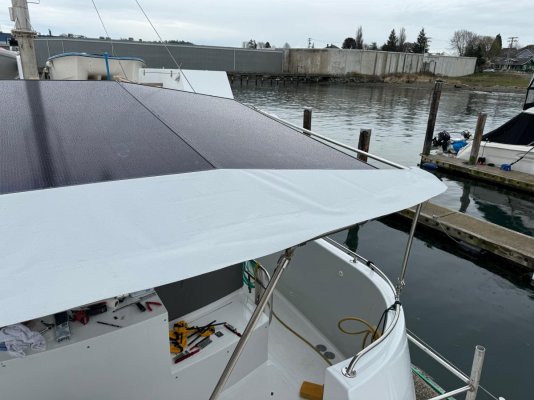
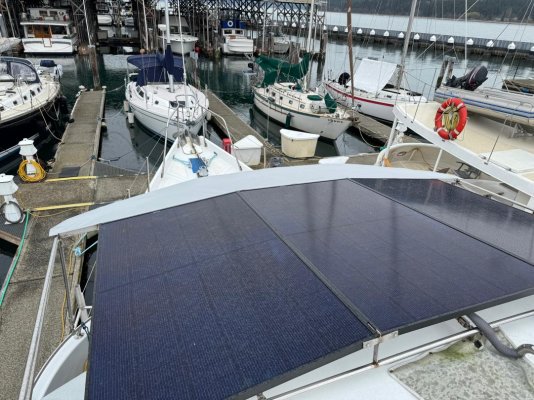
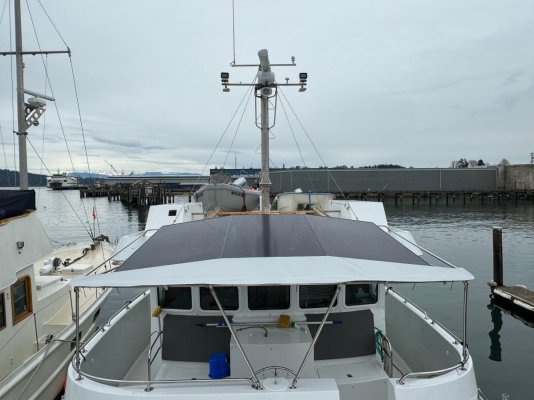
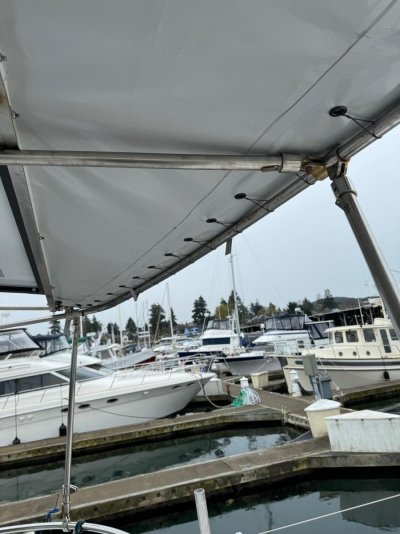
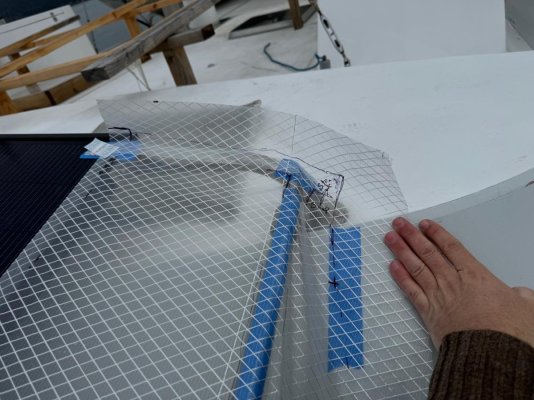
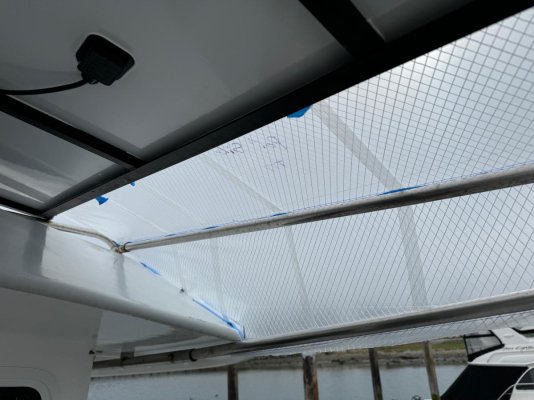
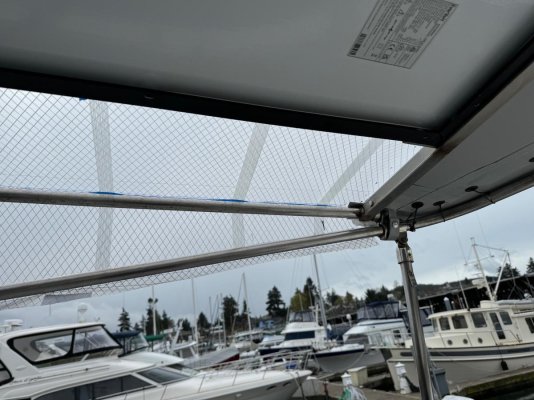
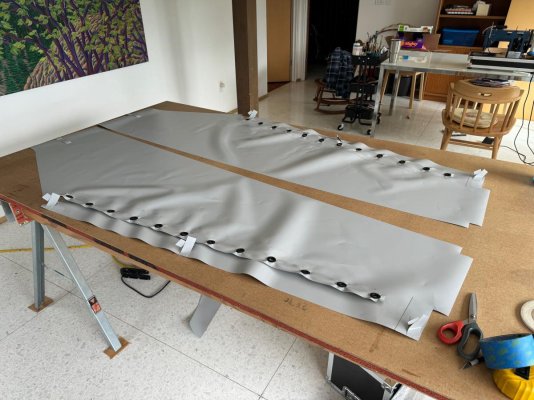
My boat came with a good sized Bimini/awning over the Portuguese bridge area in front of the pilot house. There is a second outdoor helm station out there which it provides protection for. I really like it, as it keeps the sun off, and more importantly where I live, keeps the rain off. It had 10 100W Renology flexible solar panels mounted on it. I think the whole thing is only about 8 years old, but unfortunately it was falling apart. The Renology panels had been destroyed by the UV from the time the boat spent in the tropics, and were putting out near zero power. The sunbrella canvas it was made out of was fine, but unfortunately they didn't use Tenara thread on it, and all the stitching was rotting and falling apart. The previous owner must have spent a lot of money setting this all up as it was a very complicated bit of fabrication. It's unfortunate that it didn't last a lot longer.
 

Attachments

  • IMG_2425.jpg
    IMG_2425.jpg
    137.2 KB · Views: 26
  • IMG_0195.jpg
    IMG_0195.jpg
    105.7 KB · Views: 23
I thought about trying to take it down and restitch the existing canvas, but that was no small job, and I wanted to change the setup anyways to incorporate hard panels instead of the flexible ones. I took down the old canvas system, and fortunately the frame was in good shape, and ready to use. It was complicated figuring out how to mount the huge rigid panels as no part of the frame was flat or square. In the end I stretched a couple strings across the existing frame to establish reference lines in a couple places and took a ton of measurements in reference to the strait strings. I then took my measurements home and made some full sized 12' long cross-sectional templates on a roll of butcher paper I had left over from when my daughter was little and we used to let her paint on it. Once I had the templates, I used them to lay out/ weld up some 316 stainless supports that I then brought out to the boat and welded to the top of the existing frame. I managed to fit 3, 400W Panasonic panels up there. I am very pleased with how it is coming out so far. My next step is to fill in the spaces around the edges between the panels and the outside edge of the frame with Stamoid awning vinyl. I have ordered it from Sailright and am now waiting for it to be delivered.
 

Attachments

  • IMG_2955.jpg
    IMG_2955.jpg
    176.1 KB · Views: 41
  • IMG_2957.jpg
    IMG_2957.jpg
    134.5 KB · Views: 38
  • IMG_2958.jpg
    IMG_2958.jpg
    180.3 KB · Views: 29
  • IMG_2959.jpg
    IMG_2959.jpg
    127.6 KB · Views: 31
  • IMG_2960.jpg
    IMG_2960.jpg
    119.6 KB · Views: 34
For now I have the new panels wired to the single solar inverter that the boat came with. It seems to work fine, although I am sure I could get a little more power out of them if I put them each on their own dedicated one. I just wired it up a couple days ago, and it was overcast, so I have not gotten a chance to see how much power it can put out in sunny conditions. At one point the clouds got pretty thin and it got up to 35 amps @ 12V. I am hopeful that with good sun, at a higher angle in the summer I can see 50-60 amps. I am hopeful that these panels can meet 100% of my energy needs at anchor in good weather in the summer, and dramatically reduce generator run time when the weather is not so favorable. I have a crappy generator, so this will be nice.
 
I purchased the panels last Sumer and temporarily mounted two of them just behind the Bimini on a temporary frame I made with lumber. I did it in a rush 2 days before we were leaving on a 2 week summer cruise on the boat up into Canada. The two panels helped a ton, but were not quite enough to meet 100% of our loads. On the days we stayed at anchor they reduced our generator run time from 3-4 hours, to about 1 hour. They also got more shading than the Bimini as they were closer to the mast, and were often slightly shaded by the shrouds that hold up the mast. I will finish the canvas work part of this project and see how it works out power wise. If I still think I want more power, I could add 2 more 400W panels near to were I put the temporary ones, on a more permanent frame. If were were living on the boat I would definitely do it, but it might be excessive for how we use the boat.
 

Attachments

  • IMG_2660.jpg
    IMG_2660.jpg
    170.5 KB · Views: 9
You should have plenty of solar with the existing array, can you explain what solar charge controlller/s you have, volts and amps, your battery bank capacity and your inverter capacity please?

I think your modified arrangement both looks fine and once you add appropriate charge controllers you should see impressive numbers, nice work!
 
It always amazes me that fabricators don’t use Tenara thread on every project. Even though Tenara is about 10 times as expensive are poly thread it will last forever and for your project it might add $20 to the cost of fabrication. And as you said the Sunbrella is still in good condition. So for a few bucks saved in the original fabrication it will cost you a lot of money to fix it.
 
You should have plenty of solar with the existing array, can you explain what solar charge controlller/s you have, volts and amps, your battery bank capacity and your inverter capacity please?

I think your modified arrangement both looks fine and once you add appropriate charge controllers you should see impressive numbers, nice work!

The wires from the three panels come down though the roof of the pilot house and tie in (In Parallel)to a blue seas fuse box (15A fuse on each panel, 50v at this point) which has heavy gage wiring that leads down to an outback solar charge controller on the lower level near the inverter and power distribution gear.

The batteries, inverter, etc are all Mastervolt. The previous owner did a big refit between 2015-19. He put in two big master volt Lithium batteries that I think are 370 Amp hour? at 12V. They were $7500 each at the time. You can get Vicron equivalent ones now for around $1200. So I think I have about 740 amp hours at 12V. I would like to have more, and may add it someday, but it's a little complicated as I would probably switch to Vicron, but they have their own monitoring and distribution that would get complicated to mix with the Mastervolt, which are way too good to throw away.

The big power users on my boat are inefficient home style refrigeration, Starlink, and my Kabola Boiler. I average around 35 amps constant draw in the winter, and 25-30 amps in the summer. This boat takes so much more power than my last boat. It feels like a ton, but it is also nice to have fancy zoned heating, and a huge home style fridge, and fast internet.

I also have a couple 12v air conditioners that would take a ton of power, but I have had them pickled, full of antifreeze since I got the boat home from Hawaii. Don't really need them around here.
 
Last edited:
It always amazes me that fabricators don’t use Tenara thread on every project. Even though Tenara is about 10 times as expensive are poly thread it will last forever and for your project it might add $20 to the cost of fabrication. And as you said the Sunbrella is still in good condition. So for a few bucks saved in the original fabrication it will cost you a lot of money to fix it.

I just had my stamoid Bimini top restitched on a ten year old cover due to some failed stitching. The material is still in great condition and if I can get another five years or so I’ll be happy with the $150 re-stitch investment.
 
The wires from the three panels come down though the roof of the pilot house and tie in (In Parallel)to a blue seas fuse box (15A fuse on each panel, 50v at this point) which has heavy gage wiring that leads down to an outback solar charge controller on the lower level near the inverter and power distribution gear.

The batteries, inverter, etc are all Mastervolt. The previous owner did a big refit between 2015-19. He put in two big master volt Lithium batteries that I think are 370 Amp hour? at 12V. They were $7500 each at the time. You can get Vicron equivalent ones now for around $1200. So I think I have about 740 amp hours at 12V. I would like to have more, and may add it someday, but it's a little complicated as I would probably switch to Vicron, but they have their own monitoring and distribution that would get complicated to mix with the Mastervolt, which are way too good to throw away.

The big power users on my boat are inefficient home style refrigeration, Starlink, and my Kabola Boiler. I average around 35 amps constant draw in the winter, and 25-30 amps in the summer. This boat takes so much more power than my last boat. It feels like a ton, but it is also nice to have fancy zoned heating, and a huge home style fridge, and fast internet.

I also have a couple 12v air conditioners that would take a ton of power, but I have had them pickled, full of antifreeze since I got the boat home from Hawaii. Don't really need them around here.

I’ve also just done the home fridge conversion, but my new basic, fridge only (no freezer) draws 4 amps, similar to the small camping box style ones.
 
I just had my stamoid Bimini top restitched on a ten year old cover due to some failed stitching. The material is still in great condition and if I can get another five years or so I’ll be happy with the $150 re-stitch investment.

Hope you have a good fabricator doing the restitching and can get the stitches through the same holes so it doesn’t leak too much.
 
I haven't tried it yet, but I think with Stamoid you can seam seal it with vinyl glue to fill any old holes.
 
Hope you have a good fabricator doing the restitching and can get the stitches through the same holes so it doesn’t leak too much.

It’s only an open sided flybridge awning covering a rarely used upper helm, it doesn’t matter if it leaks, but it’s a good point CD.
 
Don't forget to file for the Federal Solar Tax Credit for your solar panels, and the Solar Panel Support Structure!
 
Even if you are not supplying energy back into the national grid?

Yes, if your boat qualifies as a 2nd home (and it would if you do not already have two homes deducted) then you can deduct the cost of solar panels and installation in the year tax year that you complete the install. 30% tax credit until 2032.

Make sure you keep all your receipts for parts and labor.

Note: New batteries associated with the Solar install cannot be deducted on the Solar Energy Tax Credit unless certain conditions apply, so consult with a tax accountant who is well versed in the specifics.

Enjoy!:dance:
 
I have made a little bit of progress on this project. First of all I had scheduled to take the boat into the yard for bottom paint and it was blowing a steady 35 the day I took it in. The panels seemed rock solid in the wind, which was a relief. I have mostly been working on paint repair/polishing projects while in the yard, but my order of fabric, and patterning plastic showed up at the house last night. Today I made a pattern of the front portion. I plan to build the Vinyl in 3 pieces with a front section ahead of the panels, and Port and Starboard sections on the sides. I hope to start cutting it out, and sewing it together this weekend, but I probably won't have a chance to try and install it till late next week at the earliest.
 

Attachments

  • IMG_2975.jpg
    IMG_2975.jpg
    190.2 KB · Views: 8
  • IMG_2976.jpg
    IMG_2976.jpg
    196.5 KB · Views: 9
Yes, if your boat qualifies as a 2nd home (and it would if you do not already have two homes deducted) then you can deduct the cost of solar panels and installation in the year tax year that you complete the install. 30% tax credit until 2032.

Make sure you keep all your receipts for parts and labor.

Note: New batteries associated with the Solar install cannot be deducted on the Solar Energy Tax Credit unless certain conditions apply, so consult with a tax accountant who is well versed in the specifics.

Enjoy!:dance:

Seems generous for a second home, I’ll have to look into the arrangements in this country, thanks
 
Made a little more progress on this project today. I spent a bunch of time setting up the sewing machine for PTFE thread, and trying to get it dialed in. Then experimented with the Vinyl to try and figure out how I want to treat the outside edge of it. I tried a few things, but in the end decided that just double layering it, gluing it together, then cutting it perfectly will make the nicest edge. Everything else I tried got really wrinkly around the curves. I will probably run a line of stitching just behind the edge to keep it together incase the glue ever fails.
I then proceeded to rough cut out the main body piece from my pattern. It was surprisingly hard to deal with due to the size. It's about 13' long. I need a 13' plus work table to work on. I have a 4x8 table that I thought was pretty big, but it is still a pain in the ass. Since I want to double layer the front edge and leave the cut raw as finish, it needs to be perfectly cut with no waves, and the two pieces need to be exactly the same. I decided to cut it about 1/2 long along on the front edge, glue the second layer onto the main piece, then cut them both together, perfectly. I got the 6" deep doubler glued on, and will try and trim it tomorrow. It worked pretty good, although it seems a bit wrinkly where I glued the panels together. It was looking great while I glued it, but as the end fell off the end of the table and bent, wrinkles appeared. I put it on the floor to dry overnight, and tried to roll out the wrinkles the best I could. They will not be noticeable once it's on the boat. I am going to try and use a thin wooden batten as a cutting guide with a rotary cutter, so I can get a nice fair cut. I haven't figured out yet how I am going to hold the batten in place.
 

Attachments

  • IMG_2980.jpg
    IMG_2980.jpg
    128.2 KB · Views: 11
  • IMG_2979.jpg
    IMG_2979.jpg
    150.5 KB · Views: 8
Last edited:
Seems generous for a second home, I’ll have to look into the arrangements in this country, thanks
None is my bet. But, election looms, "pollies" promises can be "assessed".
 
Most shops that do that work have huge tables their machine mounts to. Makes all the difference.
Did you think of trimming the edge with a bias tape or similar?
 
Most shops that do that work have huge tables their machine mounts to. Makes all the difference.
Did you think of trimming the edge with a bias tape or similar?

I experimented with trimming the edge with bias made out of a cut strip of the vinyl, and it worked great on strait sections, but got all puckery on curves. I am sure I could use sunbrella bias, but I am trying to avoid any fabric because it is so wet here that it ends up getting green funk growing on it. It doesn't hurt anything, but it's a pain to clean off.
 
Oh, I know about green funk. It’s a fact of life around here.
I haven’t experimented with raw vinyl edges, maybe it’ll be great, maybe it’ll turn green too. I think it may depend on how porous it is. Let us know how it works out..
 
I used a batten to cut a nice fair final curve on the leading edge of the double layer of vinyl, then sewed it along the edge to keep it together just incase the glue ever lets go. I then made a smaller flap inboard of the leading edge that got glued and sewed on about 6" inboard of the leading edge, on the underside that is where the grommets are installed to keep it tight.
 

Attachments

  • IMG_2988.jpg
    IMG_2988.jpg
    196.1 KB · Views: 7
  • IMG_2989.jpg
    IMG_2989.jpg
    183.2 KB · Views: 5
  • IMG_2992.jpg
    IMG_2992.jpg
    89.1 KB · Views: 9
  • IMG_2995.jpg
    IMG_2995.jpg
    118.7 KB · Views: 9
Next up was to install it on the boat. The aft edge was secured by clamping it against the new SS frame I built for the solar panels. I put down a strip of butyl tape, then the new top, then a 1 1/4" wide fiberglass sail batten then used the bolts that hold the panels in to squeeze it all together. It took some time to put it together, but came out pretty nice in the end. Once I had the aft edge attached, I realized I needed to Caulk the gaps between the three panels before I laced it on, or I would not have been able to reach the lower part over the new awning.
I used foam backer rod, and polyurethane caulk. I had just finished putting it on, then 5 minutes later it started raining. I think it's oil based enough that the rain won't hurt it as long as it went on dry. Once the caulking was on I laced the front edge to the frame. The only thing I have left to do on this part is install snaps on some tabs I installed on the leading edge to hold it down to the frame in the event of extreme wind. I am waiting for the snaps I ordered to show up.

Overall I am very pleased at how this is coming out so far. It looks way cleaner than the old top, and should last way longer.
 

Attachments

  • IMG_3012.jpg
    IMG_3012.jpg
    172.8 KB · Views: 7
  • IMG_3013.jpg
    IMG_3013.jpg
    198 KB · Views: 9
  • IMG_3016.jpg
    IMG_3016.jpg
    163.3 KB · Views: 7
  • IMG_3017.jpg
    IMG_3017.jpg
    133.4 KB · Views: 9
More pictures
 

Attachments

  • IMG_3020.jpg
    IMG_3020.jpg
    196.8 KB · Views: 11
  • IMG_3023.jpg
    IMG_3023.jpg
    115.2 KB · Views: 10
  • IMG_3024.jpg
    IMG_3024.jpg
    111.4 KB · Views: 10
I am hoping to get a break in the rain and make it out to the boat tomorrow to pattern the two sides so I can build them and finish this up.
 
Nice work, a big learning curve to get the stitching of big sections of canvas type material, and get it to look half reasonable.
 
Made it out the the boat yesterday and patterned the port and starboard sides. It was windy and misty out and a real pain to deal with the plastic trying to blow away, and to keep it dry so the tape would stick, and I could mark on it. Got it done in the end though.

Today I built the vinyl pieces for the two sides. They were nice and flat till I set all the grommets, which rumpled them up. Hopefully they will flatten out when I lace them on tight. I am hoping to get a break in the weather and get them installed in the next few days.

One other live and learn (I already knew this, but had to learn it again apparently.). I needed a snap setting tool that would let me set the snaps with the vinyl in place, not the punch and anvil one that you set with a hammer that I already had. I cheaped out and ordered one of Amazon for $50 instead of the fancy one from Sailright for $180. The geometry of the head that sets the inside of the snap is not quite right on the "Cheap" tool and I am not happy with how it sets the snaps. I ended up ordering the fancy one in the end. It will probably delay getting this project 100% complete waiting for it to show up. I am tempted to try and drill out the centers of the snaps I put on with the crappy tool and replace them, but I am a little afraid of doing more harm than good. It would be hard to hold them still enough to drill out.
 

Attachments

  • IMG_3032.jpg
    IMG_3032.jpg
    144.3 KB · Views: 7
  • IMG_3031.jpg
    IMG_3031.jpg
    120.8 KB · Views: 5
  • IMG_3030.jpg
    IMG_3030.jpg
    146.7 KB · Views: 6
  • IMG_3036.jpg
    IMG_3036.jpg
    152.3 KB · Views: 8
Back
Top Bottom