Spring 2024 Old Mainship Projects

The friendliest place on the web for anyone who enjoys boating.
If you have answers, please help by responding to the unanswered posts.

Gdavid

Guru
Joined
Jan 4, 2016
Messages
1,395
Location
US
Vessel Name
Graceland
Vessel Make
Mainship 34 MK1
Once again, I'm sharing my off-season projects on my old 1980 Mainship 34 via a thread. Previous editions have provided me with some great feedback and suggestions as so many of these projects have been taken on by others. There are still a few of these boats kicking around and a few members that have owned them in the past (I can think of at least 4 immediately).

I'm trying to get a bit earlier start this year as my list is pretty long, there are usually a few unseasonably warm days in the Mid-Atlantic winter season and I hope to take advantage of them.

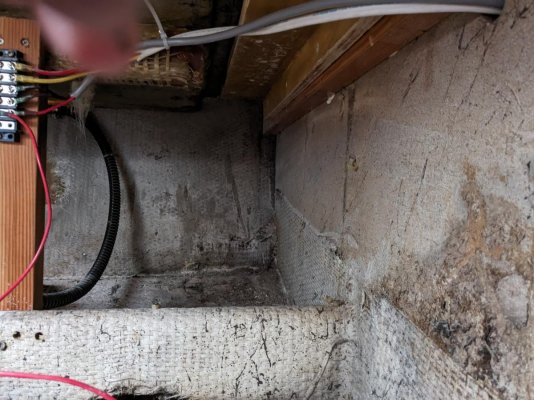
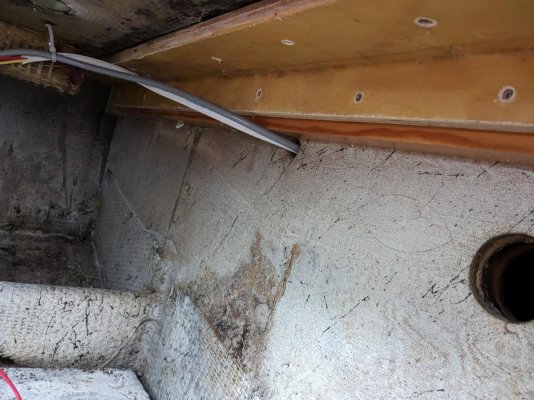
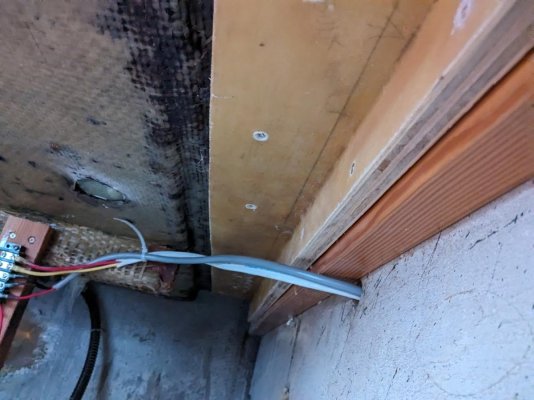
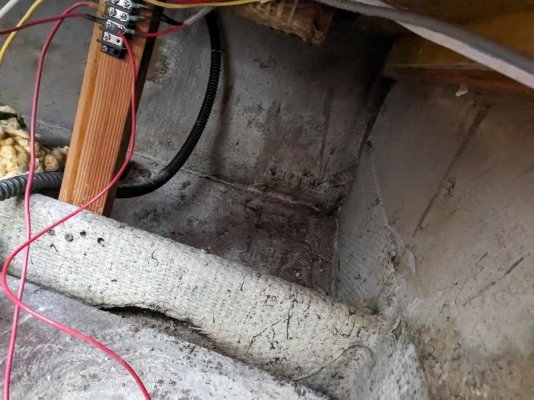
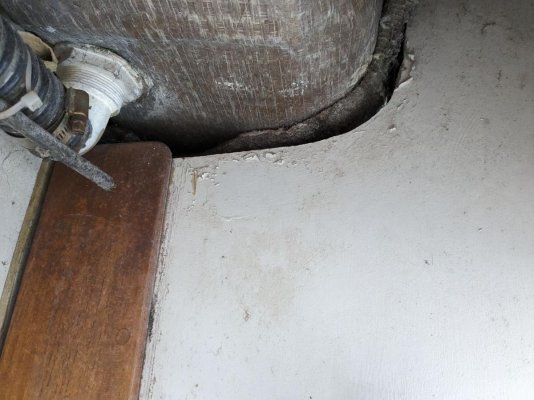
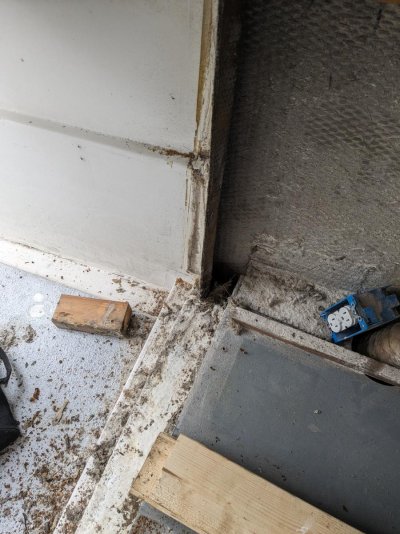
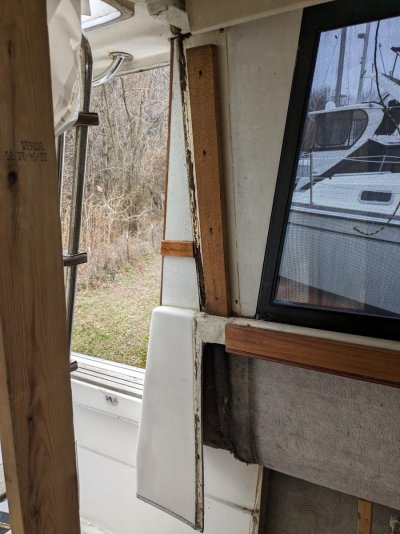
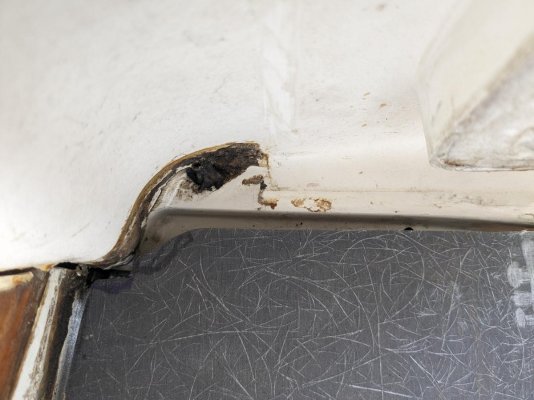
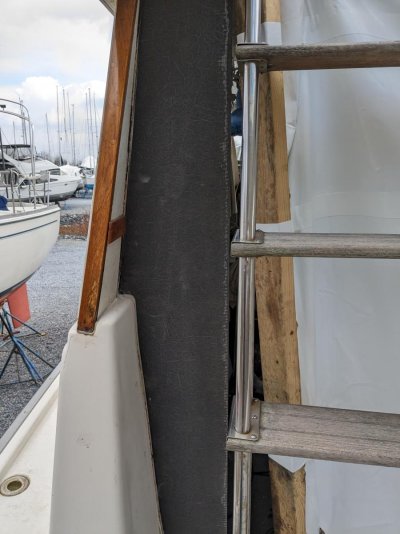
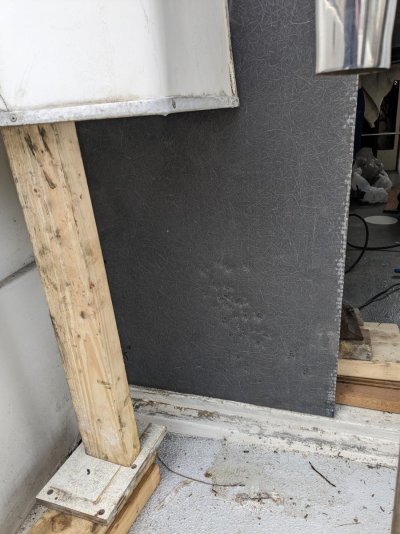
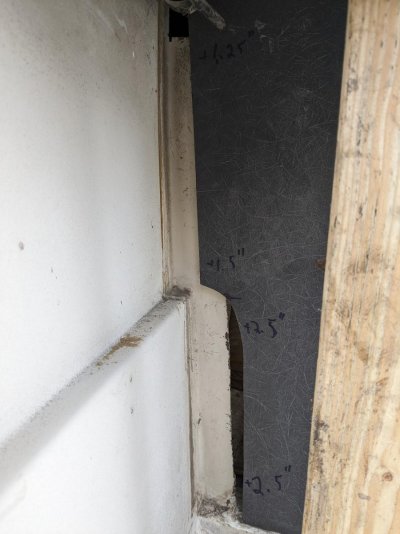
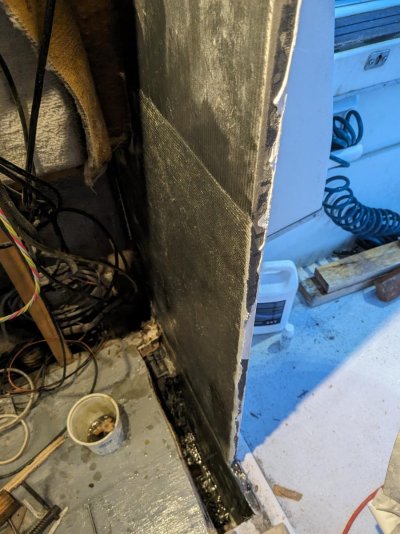
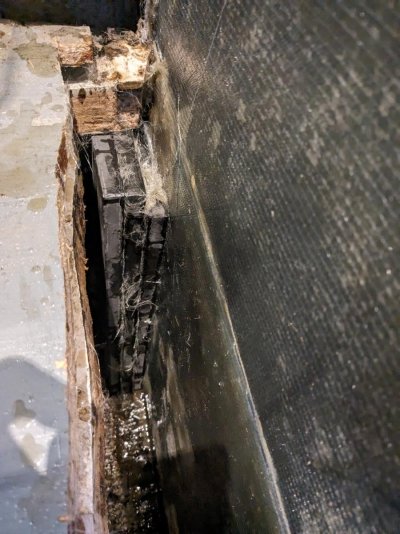
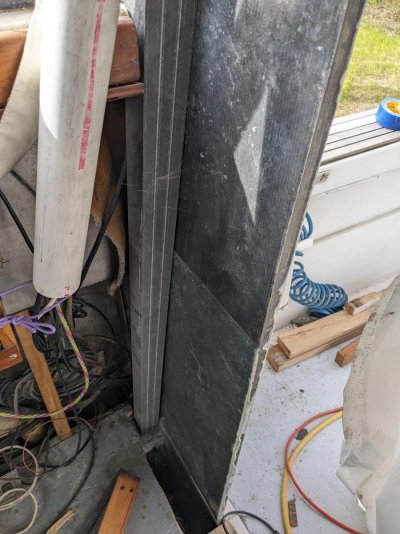
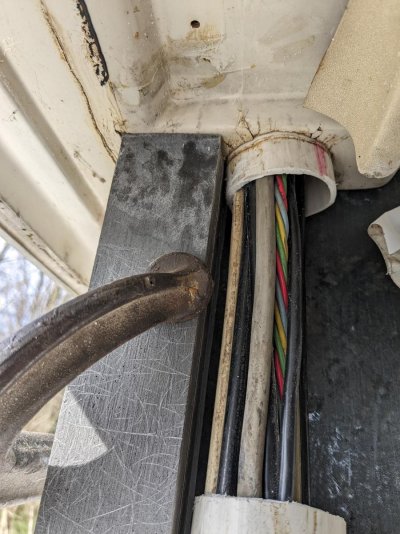
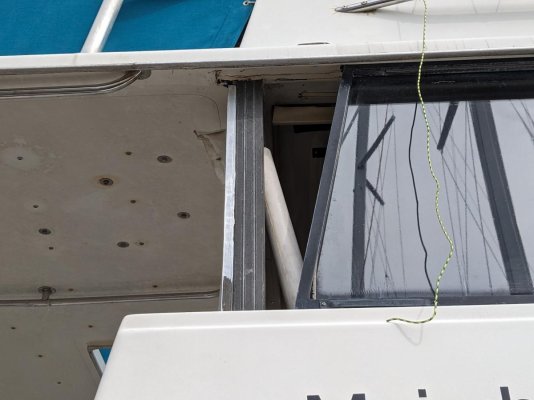
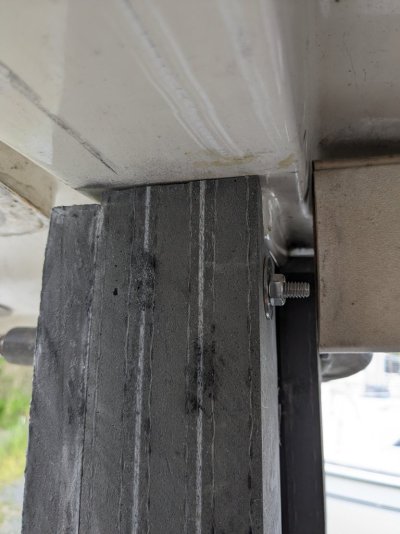
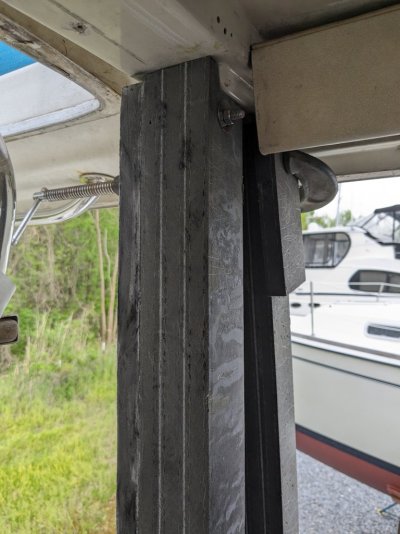
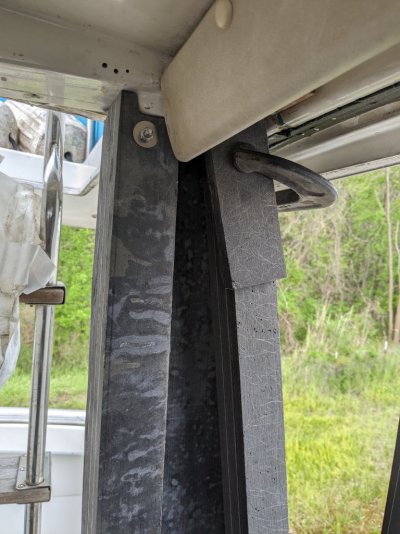
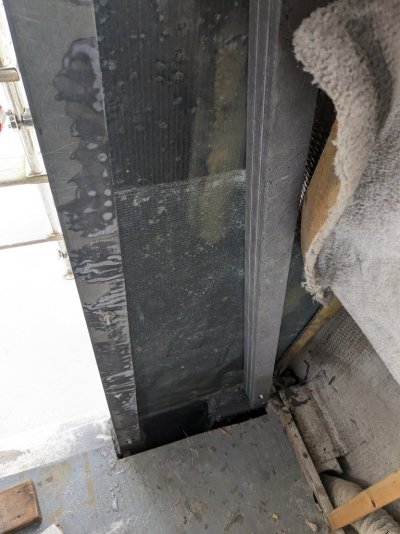
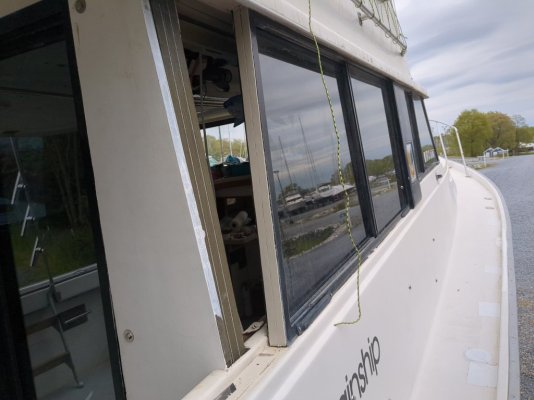
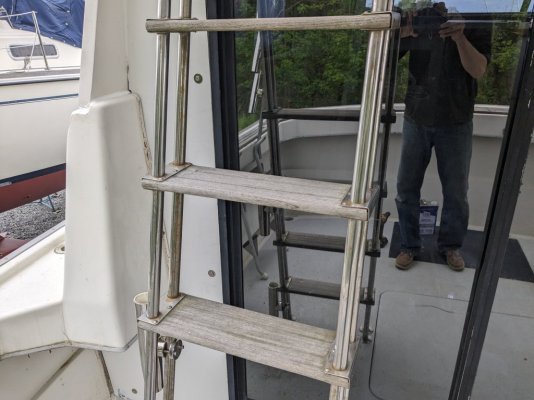
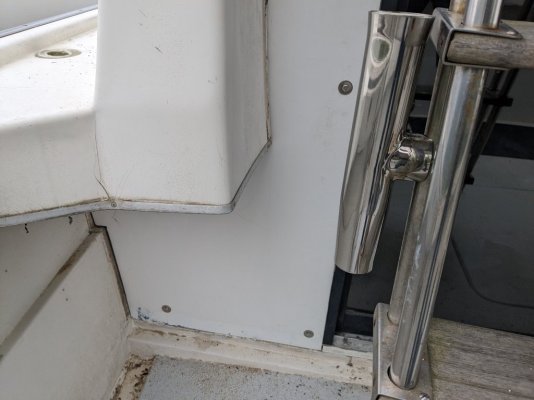
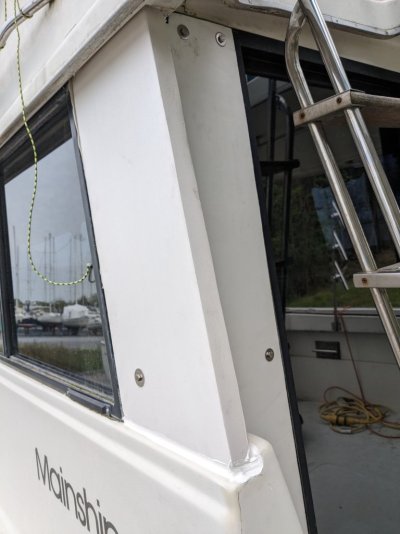
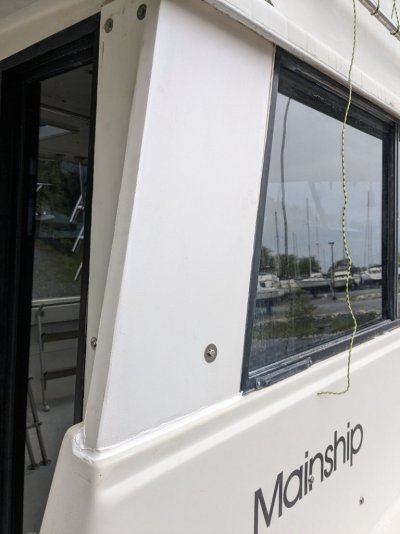
1. Replace bulkheads outboard of sliding glass door to salon. These include both and inner and outer 3/4 plywood panel. Mine are not tied into the hull, nor side deck. The threshold of the sliding glass door has been reinforced from below deck by a previous owner and the door slides freely but the flybridge does not have adequate lateral support and sways in cross seas. The aft/outer bulkhead has been patched at the bottom on both sides and this non-continuous panel seems to be exacerbating the problem. I believe mine should have been tabbed to the hull and deck but was not for some reason. Also, my deck/cap structure is sagging down due to bearing the weight of the flybridge without adequate support. Other mainships side decks are level, my slope inward.

2. Re-core side decks from cockpit to front of trunk cabin. I'm planning to use coosa board and also plan to correct inward drooping of the deck while I have the coring removed and replace the forementioned bulkheads.

3. Refinish exterior of flybridge - flybridge brow where gelcoat is wearing thin. Relatively straightforward project once I decide on the product I will use. Will be rolling and tipping as necessary. This project may get postponed.

4. Lift motor, replace oil pump, main bearings and rod bearings. Thoroughly clean engine compartment. My oil pressure runs on the lower side of the acceptable levels and drops on longer runs. I've confirmed mechanically at the motor. It produces 40 psi at best and low 30s after run to operating temp and slowed to idle. Not catastrophic but not acceptable to me either.

5. Standard bottom paint refresh and zinc repair.

I have already received some great info from Captain Bildgewater, who has shared several of his past projects on mainship34.com So far I've removed all my lifeline stanchions and fuel fills in prep for my side deck project as well as disassembled my sliding glass door. My next step is building bulkheads outboard of the stringers below the sliding glass door bulkheads.

I was aware of this boat's warts when I bought her at the height of the covid market, perhaps not the extent but nothing has been a huge surprise and I have been able to use it along each season. So, no buyer's remorse, just plenty to keep me busy. I'll add some pictures in another post.
 
I had my decks, house and flybridge painted with awlgrip. I had professionals prep and paint it. It looks great and don't regret the expense. It started with the brow looking like it needed touchup then the project morphed into having it all done. The awlgrip is amazing. I don't have the other issues you are mentioning but I created 2 years worth of projects on mine.
 
I had my decks, house and flybridge painted with awlgrip. I had professionals prep and paint it. It looks great and don't regret the expense. It started with the brow looking like it needed touchup then the project morphed into having it all done. The awlgrip is amazing.

Did they spray the awlgrip?, I would assume so.


I don't have the other issues you are mentioning but I created 2 years worth of projects on mine.

My parents used to have a MKIII like yours and the sliding glass door threshold was directly over a bulkhead, which makes far more sense. The MKI boats like mine have the bulkhead at the end of the engine compartment in the same location as your boat, but the sliding glass door is further aft, about 6 inches behind it and it really is only supported by the cockpit deck/cockpit liner. I believe mine sagged and then the support was added to prevent further sagging but it was not jacked up to the correct height prior to adding the support so it is locked into this lowered position. I have since recored the cockpit, which had a rotted core, this will probably make getting it all back to the correct height a major challenge. It will probably crack up all the gelcoat of the deck in doing so, but it needs to be refinished as part of the side deck re-coring, so I'm in for a major effort.
 
My 1978 (77 hull) had the bulkhead directly below the slider, or maybe off by an inch at most.
I was fortunate that mine never got the Mainship smile, even though the flybridge core was pretty water saturated before I repaired it all.
 
Did they spray the awlgrip?, I would assume so.


My parents used to have a MKIII like yours and the sliding glass door threshold was directly over a bulkhead, which makes far more sense. The MKI boats like mine have the bulkhead at the end of the engine compartment in the same location as your boat, but the sliding glass door is further aft, about 6 inches behind it and it really is only supported by the cockpit deck/cockpit liner. I believe mine sagged and then the support was added to prevent further sagging but it was not jacked up to the correct height prior to adding the support so it is locked into this lowered position. I have since recored the cockpit, which had a rotted core, this will probably make getting it all back to the correct height a major challenge. It will probably crack up all the gelcoat of the deck in doing so, but it needs to be refinished as part of the side deck re-coring, so I'm in for a major effort.

They rolled, brushed and didn’t tip. I questioned why they weren't tipping and they said it was all in the recipe of the mix, temp, humidity and prep. I was skeptical but must say that it is a mirror finish until you get about a foot from it and look closely to tell it wasn't sprayed. The cost differential is huge rolling vs spraying. I am still very happy with the results.
 
Photos of my bulkhead existing conditions and demolition.
There are several structures coming together in a relatively small area and nothing was tied together very effectively.
 

Attachments

  • PXL_20240115_160309895.jpg
    PXL_20240115_160309895.jpg
    172.2 KB · Views: 19
  • PXL_20240115_160318998.jpg
    PXL_20240115_160318998.jpg
    181.3 KB · Views: 11
  • PXL_20240115_160327207.jpg
    PXL_20240115_160327207.jpg
    114.1 KB · Views: 12
  • PXL_20240115_160330009.jpg
    PXL_20240115_160330009.jpg
    155.1 KB · Views: 14
  • PXL_20240115_160353504.jpg
    PXL_20240115_160353504.jpg
    149.2 KB · Views: 12
  • PXL_20240127_191235457.jpg
    PXL_20240127_191235457.jpg
    184.7 KB · Views: 13
  • PXL_20240127_191231099.jpg
    PXL_20240127_191231099.jpg
    169.3 KB · Views: 18
Very slow progress due to running my kids around to various activities and the cold weather but I test fitted the port bulkhead today. Somehow I was really off on the lower, outer section but the test is fitting pretty well. I will scarf in additional material to correct my error and start with a layer of 1708 biaxial on both sides. I have not disassembled the starboard side yet but really hope they are close enough that I can basically copy this bulkhead over. I am keeping the tolerances pretty tight because I don want to rely on thick fillets under the fiberglass tabbing I will be making.
 

Attachments

  • PXL_20240224_160409528.jpg
    PXL_20240224_160409528.jpg
    128.7 KB · Views: 19
  • PXL_20240224_160416113.jpg
    PXL_20240224_160416113.jpg
    121.3 KB · Views: 17
  • PXL_20240224_160419808.jpg
    PXL_20240224_160419808.jpg
    168.1 KB · Views: 17
  • PXL_20240224_160425652.jpg
    PXL_20240224_160425652.jpg
    114.3 KB · Views: 15
They rolled, brushed and didn’t tip. I questioned why they weren't tipping and they said it was all in the recipe of the mix, temp, humidity and prep. I was skeptical but must say that it is a mirror finish until you get about a foot from it and look closely to tell it wasn't sprayed. The cost differential is huge rolling vs spraying. I am still very happy with the results.

I also didn’t tip-off the finish, after testing some areas previously, I got a better finish straight from the foam roller.
So much information on the internet is confusing regarding this subject, the prep can never be emphasised enough, as is the constant thinning of the topcoats to achieve an acceptable flowout.
Depending on the paint system you choose, the stipple or “orange peel” effect can be wet sanded and buff polished out, of course with the appropriate level of film thickness.
I’ve got a whole new level of respect for (no shedded) boat painters now after tackling this job recently, especially juggling air temps, humidity, rain, wind, direct sunshine AND the expectation time frame of the customers who just don’t understand, and who will no doubt want warranty corrections if the finish isn’t perfect.
 
If you Alexseal and the rolling additive you don’t need to tip.
 
Regarding your salon bulkhead rebuild, the side panels on our 34 were tabbed (sparingly) to the walls and while the all glass bulkhead really gives the interior an open and airy feeling, I always felt it was a sacrifice of rigidity for aesthetics.
I recall seeing somewhere a 34 that had a solid bulkhead with a regular door and window(s) cut into it, leaving a majority of it intact and seemingly strengthening the whole area. I was never 100% happy with the design of the salon superstructure design of that boat, with nothing supporting the entire salon roof and flybridge but the aluminum window frames and aft bulkhead. A more solid aft salon bulkhead would've gone a long ways towards reducing the boats twisting characteristics in a beam sea.
 
I wouldnt use biaxial to the wood as a first layer. I wouls use 1 1/2 ounce mat against the plywood.
But first “ paint” the plywood with resin cut with 25% acetone so it can soak into the surface and give the resin something to adhere to.
Assuming you are using polyester resin.
 
I wouldnt use biaxial to the wood as a first layer. I wouls use 1 1/2 ounce mat against the plywood.
But first “ paint” the plywood with resin cut with 25% acetone so it can soak into the surface and give the resin something to adhere to.
Assuming you are using polyester resin.

Thanks, I should have been more specific, I am using 3/4" coosa and the biaxial cloth has layer of mat stitched to it.
 
Yup, put the mat side next to the core and you are good. The nice thing about 1708 is the mat is stitched and doesn’t have a binder in it so you can use epoxy resin.
 
Regarding your salon bulkhead rebuild, the side panels on our 34 were tabbed (sparingly) to the walls and while the all glass bulkhead really gives the interior an open and airy feeling, I always felt it was a sacrifice of rigidity for aesthetics.
I recall seeing somewhere a 34 that had a solid bulkhead with a regular door and window(s) cut into it, leaving a majority of it intact and seemingly strengthening the whole area. I was never 100% happy with the design of the salon superstructure design of that boat, with nothing supporting the entire salon roof and flybridge but the aluminum window frames and aft bulkhead. A more solid aft salon bulkhead would've gone a long ways towards reducing the boats twisting characteristics in a beam sea.

I agree a solid bulkhead would make the entire house structure and the flybridge it supports much stronger, particularly latererally. I considered eliminating the sliding glass door, but it would be particularly expensive to do this, and I just couldn't justify the expense.

I've put a lot of thought into how to make this structure as strong as I can while retaining the sliding glass door. The very tall and narrow shape of the partial bulkheads really limits the leverage available to provide lateral stability to the flybridge. I'm trying to offset this by creating a new partial bulkhead below deck on either side and then splicing them all together by laminating together sections of coosa board from the lower to upper bulkhead, serving similar to chainplates on a sailboat which support the mast. Hopefully the picture of my eventual progress will explain what words fail to convey.
 
I'm kind of understanding what you want to do. Anything you do will stiffen it. Just replacing the rotten decks on ours made a noticeable difference.
I never figured out why the aft bulkhead under the floor was ahead of the salon bulkhead. If dumb Mainship had just put one bulkhead over the other and tabbed it all together , we probably wouldn't be having this conversation in the first place!

For the life of me, I can't figure it out either and it makes no sense why jleonard's had the bulkhead the the correct postion but other mark I's were offset, my best guess is they moved the bulkheads when the started making the MK2 models and used the same bulkhead placement regardless of the salon configuration.

Speaking of old Mainships, have you seen the MK2 listed on boattrader down in your neck of the woods?, Looks intriguing, has been repowered with cummins and a newer generator, bow thruster and repainted. Hard to tell looking at pictures, but at the very least, someone has spent a lot of money on it. Description says the cabin was gutted.
 
My hull was built in 1977 and finished in 1978. I’ve been aboard many boats old Mainships. The 1979 and newer boats were built differently than the early ones. Some differences were subtle, some significant.
 
My hull was built in 1977 and finished in 1978. I’ve been aboard many boats old Mainships. The 1979 and newer boats were built differently than the early ones. Some differences were subtle, some significant.

Ours was a '78 built in June ,IIRC ,and it definitely had the structural aft bulkhead in the engine room placed 8-10" ahead of the salon bulkhead. They didn't seem to place much emphasis on quality control back then.
 
For the life of me, I can't figure it out either and it makes no sense why jleonard's had the bulkhead the the correct postion but other mark I's were offset, my best guess is they moved the bulkheads when the started making the MK2 models and used the same bulkhead placement regardless of the salon configuration.

Speaking of old Mainships, have you seen the MK2 listed on boattrader down in your neck of the woods?, Looks intriguing, has been repowered with cummins and a newer generator, bow thruster and repainted. Hard to tell looking at pictures, but at the very least, someone has spent a lot of money on it. Description says the cabin was gutted.

I just looked on boat trader and no MkII's came up for me. There was one a few years back that was discussed on on a thread here that had been gutted and repowered with a 3208 cat. It had potential but I wasn't in the market for for a II but if I was , I would've jumped on it. I saw it last summer on death row at the boatyard where we haul out. It looked like the entire top had either collapsed or been crushed like it was in a low boathouse during a high tide. I think the name was Reality, or something like that. What a shame.

https://www.trawlerforum.com/forums/s11/should-i-mainship-34-mkii-48796.html
 
Last edited:
I just looked on boat trader and no MkII's came up for me. There was one a few years back that was discussed on on a thread here that had been gutted and repowered with a 3208 cat. It had potential but I wasn't in the market for for a II but if I was , I would've jumped on it. I saw it last summer on death row at the boatyard where we haul out. It looked like the entire top had either collapsed or been crushed like it was in a low boathouse during a high tide. I think the name was Reality, or something like that. What a shame.

https://www.trawlerforum.com/forums/s11/should-i-mainship-34-mkii-48796.html

Here is the link:
https://www.boattrader.com/boat/1982-mainship-mainship-ii-9220568/

and for the sake of anyone else reading along, please know that I have no affiliation with this boat at all and no idea of it's actual condition. It appears to be a much better deal than what I purchased, I'm afraid to admit.
 
I have installed the new starboard bulkhead, here are some pictures. It is supported by a lower section below the deck and laminated together with 45 ° biaxial fiberglass. In the pics,the salon floor is removed about 6" in front of the bulkhead to give me access to tie everything together. The forward end of this opening is right over the factory bulkhead that extends the full width of the hull, forming the end of the engine compartment.

In some of the pictures you can see a support vertical support member in front of the bulkhead, it is approximately 2.5" x 2.5", made of three pieces of 3/4" thick coosa board laminated together. It sits on a "knee" thick is laminated and bolted to the front of the lower bulkhead. The bottom is further outboard than the top, where it supports the fly bridge. There will be another inboard which will be vertical and tied into the stringer as well as the lower bulkhead.

In a couple of the pictures, you can see the chase for control cables and wiring from to the fly bridge, limits the area I can support the fly bridge as well as complicates the assembly. I believe I have the most complicated part behind me and replicating this on the port side will be easier. There will be a plate at the top of the bulkhead, on the salon side with thru bolts tying everything together and then varnished marine plywood will serve as trim, when removed, I'll have better access to the wiring chase compared to the orginal design where the forward panel was supposed to be a stressed member and only had a small access panel to fish wires and cables through.

In the picture from outside the boat, you can see where outer panel aft of the salon windows is removed. This was really poorly constructed and in rough shape. It is a gelcoat finished molding, mostly hollow and was laminated to a piece of 5/8" marine plywood with a plastic veneer on it. Much of the plywood was rotted. I have build it back up with a combination of coosa and several layers of fiberglass, it will be bolted to the new bulkhead support and lag screwed from below to connect it to the deck molding.

I am really anxious to get this all back together and see how much stiffer the fly bridge will be in a beam sea.

I believe the hull design of this boat and overall layout is great but it is a lot to expect a 44 year old, budget production boat to be as sturdy as I expect a boat to be.

My planned launch date is coming at the end of the month, doubt I will get to the side deck recording. I want to be back on the water already.
 

Attachments

  • PXL_20240330_233607901.jpg
    PXL_20240330_233607901.jpg
    149.3 KB · Views: 11
  • PXL_20240330_233613828.jpg
    PXL_20240330_233613828.jpg
    157.8 KB · Views: 15
  • PXL_20240331_143321600.jpg
    PXL_20240331_143321600.jpg
    156.8 KB · Views: 16
  • PXL_20240331_143330274.jpg
    PXL_20240331_143330274.jpg
    180 KB · Views: 12
  • PXL_20240331_145048181.jpg
    PXL_20240331_145048181.jpg
    94.4 KB · Views: 11
Last edited:
I always kind of wished I had the time to take a 1st gen 34 Mainship and completely gut the thing and start from scratch with nothing. There was so much wasted space on ours that always drove me crazy. The flybridge with huge deck covering the cockpit & the head with stall shower in a 34' boat is what drew us to it. I also liked the soft chines and the hollow full keel with the shaft log bolted right to the back of the keel. I hated the aluminum framed windows and aft bulkhead that was used as the support for the bridge. I always felt that with some creativity, a walk around "queen" berth could've been a feasible option.
There really is a lot to like about the basic boat.
 
Here are some pictures of the current progress. I am pretty much done with the bulkhead replacement, I need to install the sliding glass door assembly as well as reinstall the panels that attach to the aft-most salon window and the bulkhead. These are rebuilt and I am working to finish them in matching gelcoat prior to reinstalling them.

My side decks are going to have to wait till the off season and I am planning on refinishing the exterior of the fly bridge while in the water. I am trying to get better at color matching and applying gelcoat via roller, it has been hit and miss so far but I would like to go with gelcoat for this refinishing.
 

Attachments

  • PXL_20240417_212016552.jpg
    PXL_20240417_212016552.jpg
    130.4 KB · Views: 10
  • PXL_20240417_212010945.jpg
    PXL_20240417_212010945.jpg
    140.2 KB · Views: 8
  • PXL_20240417_212008130.jpg
    PXL_20240417_212008130.jpg
    155.1 KB · Views: 10
  • PXL_20240417_212003032.jpg
    PXL_20240417_212003032.jpg
    150.1 KB · Views: 10
Looks great! You do nice work. I just finished installing a 2nd ac system. I've been contemplating removing the sliding door and glass panels to then rebuild the area to have one hinged door. The only problem with that is if I ever replace the engine the back would need to be disassembled.
 
Some updated photos, almost done.
 

Attachments

  • IMG_20240421_131005.jpg
    IMG_20240421_131005.jpg
    147.4 KB · Views: 14
  • IMG_20240421_131025.jpg
    IMG_20240421_131025.jpg
    104.7 KB · Views: 13
  • PXL_20240421_214902761.jpg
    PXL_20240421_214902761.jpg
    135.6 KB · Views: 10
  • PXL_20240421_214905361.jpg
    PXL_20240421_214905361.jpg
    102.4 KB · Views: 13
  • PXL_20240421_214910251.jpg
    PXL_20240421_214910251.jpg
    98.2 KB · Views: 15
  • PXL_20240421_214916463.jpg
    PXL_20240421_214916463.jpg
    93.6 KB · Views: 14
I did something exceedingly stupid this evening on this project. Fortunately none was hurt. I had disconnected my old hynautic steering lines as they were in the way of the new bulkhead supports, I capped off the lines and marked them with tape but at some point crossed up the lines and mixed up the return line with one of the pressure lines. Not realizing my mistake, I was trying to bleed the system tonight and not getting fluid to the upper station, without thinking clearly, I tried using the autopilot in followup mode to and had closed the bypass valves, with the lines hooked up backwards, this pressurized the hynautic reservoir and blew it apart.
As these are no longer made, I found myself at the mercy of the used market, fortunately I found one under one hour away for $30. Hopefully this will be my last stupid mistake.(On this project)
 
I picked up the reservoir and learned how closely I came to missing out. The seller was contacted by another party 20 minutes after I had contacted him, offering more than the advertised price (substantially) money and requesting to have it shipped. Fortunately the seller is a standup guy and honored our agreement.
If anyone is retrofitting their would hynautic system, don't toss any parts. I also ended up with a spart H-50 helm pump in the deal, I don't need it.
 
Last edited:

Latest posts

Back
Top Bottom