New Build - Electric Powered

The friendliest place on the web for anyone who enjoys boating.
If you have answers, please help by responding to the unanswered posts.
12/25/2023 Update

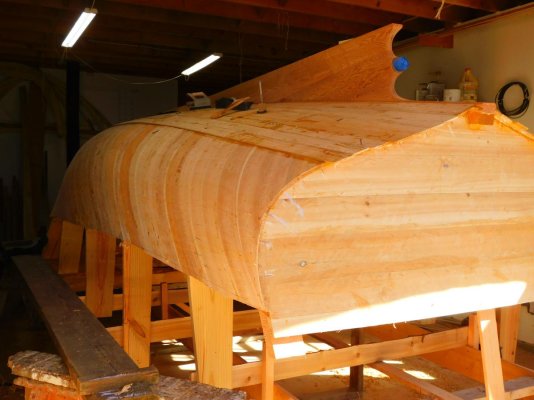
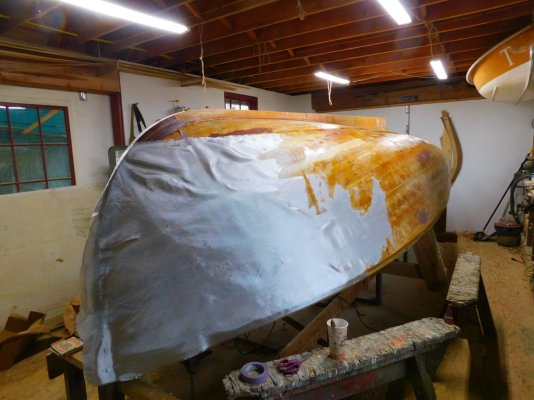
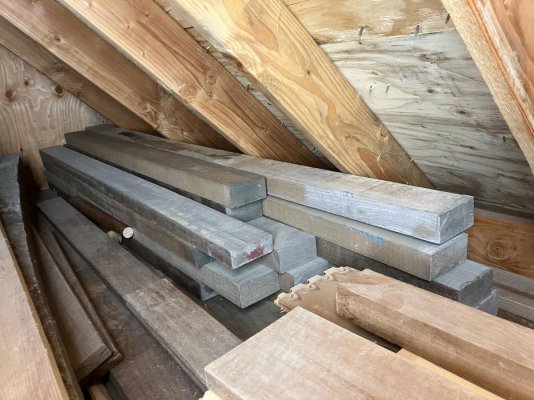
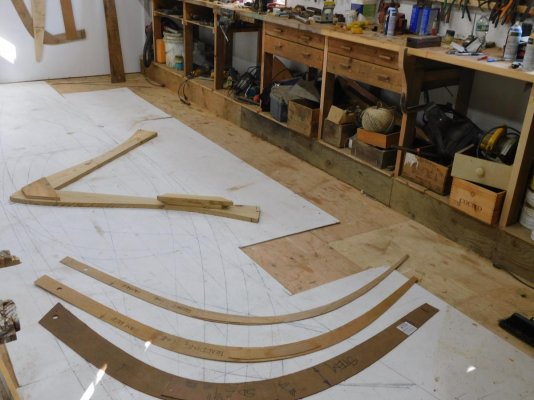
I spoke with Paul yesterday who confirmed he has the required wood to start the boat. I'm surprised and pleased how quickly he was able to locate the different types of woods in different states before driving and picking them up himself. While we are still looking for some mahogany it is not required for a couple of months. The stern tube is expected to be completed by a supplier and ready for Paul to pick up next week. After the holidays focus will turn to lofting and making the templates required to start building the boat.

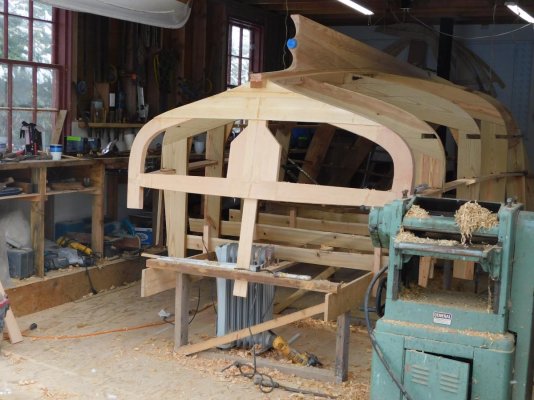
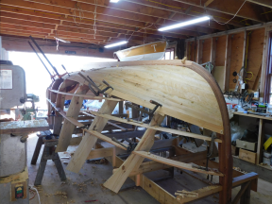
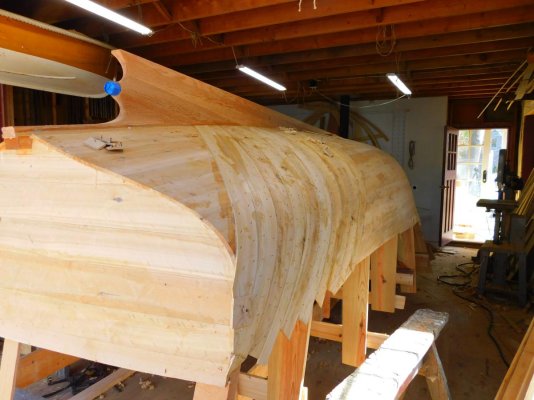
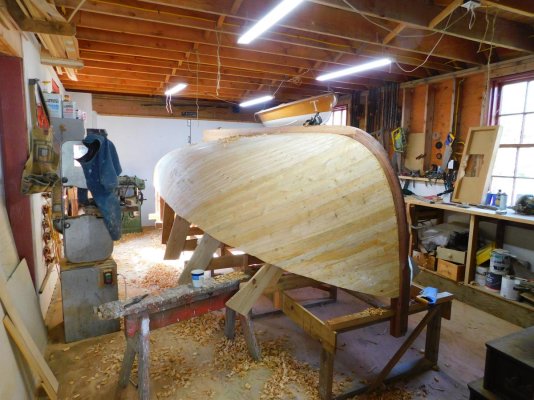
While I did a reasonably good job documenting the build process of the rowing / tender by another builder, this boat is different in design and construction which I look forward to learning about for our next potential new build.

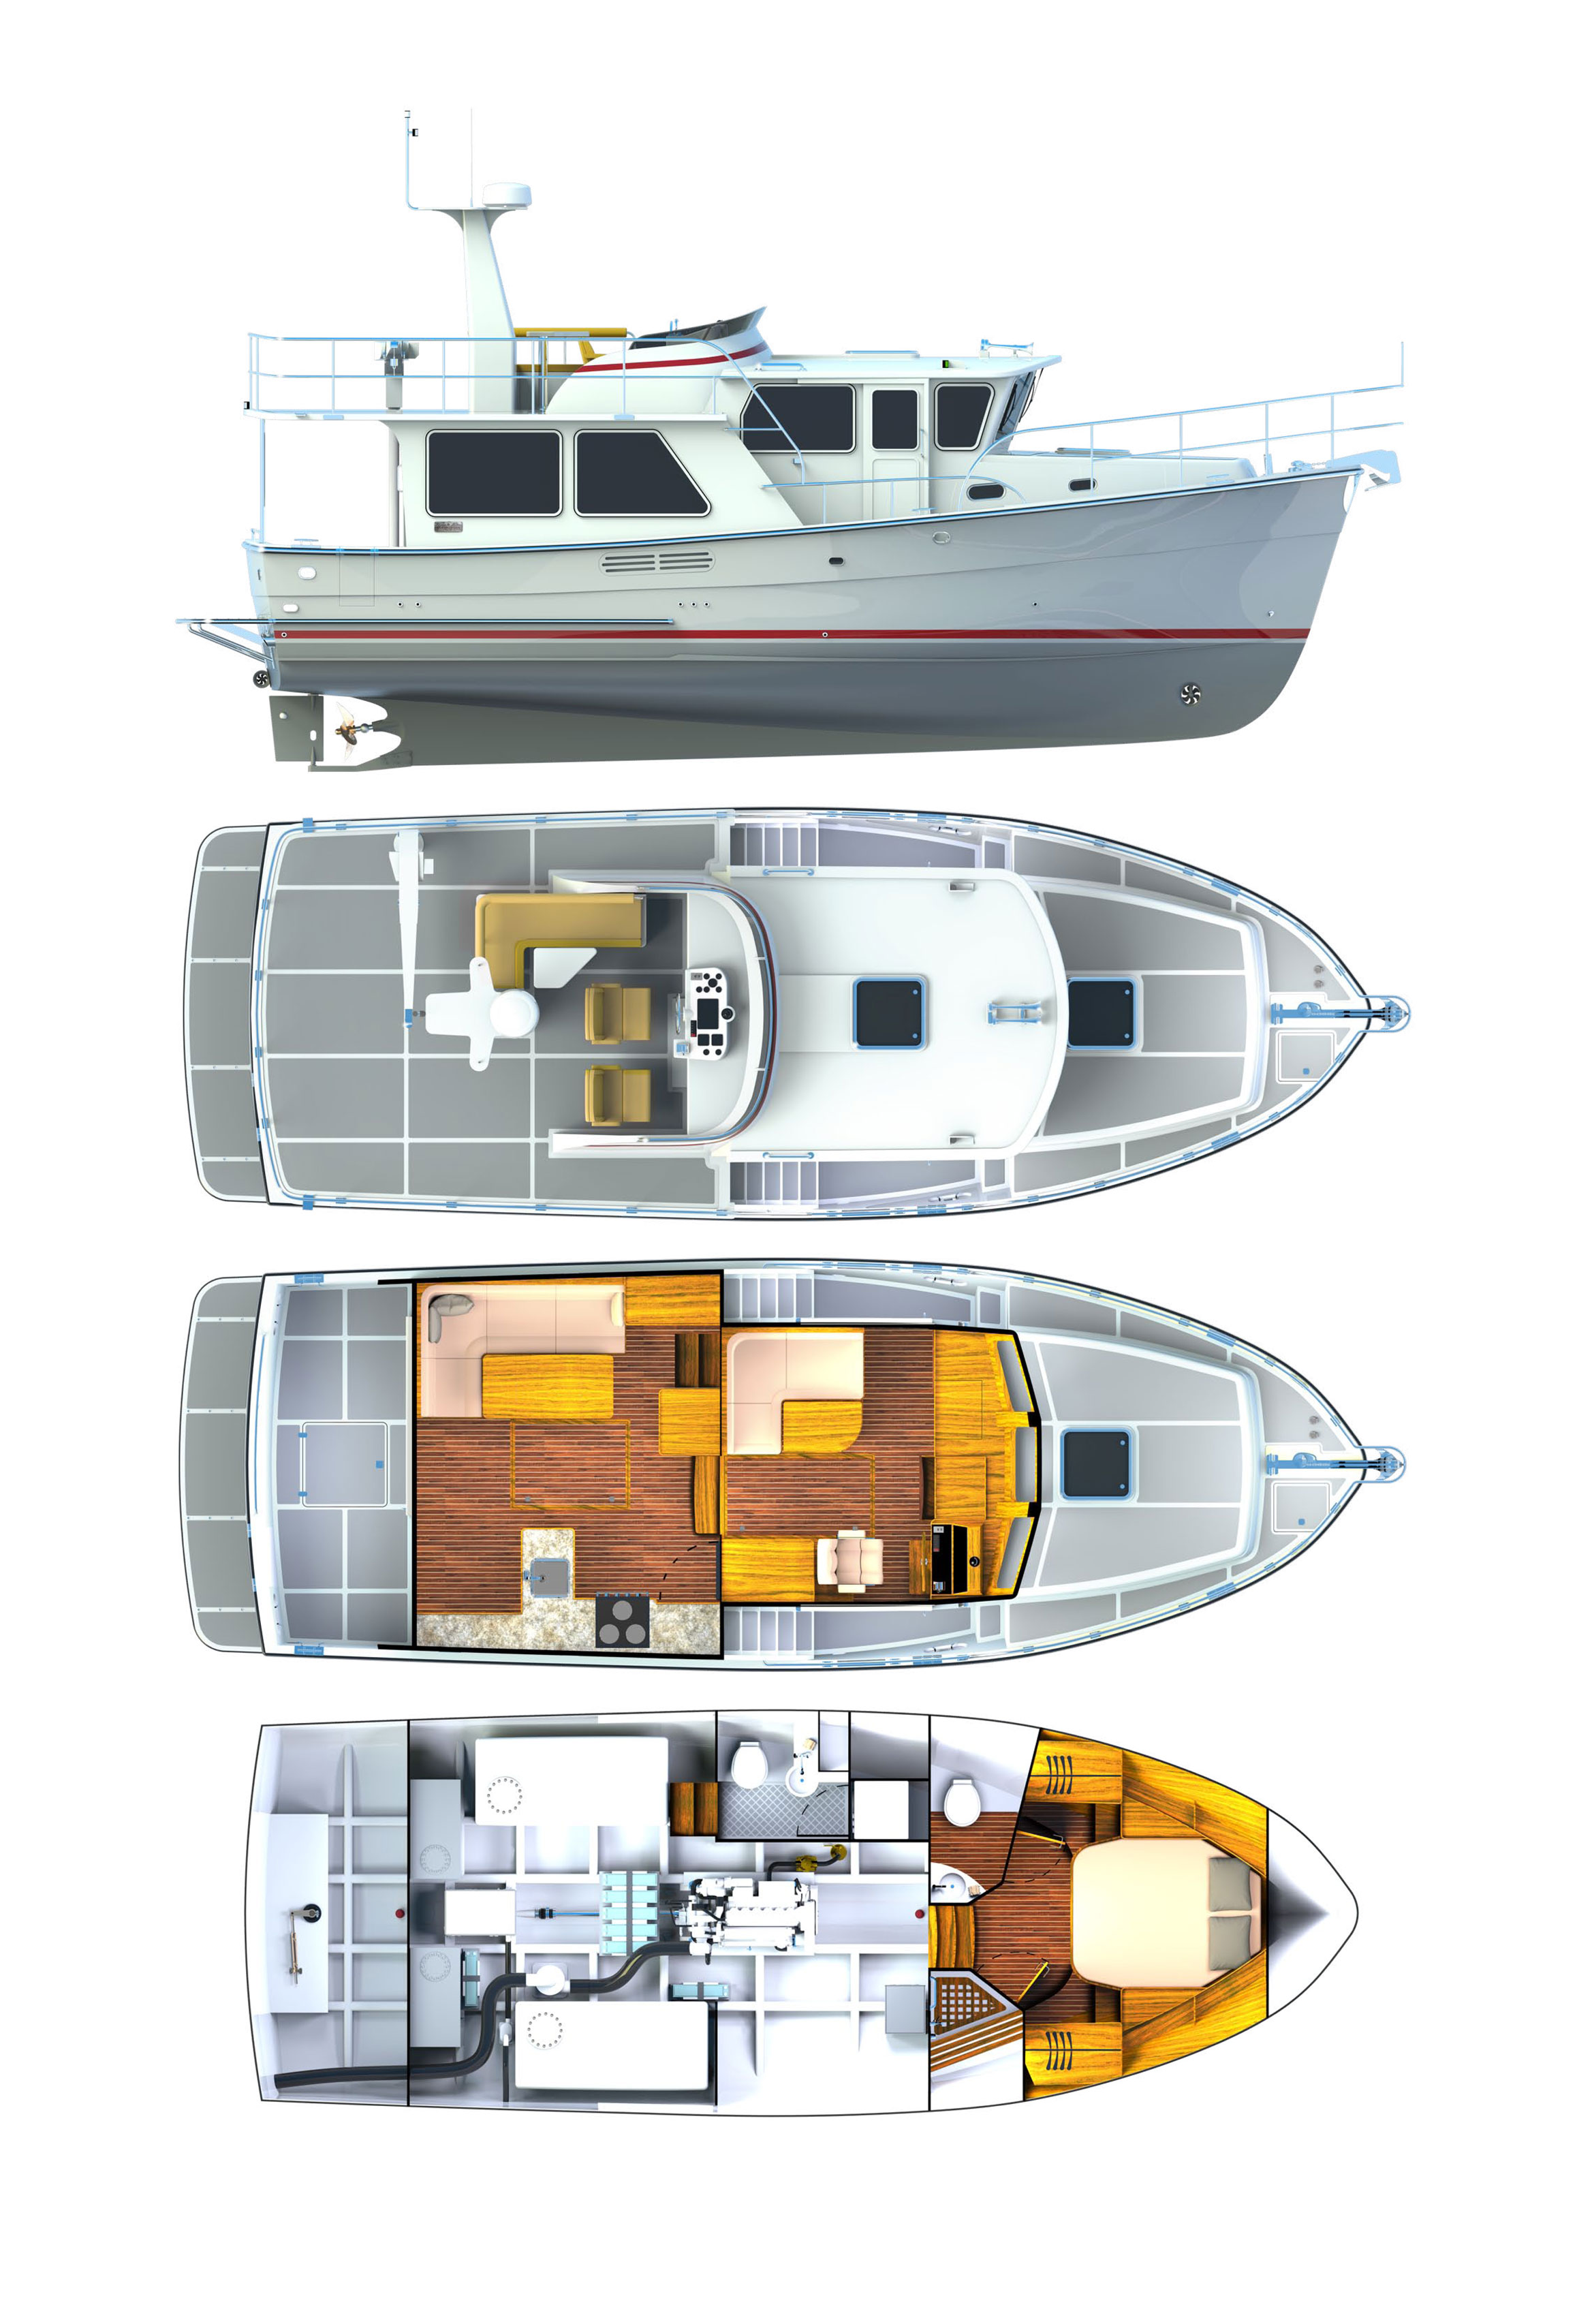
Designing the canvas tops for this boat has taken on a life of its own balancing "must haves" by Maria while keeping the look of the boat traditional and yachty.
I'm constantly searching the web for different approaches but still have work to do. Fun stuff.

John
 
Horn Timber

As with our first ever "all wood" project the rowing/tender our new project is following in the same learning experience and confirming our decision to start with smaller boats before considering a larger trawler style design project.

This morning I received an update from Paul explaining the next steps including acquiring horn timber. I was doing OK following the shaft tube, keel and stem but the "horn" was totally new to me and something I needed to look it up resulting in the following explanation: "In wooden boat construction the horn timber ties the keel and transom together, with the propeller shaft running through the horn timber and skeg. A horn timber shapes a concave bottom near the stern. When the boat is underway, a concave bottom helps to keep the stern down, just touching the water, and aids the boat in staying level in the water. A solid-piece horn timber is a tricky element to replace."

Needless to say, an important part of the boats structure and something that needs to be built and installed correctly. We are expecting to see our first set of photos showing the piles of different woods next week and some of the lofting plans. Today we also decided to go with a flat transom with a slight taper top to bottom instead of a curved transom. Primary reason is to keep thing simple for the relatively large rudder that will be hung off the transom and tied to column steering as well as a tiller arm providing both options and an emergency backup system. Fun stuff.

While we are just getting started, we are tracking to schedule and hopeful thigns will remain this way.
 
Update - Jan 2024

Since my last post I received photos of three different loads of timber all part of our project. Some from Virginia and upstate New York. With the holidays behind us and weather a little better Paul commenced lofting and forwarded a few photos of large paper on the floor with actual boat size lines being drawn. Amazing to watch the process and see our future boat come alive from a pile of wood.

We also discussed the best trailer style (rollers versus boards) and agreed on rollers for this boat. Paul will be providing the trailer manufacture with the hull design for them to use when building our custom trailer. I plan to have the trailer built and delivered within a couple of weeks of Paul being ready for it so it does not sit outside in the winter weather and take up space outside the shed.

We also decided on the canvas design and forwarded photos and specification to Paul this week. Instead of a typical forward dodger style canvas we decided to use two (2) separate bimini tops with clear and removable curtains on the forward top. This approach should provide protection from the wind for Mary and Sailor Blue when she is with me. On days I'm our along I will likely not use any of the tops. Storing the tops when stowed is something we are still exploring since we don't want them to take away from the "yachty" look of the boat. We are going as far as possible wood storage boxes with hinged tops to hide the tops. We will see how that will look.

I found a sailboat charter company in San Diego performing retro-fits to their fleet to replace diesel engines with electric motors. The motors being installed are the same that we selected for the launch and I'm anxious to see one along with the batteries. Plan is to drive down to San Diego this week and see the installation in process then revisit after its complete and possibly get a short ride to test its performance.

The fun has started and despite this being a small boat a lot of work goes into making sure it ends up meeting our expectations. Fun stuff.
 

Attachments

  • Teak.jpg
    Teak.jpg
    170.5 KB · Views: 11
Who is doing the electric installation and commissioning? That's a very different skill set us wooden boat building.


And what are you thinking re shipping across the country after your last experience?


And sorry if you already mentioned it, but who's propulsion system are you using, what voltage, and what capacity batteries and who's the vendor?
 
questions

Who is doing the electric installation and commissioning? That's a very different skill set us wooden boat building.


And what are you thinking re shipping across the country after your last experience?


And sorry if you already mentioned it, but who's propulsion system are you using, what voltage, and what capacity batteries and who's the vendor?

Great questions above. The current plan for installing the electric motor is for Paul to lead the effort and bring in any assistance he requires from local marine shops. I'm heading to San Diego next week to see the installation of the same system we are purchasing being performed on sailboat. The builder of the motors (Electric Yacht) also provides support. One of the reasons I choose EY is that Marshall Marine Corp who built our sailboat has been installing these motors for years in new boats and reported no major issues with the system. Sometimes old and proven is better than new and exciting. We selected a 10Kw system which is the smallest the offer and used on all the Marshall Marine 18' and 22' sailboats. Still deciding on battery size but will be lithium.

Regarding shipping the completed boat from NY to SD - it keeps me up some nights. Not sure what the answer is except to locate a transport company with a proven record and make sure everything is insured as we did last time.

John
 
Update 1/20/2024

This past week Paul continued to focus on the lofting, patterns and molds. It's a time consuming and IMO back breaking effort. The weekly photos help me understand the process and progression leading up the layup. While I appreciate the advantages using CAD systems in different industries, I would argue that today's generation of young engineers could benefit from experiencing traditional methods of design and tooling especially in boat building. It's unfortunate I do not live close to Paul, or I would ask to work side by side on this project and experience every aspect of building the boat. Possibly the next boat will provide this opportunity.

In reference to the next boat, I already starting to chart the costs of this project which we will use when estimating our next potential project before deciding on size and type of boat. I don't mind paying a little more for a custom design boat and with import tariffs around 20% for one country, increasing cost of shipping, plus builder mark-up around 20% we may not be far off. Fun stuff.

John T.
 

Attachments

  • Lofting jan 20th.jpg
    Lofting jan 20th.jpg
    117.2 KB · Views: 6
Progress Report

While the rainy weather in So. Cal. slowed down installation of a similar electric motor into a sailboat we have been waiting to view, Paul has been working hard on the boat. His weekly updates and photos show amazing speed at which he can build a boat. All drafting and forms are completed as is the keel with drive shaft tube and stem all connected. The transom frame was attached last week and the boat is starting to take shape.

I visited the sailboat retrofit last week between rain showers and was pleased with the simplicity of the system. All prep work is completed with final installation planned to be completed in two weeks. I look forward to a follow-up visit and hear the motor running. I also confirmed lead time to have our system built and delivered is only a few weeks.

Mary and I decided not to finish the transom in Mahoganey similar to the row boat and paint it. Our thought is with a large hanging rudder built out of mahogany it would not show up well against a similar finish on the transom. We also agreed on types of canvas (two sections) that should support various requirements. Fun stuff.

John
 
Progress Report

Paul is making amazing progress with the boat. The hull forms are now complete along with the stern tube / keel / stem which can be seen in the photo below. Every week Paul provides photos which leads to many questions I ask and likely slows him down as he provides detailed answers :).

One of the reasons I decided on this project was for the education related to designing and building a boat. Looking back at every boat we owned and thinking I knew a thing or two about the process and design only proves I was wrong. While a lifetime of boating experiences has provided a limited level of skill and understanding of boat design, I now realize that I don't really know anything and starting from scratch. As much as I have tried to listen to the facts during our boating journey even those were blurred with builders "marketing data". Unless you're in the business and dealing with the day-to-day issues and learning process as most of are in our personnel professions we are stuck with what we are told and printed.

It's not until one gets into the details of every step of the process that allows you to appreciate what really goes into designing and building a vessel. I'm very glade our first custom design / build is small and something we can follow and learn before thinking about the next boat. Being involved in most every step of this process continues to be an educational which is what I needed. Even with this education I know this boat will not be perfect and we will learn from mistakes but that's OK. At least any mistakes will be ours and something we will learn from instead of listening to builders talk about how great their boats are when in reality they have flaws.

If I could be with Paul every day assisting with the build process I would but that's not possible (today). What I'm learning from extensive discussions based on his work and photographs is the best I can do. The pure enjoyment of receiving his photos showing his progress every week is worth more than boat itself. I should have done this years ago.

Not trying to get too far ahead but today I finished up the preliminary interior layout of the next boat we hope to build. I already provide Paul with the requirements document for this boat but he has me on hold until we make further progress on the Launch. Yes, I'm a little crazy but life is too short not to have fun and hopefully prove that you design and build your own boat for the same cost as production boats. It feels good to experience something beyond handing over a check for a production-built boat of that doesn't meet all your requirements. Fun Suff.
 

Attachments

  • Launch Keel .jpg
    Launch Keel .jpg
    149.1 KB · Views: 13
That looks very promising, the stern has a nice line!
The type of wood of the trusses is that Orion Pine?

Mvg,

Pascal.
 
Building Materials

That looks very promising, the stern has a nice line!
The type of wood of the trusses is that Orion Pine?

Mvg,

Pascal.


The keel, stem, drive shaft tube and stern are all Douglas Fir. The planking is White Cedar. Everything will be glassed over, faired and painted when completed. Paul tells me the finish will be a good as a fiberglass lay-up using a clean mold. This is part of what takes time and drives up the costs. The interior will be teak and mahogany to get that "yachty look" we desire. Marry doesn't like dark woods so its a compromise to see how much I will add. We plan on a very light color for all the cushions and shiny 316 stainless fittings to give the boat a modern look since hull is more traditional shape.

What's interesting is on our 11' rowing boat the wood hull was sanded and then primed and painted. It is a nice finish but not shinny like a fiberglass hull and holding up very well. I have been out about 20 times and just rinse and wash with mild soap when I come home. I think this painted finish will last forever since the boat sits on a trailer inside the garage. I need to ask what wood was used to build this boat. fun stuff and thanks for the questions.
 
Update 3-01/2024

I'm starting to see a real boat coming together with progress made on installing the hull planking. I can also start to see the wide full displacement hull design we draw up. While not visible in this photo I'm also pleased with the transition to a slightly narrow "wine glass" shape in the stern which is something we included in our original requirements specification. Fun stuff.
 

Attachments

  • Boat Build 3-1-2024 bow.png
    Boat Build 3-1-2024 bow.png
    158.1 KB · Views: 135
Wonderful to see, I love it!
Teak or Mahogany interspersed with light panels/accents gives a retro look which will certainly fit in this ship!
Too bad the photo is so small and you can't enlarge it, it might be possible to upload the photo to another site so that they are bigger and more details can be seen, for example in: https://imgur.com/a/nZOeX9o

Greeting

Pascal.
 
Progress Report

Last week concluded with the final hull plank (first layer) installed allowing us to see the hull shape. Two additional layers (slightly thinner) of stabled planking in different directions will follow over the next couple of weeks. We also discussed keel protection and what size of SS should be designed and installed prior to flipping the boat. Since our boat will be trailered and the keel will be handling most of the weight, I'm concerned with the potential for damage similar to our small rowing boat keel.

Looking ahead at hull colors Mary and I are starting to lean towards a white hull. Not sure exactly what shade of white but since this is going to be a San Diego based boat and she prefers modern over traditional looks, the original planned dark blue with teak and mahogany wood trim would be too dark. I also decided not to build a mahogany transom since the hanging rudder will be mostly mahogany with teak and SS trim and would not be as prominent to the eye. The contrast against a white transom should look nice. I still need to design the rudder over the next few months with all its detailed trim. Fun stuff.

I'm working to provide better photos but not very good with computers.

John
 
Hull Planking

This photo shows the second layer of planking starting to be installed. As with most wooden boat builds each layer of planking is applied in different directions to add strength. On our build the third and final layer will be covered with fiberglass for a watertight and smooth painted surface. You can also see in this photo the full displacement hull design we selected for maximum stability and tapered transom for best performance in a following sea. While this may not be of significant concern for the boats purpose, I decided to incorporate it as part of a learning process in case we design a trawler. Fun stuff.

John
 

Attachments

  • Launch hull second layer.jpg
    Launch hull second layer.jpg
    118.2 KB · Views: 11
Transom

I want to clarify my previous post related to the shape of the transom. While many designers will agree the best shaped aft hull / transom is the traditional "wine glass" we did not want to give up the space and remained with flat transom but softened up with the taper in the hull. This will be a small test to see how the taper works in a following sea. With the Helmsman and Nordhavn's we had a relatively flat hull aft and square transom resulting in the stern squatting in some following or quarter stern following seas. I have to believe even some degree of hull taper will help the waves pass under the stern resulting in less squatting. The shape I asked Paul to design is similar to our proven Chasin Dory rowing boat. I have spent many afternoons rowing out pass the jetty into the ocean before turning the stern into the incoming swells and waves. Then I just sit there watching the sea react with the stern. For the most part the boat does not life up as much as I expected due to some of the water passing clean under the tapered hull. This is more prevalent with the smaller wind waves and chop up to 2' that would slap against the transom if the boat had a flat hull aft. It's a small experiment but I believe tells me something about hull design. Fun stuff.

John
 
As you continue your research, I think you will find that the amount of squat is related to the amount of rise from amidships running aft to the stern.

Displacement hulls, in addition to being round bottom, have a lot of rise and so much squat they can't exceed hull speed.

Planning hulls have none, though then generally do have some V (deadrise) for stability at speed, and thus no squat once on plane

Semi-displacement have "some" rise and "some" squat, and beamy at the stern to help counteract that somewhat.
 
design

As you continue your research, I think you will find that the amount of squat is related to the amount of rise from amidships running aft to the stern.

Displacement hulls, in addition to being round bottom, have a lot of rise and so much squat they can't exceed hull speed.

Planning hulls have none, though then generally do have some V (deadrise) for stability at speed, and thus no squat once on plane

Semi-displacement have "some" rise and "some" squat, and beamy at the stern to help counteract that somewhat.

Thank you for the input. When you mentioned "amount of rise from amidship running aft to the stern" did you intend to say rise from stern running to midship as with a true FD hull design? Our H38 the hull was basically flat along the centerline from midship to the stern. Excess power resulted in her squatting but not as bad as our N40 (FD) with slight hull rise from "stern to midship" and significantly greater round bilges which likely contributed to this design effect. Fun stuff to explore and try to understand.

JT
 
Progress Report

The boat now has two completed layers of hull planks with the third and final layer ready to start. Each layer is faired smooth prior to starting the next. Time consuming effort that Paul performs himself. I wish I had the skills to do this myself, but I don't and know better than to even try.

It appears the boat will be painted white with a little less mahogany trim and more teak all around. We will include a 3/4" Cedar sheer to break up the solid color. When varnished it will look like gold leaf. Mary keeps reminding me we live in San Diego not Maine and the boat needs to reflect this with lighter colors. I will still include some mahogany including the hanging rudder I still need to design.

Another area of the boat I'm playing with is the bow stem. While most boats cut the stem flush with the deck, I like the look of it standing proud and may decide to leave it. Fun stuff
 

Attachments

  • Launch hull final second layer.jpg
    Launch hull final second layer.jpg
    165.7 KB · Views: 12
I always thought DD planking produced the ultimate boat.
Like your proud stem post.
 
Thank you for the input. When you mentioned "amount of rise from amidship running aft to the stern" did you intend to say rise from stern running to midship as with a true FD hull design? Our H38 the hull was basically flat along the centerline from midship to the stern. Excess power resulted in her squatting but not as bad as our N40 (FD) with slight hull rise from "stern to midship" and significantly greater round bilges which likely contributed to this design effect. Fun stuff to explore and try to understand.

JT

38E-PH-Profile-Layout.jpg


Yes. I am referring to the rise from the center fore to aft, to the transom. The H38 has a lot less than full displacement, but more than a planing hull.
 
Hull Planking

This week Paul is continuing work with the third layer of hull planking. Each layer is installed with adhesive and diagonal to the previous layer. Our boat will have a total of three layers of wood. Soon the fiberglass work will commence over the faired and final layer of planking. Amazing he does all this alone. Since we selected a white hull (painted) the glass will include a light gray or off-white pigmentation.

It's worth mentioning that with every decision or change we talk with the Paul to confirm we are within the quoted price and if not what is the cost impact. So far we have not incurred any increases but it's still early in the process. Fun stuff
 

Attachments

  • Launch hull third layer in work.jpg
    Launch hull third layer in work.jpg
    104.7 KB · Views: 14
Planking is now complete and the bulk of the fairing done. The hull sheathing will use a 6oz per square yard glass cloth applied in 38in widths fore and aft so two pieces a side. Resin will be West 105, the same epoxy used throughout for gluing, no thickener for sheathing, just the resin. The hull will be primed and de-waxed first, then the cloth goes on dry, then the resin is spread and worked in over the glass. Two or three fill pigmented fill coats will follow. Watching other builders on You-Tube perform similar steps on their boats has significantly helped Mary and I understand what Paul is doing on our boat and added appreciation for the amount of labor and skill required.

Since we are planning on teak flooring the question between natural and finihsed is being discussed. While I have seen a few decks with finished teak that looks great I recognize the ease of maintenance leaving them natural. Looking back at all our trawlers they all had fiberglass decks. This boat will be stored indoors so I'm not concerned with weather but don't want anything slippery. Appreciate anyone's thoughts. fun stuff

John
 
With hull planking now complete work has commenced on the fiberglass layup starting with one hull side. Wrinkles in the cloth will be worked out as resin continues to be applied. Cloth is applied to the hull one side at a time. Another layer of material with pigment close to the paint color will applied next. Getting close to flipping boat over. Fun stuff.
 

Attachments

  • launch glass layer.JPG
    launch glass layer.JPG
    132 KB · Views: 5
Back
Top Bottom