You are using an out of date browser. It may not display this or other websites correctly.
You should upgrade or use an alternative browser.
You should upgrade or use an alternative browser.
Varnish, first time...
- Thread starter RonR
- Start date
The friendliest place on the web for anyone who enjoys boating.
If you have answers, please help by responding to the unanswered posts.
If you have answers, please help by responding to the unanswered posts.
Global Diver
Member
- Joined
- Feb 20, 2021
- Messages
- 7
- Vessel Name
- Prudence
- Vessel Make
- Grand Banks 42
Thank you for the advise.
Another question; To Epoxy or Not to Epoxy? I have been reading that you can better protect the wood by using a 2 part epoxy as the first coats. The upside is that it requires less coats with varnish to get the same thickness and appearance. The down side is that once you apply the epoxy, it is very hard to remove in the future.
Thoughts?
Nomad Willy
Guru
As Calder says I prefer to use linseed oil and turpentine (lean on the oil) at first and up to 20% oil on the fifth coat or so. I keep doing it until the wood won’t take any more oil. Then I use Japan Drier (as directed) and go back to turpentine to drive the dryer into the wood.
Obviously this is prep for oil base varnish .... not epoxy ect. This is also the best prep for oil based paint and an oil based paint should last a very long time w this kind of base.
The new “advanced” finishes are too much trouble and too much much like a fad. Roll bar anchors were the same not long ago.
Brightwork by Rebecca Whittman is the bible for varnishing. I refer to it often.
Last edited:
rgano
Guru
- Joined
- Oct 8, 2007
- Messages
- 4,996
- Location
- USA
- Vessel Name
- FROLIC
- Vessel Make
- Mainship 30 Pilot II since 2015. GB-42 1986-2015. Former Unlimited Tonnage Master
I spent decades caring for the varnish of a Grand Banks 42 like yours, and my final iteration on the varnish question was to strip to bare wood, sand as smooth ats 150-grit would get it and apply Clear Penetrating Epoxy in two coats. Before the CPES cured (around 16 hours) I applied one full strength coat of Epifanes - no need to the thinned "tie coat" since it is going over CPES. Before the Epifanes cures, hit it again with another coat of varnish. Let it cure a day or two and sand all the bumpiness out. Now, use the varnish thinned as you like to achieve smooth flow. Sand between coats of use green 3M scratch pads as you get smoother and deeper coatings. Six coats of varnish and then put your TRANSOM cover back on. Good for years, but I hit with a maintenance coat every year or two.
Global Diver
Member
- Joined
- Feb 20, 2021
- Messages
- 7
- Vessel Name
- Prudence
- Vessel Make
- Grand Banks 42
Best Advice yet....
thank you so much.
Looking forward to getting started on this project.
thank you so much.
Looking forward to getting started on this project.
Delfin
Grand Vizier
- Joined
- Jan 20, 2010
- Messages
- 3,822
I spent decades caring for the varnish of a Grand Banks 42 like yours, and my final iteration on the varnish question was to strip to bare wood, sand as smooth ats 150-grit would get it and apply Clear Penetrating Epoxy in two coats. Before the CPES cured (around 16 hours) I applied one full strength coat of Epifanes - no need to the thinned "tie coat" since it is going over CPES. Before the Epifanes cures, hit it again with another coat of varnish. Let it cure a day or two and sand all the bumpiness out. Now, use the varnish thinned as you like to achieve smooth flow. Sand between coats of use green 3M scratch pads as you get smoother and deeper coatings. Six coats of varnish and then put your TRANSOM cover back on. Good for years, but I hit with a maintenance coat every year or two.
Ditto that, mostly. Only comment is that you can make your own CPES from regular epoxy thinned with MEK, which is all CPES is. Thin it to paint thinner consistency, then apply. The only thing I would question is the application over the epoxy before it completely cures. It can work, but the outgassing can cause a failure of the first coat of varnish. Not sure why it happens sometimes and not others, but that is my experience.
I apply the thinned epoxy, the MEK flashes off in about 2 minutes, then the epoxy is left alone for a few days, then wet sanded flat before varnishing as needed.
Nomad Willy
Guru
Jack,
I was thinking about that .. and the viscosity of the CPES. You must not use much epoxy if it has the vis of paint thinner.
I do basically the same thing but w turpentine and a bit of varnish. I let it “cure” for hours or days.
Actually I use Linseed oil to begin. Do several coats to many until the wood won’t take anymore. Then I do the small amounts of varnish like priming for varnishing.
Two things;
1. Nothing soaks into the wood very much. Maybe about 1/50th of an inch depending on the wood. So is the CPES to “seal” the wood? Or is it mainly for adhesion? It may be for both as keeping the water away from the varnish and top surface of the wood is basically the whole mission. What percentage is epoxy and what percentage is “thinner”?
2. I use Japan Dryer and the rather slow evaporation of turpentine. So I have and take long periods of time for the soaks.
rgano
Guru
- Joined
- Oct 8, 2007
- Messages
- 4,996
- Location
- USA
- Vessel Name
- FROLIC
- Vessel Make
- Mainship 30 Pilot II since 2015. GB-42 1986-2015. Former Unlimited Tonnage Master
Ditto that, mostly. Only comment is that you can make your own CPES from regular epoxy thinned with MEK, which is all CPES is. Thin it to paint thinner consistency, then apply.
I strongly suggest you read the information on CPES from Richardson's before trying this idea. YOU CANNOT THIN EPOXY TO MAKE CPES.
From the Home of Smith's Original and Genuine Clear Penetrating Epoxy Sealer website: This is unlike any other epoxy product on the market. It is permanently flexible, because it is made largely from the natural resins of wood itself. It leaves a porosity in the impregnated wood that is close to the natural porosity of wood, so the treated wood can still "breathe". It is very slow to cure, so when you apply it one day and the first coat of varnish the next day, the Sealer finishes curing under the varnish, and that glues the varnish to the wood with the strength of epoxy glue.
There is a section on how to use this product under varnish, and I recommend reading it before taking any advice, including mine.
sailormike
Senior Member
- Joined
- Jul 25, 2010
- Messages
- 205
- Location
- USA
- Vessel Name
- Miss Dot Dee
- Vessel Make
- 1980 29' Prairie Trawler
I use a flexible putty knife and a heat gun to remove old coating. Then sand with 100 grit and final 320 grit. Then I apply 3 coats of honey teak. the last time we did it it lasted 18 years with no maintenance. It is a great product!
Check out a product called 'Awlwood'. I use it on exterior teak handrails and dorade boxes and interior floors. After three years it's holding up well. Long last lasting and easily touched up, if you follow the mfg instructions. In the right conditions you can double and triple coat in a day.
Others on this forum have had success with it as well.
Others on this forum have had success with it as well.
Lou_tribal
Guru
I strongly suggest you read the information on CPES from Richardson's before trying this idea. YOU CANNOT THIN EPOXY TO MAKE CPES.
From the Home of Smith's Original and Genuine Clear Penetrating Epoxy Sealer website: This is unlike any other epoxy product on the market. It is permanently flexible, because it is made largely from the natural resins of wood itself. It leaves a porosity in the impregnated wood that is close to the natural porosity of wood, so the treated wood can still "breathe". It is very slow to cure, so when you apply it one day and the first coat of varnish the next day, the Sealer finishes curing under the varnish, and that glues the varnish to the wood with the strength of epoxy glue.
There is a section on how to use this product under varnish, and I recommend reading it before taking any advice, including mine.
I am sorry to say this that way, and don't mind me, but this is just pure marketing bullshit.
L
Actually I’ve used CPES for years and always thought it was a good product. Regular epoxy thinned produces something that while thin, does not cure right. I’m no chemist, but my slip mate a few years ago was. We got to talking about CPES and he was of the opinion that it was a unique product. He called and chatted with one of the guys at System Three at the time and after they talked, he chuckled and said that the person he spoke with said that it was in fact a unique product and they sort of wished they had something similar. I think it’s a niche product that at its price point, not too many mfg really want to get in the market for the comparatively low volume.
So not really sure that it’s marketing, unless you are pointing out that rot doctor is just reselling Smiths. I am pretty sure that those who claim it’s just regular epoxy thinned could probably use a little backup on whether that’s actually true. Everything I’ve seen on it says otherwise, but hey in the marine world, anything is possible.
I do know this from first hand experience. If you try to top CPES with regular epoxy, it may not be compatible. I knew I had put System Three over it successfully once and got terrible cratering. Sanded it off tried again, and got the same result. West was not much better. Finally used System Three Silvertip and no problems. Silvertip has been the most compatible epoxy if you are not sure about chemistries in multiple products. This may be useful for anyone who is trying epoxy build before varnish. I’m only on year 3.5 so don’t ask me about the longevity yet. Also, cause somebody will suggest it, the incompatibility did not seem to come from blushing. No amount of washing or sanding would keep it from cratering.
OP
OP
RonR
Guru
I have used CPES a few times now. Twice to help with wood rot. And once under varnish. It does what it says it will, so in my mind its worth the $$.
Word of advice, use it in an open air environment, let it soak in and dry for a few days before topping.
Word of advice, use it in an open air environment, let it soak in and dry for a few days before topping.
Nomad Willy
Guru
HaHa,
Well I’m sure Linseed oil is compatible w turpentine.
Well I’m sure Linseed oil is compatible w turpentine.
OP
OP
RonR
Guru
What they don’t share in the books!
Attachments
-
 654C1A05-4A89-4953-BD0B-FF0F8F28B1A5.jpg167.3 KB · Views: 27
 -
 5A90712A-8C5D-4C70-A04F-B7C39F2DC4B7.jpg168.8 KB · Views: 28
 -
 D0EB37CE-C9F7-4422-AEBA-FE7249003811.jpg181.2 KB · Views: 27
 -
 18F1CFA6-D48F-41FC-8444-27C1B261CDB0.jpg139.6 KB · Views: 26
 -
 FD53DFDE-08DE-4D01-8A5B-7F6F7F613C92.jpg154.4 KB · Views: 28
Last edited:
OP
OP
RonR
Guru
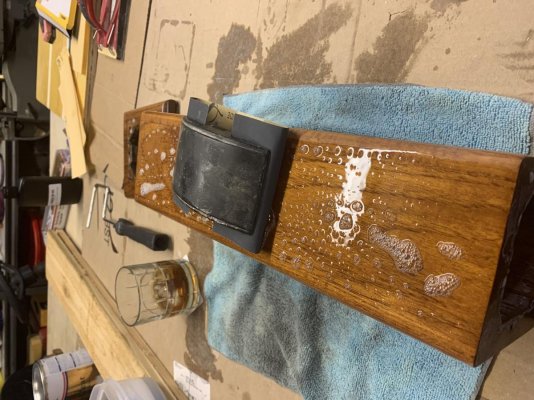
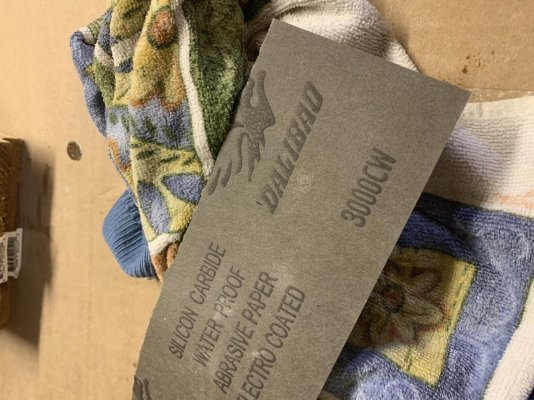
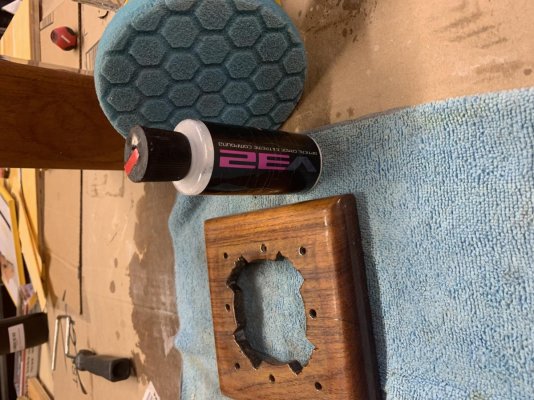
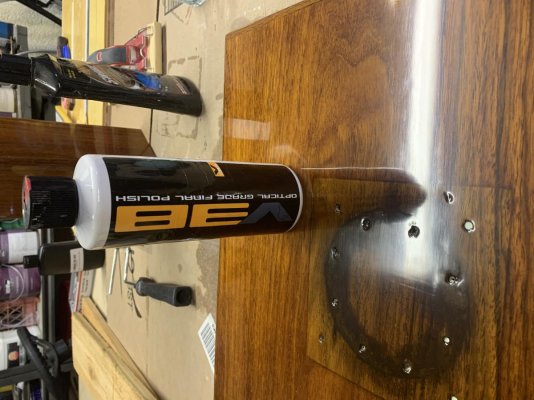
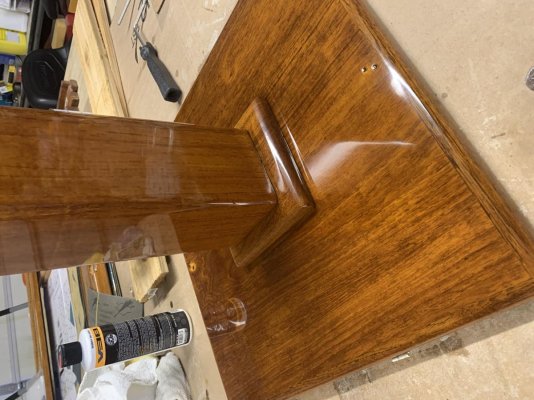
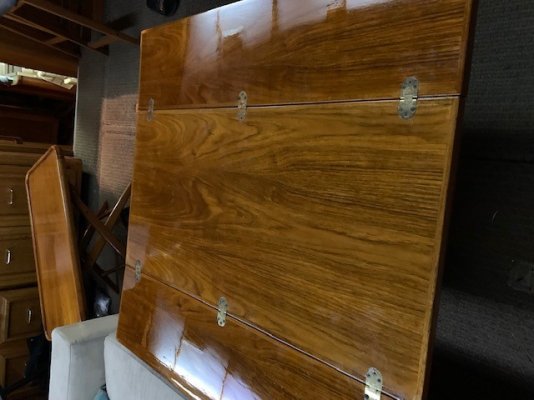
About 10 coats of Interlux compass clear
Sanded to 320 between coats
Final coat was sanded from 800-3000
Then buffed from 32-38
It’s not perfect, but man it shines!
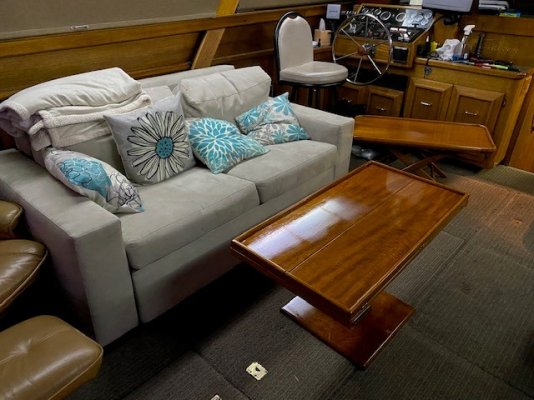
Part of our hi -low flip flop table from the 1971 Egg Harbor.
Sanded to 320 between coats
Final coat was sanded from 800-3000
Then buffed from 32-38
It’s not perfect, but man it shines!
Part of our hi -low flip flop table from the 1971 Egg Harbor.
Attachments
Cigatoo
Guru
Wonder how this compares to smiths?
https://www.jamestowndistributors.c...Hb1RiL9GARGod4rGIM-QFq0Ag26C3VFBoC6D4QAvD_BwE
https://www.jamestowndistributors.c...Hb1RiL9GARGod4rGIM-QFq0Ag26C3VFBoC6D4QAvD_BwE
OP
OP
RonR
Guru
Wonder how this compares to smiths?
https://www.jamestowndistributors.c...Hb1RiL9GARGod4rGIM-QFq0Ag26C3VFBoC6D4QAvD_BwE
Smiths is much more like water vs thicker like the total boat.
OP
OP
RonR
Guru
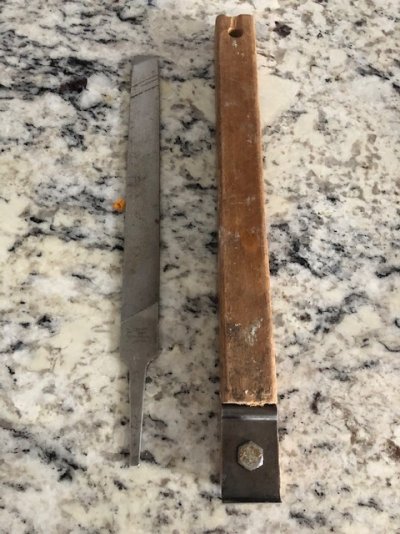
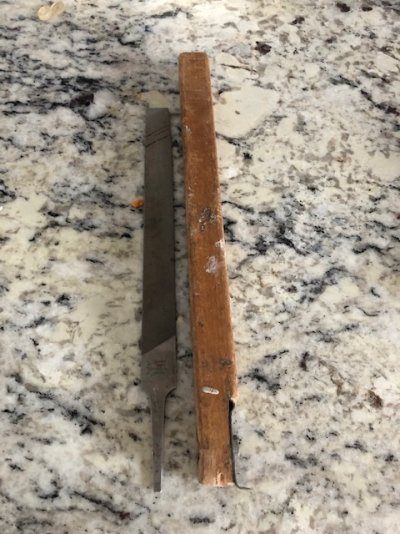
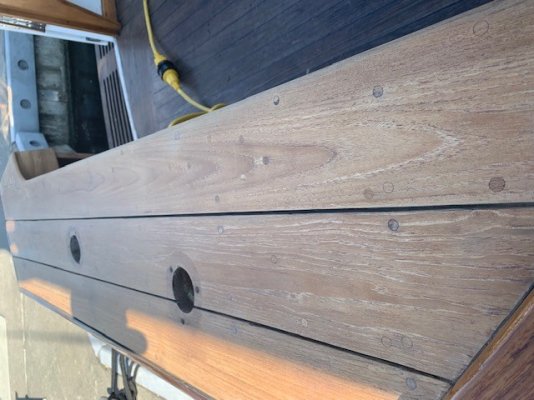
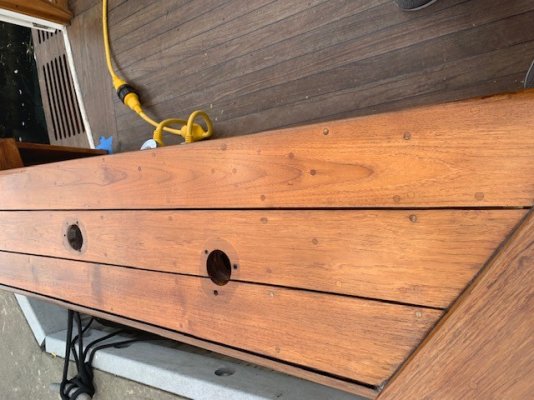
I am refinishing the cover boards on the back of the Egg. They have a calk line between the boards. I have stripped all of the old varnish and will re-calk the seams. My question is do I varnish first and then calk. Or do I calk then varnish. I think I may put down the first 3 coats of varnish so that it covers the edges of the boards to help prevent lifting down the road. Then calk, and then add the last few coats of varnish and cut a thin line with a razer over the calk line so it can move around like it should.
Thoughts?
Thoughts?
Attachments
FoxtrotCharlie
Guru
That's what I would do if I had seams like that . And love that finish on the hi-lo table.
. And love that finish on the hi-lo table.sailormike
Senior Member
- Joined
- Jul 25, 2010
- Messages
- 205
- Location
- USA
- Vessel Name
- Miss Dot Dee
- Vessel Make
- 1980 29' Prairie Trawler
Varish first and caulk the seam over it is exaclty what I have doneI am refinishing the cover boards on the back of the Egg. They have a calk line between the boards. I have stripped all of the old varnish and will re-calk the seams. My question is do I varnish first and then calk. Or do I calk then varnish. I think I may put down the first 3 coats of varnish so that it covers the edges of the boards to help prevent lifting down the road. Then calk, and then add the last few coats of varnish and cut a thin line with a razer over the calk line so it can move around like it should.
Thoughts?
OP
OP
RonR
Guru
Varish first and caulk the seam over it is exaclty what I have done
Will do !
OP
OP
RonR
Guru
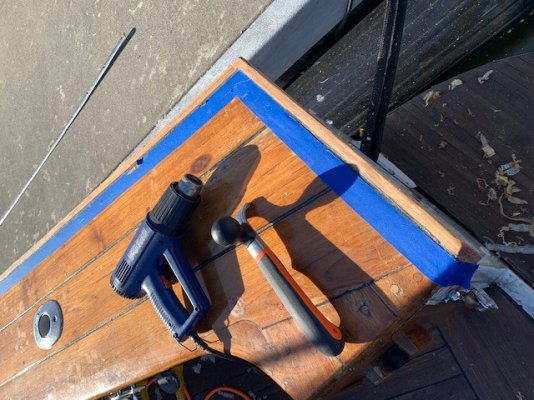
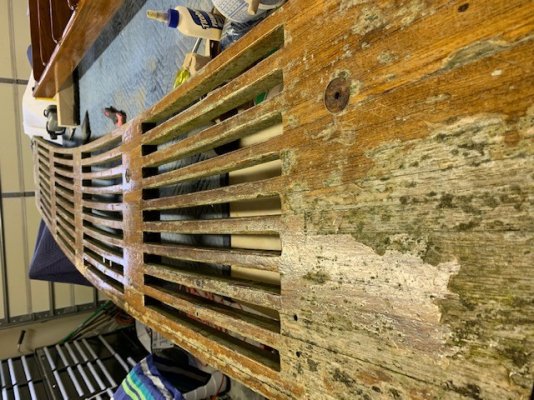
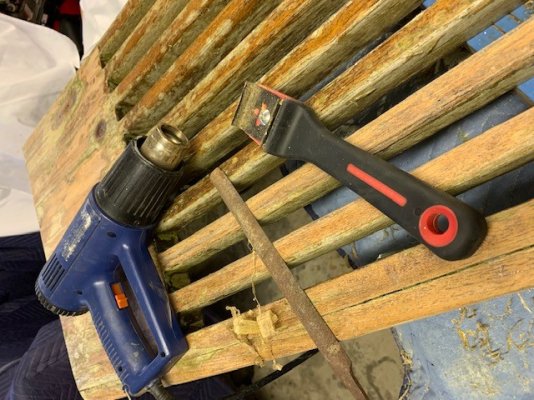
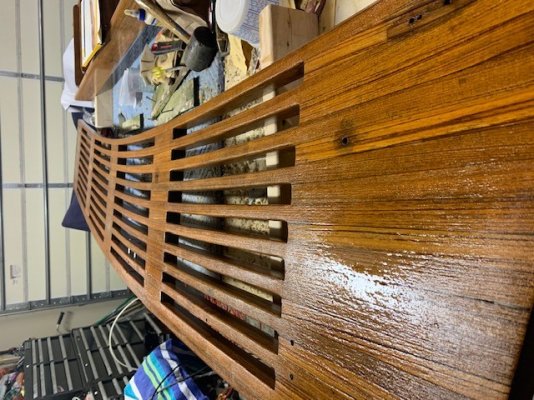
Got the cover boards stripped and the first coat is on!
I did not use a heavy bleach. Same as the last go around. I could have gotten it a little blonder, but I am afraid the bleach will streak the hull and other items.
And I dont want it draining into the sound!
I did not use a heavy bleach. Same as the last go around. I could have gotten it a little blonder, but I am afraid the bleach will streak the hull and other items.
And I dont want it draining into the sound!
Attachments
Last edited:
OP
OP
RonR
Guru
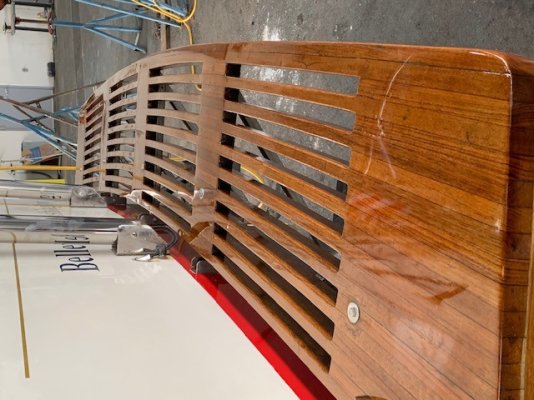
looking back I forgot to put up a picture of the finished swim step.
I used Perfection Plus, its a two part varnish. I had issues with gassing of the wood when I started. But it was my own doing, as I was adding heat to the garage and raised the temp to fast.
But it held up well to a season of fishing/crabbing/kids/dogs/sand.
(this was on the 33' Egg that we sold)
I used Perfection Plus, its a two part varnish. I had issues with gassing of the wood when I started. But it was my own doing, as I was adding heat to the garage and raised the temp to fast.
But it held up well to a season of fishing/crabbing/kids/dogs/sand.
(this was on the 33' Egg that we sold)
Attachments
OP
OP
RonR
Guru
This past trip to Point Hudson I ran into a few guys that restore boats for a living. They have swapped from using Perfection Plus or any single or two part varnish are starting to use Awlwood. Unless the customer request a product this is the go to stuff for them. They state it has better UV protection, last longer to abrasive environments and use. They can put multipole coats on in one day. The problems they have are it runs very easy, its very difficult to remove from items that it was not intended to go on.
Combined with this feed back and others on this Forum. After I finish out my tow/cover boards with what i started with. I may try some Awlwood on my table top and a few other small items in the garage to see how it is to work with. I will be building a new swim step this winter and want something that will take a beating.
Combined with this feed back and others on this Forum. After I finish out my tow/cover boards with what i started with. I may try some Awlwood on my table top and a few other small items in the garage to see how it is to work with. I will be building a new swim step this winter and want something that will take a beating.
OP
OP
RonR
Guru
Choices
Guru
- Joined
- Apr 16, 2018
- Messages
- 899
- Location
- Montgomery, Tx
- Vessel Name
- Choices
- Vessel Make
- 36 Grand Banks Europa
Depends how many times you want to go through the process.
I don't have time to do it over and over, so I used Awlwood and it has lasted five years, on the Gulf Coast.
Definitely requires a little more effort to nail it, but results blow away and varnish. Looks more like wood coated in glass.
Look up some of the magazine comparisons. Incredible product.
I don't have time to do it over and over, so I used Awlwood and it has lasted five years, on the Gulf Coast.
Definitely requires a little more effort to nail it, but results blow away and varnish. Looks more like wood coated in glass.
Look up some of the magazine comparisons. Incredible product.
OP
OP
RonR
Guru
Depends how many times you want to go through the process.
I don't have time to do it over and over, so I used Awlwood and it has lasted five years, on the Gulf Coast.
Definitely requires a little more effort to nail it, but results blow away and varnish. Looks more like wood coated in glass.
Look up some of the magazine comparisons. Incredible product.
It is a bit more difficult to use as it does not cut and buff as well as some others. But when it goes on right, it looks incredible!
Choices
Guru
- Joined
- Apr 16, 2018
- Messages
- 899
- Location
- Montgomery, Tx
- Vessel Name
- Choices
- Vessel Make
- 36 Grand Banks Europa
Table looks great!
Awlwood rolls out pretty good. If you get nibs you can gently sand and buff them out.
Awlwood rolls out pretty good. If you get nibs you can gently sand and buff them out.
OP
OP
RonR
Guru
Table looks great!
Awlwood rolls out pretty good. If you get nibs you can gently sand and buff them out.
I have tried sanding and buffing the Awlwood. But I can never get the same shine as when its first put down. I start with 300 and work my way up to 1000 and then cut and buff with a 9" buffer followed by a 4" slow speed buffer. It looks ok, but not great. So this time I just rolled/back brushed and left it. There are some little bumps, but I just left them and put the table in the boat and called it done. It looks 1000 time better than when I started. Time will tell if I should have just re-oiled it or if this was the right thing to do.
As soon as I finish up my new fastback cover I will start in on the new swim step. I have a pile of teak sitting in the garage ready to go!
Similar threads
- Replies
- 0
- Views
- 206