Snapdragon's Fantasy Trawler Manifesto

The friendliest place on the web for anyone who enjoys boating.
If you have answers, please help by responding to the unanswered posts.
As I mentioned the Seakeeper had engine driven compressors for separate cold plate refrigerator and Freezers. They were actually the same, and by adjusting the set points we used them as two freezers at times when we were hauling a lot of fish home. They were top loading in the counter of the galley. The great part of these were that they used zero battery power, were pretty big, and only needed 30 minutes a day of engine time to stay cold. They had lots of downsides too. Top loading was a pain for everything but the top layer. Finding a beer at the bottom of the fridge was a pain! The other thing that was a pain was you could not leave any food in the fridge when you left the boat at the marina as they could not stay cold on their own on shore power. It sucked to have to haul everything home every time at the end of the trip. With the engine driven refrigeration, and heater that used zero power, there was just nothing that used power when you were at anchor. The inverter was the only thing that used an appreciable amount, but we were mostly just charging computers with it. We never had to worry about running out of battery power on this boat.

Another quirk was that the only way to make hot water was with engine heat from the “Pony Engine” that was a 10 Hp Yanmar that was also dry stacked and keel cooled, that could run the refrigeration, hydralics, and house alternator. Its hard to describe, but all this stuff ran off belts on a shaft. The shaft had electric air conditioning clutches at each end and could be engaged to run off the pony engine, or one of the main engines. It was a unique and super reliable system but I don’t think I would try and replicate it on future boats. It would not be worth the massive amount of labor to custom build it all, and all the belts made too much dust in the engine room that vexed me in my mission to keep things clean. The result of this setup was that wanting hot water was always what made us start up the pony engine. It took about 20 minutes for the water tank to get hot, and by the time we were done with dish washing or showers, the batteries and freezer were good for the day.

I think this setup made a ton of sense in 1990 if you were trying to optimize for cruising away from marinas. Now though, with solar and lithium batteries I don’t think it would be the best way to go on a new boat. To it’s credit it was all 30 years old, and everything worked perfectly for the 5 years we owned the boat. It was very robust.
 

Attachments

  • IMG_0365.jpg
    IMG_0365.jpg
    147.2 KB · Views: 16
  • IMG_0364.jpg
    IMG_0364.jpg
    163.8 KB · Views: 15
The hydraulic anchor windlass, and dingy crane on the Seakeeper were also really cool, but not really practical to try and replicate as they were completely custom built by the builder and must have taken a million man hours to put together. The Crane used a hydraulic ram with a big block and tackle system that multiplied its travel. I think Steel head cranes work the same way. The ram was hidden in the top of the kitchen cabinet and the cable ran up through the deck in up the center of the crane. It was controlled by a lever on deck that actuated a hydraulic valve under the deck. It was so fast and easy to launch the heavy custom dingy. You could fully raise or lower it in about 1 second. You could go slower by feathering the control valve.

The double windlass was controlled by valves on deck right next to it. It was set up perfect to work the valve with one hand, and spray the mud off the chain with the salt water wash down pump with the other hand. I really liked that with the hydraulic valve the speed was infinitely variable between full speed and stopped. It was nice to be able to slow down when there was sticky mud on the chain, or when the anchor was at the roller. They hydraulics were so powerful there was no need to ever drive up on the anchor. It easily just pulled the boat up over it.

The other great use of the super fast dingy crane we discovered was that we could clip the flopper stopper I had made for stabilization at anchor onto it and use it as a seat. Then in a scary fast manor use the crane to dip you in and out of the water. I felt like dad of the century when I came up with this. We dubbed it "The big Dip." I wish there was an easy way to post a video here, but a still picture will have to do.

The pictures of Windlass construction are from a DVD of pictures the boat came with.
 

Attachments

  • C6A56C5A-2DD9-41D5-AC97-44463BD980FF.jpg
    C6A56C5A-2DD9-41D5-AC97-44463BD980FF.jpg
    123.2 KB · Views: 15
  • 2D8E7F29-6D98-4123-BE33-358794A45758.jpg
    2D8E7F29-6D98-4123-BE33-358794A45758.jpg
    164.7 KB · Views: 16
  • E9C69F0A-ADEB-4426-B879-03EE19893825.jpg
    E9C69F0A-ADEB-4426-B879-03EE19893825.jpg
    155.6 KB · Views: 15
  • IMG_0929.jpg
    IMG_0929.jpg
    169.9 KB · Views: 15
  • IMG_1193 (1).jpg
    IMG_1193 (1).jpg
    160.1 KB · Views: 15
  • IMG_3531.jpg
    IMG_3531.jpg
    172.5 KB · Views: 19
The Seakeeper came with a pretty sweet Custom made plate welded dingy, that was specifically designed to fit perfectly on the cabin top, and be used with the custom crane. It as a really cool system. The design for the dingy was adapted from a plywood boat design that had the pointy bow snubbed off. It hauled ass with a 20hp Suzuki on it, and also rowed really nice. The only downside was that it was really wet in big chop. I did some restoration work on the dingy. It was originally built with plywood seats, that were getting a bit soft after 30 years. I removed them and fabricated new ones out of Aluminum. It turned out really sweet. I also sand blasted the failing paint off it in my driveway with a harbor fright sand blaster. It took forever. I was trying to figure out what to do with the failing paint on the main boat. The experiment was a success and I was able to determine that I would be happy with a sand blasted, then lightly sanded finish on the hull, which I had done the next year, and will write more about later. The greatest thing about this dingy was that it was 30 years old and after the work I did on it better than new. There is no reason it couldn’t 50 more years. Just in the time I owned it I landed it on hundreds of barnacle covered, sharp rocked beaches and there was zero damage. It was also completely impervious to UV damage.

As an aside, I am too lazy to do this, but I think one could make a very successful business out of copying the design of the OC tender in welded plate aluminum. It would be so sweet in the Pacific NW.

In the picture of the kids rowing, if you look very closely you can see a string tied to the bow. They wanted to row around, but I was afraid they would not be able to make it back as they didn’t really know what they were doing. I got out one of my big halibut poles and tied the spectra line to the bow so I could reel them in if they could’t make it back to the boat. I did not end up having to use it, but I thought it was a crafty idea.
 

Attachments

  • IMG_6627.jpg
    IMG_6627.jpg
    130.8 KB · Views: 13
  • IMG_0788.jpg
    IMG_0788.jpg
    144.2 KB · Views: 14
  • IMG_0867.jpg
    IMG_0867.jpg
    103.6 KB · Views: 14
  • IMG_0988.jpg
    IMG_0988.jpg
    149 KB · Views: 15
  • IMG_1851.jpg
    IMG_1851.jpg
    177.9 KB · Views: 14
  • IMG_3755.jpg
    IMG_3755.jpg
    138.8 KB · Views: 14
The Seakeeper came with a salt water flush manual marine head. It was a fancy expensive one with the bottom made of bronze castings. It worked well, but it was stinky and gross. The old salt water in the lines would get stinky and was horrible the first time you used it, and rather than just flush your #2 down, it would kind of grind it up and recirculate it while diluting it to death. My kid could never get her poo’s to flush so I would have to go in and deal with it, which was a joy.

I go fed fed up with it after a couple years (Meaning my wife was fed up with the head, and me), and after much angst, and internet research, ordered and Air Head composting toilet. It seemed like a lot of money for what it was, and I was nervous about drilling a hole I’m my hull side for the air vent. I went for it and it was great. I could not believe how good it worked. It does not really compost anything, it just dries it out, and maintains negative pressure in the toilet so it never stinks. One thing that really helped was to put the toilet paper in a separate waste bin, which I was also shocked by how little that stinks. The biggest trip we took with the composting head was 3 weeks with two adults and one child and I cleaned it out before and after the trip, but didn’t need to deal with it at all during the trip. Cleaning it out was way easier, and less disgusting than legally pumping out your waste tank, but harder than illegally dumping it in the water. The bottle that separated the urine was kind of a pain as you had to empty it every day. I solved this by running a gravity fed line, (This was super hard due to bad access) to my existing 50 gallon black water tank. My boats holding tank was well vented, and I never had any smell issues with this setup. This was the best of both worlds, as the solids were collected in the head, and the urine was not diluted with flush water, and could go for over a month before the tank needed to be pumped out. It might not be technically legal to dump urine in Washington but I never felt guilty about doing it. The other thing I really liked about it was there there was zero danger it was going to break down on you and be unusable during a trip.

The downsides were that guys had to sit down to pee, and that it was a lot to explain to guests. I would consider a composting head in a dream boat build for sure, but I would also worry about making it hard to sell. If the boat had 2 heads I might go composting in the master suite, that my wife and I would use if we were alone on the boat. And traditional in the guest head.

Years ago I read about a boat that had a “Direct drop” RV head that I found intriguing. I think these are kind of like an airplane head that just opens up and drops right into the tank. It would only work if you had room for the holding tank directly under the head, but it is an interesting idea. I think they use way less flush water to fill up the tank, and there are way less pumps, hoses, duck valves etc to go bad, or get plugged up. I would definitely do a bunch more research on it if I were doing a new build.

My current boat came with fresh water flush electric heads. They are ok. Less stinky than the salt water flush, but more stinky than the composting. They have been pretty reliable so far other than needing new duck bill valves that were not convenient to access for replacement. I don’t like that they are using fresh water that is always in short supply.

I did not manage to take any pictures of the competing head.
 
Last edited:
The twin Rudders on the Seakeeper were nothing that special, but they were very nicely engineered, and like everything else on the boat had a mind bending number of man hours of custom machining work in them. The boat even came with a plate in the deck of the cockpit you could take out and drop down a custom stainless steel emergency tiller handle to steer the boat in the event of a hydraulic failure. The handle was stored under the dingy cradle on deck. I really liked the way the rudders and props were protected. I was told it was designed to dry out and balance on the twin keels. After all the work to get the epoxy barrier coat right, that I will talk more about later, I tried really hard to avoid scratching it.

One other slight point of interest was the rudders had fish tails welded on them. I think they were added some time after the initial build. It’s not that interesting because I never got to try it before they were added, so I can’t report if they made any difference. It worked great with them though. The boat tracked like it was on rails in big following seas, and was great at close quarters too.

This was a much better setup than my current boat that has twin screws, but only a single rudder in the middle. This works fine when you are out cruising around, but sucks for slow speed maneuvering in the marina. Without the prop wash flowing over it, the single rudder has no authority and does not turn the boat when it is going super slow. It makes it much harder to control in the marina. There is also less protection for the props, but there is a pretty huge keel below them so it’s still not too bad.

In the last picture taken from above at Teakerne Arm in BC you can see the emergency rudder on deck under the dingy cradle. You can also see the intake, and exhaust for the engine room ventilation I will write about next. The intake is hard to see but it is the louvers just behind the orange life ring on the starboard side. The exhaust is the louvers in the back of the stack.
 

Attachments

  • IMG_2195 (2).jpg
    IMG_2195 (2).jpg
    126.5 KB · Views: 15
  • IMG_5087.jpg
    IMG_5087.jpg
    111 KB · Views: 17
  • IMG_5088.jpg
    IMG_5088.jpg
    103.1 KB · Views: 14
  • IMG_0694.jpg
    IMG_0694.jpg
    169 KB · Views: 19
  • IMG_3816 (2).jpg
    IMG_3816 (2).jpg
    180 KB · Views: 16
I am going get to engine room ventilation, but I am going to take a side trip first into my current breaking boating issues. Condensation and the new window I cut in my pilot house bulkhead to improve visibility. My daughter is off this week from school for winter break and we were planning on heading out to the islands for a few days. We came down to the boat on Monday and had some friends we met in Alaska over for a dinner party, then were going to take off the next morning. The weather forecast went from bad to worse and we ended up deciding to just hang out of the boat at the marina instead of braving the storm. This gives me too much time to type on Trawler forum.

We are having a few days of strong north winds and cold. Sitting here at the dock it is blowing my mind that we have considerable condensation all over the windows and hatches. We are at the dock so we have plenty of power. I have two compressor style dehumidifiers running, one upstairs and one down stairs. They are each producing a couple gallons a day of condensate. The boat was dry when we got here, I leave a Dehumidifier running 24/7 although it does’t work as good when its cold. The Kabola boiler is cranking along and it is a comfortable 72 degrees in here, and the dehumidifier says the relative humidity is 36%. It is about 33 degrees outside and the wind is blowing hard. WTF! I have decided it’s impossible to fully control condensation on a boat, at least in this climate. A future dream boat will include finish trim around the windows, port holes, and hatches that is impervious to water damage. Maybe Starboard? I would also like to have welded or glassed in drip pans under all portholes in the hull to catch the drips when they inevitably leak, and carry it down a hose to the bilge.
 

Attachments

  • Condensation 2.jpg
    Condensation 2.jpg
    198.3 KB · Views: 12
  • Condensation.jpg
    Condensation.jpg
    82.4 KB · Views: 13
The other thing I am working on this week is cutting a window in a bulkhead in my pilot house to improve visibility. I will likely write more about it later, but my current boat has a very small pilot house that consists of a bench seat around 4’ long on the port, and a single seat to the starboard that is the normal Helmsman seat when cruising. This setup has it’s ups and down, but one of it’s big downs was the visibility to the starboard side, when setting on the bench seat was horrible. This was due to a bulkhead wall that blocked the view. It was also socially isolating between the person sitting on the bench, and the person in the pilots seat. It’s a little hard to describe, but a picture is worth a thousand words.

Here are some pictures of the original set up.
 

Attachments

  • IMG_2188.jpg
    IMG_2188.jpg
    140 KB · Views: 14
  • IMG_2189.jpg
    IMG_2189.jpg
    146.4 KB · Views: 10
  • IMG_2187.jpg
    IMG_2187.jpg
    122.7 KB · Views: 12
I have been thinking of cutting a window in the bulkhead to improve the visibility, and finally got the courage up to do it this week. I could not be more happy with the results. It is so much better. I still have to finish the trim around the hole I cut, but I am on my way. I started making the trim a few days ago, but had to take a break when I attempted to cut my finger tip off with my router. My finger seems to be healing well, although the bandage has been driving me crazy while typing.
 

Attachments

  • IMG_2191.jpg
    IMG_2191.jpg
    130.6 KB · Views: 13
  • IMG_2194.jpg
    IMG_2194.jpg
    137.1 KB · Views: 14
  • IMG_2196.jpg
    IMG_2196.jpg
    140.6 KB · Views: 14
  • IMG_2197.jpg
    IMG_2197.jpg
    120.9 KB · Views: 12
  • IMG_2177.jpg
    IMG_2177.jpg
    106.3 KB · Views: 14
  • 69846551062__A86A4D1E-C60A-4790-B1A4-23C33EC5D0D0.jpg
    69846551062__A86A4D1E-C60A-4790-B1A4-23C33EC5D0D0.jpg
    76 KB · Views: 13
The engine room ventilation on the Seakeeper was amazing. So much better then my current boat, or any other boat I have been on. It has an intake louver on the side of the pilot house that was 16-18” square. On the inside of it there was a drip pan with a drain to catch any water that made it past the louvers, and a metal hatch that you could close to isolate the intake. I assume this was intended for closing it off it you were in very extreme weather and were worried about getting knocked down and flooding? The only time I ever closed it was when it was really cold and I was heating the engine room to prevent freezing in the winter. I guess you could close it in the event of a fire too. It had a generous duct that led a couple feet down to the engine room below. At side of the engine room a 12 Volt Radiator fan was mounted on the wall to suck air into the engine room. I could not find a picture of it, but will include a screenshot of the type of fan. The fan was wired with a three way switch that could either be on, or auto controlled by a thermostat on the other side of the engine room. I usually just left it on auto with the thermostat set to around 90. The exhaust was a chase going up through the pilot house with the exhaust pipes and out louvers in the stack. This system worked great even when the fan was off just due to the warm air rising up the stack, and being pulled out by the low pressure area on the back of the stack any time the boat was going into the wind, or anchored. The fan moved so much more air, and was so much cheaper than any other setup I have ever seen. I wish my current boat had a system half as good. I think the fan was also wired into the fire system, but I am not sure.
 

Attachments

  • Screen Shot 2023-02-22 at 2.25.32 PM.jpg
    Screen Shot 2023-02-22 at 2.25.32 PM.jpg
    49.2 KB · Views: 14
  • IMG_3816 (2).jpg
    IMG_3816 (2).jpg
    180 KB · Views: 12
  • IMG_6628.jpg
    IMG_6628.jpg
    156 KB · Views: 9
While searching for other pictures I found a good picture of the super sweet parts organizing bins under the raised center section of the dining table that I had described earlier.
 

Attachments

  • IMG_5083.jpg
    IMG_5083.jpg
    88.9 KB · Views: 22
I will now go into the issues and experience I had with corrosion and paint on the Aluminum boats I have owned. I have experience corrosion issues in three areas on aluminum boats. The first is the underwater hull if not coated with a proper epoxy barrier coat, or if the barrier coat is damaged and not repaired properly as as the case with my boat. The second was areas where standing salt water collected and sat for a long time there would be issues at the air water interface. The third area I experienced on a friends boat, but it was petty bad corrosion in the fresh water tanks.

The Seakeeper had white chunks of corrosion growing out of the hull when I bought it. It was hard to tell exactly what was going on during the survey, and the surveyor was not very familiar with aluminum boats. The spots were small, but there were a lot of them. We poked at them with a pick and they didn’t seem too deep, but it was hard to tell. I bought it anyways. After doing a bunch of reading on aluminum corrosion and electrolysis, and a bunch of testing on the electrical system, I determined that the problem was most likely failing epoxy barrier coat. I did some experimenting on the dingy with a small sand blaster in my driveway, and discovered that getting down to bare aluminum was no joke and a huge job. I talked to a few boat yards and got quotes around $30k to have the bottom blasted down to bare metal and recoated. This seemed like a lot for a boat I have only paid around 120K for. I was trying to figure out how to do the job myself. But it was really hard. The hardest part is that I could not find anywhere that could pull the boat out, that would let me sand blast. It is just too big of a mess, and too big of an environmental issue around here. At the same time I was talking to the sales rep of a “Dustless blaster” product that mixed water in the blast medium and made much less dust than a traditional sand blaster. I ended up setting up a meeting to meet with him at a commercial boat show in Seattle. After talking to him he suggested I should talk to a guy from LaConner Maritime, who had just purchased one of his blasters. I really like him, and ended up having them do the job, and I think it was about $15K for that part of it. While I was there I also had them blast the paint and fairing off the hull sides and the insides of the lazaretto lockers in the back that were not sloped properly and had standing salt water get stuck in them and create a corrosion mess.

The blasting process was a long ways from “Dustless.” It was a huge mess and took a long time. We went through a couple pallets of crushed glass blast media and it took 2 or 3 weeks of one guy working full time on it, and me there helping him quite a bit. To follow the environmental rules they had to do the work on their special containment pad with a waste capture system that they use for pressure washing bottom paint. It was one of the reasons it was so expensive, and I couldn’t do it myself. When the metal was blasted clean it became more clear what was going on. When the boat was constructed they had left the welds below the waterline proud and not ground them flush. This was fine, and they did a very good job of applying Epoxy barrier coat that was still in great shape 30 years later. The problem was that at some point, someone has sanded the bottom and sanded through the epoxy at the high points where the welds were. The corrosion spots were small, but there were a lot of them. Probably 100 in total. The worst ones were probably 3/4 of the way through the plate. I would come and help the guy doing the blasting during the day, then after they clocked out at 4:30, I would get my welder out that I had set up in the back of my van and work on fixing the corrosion spots he had uncovered that day. I would grind them out with a die grinder, then use a TIG welder to fill them back in. Then grind them flush. The welding Michelangelo style (Sistine chapel) over your head was not the easiest thing, but it was doable, and I am confident the boat was good as new when it was all done.

The areas in the lazaret were actually worse than the bottom. The corrosion was too widespread to just weld over, but it was not an important structural part of the boat so we just sand blasted it down to clean but very pitted metal, then coated it with a special industrial epoxy coating system that went on super thick and filled in all the voids. We put a couple coats on , and it was probably close to 1/8” thick by the time it was done. It seemed to work out really well. The boatyard had used it on previous jobs for things like fish holds on Alaskan fishing boat, and had good success. This was the product we used.

https://www.bluesealinc.com/


The other area I Found just a little bit of corrosion was in the bilge. There were only a couple spots I found that were deep enough that I was worried about them. With considerable suffering and contortion, I was able to get under the floor and weld up the worst spots form the inside. I made an effort to keep the bilge very clean after that, and would suck it dry at the end of every trip with a wet vac I kept in the engine room. It seemed fine.

The other corrosion issue I have experienced was not on my own boat but on a large aluminum sail boat built in the early 80’s that a friend of mine bought after I had sold my aluminum trawler. I was helping him out during the multi-day survey and we found water dripping from one of the water tanks. We took off the inspection port and it was a hot mess in there. It had corroded all the way through and was dripping out the outside of the tank. This boat, like mine, had integral tanks that were welded right into the hull, and used the outside of the hull as the outside of the tank. This was not an easy repair but he bought the boat anyways. I never pulled the inspection ports on my tanks, but the experience made me wonder what might have be going on in there. If I ever buy another used aluminum boat I will definitely inspect the water tanks during survey. I did inspect and clean the integral fuel tanks on my boat and they were slightly dirty, but the metal was like new when wiped down. My understanding is that it is not the water that messes up the tanks, but the chlorine from municipal water systems attacks the aluminum.

I made a friend this summer in Alaska that had an Aluminum Dashew FPB, (One of my dream boat’s I will talk about later). He and the previous owners where super careful to put nothing but water maker water in the tanks for the whole life of the boat. This was a pain in the ass, but he said he pulled the inspection plates and they looked like new inside. I think you would be safe running dock water through a good carbon filter to filter out the chorine.

One other place I have seen corrosion on aluminum is where you use stainless fasteners on it. My old boat had very little of these problems. They did a good job of using plastic spacers between stainless and aluminum parts, and putting Tefgel or something equivalent on the threads.

The first picture is of the corrosion when we found it during the survey. It was very hard to tell what was actually going on, or how bad it was.

The last picture was the Lazerett before we epoxy coated it. You can see the inside of the fuel tank in the background before I cleaned it. I ended up having new caps for the inspection ports fabricated as the old ones were pretty corroded.
 

Attachments

  • IMG_0021.jpg
    IMG_0021.jpg
    144.7 KB · Views: 15
  • IMG_1994.jpg
    IMG_1994.jpg
    181.9 KB · Views: 18
  • IMG_1995.jpg
    IMG_1995.jpg
    196.4 KB · Views: 16
  • IMG_1997.jpg
    IMG_1997.jpg
    140.2 KB · Views: 19
  • IMG_2013.jpg
    IMG_2013.jpg
    136.9 KB · Views: 17
  • IMG_2148.jpg
    IMG_2148.jpg
    136 KB · Views: 16
  • IMG_2149.jpg
    IMG_2149.jpg
    132.3 KB · Views: 16
The paint was the worst thing about my old aluminum boat. It looked ok from a distance, but up close it was a hot mess. They did a really good job painting the boat originally, but after 30 years it was coming apart at the seams. It was a frustrating situation as a good professional paint job was way too much money to spend on a 30 year old boat, but it was hard to do yourself as you couldn’t really do any blasting yourself, which is by far the best way to prep it. I did have pretty good success with small areas that were particularly bad sanding and scraping it down by hand, then doing 2 part aluminum primer, then one part primer and poly, which is what the boats most recent paint was. I never put too much time into it because when I did the bottom I ended up adding the job of blasting the paint off the outside of the hull. I was very happy with the results and planned to try and do the whole boat eventually that way. After blasting the hull was very rough, so I gave it a quick sand with 150 grit sand paper on a random orbit sander. I was happy with the results.

Blasting the paint off the hull sides was no joke. It was way harder than I , or the yard, thought it would be. To their credit they did not try and change me more than their original estimate. It was not clear from looking at it, but they had done a significant amount of fairing on the hull to give it a yacht finish. In some places is was up to 3/4” thick. It took forever to sand blast it off, but I don’t know if there is really a better way to do it.

It wasn’t easy to get the paint off the top of the boat either. After being involved in the process of blasting the bottom I came to realize that and industrial sand blaster is a brute force weapon. At the time I did the bottom, LaConner Maritime had just bought this big blaster, and this was their first job with it. They were super nice guys, but I was not convinced they had the experience to protect the windows and all the other important stuff on the topsides to blast it without causing a disaster. I ended up selling the boat before I ever made a decision. My plan was to have the decks, and inside gunnels done next time I was out for bottom paint. They were easier to protect. Then worry about the cabin and roof in a couple more years.

There were parts of the dingy that were never painted, and looked fine after 30 years. If starting from new I would definitely not paint aluminum. Except for a couple areas. The bottom of coarse. And I would sand blast and paint the bilge area that will see standing water with the same barrier system used on the bottom. The other place I think it works out pretty well is nonskid on decks. The trick is to mask it back a couple inches from all corners and hardware, so when it fails, which it will, it is easy to scrape, sand, and reapply. I had my ACB done this way and was very happy with it. There are some really nice rubber tread products for nonskid but they seem like a big rip off in price, and are not easy to install properly. Likely not worth the cost if you are on a budget. I think there also might be products in the family of the stuff they use for truck bed liners that might be worth exploring for nonskid, but never go too far into it. My cousins Seawolf had diamond plate on the decks, which was great for maintenance, medium for non skid, and horrible if you ever had to kneel down on it to do anything.

I am a big project guy, but doing paint work on boats is one thing I do not like. I think my main objection is that it’s so weather dependent. The only time you can do it, at least where I live, is the times of year you want to be out using your boat, not having it destroyed by a huge paint project. My other frustration is that it is hard to spray in the marina for legitimate reasons, but spraying is so much easier and faster to get great results. The only thing worse than painting your boat in the middle of summer is being in a boat yard painting your boat in the middle of summer. Give me a raw aluminum boat and I will never paint again! (My current boat needs a ton of paint work and I am bummed about it.)

One thing I am very excited about for the future of metal boat ownership is laser cleaners. They are very new technology now, and very expensive, but I assume they will get cheaper with time. If they are half as good as the videos on Youtube make them look, they would revolutionize metal boat painting and maintenance. If I could get a laser cleaner I would be much more interested in owning a steel boat.
 

Attachments

  • IMG_1980.jpg
    IMG_1980.jpg
    138.3 KB · Views: 13
  • IMG_2197.jpg
    IMG_2197.jpg
    164.5 KB · Views: 12
View attachment 136513
... The corrosion spots were small, but there were a lot of them. Probably 100 in total. The worst ones were probably 3/4 of the way through the plate.

I would come and help the guy doing the blasting during the day, then after they clocked out at 4:30, I would get my welder out that I had set up in the back of my van and work on fixing the corrosion spots he had uncovered that day.

I would grind them out with a die grinder, then use a TIG welder to fill them back in. Then grind them flush. The welding Michelangelo style (Sistine chapel) over your head was not the easiest thing, but it was doable, and I am confident the boat was good as new when it was all done.

The areas in the lazarette were actually worse than the bottom. The corrosion was too widespread to just weld over, but it was not an important structural part of the boat so we just sand blasted it down to clean but very pitted metal, then coated it with a special industrial epoxy coating system that went on super thick and filled in all the voids.


We put a couple coats on , and it was probably close to 1/8” thick by the time it was done. It seemed to work out really well. The boatyard had used it on previous jobs for things like fish holds on Alaskan fishing boat, and had good success. This was the product we used.

https://www.bluesealinc.com/

The other area I found just a little bit of corrosion was in the bilge. There were only a couple spots I found that were deep enough that I was worried about them. With considerable suffering and contortion, I was able to get under the floor and weld up the worst spots form the inside.


I made an effort to keep the bilge very clean after that, and would suck it dry at the end of every trip with a wet vac I kept in the engine room. It seemed fine.


The other corrosion issue I have experienced was not on my own boat, but on a large aluminum sail boat built in the early 80’s that a friend of mine bought after I had sold my aluminum trawler. I was helping him out during the multi-day survey and we found water dripping from one of the water tanks.


We took off the inspection port and it was a hot mess in there. It had corroded all the way through and was dripping out the outside of the tank. This boat, like mine, had integral tanks that were welded right into the hull, and used the outside of the hull as the outside of the tank. This was not an easy repair but he bought the boat anyways.


I never pulled the inspection ports on my tanks, but the experience made me wonder what might have be going on in there. If I ever buy another used aluminum boat I will definitely inspect the water tanks during survey.


I did inspect and clean the integral fuel tanks on my boat and they were slightly dirty, but the metal was like new when wiped down. My understanding is that it is not the water that messes up the tanks, but the chlorine from municipal water systems attacks the aluminum.


I made a friend this summer in Alaska that had an Aluminum Dashew FPB, (One of my dream boats I will talk about later). He and the previous owners were super careful to put nothing but water maker water in the tanks for the whole life of the boat. This was a pain in the ass, but he said he pulled the inspection plates and they looked like new inside. I think you would be safe running dock water through a good carbon filter to filter out the chlorine.


One other place I have seen corrosion on aluminum is where you use stainless fasteners on it. My old boat had very little of these problems. They did a good job of using plastic spacers between stainless and aluminum parts, and putting Tefgel or something equivalent on the threads.


The first picture is of the corrosion when we found it during the survey. It was very hard to tell what was actually going on, or how bad it was.

The last picture was the Lazerette before we epoxy coated it. You can see the inside of the fuel tank in the background before I cleaned it.

I ended up having new caps for the inspection ports fabricated as the old ones were pretty corroded.


HOLY MACKEREL!


Posts #42 and #43 should be required reading for anyone who owns an aluminum vessel.


And I'm sure you're going to get to it, Loren, but why did you decide to sell the Seakeeper after putting this much work & money into ensuring that every inch of the hull was safe, solid, protected and sealed?


My personal experience has been that rebuilding the stringers and bulkheads on a fiberglass vessel is the most labor-intensive job in boating, but you have now disabused me of that quaint notion.


Just one minor suggestion, try to break up your writing into more paragraphs. It's perfectly fine to have one long sentence as one paragraph (see above). It may seem counter-intuitive, but this strategy helps the flow of beautifully detailed narratives like yours.


And a note about condensation on boat windows. We discovered that in cold, damp weather that wiping shaving cream on, then off, the inside of all our windows and portholes reduced the condensation quite a bit. Not completely, but it was an improvement.

Cheers,
Mrs. Trombley


Shaving cream.JPG
 
Last edited:
Just before I decided to start this thread I read the latest few blog posts Wayne posted on his Mobius.world blog, that talks about crossing the Atlantic, and working out how to best rig his paravane stabilizers. I have run boats with both Paravanes and active fins, and have thoughts on both, that were too much for a blog comment. I ended up writing him a long email with my experiences. I am going to excerpt the email I sent him here rather than start from scratch of the topic of stabilizers. He is also planning on posting more in the future about his experience, rigging, and use of his stabilizers, and might include some of my comments as well. I encourage everyone to check out his amazing blog if you haven’t done so already.

https://mobius.world/

Edit- Copy paste did not work as good as I thought it would. It inserted hundreds of ** in the text. I took most of them out, but I am sure I missed a few.

Wayne,

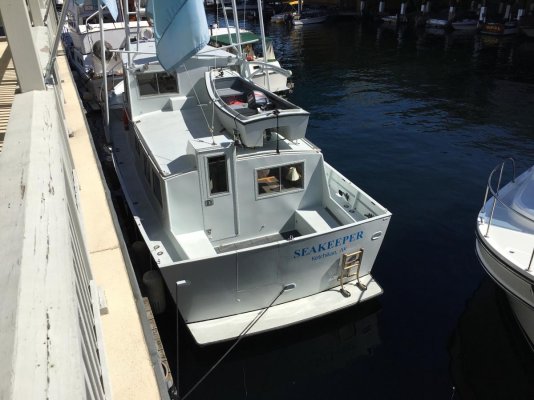
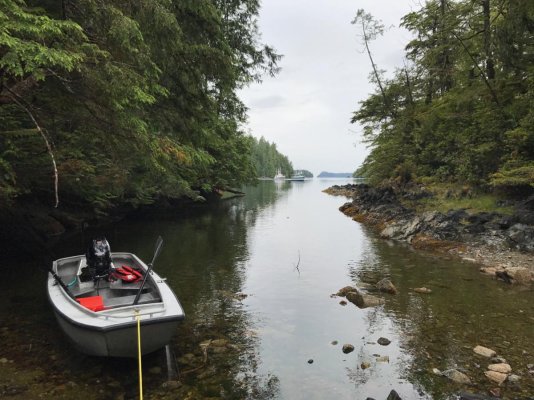
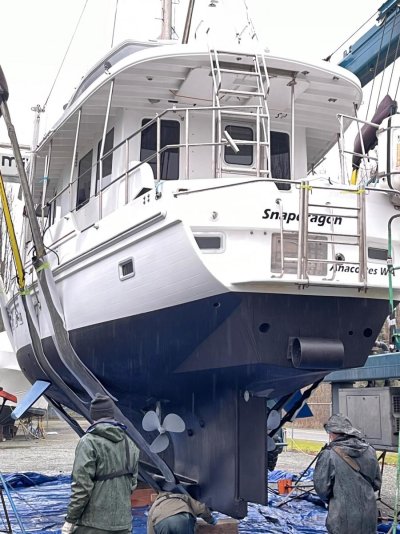
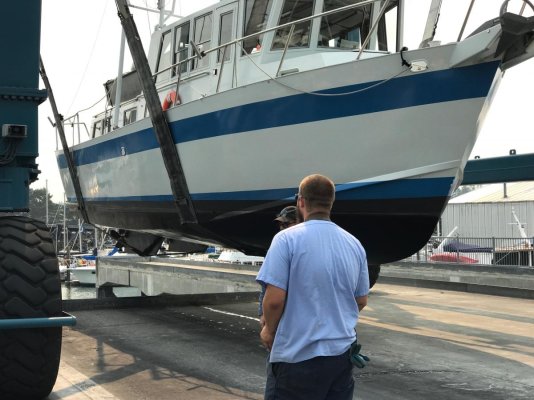
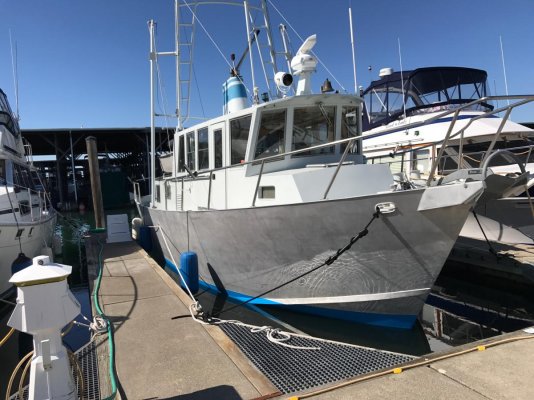
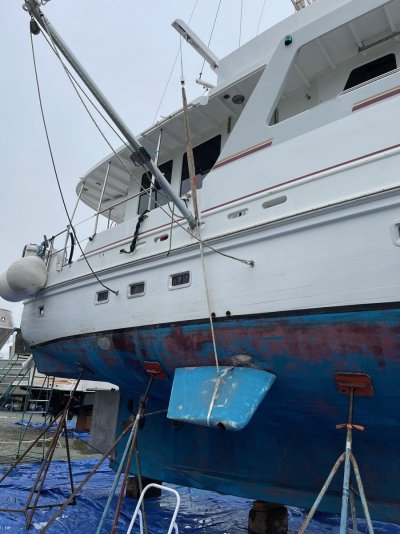
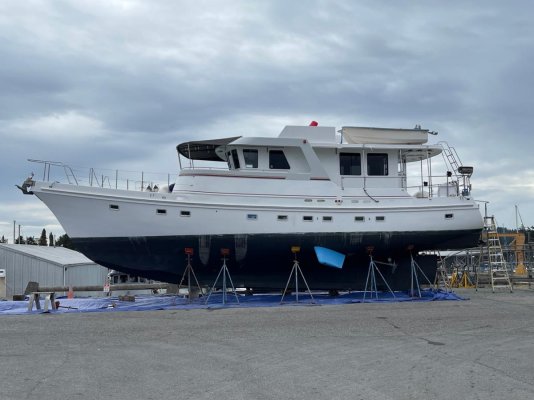
I have been following your blog since you began construction and have enjoyed and envied your project. In the past few years I have owned and ran boats with both paravanes and active fin stabilizers and have thoughts on both that I figured I would share on the off chance you found them helpful in dialing in your new boat. While I have run both systems, it is hard to directly compare them as the boats they were on are very different. My previous boat with the paravanes was a 40’ aluminum trawler that was relatively light, and shallow draft. While my current boat with the active fins is a 56’ heavy displacement, full keel trawler that was based off an old school sail boat hull. While both of them are fairly narrow beam/length compared to most modern trawlers, they are not as extreme as your boat. The 56’ has much more natural stability, than the 40’er, I assume due to the weight, and large full keel (It is slow as a slug too). On the Aluminum boat we used the paravanes almost all the time. Even if flat water around home we often used them as there is lots of traffic around our home waters, and they made other boats wakes so much better that it was worth dragging them around. *We did not have fancy electronics on the boat to record the angles, but the best description I always used, was if you didn’t have them out, and set down a mug of coffee, it would immediately end up spilled or on the floor. With them, it would stay where you put it and not spill. They seemed to slow us down about .5-.75kn when in use. I also made some big plates to use as flopper stoppers while at anchor. We didn’t need them much around here as we have fairly protected anchorages, but a couple times they were really nice. The active fins on my current 56’ boat seem very similar to me in effectiveness to the paravanes, although it is hard to compare directly as the hulls are so different. In rough weather the active fins slow the boat down almost 1kn, which is brutal as it is a slow boat to begin with, and only normally cruises around 5-6kn in ocean crossing mode, and 6-7Kn in costal mode. I bought the boat in Fiji and brought it back to Washington state. During that trip, the distances were so huge, and the hit to boat speed was so big with the stablilizers that we barely used them even though it was very rough. We kept the gain turned way down to 10% most of the time to keep the boat speed up. The nice part was that we could crank the gain up to 100% with the push of a button when we needed to cook something, or do something on deck that needed the boat to me more stable. Around home I always keep them at 100% gain as they don’t slow the boat down much when it is not super rough, and when it is rough the happiness of my wife is much more important than boat speed, and I am less worried about saving fuel as we are not crossing the Pacific.

I am not a good enough writer to put my thoughts into nice paragraphs, So I am just going to make a list.

- I really liked the Paravanes, and felt that they were as effective as the active stabilization, although as I stated before, it is hard to compare as my boats were very different. I would not assume though that active would be more effective than well dialed in paravanes. There were a couple times the paravanes on my boat seemed a little dangerous/sketchy. They involved situations where it was really rough and stormy out but I needed to enter a bay or Marina that was either too narrow, or too shallow to be safe to leave them deployed while entering. My boat was small enough that I didn’t not have them rigged with any winches or blocks to bring up the fish, or bring in the poles. This was ok as I was young, and they were not too big as it was only a 40’ boat. But we did have to put the boat in neutral to do it, and the boat would tend to drift beam to the sea. If it was really rough the boat would wallow like crazy beam to the sea while I was on deck trying to get the fish in and stowed. It did not feel super safe to be out on deck doing it, stuff inside the boat would inevitably be shifting all over the place, and it scared the heck out of my wife. It happened a couple times right outside our home marina that can get a 2kn+ current on an ebb tide and with a strong west wind running against it gets super ugly. And also a couple times coming into inlets off the Pacific on the coast of British Colombia that were relatively shallow and narrow, with big rocks and huge breaking waves on either side. It is the worst time to be out on deck fighting it, as you are so close to danger if something goes wrong. We don’t have Sargasso around the pacific NW, but we have tons of kelp. Surprisingly I have had way more problem with kelp getting stuck between my active fins and the hull, than I ever had with it getting stuck on the paravanes.

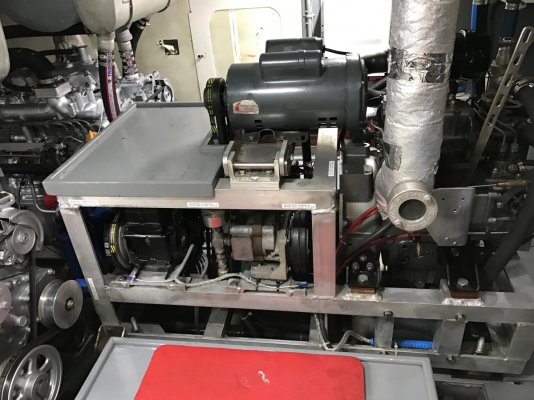
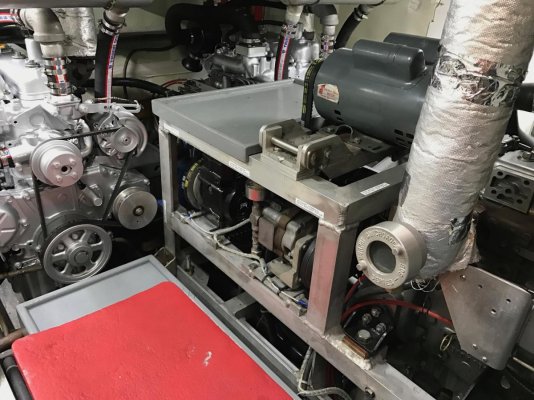
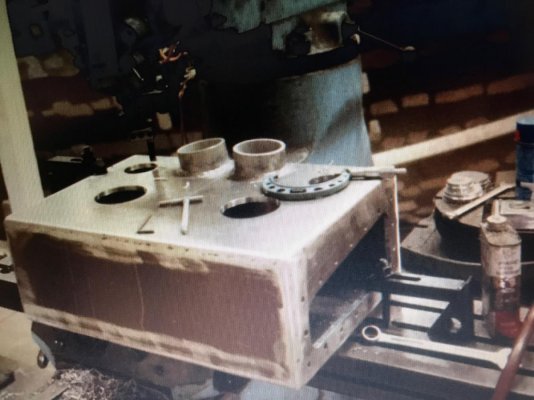
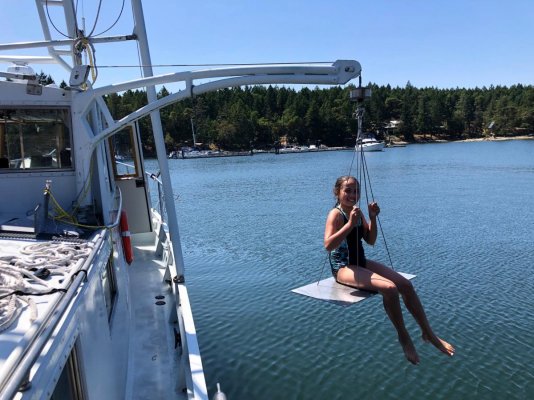
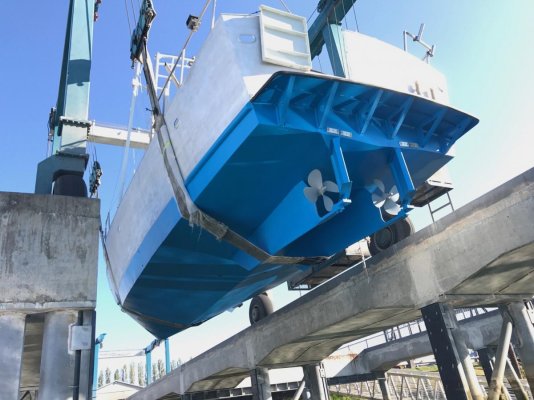
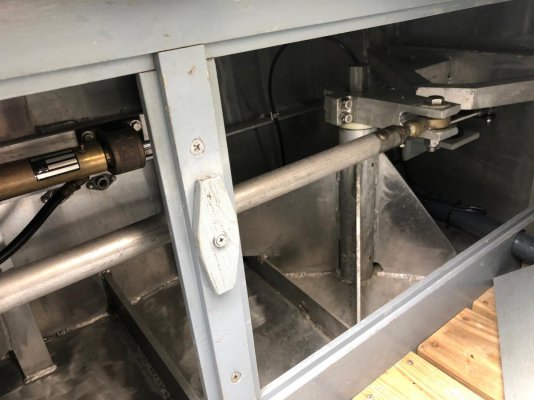
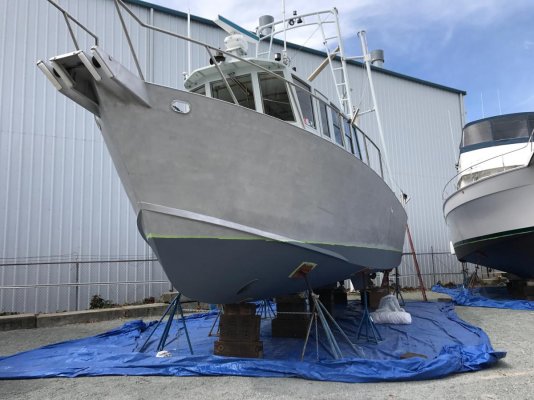
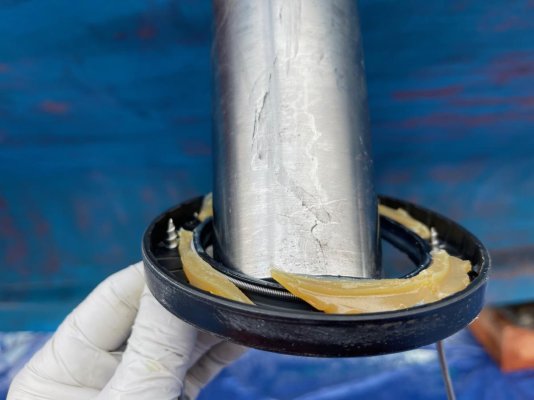
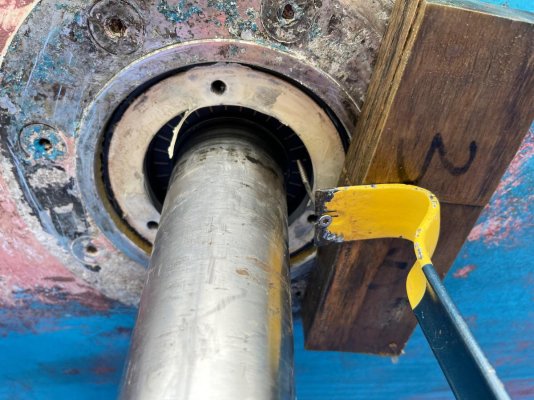
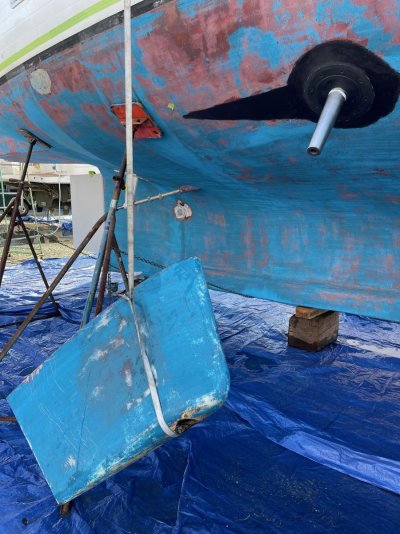
- The active fins are a great system and seem to work well. The things I like about them is that they are super easy to turn on and adjust inside the boat with the push of a button. No going out on deck in a storm to fight them. I also like that they have little drag in calm weather, but still dampen the roll if a big wake comes by. They are much better when entering a bay or marina in really bad weather. I did the seal replacement myself and that was no big deal, and very cheap. (I was fortunate to be able to reach them with my Steelhead dingy crane and use it to lift the heavy fin on and off in the yard. It made it very easy.). The thing I don’t like about them is the complication of having the extensive hydraulic system that it takes to run them. While the system the previous owner had installed on my boat works well, it was not original to the boat and is a bit of a bowl of spaghetti situation in the engine room. It is a lot of pumps, hoses, valves, bypasses, heat exchangers, tanks, wiring, etc. My engine room would he a hell of a lot nicer, and cleaner without all that crap. (My 56’ boat was originally built with paravanes, but the previous owner rendered them unusable as part of a poorly executed refit attempting to add a sailing rig that doesn’t work for a bunch of reasons, and I have since removed.)

- This would probably not be such an issue on your boat, but on my boat, speed was an issue with the active stablilizers. The passage from Fiji to Hawaii, and from Hawaii to Anacortes was at the edge of my boats fuel range, so we were taking it slow to save fuel. The stabilizers did not work as well at slow speeds, I assume they could not develop as much force as the water was not passing over them as fast. It would be something to consider though in the engineering. I would try and size the fins for the speed you think you will be going in the worst upwind conditions. We ended up barely using them anyways just because they slowed us down so much, and 3/4 of a kn seems like a lot when you get out the calculator and figure out how long that is going to cost you at 2500 miles at 5-6kn.

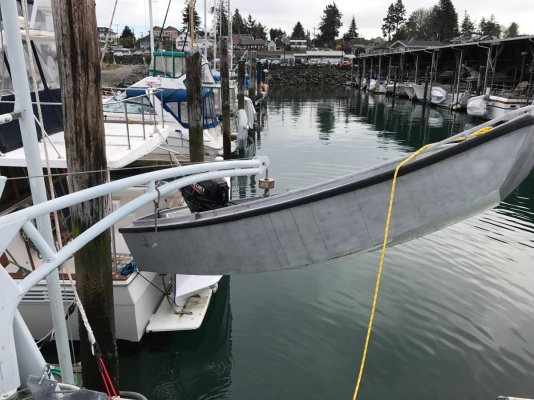
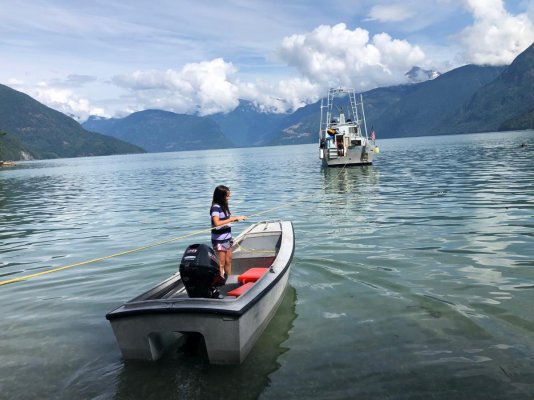
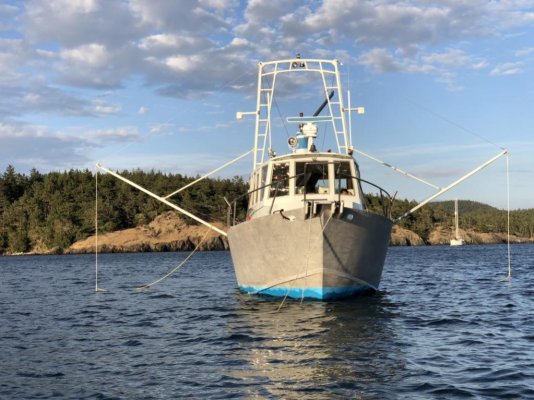
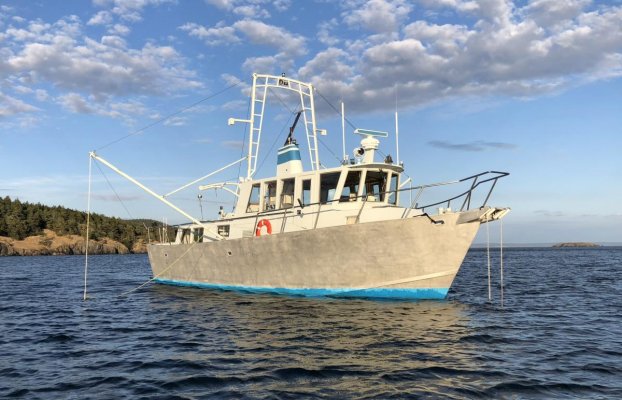
- The spectra line you are using on your fish looks way thicker than what I was using. I know your boat is way bigger, and the loads are higher, but I think it would be worth trying to figure out how small you could safely go. My theory is that the smaller line slices through the water easier, and is more likely to saw through kelp or seaweed that might get stuck on it. I also wanted it to be the weak part of the system in case it ever got caught on a big log or rock. Not that bad to loose a fish, but tearing off the pole and support mast structure would have been a disaster. My boat was rigged with three strand nylon from the pole tip to the waterline, then stainless cable from the waterline to the fish, when I got it. I assume the idea was to have some*stretch to reduce shock loads? I switched it a single piece of Amsteel from the pole tip to the fish, and it seemed way better. I never once had it slam in a way that I though it was experiencing big shock loads.

- I tried retrival lines on the back of the fish similar to how you have them rigged, and for my boat they were more trouble than they were worth. My main complaint was that if I stopped the boat with them on the fish would swim in circles as the boat rocked around, and twist them all up. It was a pain in the ass. I ended up with small retrieval lines that I would just clip over the Amsteel and they would ride just above the water line, then I would tie the other end to the pole just past the railing with a clove hitch. Their only use was so I could pull on them and get the main line in close enough so I could grab it and manually pull the fish up out of the water. Probably not practical on your boat, but it was nice only having only one line in the water. I always had a fantasy of how to set them up, that might be worth thinking about on your boat. First have the poles on pulleys with a winch and line stoppers so you can pull them up when under moderate load (My boat wasn’t rigged this way, but I think yours is.). Then have the fish on a line that runs from the fish, through a very strong block at the end of the pole, down to a sailboat winch*mounted on a plate on the pole near the railing. To get the fish in you would slow the boat down, raise up the pole about 2/3 of the way till the line running down into the water was close enough that you could grab and control it, but far enough away that the fish wouldn’t be right against the hull, then winch the fish up out of the water with one hand using the winch on the pole in front of you, while controlling the fish from swinging into the boat with the other. In rough weather you could leave the pole further out, get the fish at the surface, then reach out and hook it with a boat hook to control it swinging before bringing the pole up further. The other thing I like about this idea is that in a situation like I mentioned previously where you were entering a harbor, that had say a charted depth of 18’, you would probably not want to go in there with your *fish in the water, but if the conditions were not to extreme and you could bring them up so they were only 6-8’ under water it would be fine. The things I worry about with this idea are chafe issues at the block on the end of the pole, the block blowing apart under big load, The winch might not work that great with small Amsteel, and the blocks might be hard to secure so that they don’t bang on the poles when they are up and you are not using them.

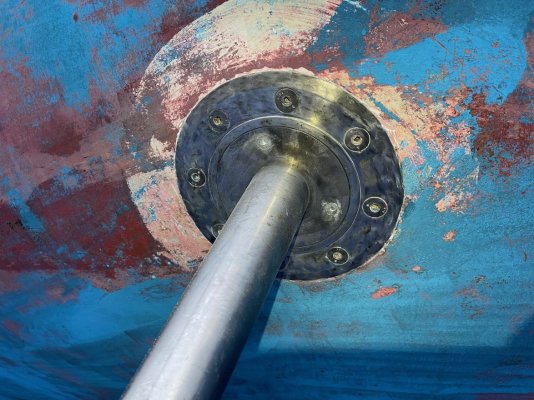
- My current boat came with Keypower active stabilizers. They seem very similar to other systems, but there are two things I really like about them. First, their technical service was super responsive and friendly when I was trying to figure the system out when I first got the boat under challenging circumstances, (There was some friction with the guy I bought it from, and he didn’t understand the system anyway,) and also later when I was trying to figure out how to service the seals and order the parts for it. They were great both times. The second thing I like is that the fins are made of molded hard rubber over a stainless frame. The idea is to provide a little bit of shock protection in the event of hitting something. There are tons of logs floating around where we cruise and this seem like a good method of construction.

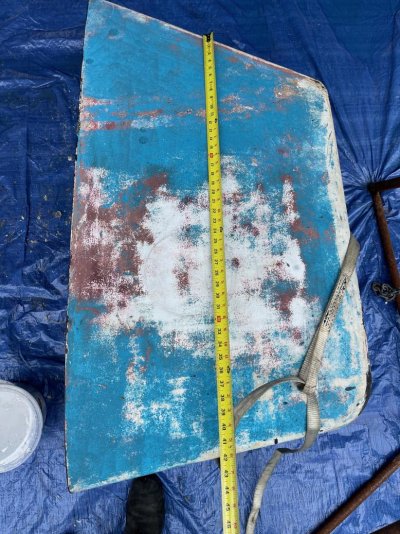
- I always though gyroscope stabilizers were dumb, but lately when I think about dream boat designs I wonder if there is a path that makes sense where you have paravanes and Gyro. Paravanes would be the go to for long passages, but the gyro could be used along with it during bad weather, or shorter costal hops where setting up the paravanes seems like a pain in the ass, but it would still be nice to have stabilization, and it would also be nice in a crappy anchorage. You would avoid having the big hydraulic system, the fins in the water with their drag and strike danger. It would only make sense if you already had the electrical system to run it, and a decent place to put it. It might be more expensive than I can imagine as well.
 
Last edited:
Some pictures of the stabilizers on my last two boats. Also pictures of replacing the seals on the active fins.
 

Attachments

  • Snapdragon head on.jpg
    Snapdragon head on.jpg
    118.6 KB · Views: 10
  • Snapdragon pick.jpg
    Snapdragon pick.jpg
    145.4 KB · Views: 11
  • IMG_0618.jpg
    IMG_0618.jpg
    140.7 KB · Views: 11
  • IMG_0625.jpg
    IMG_0625.jpg
    78.7 KB · Views: 11
  • IMG_0628.jpg
    IMG_0628.jpg
    166.6 KB · Views: 12
  • IMG_0633.jpg
    IMG_0633.jpg
    196.3 KB · Views: 12
  • IMG_0634.jpg
    IMG_0634.jpg
    197.2 KB · Views: 12
  • IMG_0638.jpg
    IMG_0638.jpg
    183.5 KB · Views: 12
  • IMG_1892 (1).jpg
    IMG_1892 (1).jpg
    113.8 KB · Views: 15
One of the few areas of boats I don’t have super strong feelings about is electronics. My general feeling is that many people tend to way overspend in this area . When I got the Seakeeper 40 it came with original 1990 Furuno fish finder, and radar. And a PC notebook that was probably 10 years old when I got it 6 years ago, that was running Coastal explorer. When I bought the boat I thought “I will have to replace all this old crap.” After using it though, it all worked fine, and would take me anywhere I wanted to go. In the 6 years I owned the boat I never had a single problem with any of it, and didn’t have any desire to replace it. I even caught a ton of fish using the ancient fish finder.

I put Garmin in my ACB I had built in 2010 and it worked great.

My new boat came with a 10” Simrad plotter, which is a little small but works fine. It got the boat 6000 miles home from Hawaii, then through a 3 month trip to Alaska this summer.

I do feel strongly that a good quality hydraulic autopilot, and AIS Transponder are must have items on a trawler. The autopilot for your sanity traveling at slow trawler speeds, and the AIS for it huge safety boost.
 

Attachments

  • IMG_3624.jpg
    IMG_3624.jpg
    117 KB · Views: 13
  • IMG_1092.jpg
    IMG_1092.jpg
    101.7 KB · Views: 12
  • IMG_1656.jpg
    IMG_1656.jpg
    130.7 KB · Views: 12
  • IMG_1555.jpg
    IMG_1555.jpg
    156.5 KB · Views: 11
This subject has been beaten to death, but I will throw in my latest thinking on the Twins VS. Single blood feud. I definitely understand the arguments on both sides of this one, and do not think there is a clear “Best.” For me, my personal experience has led me to slightly prefer twins. But if the rest of the package was great enough I would certainly consider a boat with a single.

The big thing I like about twins is having instant backup if something goes wrong and you have to shut down an engine. In the area we use our boat we are very often within a couple hundred yards of rocky shores that are not great places to drop and anchor. There is also very strong currents in the area. It is not the type of situation where you can stop and change out the water pump from your spare parts and continue on your way. You would be on the rocks before you got the new pump out from storage. With twins it’s no big deal, you just shut down one engine that’s having problems, and deal with fixing it when it is safe and convenient.

I have had two experiences personally that were no big deal as I had twins, but would have been a nightmare with a single. The first was I had a bearing in the freshwater water pump fail. Amazingly, I noticed the pulley wobbling like crazy during and engine room check before the seal burst, and I was able to shut it down and not spill all the antifreeze all over the place. Took 7 weeks to order a new water pump from Japan, but that’s another story. The second problem I had was an air leak in my fuel system after I had the injectors rebuilt and reinstalled them. It turned out to be a simple problem that I was not tightening the hand priming pump on the engine enough after using it to bleed the fuel system. It was letting air in through the plunger on the priming pump. I could not figure it out on the water though. I bled the fuel lines like ten times in a row, but it would not run for more than a couple minutes before crapping out again. I finally gave up on it and limped in on one screw. I finally figured out what was going on at the dock. In addition I’ve had a lot of other friends that have had similar experiences.

One of the arguments you hear all the time for singles, that I find totally unconvincing is. “All the Fishermen use singles.” I find this totally unconvincing. Those guys run in packs with all their homies around ready to come to the rescue. I would want a single too if every time I left the dock, 10 of my friends were heading to the same area and we could all watch each others backs.

Some of the issues of things like water pumps going bad on a single can be mitigated by doing more proactive maintenance than I do on my boats. If you were to proactively replace or rebuild some of this stuff at a set number of hours, some of the risk would be mitigated. Since I have twins I just run my water pumps, injector pumps, starters, etc, until they have a problem. I have only had the one problem I mentioned above doing this, but would be more nervous about it if I had a single.

Another experience we had that made me glad I had twins was getting a crab buoy wrapped up in one of my props. Fortunately I shut down the engine very quick when I hit it and it just barely got caught. I was able to poke at the buoy with a boat hook hanging my head off the swim step, rotate the shaft from inside the boat, them back down against the strong current with my good engine, and was able to get clear of it, without destroying the boat, or the pot.

When I think of my dream boat build I am toying with the fantasy of twins, with Permanent magnet DC alternators that would serve as propulsion and generator. The alternators I have in mind are something along the lines of the one’s made by Polar power. The propulsion would be traditional, not hybrid. The generator would run off the front of the crankshaft. I have not actually seen this setup, but I don’t see why it wouldn't’ be possible.

https://polarpower.com/applications/marine/

It seems that with large Lithium battery banks and their high charge rates, great inverters, and solar, this might be a great setup. There would be no AC generator on board. The things I like about this idea include,

-Only one type of engine on board, and one set of spare parts.

-Redundancy on the generators, as both mains would be equal and very powerful

-The DC generators can be set up to run at low rpm. I don’t understand how sensitive this technology it to changing RPM? This might kill this idea if they only work at a fixed RPM?

-Only having two engines on the boat to maintain

-If you could couple this idea with some combination of Paravane stabilization, gyroscope stabilization, Magnus effect stabilization, or even electrically actuated fins you could get rid the super complicated and expensive hydraulic system. This would also be helpful in achieving the super clean, uncluttered engine room of my dreams.

-You would have super high capacity electric available while running.

-This idea might not work as well in climates where you have to run the air-conditioning 24/7, but that is not an issue where I live.
 
Last edited:
As long as I am on the subject of Trawler forum holy wars I might as well just jump right into anchors.

The only anchor I have had huge problems with and will not use is the Bruce. This was on the 25’ boat, and was probably around a 20-25lb version. On multiple occasions I just could not get it to set. I finally got pissed off and threw it away and got a Delta for that boat which worked great for us.

The Seakeeper 40 came with a Rockna with the roll bar. I was excited as they have such a good reputation. Early on I had a lot of trouble with it setting. I finally figured out that I was backing down too fast and it was scooping up a big ball of mud between the fluke and the roll bar that prevented it from setting. I learned that if I backed down on it super slowly it would set every time. It always made me nervous that it would not reset properly on a current shift, but I never actually had a problem with that. With the sticky mud we have around here it would bring up a huge ball of mud almost every time you pulled it, that was a pain in the ass to get off. After having these problems I discovered SV Panope’s amazing anchor video’s. He observed the same issues I was experiencing with the Rocna (We live in the same area). Based on his testing I bought a Spade anchor for the Seakeeper. It worked flawlessly for the time I owned the boat. It also brought up way less mud, and was way easier to clean off.

My 56’ boat came with a huge Bruce anchor. It was probably fine as it was a way bigger anchor than the one I had problems with back in the day, but I was traumatized with Bruce anchors and got rid of it. I replaced it with a Rocna Vulcan. The Vulcan has worked flawlessly, but it has a weird short, curved shank that does not sit as nice as other anchors in the bow roller.

The reason I bought the Vulcan for the new boat instead of another Spade was I thought it would be easier to regalvanize if it ever needed it. The Bruce Anchor the boat came with was pretty rusty and I would have had it regalvanized if I had kept it. The spade has a hollow shank, and a lead tip that is epoxied into the fluke to weigh it down. It would be possible to regalvanize, but a bit complicated. The Vulcan is a very similar design, but all one piece.

I regalvanized the anchor chain on the Seakeeper 40 when I got it and am a big fan of that if you have a place that can do it. I think it was about 1/3 the price of new chain. The galvanizing was not quite as smooth as factory, and might not have laid down quite as nice in the locker, but it was way thicker. It seemed that it would last way longer than the original. In Seattle there is only one place that I know of that will galvanize chain. (Emerald Galvanizing in Ballard.). They only do it seasonally in the fall and winter to serve the Alaskan fishing fleet that is in port that time of year.

Despite my previous post where I dreamed of getting rid of the hydraulic system all together, The Seakeeper had a hydraulic anchor windlass that was super sweet compared to the also nice Maxwell electric one on my current boat. I think that for a big 75K lb boat like mine, a 24v, electric or hydraulic would be better than the 12 v Maxwell I have. It always gets the anchor up fine, but you can blow the breaker pretty easy if you are not careful. That was never an issue on the Hydraulic. We anchored a few times in Alaska this summer in 100'+ deep water. I was very nervous that the weight of all that chain hanging was going to be too much for it, but it came up fine.
 
Last edited:
Wow! I think I am finally talked out about the Seakeeper 40. Next (Not tonight) I will move on to my current boat. It is less exciting mechanically, but does have some layout features I really like.

The current projects I have been working on this week are the trim for the new interior bulkhead window that I posted about up thread, and installing starlink on the boat.

Making round corner trim is so much harder than I thought it was going to be, but in the end it turned out pretty sweet. If you ever want to take on this project and don't have a lot of woodworking experience DM me. I have some hard learned tips to pass on.

The Starlink seems to work great, but I have not really installed it yet. Just put it on the roof temporarily to try it and plan the install. I have a plan and am hoping it won't be raining or snowing tomorrow and I can get it installed properly.
 

Attachments

  • IMG_2213.jpg
    IMG_2213.jpg
    149.3 KB · Views: 11
  • IMG_2214.jpg
    IMG_2214.jpg
    150.4 KB · Views: 8
  • IMG_2216.jpg
    IMG_2216.jpg
    140.9 KB · Views: 8
Back
Top Bottom