Rain intrusion into bridge

The friendliest place on the web for anyone who enjoys boating.
If you have answers, please help by responding to the unanswered posts.

paulga

Guru
Joined
May 28, 2018
Messages
977
Location
United States
Vessel Name
DD
Vessel Make
Marine Trader Sundeck 40'
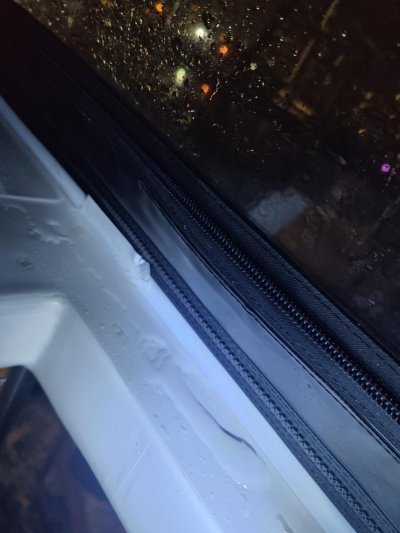
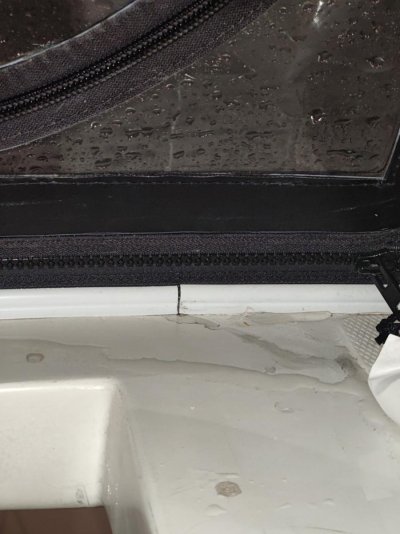
The rain started earlier and going overnight. I just noticed water leaks inside through zippers and canvas where the windows connect to the aft hardtop (sundeck roof). See the picture I attached. I attempted to patch a vinyl tape but failed to seal it. Water still comes in continually.

What caulk can I apply along the perimeter inside or outside to block the water?

IMG20231121205946.jpg

IMG20231121214127.jpg
 
Last edited:
I have never had, or wanted, to caulk canvas. A property designed enclosure shouldn’t leak very much. In a deluge you may get some leaking but normal rain no. As to caulking your existing enclosure I am not sure exactly what caulk I would use.
 
Last edited:
The bridge deck is designed to shed water. As long as you’re not holding water and leaking to the interior I wouldn’t worry too much. If it’s really troublesome, there are self adhesive vinyl rain gutters you can apply to channel the water for better drainage.
 
Over view perspective.
Rain and snow will come. If you block off one area , the water will go somewhere else. Hopefully OFF of the boat. If the rain accumulates in a crack or crevice and freezes, you will have bigger problems. There are some cold weather tapes that work well and can be removed without harm in the spring. Caulking is semi permanent and makes a mess upon removal.
Think of shingles on a roof and the gutters. They dont need to seal 100% as long as the joints and layers overlap.
 
Zippers though will often leak, they're not water proof. As to intrusion through the canvas, I've never had that with Sunbrella but if it rains hard enough it may happen. The amount of water you show seems quite minor.
 
The bottom of the canvas shouldn't terminate "inside" your flybridge. It should end on the outside of your flybridge. This way, the water just drips down outside instead of in. In the meantime, I'd put towels down to catch the water until it can be remedied.
 
If it's older sunbrella you can use 303 Marine Fabric Guard. I've been using it for quite a while. It's made for Sunbrella and does restore water repellency. It is a bit expensive but is a cheaper alternative than new canvas.

If you are leaking at the seams or zippers, that's another issue. Not sure where someone would use caulk in canvas though.
 
Last edited:
Looking at the picture, my guess is that you have black welt cord in a white track. Looks like the upper part of the track is broken/ missing ? If so, it's new-track time. Not expensive.
How's my guess ?
 
Remember that when you put caulk on the canvas it is there forever or until you make new canvas…
 
Thanks for your input. water seems to have mostly come in through where the white track attaches to the hard top. I'm going to apply this kitchen/bath caulk along that track.
 
Thanks for your input. water seems to have mostly come in through where the white track attaches to the hard top. I'm going to apply this kitchen/bath caulk along that track.
I`m sure RTFirefly will respond in horror to the use of "super silicone' caulk. A bathroom/kitchen silicone can impede painting an affected surface long term but in my experience(at home not onboard) the "roof/gutter" variety does not. For abundant precaution a polyurethane caulk/sealant is safer.
 
I`m sure RTFirefly will respond in horror to the use of "super silicone' caulk. A bathroom/kitchen silicone can impede painting an affected surface long term but in my experience(at home not onboard) the "roof/gutter" variety does not. For abundant precaution a polyurethane caulk/sealant is safer.

I thought the hard top is just fiberglass. Is there painting?

I didn't get the concern about impede painting. This one is called paintable, so is this better?
 
Last edited:
It`s not unusual for gelcoated or painted f/g surfaces to eventually be painted.For unknown reasons I`m barred from acessing home depot but if it`s paintable, it`s paintable, resolving the issue.
 
IMG20231123145131.jpg

IMG20231123145306.jpg

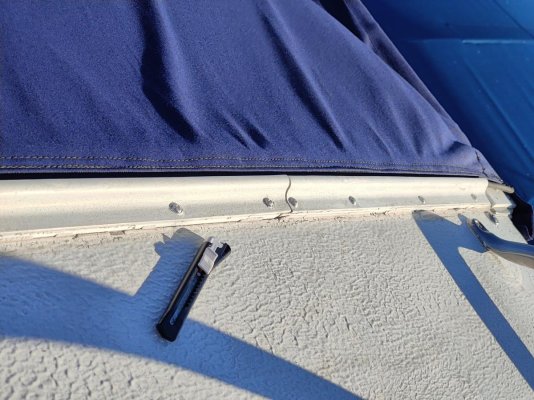
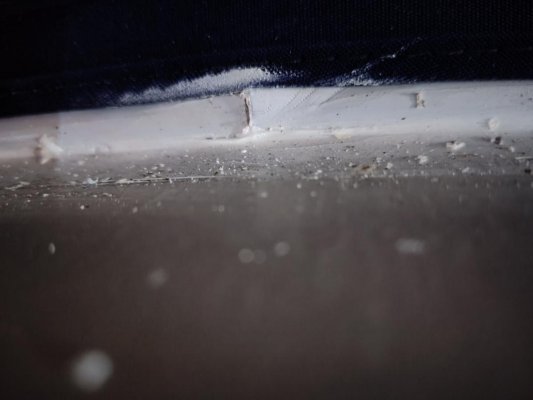
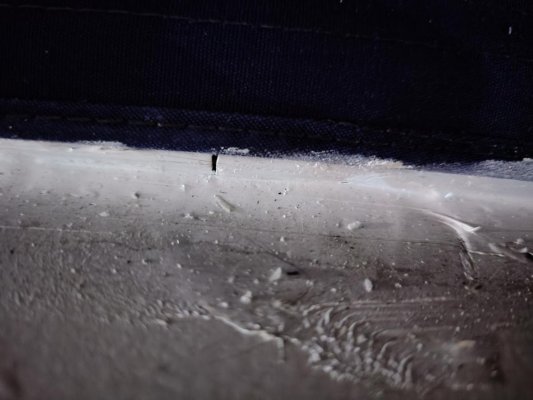
It was the existing sealant has worn away over time. First picture shows the connection at the sundeck top, second picture shows the bridge hard top. The inner side of the connection seems was never caulked before.

I'm going to strip away those cracked stuff on the outside using a caulk tool and apply new sealant.

does the area need "priming" before applying the new sealant? 
 
Last edited:
Just putting a little caulking on the exterior should be considered a temporary fix. The right way would be to remove the track, clean both surfaces, check for and fix any soft wood at the screw holes, re-bed the track with quality sealant.
Siliconized latex wouldn’t be on my list of things to use there. I’d be using something like 3m 4200, or maybe butyl tape.
Caulk on the exterior edges doesn’t address all of the potential leaks at the screw holes.

Agree on the assessment and approach to repair. My choice of sealant would likely be 3m 4000UV, for its ability to hold up better under UV exposure.
 
Thanks for your inputs.
I just ordered 3m 4k from amazon, will apply it tomorrow.
@Bmarler Thanks for reminding me the proper way of fixing. that would be a project when I get time..
 
I thought to smear the caulk yesterday but had to wait for the rain. finally got it done this afternoon.
I thought it would be as quick and clean as the Home Depot how to video. it turns out i had to climb onto the roof multiple times. it was a pain to scrape away the existing caulk. the tiny grey chips and dust got everywhere. then I had to wipe clean using alcohol, wait dry. the real pain came when I squeezed the stuff from the caulk gun, no idea why it looks so easy on the video. I had to exert enormous amount of strength and maintain for a long time, as the sealant output was so slow. I may have let out a bit too much, in the end it got all over my hand. it was already dark when I was done. the sealant may take extended duration to fully cure in cold weather (below 39F all day)
 
Be aware of application temperatures when doing any caulking or painting. 3M 4000 series has a lower limit of 40° F for the full cure time. Full cure time is 24 Hrs.

A tip for smoothing out this type of caulk is to use a wet finger (dipped in water) to lightly smooth out a newly deposited bead.
 
I thought to smear the caulk yesterday but had to wait for the rain. finally got it done this afternoon.
I thought it would be as quick and clean as the Home Depot how to video. it turns out i had to climb onto the roof multiple times. it was a pain to scrape away the existing caulk. the tiny grey chips and dust got everywhere. then I had to wipe clean using alcohol, wait dry. the real pain came when I squeezed the stuff from the caulk gun, no idea why it looks so easy on the video. I had to exert enormous amount of strength and maintain for a long time, as the sealant output was so slow. I may have let out a bit too much, in the end it got all over my hand. it was already dark when I was done. the sealant may take extended duration to fully cure in cold weather (below 39F all day)


Sounds like maybe you didn't get the inner seal fully punctured. It shouldn't take great effort to squeeze out. For future reference, masking the areas where you don't want the sealant will help reduce cleanup.
 
I used a caulk tool, it worked fine. It was the caulk gun that gave me a hard time, I don't know what I missed.
It was ~48F when I applied it. Today and wed are below 40, Thursday is warm but I don't have time. Then it will rain again from Friday. So I had to do it on Monday.

Be aware of application temperatures when doing any caulking or painting. 3M 4000 series has a lower limit of 40° F for the full cure time. Full cure time is 24 Hrs.

A tip for smoothing out this type of caulk is to use a wet finger (dipped in water) to lightly smooth out a newly deposited bead.
 
The caulk gun has a needle for puncturing the seal. After making two punctures at the seal and one more puncture at the bottom plastic, it was still extremely difficult to squeeze


Sounds like maybe you didn't get the inner seal fully punctured. It shouldn't take great effort to squeeze out. For future reference, masking the areas where you don't want the sealant will help reduce cleanup.
 
The caulk gun has a needle for puncturing the seal. After making two punctures at the seal and one more puncture at the bottom plastic, it was still extremely difficult to squeeze

Puncture at the bottom plastic? What do you mean? You don’t puncture the end that the plunger goes in. Only clip the tip to desired opening, puncture the inner seal in the tip, several times. Insert into good quality caulking gun.
Keep the caulk warm until you need to use it. Check the date on the tube when you buy it. Old or cold caulk is tough to use.
Get a good quality caulking gun like this one: https://www.amazon.com/3M-08993-Professional-Caulking-Gun/dp/B001CGR6CG

Shop around for it though, you can get it for less.
 
Keep the caulk warm until you need to use it. Check the date on the tube when you buy it. Old or cold caulk is tough to use.
Get a good quality caulking gun like this one: https://www.amazon.com/3M-08993-Professional-Caulking-Gun/dp/B001CGR6CG


One more suggestion. Squeeze a good long streak out onto something throw away as a test. On occasion I've found as I'm caulking the joint out of the nozzle comes material separated into loose fluids and granular almost solids. Better to know it's a bad tube and throw it away than to have to clean out the joint you're trying to caulk.
 
I used a caulk gun from HD

Maybe it's the caulk gun that makes the difference.


Puncture at the bottom plastic? What do you mean? You don’t puncture the end that the plunger goes in. Only clip the tip to desired opening, puncture the inner seal in the tip, several times. Insert into good quality caulking gun.
Keep the caulk warm until you need to use it. Check the date on the tube when you buy it. Old or cold caulk is tough to use.
Get a good quality caulking gun like this one: https://www.amazon.com/3M-08993-Professional-Caulking-Gun/dp/B001CGR6CG

Shop around for it though, you can get it for less.
 
One more suggestion. Squeeze a good long streak out onto something throw away as a test. On occasion I've found as I'm caulking the joint out of the nozzle comes material separated into loose fluids and granular almost solids. Better to know it's a bad tube and throw it away than to have to clean out the joint you're trying to caulk.

sound advice. i do it as a matter of course. i take a paper plate with me when i'm caulking so i can rest the tip over it and catch the drips. the plate receives the first squeeze out of the tube.
so many things are just done without thinking, and i never really thought about how to explain it to someone who's never done it.
 
There are even electric guns. But I`ve never had trouble using a standard manual gun from Bunnings, the Australian big hardware chain. I`m suspecting not the gun but the caulk. I`ve used polyurethane caulk not long out of the freezer (put there to stop it going off in the tube) without so much resistance.
 
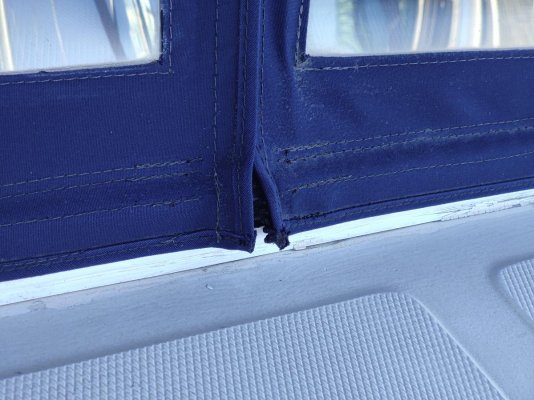
Small amount of rain still leaks through the crevice of joints shown below. For this kind of gap, is butyl tape or 3m 4200 a better choice to seal?

IMG20231205190735.jpg

IMG20231205190912.jpg

Just putting a little caulking on the exterior should be considered a temporary fix. The right way would be to remove the track, clean both surfaces, check for and fix any soft wood at the screw holes, re-bed the track with quality sealant.
Siliconized latex wouldn’t be on my list of things to use there. I’d be using something like 3m 4200, or maybe butyl tape.
Caulk on the exterior edges doesn’t address all of the potential leaks at the screw holes.
 
Small amount of rain still leaks through the crevice of joints shown below. For this kind of gap, is butyl tape or 3m 4200 a better choice to seal?

I can’t exactly see what your picture is supposed to be showing. I know you’re trying to show a detail, but a picture from further away would be helpful to put things into perspective.
But, as a general rule, I don’t patch in different sealants unless I’m making a temporary patch. I also don’t use something like 4200 for temporary fix unless it’s all I have. 4200 or 4000 uv should be used when making permanent repairs/rebedding of deck hardware.
Butyl tape actually can make a temporary patch at times, you can form it to a shape and press it into and over small gaps to get you through the winter.
 
Back
Top Bottom