Perkins thermostat housing

The friendliest place on the web for anyone who enjoys boating.
If you have answers, please help by responding to the unanswered posts.

Pack Mule

TF Site Team
Joined
Jan 24, 2013
Messages
3,749
Location
USA
Vessel Name
Slo-Poke
Vessel Make
Jorgensen custom 44
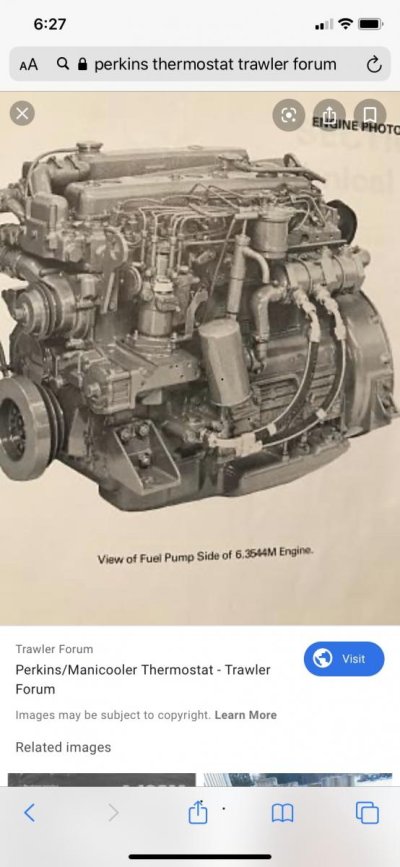
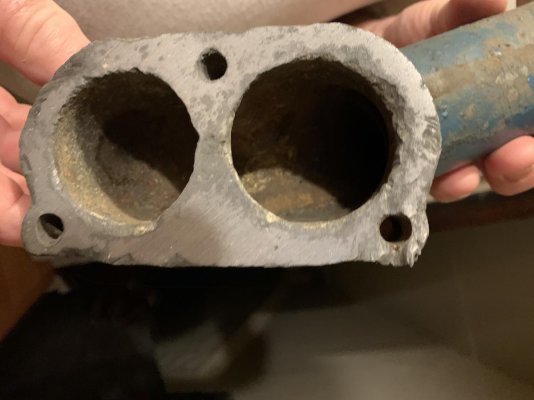
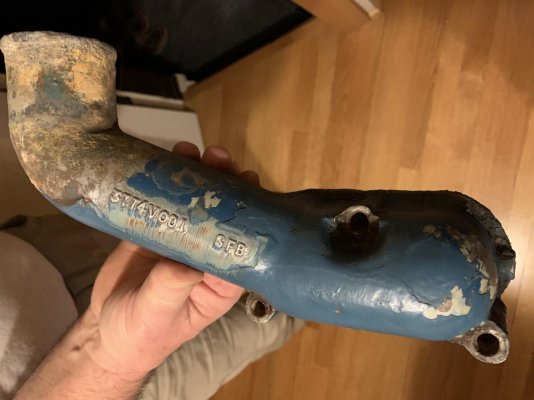
I’m in the middle of replacing my thermostats on my Perkins 6.354 na . This should be a fairly simple job right. Mine has two thermostats under the housing neck and there are three 5/16” dia bolts that hold the housing neck down. All three bolts were froze tight. I tried everything but heat. Pb blaster, Kroil penetrating oil, hand impact, battery and air impact.
I finally used a breaker bar and got one bolt out and broke the heads off the other two. After a lot of prying and more PB Blaster I was able to get the housing off. The housing was seized to the bolts. After I got the housing free and off the other two bolts came out by hand. I may need to get another housing because I buggered the bottom of mine with all the prying.
Does anyone know why this engine has two thermostats or is this normal for all Perkins? Simple job not so simple.
 
Is this a Range 4 or earlier? Pictures?

Mine is a 6.3544M (TW). It has 2 thermostats and the Multi-Cooler type manifold.
 
Is this a Range 4 or earlier? Pictures?

Mine is a 6.3544M (TW). It has 2 thermostats and the Multi-Cooler type manifold.
This is my engine.
 

Attachments

  • 47C36BAA-3D8D-44BA-88FE-734DEE99B31B.jpg
    47C36BAA-3D8D-44BA-88FE-734DEE99B31B.jpg
    72.6 KB · Views: 73
They probably figured the little tstats for little engines were on the shelf, so instead of ordering a larger new design, just put two little ones in there. Many engines use two.

You may be able to take the tstat cover to a machine shop and have it fly-cut to renew the buggered surface. In my shop that would be about 20 bucks.
 
Greetings,
Mr. PM. If your housing sealing surface is REALLY bad a good welder should be able to TIG filler material into the bad spots. Iron or aluminum shouldn't make any difference. THEN do as Mr. Ski suggests. Quick fly cut.
 
I need one too. Mine is held on with 3 bolts and alot of gasket material with broken bolt holes in 2 spots.

Been working fine for a long time but still bothers me.
 
As Ski & RT suggested take off the housing and get it repaired, once you begin to refit fit it smear copper grease anti seize compound on the threads of the bolts as you're bolting two dissimilar metals together (metal bolt & alu housing).
Same with the gasket, just a light smear of grease you don't need gasket sealer other wise it'll be seized again that's the job of the gasket.
Firm tight don't bull it up, run the engine up to working temps, check for drips and tightness.
Monitor for a couple of days for peace of mind.
Job done.
 
Greetings,
Mr. IR. I think there may be a problem using copper grease with aluminum. Galvanic/electrolytic corrosion. Electro-chemistry 101 was many moons ago but best to check for sure. Grease/no corrode for sure but check compatibility first.
 
The amounts are miniscule and have never caused me any problem but if you wish to be on the ultimate safe side and have belt and braces buy a small tube of high temperature melting point grease. An industrial plumbers supplies will stock this as its used in boilers and steam plants.
 
This is mine. It’s pretty beat up from wedging it off. I don’t think I was the first one to remove it. It was installed with red form a gasket. The center part is pretty thin and I don’t know if there is enough material for a fly cut. I started working on it last night with a piece of emery paper on top of my cast iron table on table saw.(The flattest thing I have).
I tried TAD this morning and they said it’s no longer available but they’re checking to see if they have a good used one .
I still have about 3/16” thick material in center left to work with. I’ve been keeping a check with straight edge and it’s staying flat. What do y’all think? Should I keep at it this way?
 

Attachments

  • 5B377B62-9C4B-4E71-84C3-E660E224A0B9.jpg
    5B377B62-9C4B-4E71-84C3-E660E224A0B9.jpg
    84 KB · Views: 40
  • DFB316C1-D61F-4A16-8DF5-0F236956FD2B.jpg
    DFB316C1-D61F-4A16-8DF5-0F236956FD2B.jpg
    96.1 KB · Views: 46
Last edited:
I would not use JB weld.
If it were mine, I'd look at getting it milled enough to get a clean line all the way around.
Of course from the picture angles I cannot tell how much meat would be left after such machining.
 
If it were mine I'd take the engine number and send an email to parts4engines.com or try Mike Bellamy at bellamymarine.co.uk if they don't have one they'll know who has.
 
Agree with the machine shop approach. Mill flat until defects go away. If cracks start showing up, then welding or replacement.
 
I think there is a nickel base Permatex product that will prevent, well sorta, the bolts from seizing. Just use the gasket sealer on the worst side.
 
With a gasket and gasket goop you should be able to get it to seal, coolant is usually at low pressure .

Leave the tiny thermostats out and purchase a thermostat housing with 2 hose ends at the hot rod shop.

Now you can select the temperature it will function at with low cost OTS thermostats.
 
I just got this put back together on Sunday. I thought I’d share this with anyone else with same issue.

I had to get a little rough with it to get it back together. The problem was the neck on thermostat housing and neck on heat exchanger are not perfectly in line with each other. This was the original problem with bolts being married to the housing. The 2” hose that connects the two needs to have a slight offset in it. The hose is only about 3” long. The hose had to go on first then install bolts in housing. The forced offset I had to put in hose made the bolts tight against housing.

If I had to do it over again I would source a hose with slight offset.
 
Last edited:
Back
Top Bottom