Removable Non Skid Mold Over Deck??

The friendliest place on the web for anyone who enjoys boating.
If you have answers, please help by responding to the unanswered posts.

SeaBoy

Veteran Member
Joined
Nov 4, 2021
Messages
77
Vessel Make
1982 Albin 40 DC
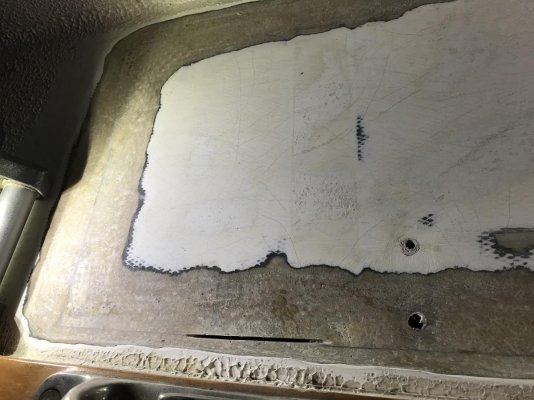
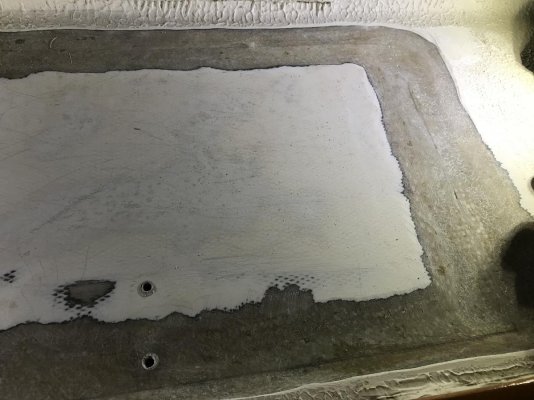
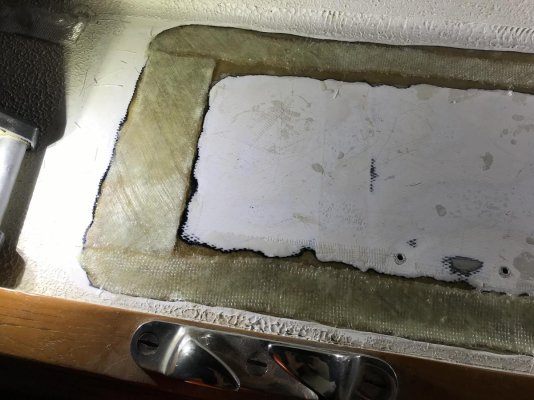
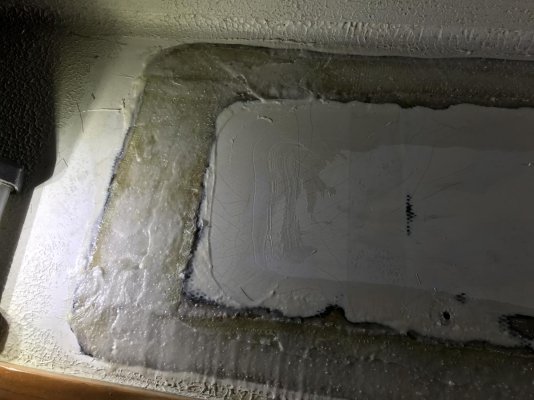
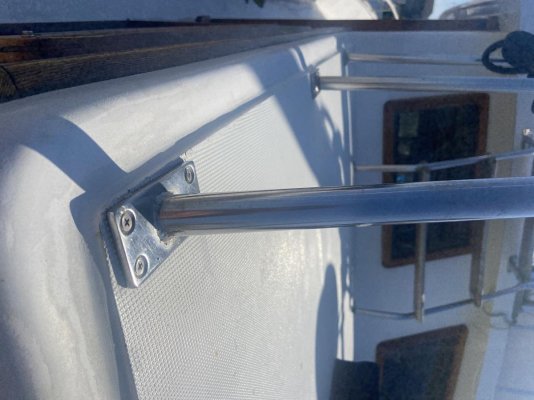
Hello all. 1982 Albin 40 Double Cabin here. Does anyone know if it’s feasible for me to remove the molded non skid deck on my mid level(mezzanine?) deck? Or is this molded nonskid integrated through ad one solid piece. My questions is, can I peal the nonskid off the deck? It looks as though I can. Below are pictures. You can see how the mid level deck looks like there’s a stiffener that runs athwartship and the deck is sagging fore and aft of it. I’ll be painting non skid on a smooth surface in the future so I’m debating if I should skim over the sagging surface or rip up the deck and start under the existing top. I also don’t like that concave “router-ed” edge look.
 

Attachments

  • 7938A7A8-EA3E-4F35-AE29-0154D0CF893F.jpg
    7938A7A8-EA3E-4F35-AE29-0154D0CF893F.jpg
    113.7 KB · Views: 28
  • 16DECD27-2DA4-45D0-8C60-38424F1CD9F2.jpg
    16DECD27-2DA4-45D0-8C60-38424F1CD9F2.jpg
    113.5 KB · Views: 25
Last edited:
Not sure why these photos turned sideways…
 
On our last boat we sanded off all the nonskid because it had stress cracks in it. Supposedly you can make a mold to repair the nonskid and match the existing nonskid, way above my pay grade. So we took off the nonskid and painted the decks with Kiwigrip. It will hide minor flaws in the glass and it pretty easy to apply, just don’t leave the tape on too long or you won’t get the tape off. Pull the tape as you go. If you need to cut into the fiberglass to repair the structure underneath it, the Kiwigrip will make it easy to do the glass repairs to the deck since it will cover minor imperfections. The worst thing was sanding off the old nonskid. A friend of mine was here helping me rewire the boat and at the end of each day we would sand for an hour with 5” DA sanders hooked to shop vacs. It took us about 10 days, so about 20 hours total sanding. The painting was easy and probably took about 3 to 4 hours of actual painting after taping. If you use Kiwigrip then wax it with Woody Wax and it will be easier to keep clean and will still be nonslip after the wax dries.
 
Rereading your post, you say the deck is sagging fore and aft of the beam. If it is it is probably due to wet/rotted coring. I use a phenolic hammer to tap out the deck to find the bad core. lt will sound dull and more of a thud than good core will. On good core it should be a sharp sound. A little practice and you will be able to tell the difference. The photo attached is the hammer I use. The fix for that is to cut the top fiberglass around the soft area. Pull the top fiberglass off and then remove the bad core however you are able, chisel, grinder etc. then put in new core with thickened epoxy. Replace the top fiberglass with thickened epoxy. Then grind a valley around the cut in the fiberglass and lay some 1708 in the valley with epoxy resin. Fair out the epoxy over the 1708 and then paint the deck with Kiwigrip. Simple… It isn’t technically difficult but it is hard work. But when you are done the deck will be solid and if you bed any fittings properly then it should be good to go.
 

Attachments

  • BF9CB61F-7A08-4807-85E1-9744E801A86C.jpg
    BF9CB61F-7A08-4807-85E1-9744E801A86C.jpg
    159.2 KB · Views: 18
I sanded off the molded non skid on the Green boat for the same reason as Comodave. As I am in the flooring business I used my edger. Very fast. Also an excellent way to get in trouble if you are not experienced with this type of machine.

Do be sure there are no underlying structural or core problems (Comodave again!) before you begin.

Rob
 
I have not used an edger, don’t really know what it is, but with the DA sander it was easy to control.
 
Dave,

The edger is used for sanding the edges (!) of the room. The big sander can not get tight to the wall and will leave drum marks if you try to get too close. The edger will get the last 6 inches or so.

The first photo shows my helper finishing the rough edging. You can see the difference between the sanded and where the old finish is yet to be removed. You will have to zoom to see it clearly.

The edger is also good when there is a lot of crossgrain. The second photo shows getting ready to do the sole in a Monk trawler. After removing the finish with 100# I sanded the sole with a 6" Fein orbital to remove the circular edger scratches.

Third photo is finish sanded, ready to begin coating.

Rob
 

Attachments

  • IMG_0595.JPG
    IMG_0595.JPG
    63.4 KB · Views: 20
  • IMG_1453.JPG
    IMG_1453.JPG
    115.6 KB · Views: 18
  • IMG_1454.JPG
    IMG_1454.JPG
    105.6 KB · Views: 19
I figured it was something like that but have never used one.
 
I still am looking for an answer to a question; is the molded nonskid integrated to the deck? Or is it a skin laid on top of the deck then faired in to look like it’s all one piece.
 
To me by looking at the pictures it looks like a skin. I think that because it has a perfect pattern and it looks like there are seams? Doesn't mean it would be easy to separate though.
 
I still am looking for an answer to a question; is the molded nonskid integrated to the deck? Or is it a skin laid on top of the deck then faired in to look like it’s all one piece.

The nonskid is formed in the mold. Then gelcoat is sprayed into the mold. Then they lay the fiberglass on top of the gelcoat. So yes it is part of the deck.
 
I would agree that the no split is molded in.
 
I disagree, my Albin 40 '86 looks nothing like that. Wouldn't be surprised if a former owner removed teak and put that non-skid on. I'd rip it and fix it.
 
The nonskid is formed in the mold. Then gelcoat is sprayed into the mold. Then they lay the fiberglass on top of the gelcoat. So yes it is part of the deck.

I’ve got the same non-skid finish on my boat without the raised base/plinth, and definitely a factory moulded finish.
All pro advise I’ve received is to sand it off back to GRP and start again with whatever your choice of surface that you prefer, otherwise it will come back to haunt you.
In the areas which are exposed to constant weather, like most gelcoat after thirty odd years, it breaks down.

Do you have any pics of the GRP sheet rejoining process, cutting V grooves, adding the 1708 and epoxy?
I always appreciate your sound knowledge and explanations when replying in threads Dave :thumb:
 
For grinding and or aggressive sanding I use a right angle Dewalt 120 volt drill. I have had it for probably 7 years and have abused it regularly and it still works. Then for the sanding I use Roloc fastener sanding discs. They are 50 grit. By using the right angle drill I get very good control of the sanding. I can bear down on one side and cut faster and deeper if I want to. With a second person I can use a shop vac and collect most of the debris. You can hold it so that the debris comes off one side and hold the shop vac there and it will get the vast majority of the debris.

Here is the adapter for the Roloc

Pro 3" Roloc Disc Pad Holder - 1/4" Shank

Here are the discs

3M Green Corps Roloc Discs, 3'' - 50 Grit DISC ROLOC 50GR 3 25/BX GREEN

What is neat about Roloc is how easy and fast it is to change discs although they last pretty well. I get them on Amazon.

Then as to how to grind a valley for 1708 strips. I use the above setup and start grinding along the area to get the 1708 strips. I gradually go deeper and wider until I get it deep enough for 1 or 2 layers of 1708, whichever I am looking to do. Remember with 1708 you have 3 layers of cloth, 2 cloth and 1 mat so it builds thickness and strength quickly. I cut some test strips of 1708 and use a short strait edge and lay the test strips in the valley. Then put the straight edge across the valley to see if I have ground deep enough. After a while you will be able to tell just by looking if it is good or needs more grinding. I wet the valley with epoxy and wet out the 1708. Lay it in the valley and use a metal fiberglass roller to roll it down tightly and get out any air and excess epoxy. Then I take thickened epoxy and fill the valley up and strike it off even with the deck using a plastic scraper, get them at an auto paint store. If I am using Kiwigrip to paint the deck then all that is left to do is wash off the amine blush from the epoxy and give it a scuff sanding. Then go at it with the Kiwigrip since it will fill any minor imperfections. So you don’t need to spend a lot of time getting a perfect finish on the repair.
 
Forget to add some photos. The PO had some rotten core replaced. However they didn’t glass over the cut in the deck so after I had the boat a couple of years it started to print though even the Kiwigrip that I had used to paint the decks. So I used a belt sander with 40 grit on it to sand off the Kiwigrip, it is incredibly tough. Then in the first photo you can see the joint between the 2 sections of deck where they cut it. I injected some thickened epoxy into the gap before I laid the 1708 over it. The second photo is another view before the 1708 and you can see the cut in this photo too. The 3rd photo is after the 1708 was laid on and the 4th photo is the thickened epoxy filler over the 1708. With the Kiwigrip you don’t need it too fair as the Kiwigrip will fill the divots. I painted right over this finish in the 4th photo after washing the amine blush and a rough sanding to give the paint some tooth. The Kiwigrip does repairs quite well and easily, except the sanding it off. The only thing is it takes a couple of months for the pure white to blend into the older paint but then you can’t tell the difference l
 

Attachments

  • 2D6AED01-0778-4C4E-B085-565E9C985CCB.jpg
    2D6AED01-0778-4C4E-B085-565E9C985CCB.jpg
    136.8 KB · Views: 12
  • 560C41C6-9D64-4FFC-962E-F5C04F584A1A.jpg
    560C41C6-9D64-4FFC-962E-F5C04F584A1A.jpg
    139.4 KB · Views: 15
  • A0B5C8D2-93DF-4DF4-95C4-CE27B4F95115.jpg
    A0B5C8D2-93DF-4DF4-95C4-CE27B4F95115.jpg
    149.9 KB · Views: 12
  • 96469F08-C694-4C37-B944-74D1A7CD1C84.jpg
    96469F08-C694-4C37-B944-74D1A7CD1C84.jpg
    126.1 KB · Views: 12
So the grooves are quite wide then, the pictures are a great addition to the explanation, thanks again for taking the time to post, cheers
 
Probably about 3 to 4” wide. I like to spread out the stress.
 
Gibco flex mold Ft. Worth Tx. manufactures the textured sheets used to make the non-skid diamond patterns in deck molds. They will send a sample pack so that you can match your pattern if you want to duplicate it. There are over 30 patterns, 1 should be an exact fit. Original manufacture lays the pad in the mold, sprays gelcoat, then glass.
You can get a pretty good match spraying a colored finish coat and using a large flat laminate single roller (not multi wheel) to set the mat into the finish and then peel when cured. they include a pretty good picture brochure of the process.
 
Back
Top Bottom