Water tanks

The friendliest place on the web for anyone who enjoys boating.
If you have answers, please help by responding to the unanswered posts.

Old Sea Dog

Senior Member
Joined
May 13, 2022
Messages
306
Vessel Name
"OLD BAY"
Vessel Make
1979 Grand Banks #599
Hello all. Have a 1979 36 classic. Port water tank leaks. Starboard soon to follow. Has anyone replaced these tanks or have the specs for water tanks of this era?
Thanks.
Bob on GB 36 #599
 
I think mine leak a bit at the seams. When I get around to replacing them I will go with plastic, and probably much smaller than the 175 gl (X2) that I have now. It is low priority though.

pete
 
Hello all. Have a 1979 36 classic. Port water tank leaks. Starboard soon to follow. Has anyone replaced these tanks or have the specs for water tanks of this era?
Thanks.
Bob on GB 36 #599

In my earlier boat, a 1979 GB 42, the water tanks were fibreglass. What material are yours?

BTW, I added a water bladder under the aft cabin sole. The fibre-glass water tanks were in the lazaret and water bladder was connected to the water pipe running from the lazaret tanks to the water pump in the engine room.
 
On my GB36 the tanks are aluminum, I suspect changed from original. They are in the Laz and easy to measure for size. Where are your tanks?
 
Good morning. The tanks are original. I believe steel. I am 1200 miles from boat and won't be back til late March. Somewhere I noted quick measurements, 43"L×14"W×31"D if I remember correctly. Then somewhere I read that they are trapezoidal not rectangular. So in the spring I will be unloading the lazerette and removing the tanks for inspection to determine repair or replacement. While the lazerette is empty, also have a Dinghy Butler to install to the transom. Last project is maneuver a 12 volt fridge/freezer through salon window and install. Let the fun begin....
 
Good morning. The tanks are original. I believe steel. I am 1200 miles from boat and won't be back til late March. Somewhere I noted quick measurements, 43"L×14"W×31"D if I remember correctly. Then somewhere I read that they are trapezoidal not rectangular. So in the spring I will be unloading the lazerette and removing the tanks for inspection to determine repair or replacement. While the lazerette is empty, also have a Dinghy Butler to install to the transom. Last project is maneuver a 12 volt fridge/freezer through salon window and install. Let the fun begin....

If the D stands for height then that sounds about right. But I am not near that boat to confirm.
 
Ok. Let's try this again. Yesterday's post seem to have been sucked into a black hole.
So last week working in the lazerette I removed the teak grating. I then disassembled the wood framing. Two more projects presented themselves. 11' of exhaust hose from the transom to the aft engine bulkhead needs replacing. The other is the rudder shaft table. All four lag bolts are disintegrating. The wood around the forward screws have dry rot. 20230405_114406.jpg20230405_114530.jpg20230405_114523.jpg20230405_130038.jpg20230405_130128.jpg20230405_125837.jpg20230405_133604.jpg20230405_125843.jpg20230405_125959.jpg
 
Afternoon all.
Having tried several sizes of cardboard mock-up tanks, settled on 2 each 35gal tanks 30"×22"×14". Tanks would be installed with 30" vertical and 22" horizontal. Tanks would be the model 7W tanks from Ronco. This should also diminish the wave action of one large unbaffled tank.
Thoughts......
Size of tank interconnecting plumbing?
2 or 3 intertank connections?
Tanks would be individually secured.
Thanks all.20230516_113806.jpg
 
Replacing rudder table. 20230516_135347.jpg20230516_135402.jpg
 
Couple of thoughts. I would coat the new table with unthickened epoxy including the lag bolt holes. I would put tape on the bottom of the holes and fill the holes with the epoxy. Let it set for a few minutes then pull the tape off and let the excess drain out. That will help the wood from absorbing water.

As to the tanks, I would use 1.5” hose to interconnect them at the top and the bottom. Ronco will spin in the fittings where you specify. Then you can screw in PVC hose barb fittings. Not sure if I would go with PVC pipe to interconnect them since it may be more difficult to get them aligned and glued. Make sure you leave room in between the tanks to make the connections.

I would also clean and paint the lazarette before you put the tanks in since now is when you have the best access and room to move around. I would regret not taking advantage of this opportunity to do the painting, if you have not done so already. I like Bilge Kote in white for painting things like this.
 
Yes on the Bilgekote. Also replacing the exhaust hose.
Those were my thoughts on connecting the tanks also. Definitely using hose.
 
My thought is the connection between the two tanks should be on the aft side of the tanks. Two reasons right off; 1: on final fit-up, you wont know if any leaks until fully installed and filled. Between tank connections will be more difficult to monitor. 2: added capacity by placing the tanks closer together- increasing tank dimension.
Just my thoughts based on my experience of replacing fuel tanks using like concept.
 
Last edited:
Another thought on your projects. When removing the exhaust hose from the "transom fitting", BE CAREFUL, the fiberglass on that fitting is not as robust as you might think, and the hose comes off hard. The gods were with me the day I replaced my hose.
 
I have a hose removal hook. Looks like a large J. It slips in between the hose and the nipple and you slide it sideways to break the hose free from the nipple. Works great. Got it at NAPA.
 
A heat un is a great help in removing old hose.

peteg
 
Yes I have 2 hose pullers and a sprayer with soapy water. Boat is in the water. Luckily with port tank out the exhaust is completely out of the water. 11+' run of 3.5" wet exhaust hose and 4 t hose clamps from Defender.
 
So ordered tanks from Ronco today. 20 day lead time.
Removed old exhaust hose, from transom to hanging locker just before engine room bulkhead. Connection there was a piece of threaded galvanized pipe. Cutting that off to be replaced with fiberglass connector.
Removed the panel to access the exhaust hose.
Waiting on angle brackets to finish rudder table. 20230524_130353.jpg20230524_130140.jpg
 
Thinking I can remount the quadrant upside down. If I raise it to the top of the shaft, I lose the ability to use the emergency tiller. 20230526_145105.jpg20230526_145053.jpg20230526_145040.jpg
 
Old Sea Dog,
Nice work! I have a couple of questions. In our 88 36 GB Classic, the tanks are aluminum, original, the length so a is 42.5 and width (front to back) is 18" , there are two for a total capacity of about 195g. I'm going to replace them this winter and am very interested in your out and in procedure.

Do I gather that you will leave the original stbd tank in and are replacing the port with two 35g?
If so, why not replace all? Did you cut the tanks up to remove?

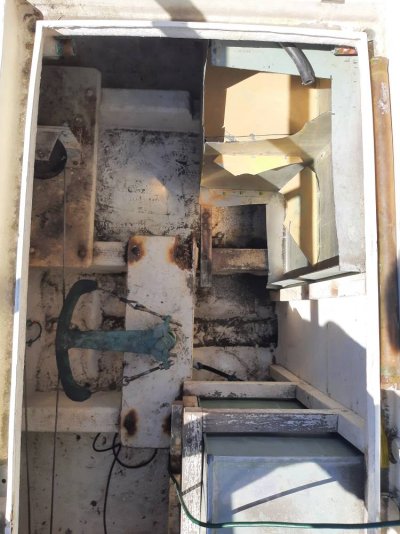
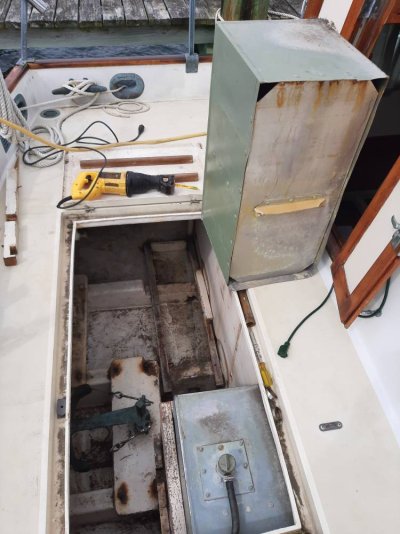
My feeling is to cut the aluminum tanks with sawsall (easy) into manageable pieces noting the fittings and locations. Then as you prepare the area and measure/template for replacement plastic tanks that by design will install with ease (easier than building boat around it) I know I should have near original capacity but a bit less is ok.

Do you have pictures of your removal of tanks and reinstalling or installed new ones?

It seems cut and dry once the old tanks out, to design structure and drubbing for new tanks....am I being naive and missing something?

Thank you for any great tips and advice.

Best Regards,
Mike Dana
Third Reef
36' Grand Banks Classic #819
Potts Harbor Maine (South Harpswell)
 
I just had the Dinghy Butler system installed on my GB 36 Classic. But rather than install the pivot hardware through the transom, mine sits on top of my swim platform. Dinghy Butler will design this version for you if you cannot drill through your transom. I absolutely love this system and cannot say enough about it. But I have a very big warning though! The angle of the line from the motor to the eye that attaches to the transom needs to be less than 30 degrees. You cannot get there with a GB 36 transom. I needed to have a custom S.S. bracket fabricated to make this happen. Please contact me at katyleigh@protonmail.com or my cell at 781-248-5759 if you need any more info.
 
Dinghy Butler System

I just had the Dinghy Butler system installed on my GB 36 Classic. But rather than install the pivot hardware through the transom, mine sits on top of my swim platform. Dinghy Butler will design this version for you if you cannot drill through your transom. I absolutely love this system and cannot say enough about it. But I have a very big warning though! The angle of the line from the motor to the eye that attaches to the transom needs to be less than 30 degrees. You cannot get there with a GB 36 transom. I needed to have a custom S.S. bracket fabricated to make this happen. Please contact me at katyleigh@protonmail.com or my cell at 781-248-5759 if you need any more info
 

Attachments

  • IMG_1902.jpg
    IMG_1902.jpg
    126.7 KB · Views: 17
  • IMG_1903.jpg
    IMG_1903.jpg
    128.9 KB · Views: 18
  • IMG_1904.jpg
    IMG_1904.jpg
    126.2 KB · Views: 17
  • IMG_1906.jpg
    IMG_1906.jpg
    166.1 KB · Views: 15
  • IMG_1910.jpg
    IMG_1910.jpg
    172.4 KB · Views: 18
Used 2 each 32 gal tanks for total port tankage of 64 gal.
 

Attachments

  • 20230413_150831.jpg
    20230413_150831.jpg
    96.3 KB · Views: 16
  • 20230414_150419.jpg
    20230414_150419.jpg
    90.3 KB · Views: 21
  • 20230630_184139.jpg
    20230630_184139.jpg
    99.9 KB · Views: 16
Last edited:
With 64 gallons on the port side and 100 gallons on the starboard, does your boat sit level in the water?
 
75 gals in original stainless starboard tank.
 
Back
Top Bottom