ASD Water Maker Install

The friendliest place on the web for anyone who enjoys boating.
If you have answers, please help by responding to the unanswered posts.
Joined
Jul 6, 2012
Messages
8,062
Location
USA
Vessel Name
Alaskan Sea-Duction
Vessel Make
1988 M/Y Camargue YachtFisher
Well the water maker from RO Water arrived today. I will post the process here.

I went to the engine room to start scouting a place to put it. I will be installing it on the STBD side, but before I can do that, I have to relocate the battery chargers to the Port side. There is already a board on that side to mount them. I purchased another Xantrex 40 amp and a remote panel to tie the 2 chargers together. Yes the wiring will be different than you see in the picture. What you see is an emergency fix last summer.

The membranes will be mounted on the engine room ceiling. This cuts down the length of high pressure lines. The water maker's control panel and filters will be mounted where the battery chargers are currently located. I will tie into the thru hull in the bottom picture. I will also make a manifold and tie that into the salt water wash down. Once that is installed, I can feed salt or fresh water to the wash down spigots.

Question: Is there a way to put captions under the pictures?
 

Attachments

  • Arrival.jpg
    Arrival.jpg
    115.8 KB · Views: 230
  • IMG_4030.jpg
    IMG_4030.jpg
    137.5 KB · Views: 250
  • IMG_4035.jpg
    IMG_4035.jpg
    106.1 KB · Views: 242
  • IMG_4032.jpg
    IMG_4032.jpg
    132.4 KB · Views: 254
In the App you can caption them easy peasy if this is what you're looking for.

IMG_4282.JPG

Nice mudder

IMG_4289.JPG

Fun from last weekend
 
OK so I type up the entry, then upload the pics from my laptop. Where in the app?
 
Someone else will need to provide that tutorial. I exclusively access the forum through my iPhone app. Sorry [emoji52]
 
That's OK. I appreciate your willingness to assist.....
 
Oh Boy! Fun times ahead Tom. If you are in the city next week or two, go look at Pairadice for ideas and maybe the Manifold I built for Raw/Fresh water wash down. Also the power box we used to mount the panel. Give me a call on how to get onboard.

Cheers, and enjoy this project!
 
Thanks buddy. I will be calling you soon
 
Tom, does this mean you can shower? Your number of friends will increase exponentially!

But this riposte aside, will you be able to use river water as RO feed?
 
sunchaser,

Water makers even remove the bacteria, so one can use almost any water(careful in marinas because of the chance of petroleum contamination which will ruin the membrane)

but...

The pre-filters take out the larger particles, algae, etc. The more "stuff" in the water, the more the pre filters have to be cleaned or changed. In not so clear water this could necessitate changing filters every 10 - 20 gallons of water made.

While in the Caribbean I could go 20 - 30 hours between changes (the spectra DC water make made about 6 - 7 gallons an hour. In Bahamas I could go for 50 hours or more, because the water was just that much cleaner. In the middle of the Atlantic, one can go for days.

Gordon
 
OK so I type up the entry, then upload the pics from my laptop. Where in the app?

Another way is upload pictures to a photo hosting site such as postimage.io

Then on the photo, right click get the URL link, come back here, click the yellow mountain icon and paste in the URL link.
Since you have separated photos, put your text in between the photo links.
 
Tom, does this mean you can shower? Your number of friends will increase exponentially!

But this riposte aside, will you be able to use river water as RO feed?
I always thought I was sweet smelling! I am told it will also work in fresh water, just have to turn down the pressure. I doubt I will ever use it in fresh water, so it will be pickled when I am in the Columbia.
 
sunchaser,

Water makers even remove the bacteria, so one can use almost any water(careful in marinas because of the chance of petroleum contamination which will ruin the membrane)

but...

The pre-filters take out the larger particles, algae, etc. The more "stuff" in the water, the more the pre filters have to be cleaned or changed. In not so clear water this could necessitate changing filters every 10 - 20 gallons of water made.

While in the Caribbean I could go 20 - 30 hours between changes (the spectra DC water make made about 6 - 7 gallons an hour. In Bahamas I could go for 50 hours or more, because the water was just that much cleaner. In the middle of the Atlantic, one can go for days.

Gordon
Sounds about right.....although I am no expert, yet.
 
On the spectra there is no way to turn down the pressure and I am scratching my head wondering why fresh water would require less pressure. It is all about straining water through the membrane, so am wondering why less pressure would be required.

Just wonder'n. . .
 
On the spectra there is no way to turn down the pressure and I am scratching my head wondering why fresh water would require less pressure. It is all about straining water through the membrane, so am wondering why less pressure would be required.

Just wonder'n. . .

The spectra units that I have owned (a Catalina and a Newport) automatically adjust for salinity level. My recollection is that with a WM you want to always produce water at a constant rate, or at least at a rate in a pretty narrow band. Lower salinity water will go through the membranes more easily, so to control the flow rate you need to lower the pressure. The spectras I've owned do that automatically. They have all had the Spectra automatic control system, so I don't know if that feature is part of the fancy control, or inherent in all the spectra products.
 
I now own a Newport and will look at the manual. My previous Spectra experience was with the smallest unit, but I did use the automated MPC-5000, which is also on my current model.

It reported out feed pressures, but did not offer a way to adjust it. Water production does vary by temperature. I have no experience with various salinities. I do know that cooler water produces less water than cooler? Higher feed pump pressures will produce more water than lower feed pump pressures.

I installed my unit and tore it completely down twice to replace o-rings and seals. I never saw a way to regulate feed pump pressure. Perhaps I wasn't looking in the right place?

Gordon
 
twistedtree,

I just looked at the manual on line and found this:

Feedwater Pressure
Pressure range 90-110 PSI (6.2-7.6 BAR)
Pressure will be higher with cold or high salinity
feed water, and lower with warm water or
low salinity.


I am guessing this is just physics and that colder water being denser produces more pressure? Don't understand the salinity angle...

I am sure some smart person on line can fill me in...

I am speculating about much of how the Newport works. It came with out boat and all I have done is pickle it with antifreeze. I have as yet made no water.

Gordon
 
Hi Alaskan Sea-Duction,

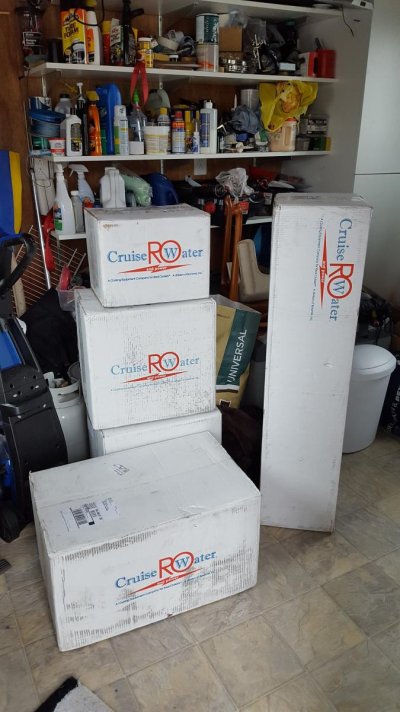
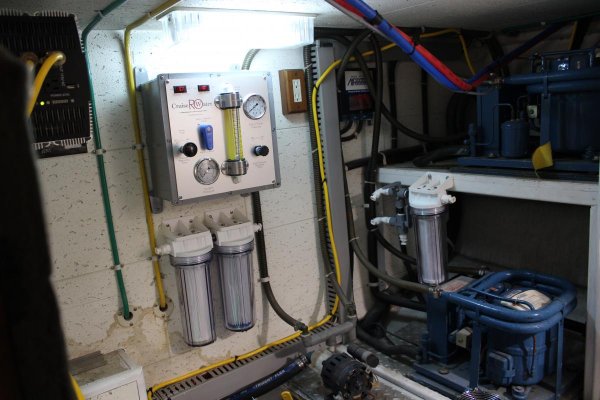
I installed a Cruise RO Watermaker aboard my Pacific Trawler 40 about a year ago. Some lessons learned during my install, and subsequent year's use:

a. The supplied fittings (quoting from the manual) "...polypropylene G.A. Murdock fittings." Good stuff, but they do leak if not properly seated. While spares are provided with the kit to ease the installation, be advised that EVERY installation of this watermaker is, by definition, a custom install. In other words, the fittings supplied may, or may not work for your particular needs. And, G.A. Murdock does not sell replacement fittings retail-they must be procured from one of their retailers. None of which I could find in the PNW, nor on-line by the way. During my install, I was forced to obtain replacement fittings from Cruise RO. While they were reasonably responsive to my needs, the latency and cost of the fittings was galling.
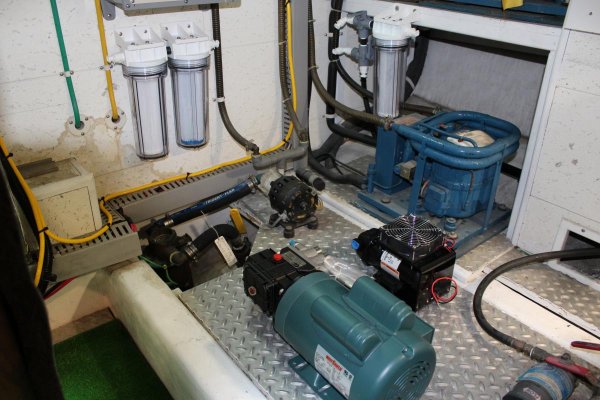
b. Rick, the salesman for Cruise RO, is responsive and fairly knowledgeable. An engineer he is not. Questions regarding boost pump selection, for instance, were brushed off with statements like "...we've got about 20 different pumps on the shop floor that failed our testing. Ours is the best." Given that the provided pump is NOT continuous duty, inquiries to replace it with a simple centrifugal pump, mounted below the water line, obviating all the bypass and fan cooling who-rah associated with protecting the Jabsco in this application were poo-pooed by Cruise RO. And their engineer, who operates (I think) somewhere in San Diego County, was not made available to answer my (perhaps) low-level questions.
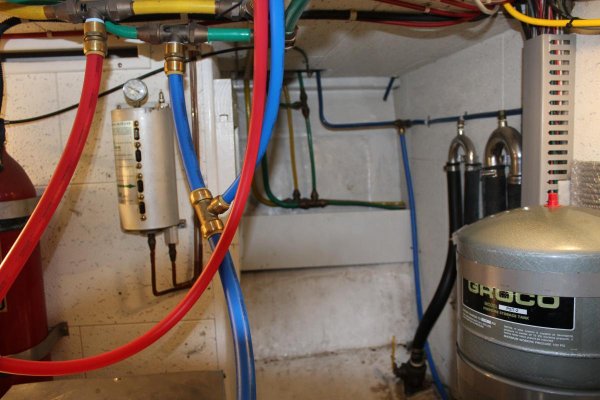
c. After operating in AK waters last summer, I came to the immediate conclusion that the pre-filters are simply too small. I operated my watermaker about twice-weekly, and found that I needed to replace both pre-filters about every three weeks. PNW waters are significantly bio-fouled, so the filters plug often. Choosing a mounting location for the filters that will allow inspection every time the watermaker is used and being able to drain and replace the filters easily and often is important. Carry lots of spares!
d. Depending on how often you use your watermaker, it can take upwards of 5 gallons of sample water to finally see good, salt-free, aurally clear water ready to put aboard. In addition, the provided block diagram makes no mention of, nor provision for dumping the sample water overboard while you wait for the hydrogen sulphide (for instance, a product of bio fouling in the pre-filters) to dissipate. A bucket works, as does dumping the sample water into the bilge, but not terribly convenient in my case. Some re-plumbing required here, IMHO.
e. The usual admonitions about operation in foul water apply. Personally, I'm not too concerned about petroleum contamination, as long as the raw water intake is significantly below the waterline. And while the RO process hypothetically removes bacterial and viral organisms from the treated water, there's REAL good reason not to locate the raw water intake for the watermaker downstream of the holding tank effluent, nor operate in suspected contaminated water! I don't want to hijack your thread, but YMMV regarding how much you trust your watermaker to provide you with healthy drinking water. Having experienced medical issues related to both viral and bacterial infections, caution is definitely in order during operation.
f. After surveying your desired installation, I highly recommend re-drawing the supplied system block diagram to fit your particulars, and studying it intensely before mounting and plumbing your hardware. Cruise RO is pretty good at reviewing your potential install, and making valuable suggestions that will reduce the re-work necessary post-installation.
g. The Cruise RO watermaker is definitely a manual system. Expect to tweak and twirl with it every time you operate. Fortunately, this is facilitated by the design (mostly), and most certainly by your installation decisions. It's one of the virtues (and shortcomings) of the system, depending on each and every owner/operator/installer/user. Neither my wife nor I care to practice bleeding before boating, and everything's' a compromise, but I won't leave home without my watermaker, despite swearing at it daily during the install, and often during operation.
h. And finally, I made a personal choice to replace about 75% of the plastic fittings and tubing with simple bronze barb fittings and reinforced vinyl tubing and hose clamps. I had to revise the plumbing anyway, and I don't have storage for the spares needed to repair and service the Murdock "stuff" underway. Typical barb fittings and hose are available everywhere. Again, YMMV.


Regards,

Pete
 
Last edited by a moderator:
Pete makes some good points. My Spectra MPC-5000 tests the water and sends the water to the tanks only when it is of sufficient quality.

I don't know if Pete back flushed his system after making water, but doing so should significantly reduce Hydrogen Sulfide in the water. My smaller Spectra would usually use about 3 gallons to back flush and I never smelled Hydrogen suflide in the water. The MPC-5000 was set up to do a back flush of the system every five days.

Gordon
 
twistedtree,

I just looked at the manual on line and found this:

Feedwater Pressure
Pressure range 90-110 PSI (6.2-7.6 BAR)
Pressure will be higher with cold or high salinity
feed water, and lower with warm water or
low salinity.


I am guessing this is just physics and that colder water being denser produces more pressure? Don't understand the salinity angle...

I am sure some smart person on line can fill me in...

I am speculating about much of how the Newport works. It came with out boat and all I have done is pickle it with antifreeze. I have as yet made no water.

Gordon

I'm guessing too, but here's my guess. This presumes that what the Spectra tech support guy told me is correct about adapting to salinity levels. The flow rate of the membranes is proportional to the flow rate of the feed pump. And the feed pump is variable speed. So my guess is that they control the speed of the feed pump to maintain a constant flow rate out of the membranes.
 
Twistedtree,

Still guessing... But my MPC-5000 did not give me the salinity if the incoming water, only the output. It did however give me the temperature of three incoming water, if i remember correctly... It has been a couple of years....

Gordon
 
I'm guessing too, but here's my guess. This presumes that what the Spectra tech support guy told me is correct about adapting to salinity levels. The flow rate of the membranes is proportional to the flow rate of the feed pump. And the feed pump is variable speed. So my guess is that they control the speed of the feed pump to maintain a constant flow rate out of the membranes.

A "traditional" watermaker design is to have a valve in the brine out stream. Pinching the brine out valve increases pressure across the membrane. Forcing h20 molucules through the membrane to produce product water.

To automate this you would use a proportional valve instead of a manual valve.

The sensors required would be membrane pressure, and product water volume.

The raw water salinity value would be no more necessary for the controller than it is for a human performing the same task.

To switch ther product water all you would need is a three way valve or two on-off valves, and a TDS sensor.
 
Stage 1 Completed

The battery chargers are now relocated. Man that was a tight spot. Those that do their own work understand you spend more time running down uninspected parts than you do in the actual install. The system seems to be working correctly, but I have a question on the remote for which I will start a different thread.
 

Attachments

  • IMG_4048.jpg
    IMG_4048.jpg
    108.4 KB · Views: 74
  • IMG_4049.jpg
    IMG_4049.jpg
    105.4 KB · Views: 87
  • IMG_4050.jpg
    IMG_4050.jpg
    112.8 KB · Views: 90
  • IMG_4051.jpg
    IMG_4051.jpg
    108.3 KB · Views: 91
  • IMG_4054.jpg
    IMG_4054.jpg
    103.4 KB · Views: 89
Install begins

I am lucky in that I have some room in my engine room. When I relocated the battery chargers to the port side it left a nice wall to mount the control panel and twin filters. I mounted the other filter on the A/C shelve. The big high pressure pump and low pressure pump fit nicely in front of the STBD engine next to the fwd A/C unit. I still need to find a home for the membranes.

So now the plumbing and electrical.
 

Attachments

  • IMG_4082.jpg
    IMG_4082.jpg
    116.9 KB · Views: 87
  • IMG_4083.jpg
    IMG_4083.jpg
    136 KB · Views: 79
Great update Tom. Still plenty of work ahead, but it will be worth it. Like the box you found for the Panel. Did you decide to build a manifold for Raw/Fresh washdown? Keep at it.
 
Yes I will be building a manifold. So I have been searching for a place for the two membranes. I found 2 places in the aft cabin.

1. Under the bed next to the water tanks. Con is drilling a 1.5 inch hole in the bullhead. Con is running long 2 high pressure hoses and 1 low pressure line.
2. Cabinet under washer/dryer. It is easy access, but i would be drilling 1.5 hole in the bulkhead. The exhaust pipe also goes through this cabinet. Con would be same as above running 2 high pressure hoses and 1 low pressure line.

3. Mount it in the engine room. All lines would be short and easy install. Big issue: the ER gets hot in the summer. According to the membrane sticker operating temps are 32f to 120f. The install book states " do not install the RO membrane module in an area where the membranes can become heat soaked to temperatures above 120f while in operation and 140f while not in operation, doing so will cook and destroy the RO Membrane. "

My engine room gets pretty warm in the summer. How much I don't know.
 
Why not mount them on the hull, one on each side, outboard of the engine room. Tell people that they are mini rocket launchers. LOL
 
I don't think I'd worry to much about that temperature warning.

I've lost track of the number of boats I've run where the membranes are mounted up on the engine room ceiling right over the engines. (Just like on the boat I currently run.) And the membranes seem to last just fine.
 
Dont forget that you will have to get to rhe membranes periodically... Say every three to four years. Also see you have filtered mounted over cables. Toy can lose a lot odd water changing filters. Just something you might want to consider.
 
Thanks for the advice everyone. This morning I ran the engines at 1000rpms for 1.5 hours. Engine room was heated up nicely. I took a laser temp tool with me. The front of the ER was cooler (70f) that the rear (92).

When I shut everything down and let it sit for about 45 minutes, I took some more readings. The front had warmed up to 82f and the rear around 100f. I am still a little concerned about the temps during the summer, but I will keep an eye on it. I just have to learn to duck when entering the ER. Time to read ( they sent me a thumb drive with all the instructions. I took it down and had it printed) and then off to the plumbing.:banghead:
 

Attachments

  • IMG_4084.jpg
    IMG_4084.jpg
    138.4 KB · Views: 70
  • IMG_4085.jpg
    IMG_4085.jpg
    62.3 KB · Views: 79

Latest posts

Back
Top Bottom