You are using an out of date browser. It may not display this or other websites correctly.
You should upgrade or use an alternative browser.
You should upgrade or use an alternative browser.
Replacing Headiner in a Mainship 400
- Thread starter Seevee
- Start date
The friendliest place on the web for anyone who enjoys boating.
If you have answers, please help by responding to the unanswered posts.
If you have answers, please help by responding to the unanswered posts.
porman
Guru
- Joined
- Aug 21, 2014
- Messages
- 1,042
- Location
- USA
- Vessel Name
- Beach Music II
- Vessel Make
- 2003 Mainship 430 Trawler
Here is a link to the Stella Blue website about the headliner. Maybe this will help.
Headliner Reinstallation
Headliner Reinstallation
Here is a link to the Stella Blue website about the headliner. Maybe this will help.
Headliner Reinstallation
Porman,
Thanks, have that page, and it's good. Kinda wondering what one would charge to do it.
garmstro55
Senior Member
Seevee,
Mine certainly needs to be replaced as well. I saw how it was done on Stella Blue and it seems to be a 1 day DIY project, but my biggest worry is breaking the plastic capture strips that the vinyl is tucked into. After 15 years or so the plastic might be brittle and I wouldn't know where to source the strips.
Let us know how it goes if you attempt it.
Dougcole
Guru
Yeah, my headliner look like that too. I'm watching this thread with interest.
I saw the same page from Stella Blue, I think the hardest part would be working around the lights. Maybe use the old piece of headliner as a template?
The bigger issue for us is the hull liner in the Fwd cabin which is de-laminating. My canvas guy looked at it last week and said it would be a $4,000 job to replace it.
Comodave
Moderator Emeritus
- Joined
- Jul 2, 2015
- Messages
- 21,284
- Location
- Au Gres, MI
- Vessel Name
- Black Dog
- Vessel Make
- Formula 41PC
What do you mean by delaminating? Is the headliner glued to the hull? If so I have used liquid contact cement and a syringe to inject it behind the headliner. Inject the cement, push the headliner against the hull to spread it on the hull and headliner, let the headliner relax away from the hull and let it dry. Then push the headliner back to contact the hull and firmly push it in contact. Worked well for me.
sailorskip
Veteran Member
The bigger issue for us is the hull liner in the Fwd cabin which is de-laminating. My canvas guy looked at it last week and said it would be a $4,000 job to replace it.[/QUOTE]
My cushion guy replaced the hull liner with a headliner carpet material. He removed the top layer of the vinyl (thin, colored part) and glued the headliner material on with contact cement - sprayed with a compressor. Job was done in a day.
Looks good. Total cost was approx. $1100.
Skip
Tampa
My cushion guy replaced the hull liner with a headliner carpet material. He removed the top layer of the vinyl (thin, colored part) and glued the headliner material on with contact cement - sprayed with a compressor. Job was done in a day.
Looks good. Total cost was approx. $1100.
Skip
Tampa
Mainship Headliner Track
Here's a supplier of the track MS used for their late model year headliners.
It looks like they also sell an "rocker" type installation tool.
https://acousticalwallfabric.com/tw...r-foot-1-50-price-per-five-foot-segment-7-50/
Here's a supplier of the track MS used for their late model year headliners.
It looks like they also sell an "rocker" type installation tool.
https://acousticalwallfabric.com/tw...r-foot-1-50-price-per-five-foot-segment-7-50/
Dougcole
Guru
The bigger issue for us is the hull liner in the Fwd cabin which is de-laminating. My canvas guy looked at it last week and said it would be a $4,000 job to replace it.
My cushion guy replaced the hull liner with a headliner carpet material. He removed the top layer of the vinyl (thin, colored part) and glued the headliner material on with contact cement - sprayed with a compressor. Job was done in a day.
Looks good. Total cost was approx. $1100.
Skip
Tampa[/QUOTE]
I now remember your post on this a few months back, it does look good. Thanks for the reminder.
Bullnuke675
Member
On our 2000 390T, the headliner was sagging/falling in both the salon (bad) and forward cabin (barely noticeable). Pulled it down from the salon; came right off and left no residue. There is some well-adhered residual glue, which lays down tight and is pretty smooth. After examining options, will tape it off, put on 2 coats of Kilz and then 1 coat of light beige satin paint. Simple, low maintenance, easy cleanup/touch up, and brightens up the interior. Lighting and speakers require no mods. Don't believe the old headliner provided much sound dampening.
Dougcole
Guru
On our 2000 390T, the headliner was sagging/falling in both the salon (bad) and forward cabin (barely noticeable). Pulled it down from the salon; came right off and left no residue. There is some well-adhered residual glue, which lays down tight and is pretty smooth. After examining options, will tape it off, put on 2 coats of Kilz and then 1 coat of light beige satin paint. Simple, low maintenance, easy cleanup/touch up, and brightens up the interior. Lighting and speakers require no mods. Don't believe the old headliner provided much sound dampening.
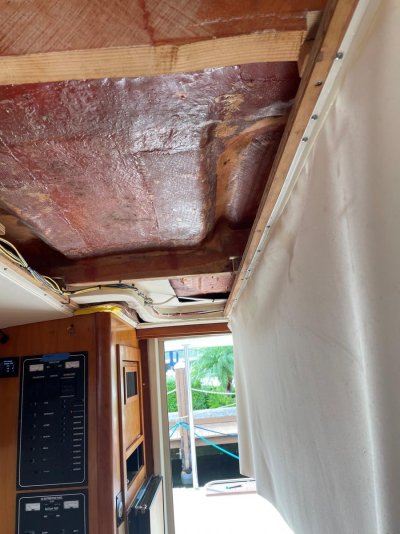
Thanks, but the headliner in the 390 is completely different than the headliner in a 400. The 390 was glued up, the 400 is held up with tracks. It's rough behind the headliner of a 400.
Bullnuke675
Member
Understand. Good luck with your fix. R/
garmstro55
Senior Member
Here's a supplier of the track MS used for their late model year headliners.
It looks like they also sell an "rocker" type installation tool.
https://acousticalwallfabric.com/tw...r-foot-1-50-price-per-five-foot-segment-7-50/
Bacchus, I thought I was pretty good at Googling to find stuff like this but you put me to shame! But $117 for the roller tool??
Thanks for the find!
Last edited:
Ouch! I missed the price of tools completely.Bacchus, I thought I was pretty good at Googling to find stuff like this but you put me to shame! But $117 for the roller tool??
Thanks for the find!
I saw the "tucking tool" but even that is $75 !
The puc provides a decent idea to make your own tool from a piece of thin stiff plastic, plexiglass, etc... just smooth the edges
Dougcole
Guru
Yeah, I looked at that too. The verbiage says the tool is "under $30" but it is priced at $75 for a rounded edge putty knife. I wonder if Yanmar makes it for them? That's about how they price stuff.
Newtrawlerowner
Senior Member
- Joined
- Nov 16, 2019
- Messages
- 326
- Location
- USA
- Vessel Name
- PartnerShip II
- Vessel Make
- 2003 Mainship 400
All,
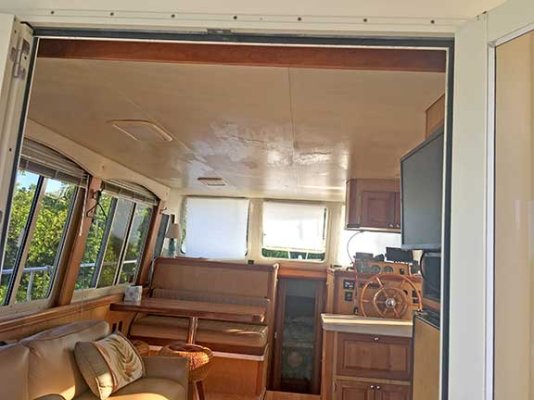
I'm looking for experiences in replacing a headliner, specifically in a Mainship 400, which is probably similar to a lot of other boats.
Can anyone let me know what the costs were and the time frame?
Did anyone do this themselves?
Thanks
I will be doing my headliner myself. I looked at the pictures mentioned and it looks pretty easy, although that depends on how you look at these types of projects.
This type of headliner is refereed to as WisperWall. The material is held up by a plastic track that's screwed in place. The material is pushed into this track to hold it up.
Here is a video I found from Regal Boats.
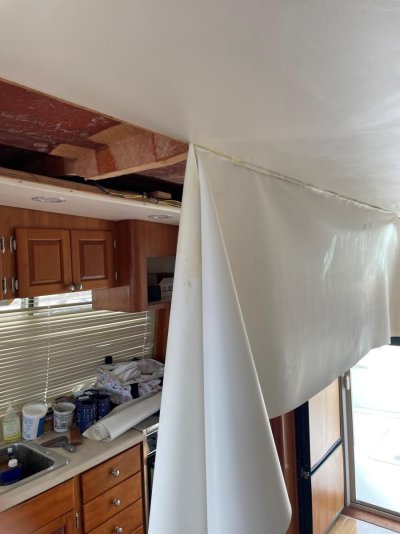
I have removed some of my headliner already so I'm committed. I pulled down the old material above the sink, removed the track and pulled out all of the old staples. If you plan on stapling the new material up, be sure to use stainless staples.
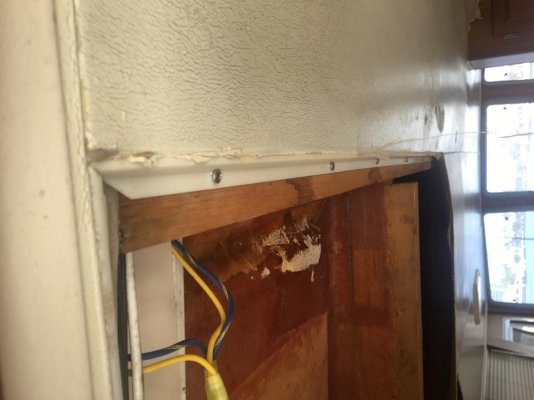
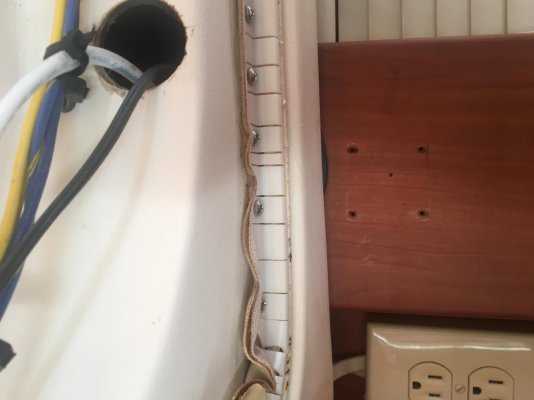
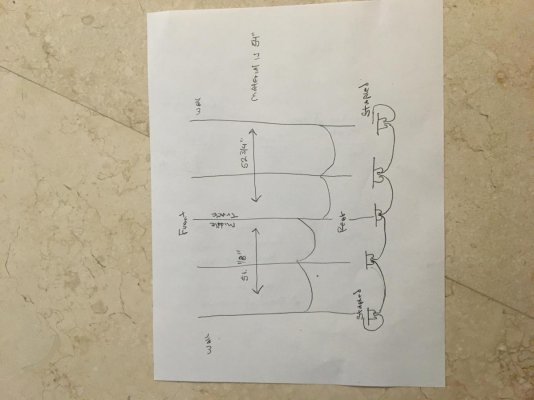
There are 4 tracks that run the length of the boat. When the headliner was installed they stapled the headliner to the outside 1st. Then installed the strip that it gets pushed into. The material is inserted it into the middle track, then the second track, then the track screwed up after the edge was stapled. The middle track will also hold the piece on the other side of the boat.
Standard headliner width is 54" wide and the track width from the side above the windows to the middle is about 52" wide. The longest overall length is 15' so you'll need 30 yards of material to do the main salon. The original material is NOT foam backed but has a type of very thin cloth.
I found 2 places that sell material similar to what is currently there. marinevinylfabric.com and rochfordsupply.com. Marinevinyl has a very impressive description of their material having both UV and mildew resistance and is good for outdoor use AND the price is right. Plus you can order a sample pack for FREE. I purchased 1 yard of white material from marinevinyl.com as a test piece. The piece I got has no backing.
As soon as I install the sample I will take multiple pictures of the headliner removed, the tracks and what it looks like installed. I expect this to be a 2 person job and take about 1-1.5 hours per side after all old material is removed. I expect removal to take at least as long.
Newtrawlerowner
Senior Member
- Joined
- Nov 16, 2019
- Messages
- 326
- Location
- USA
- Vessel Name
- PartnerShip II
- Vessel Make
- 2003 Mainship 400
Upon closer inspection the sample I bought does have a cloth backing.I will be doing my headliner myself. I looked at the pictures mentioned and it looks pretty easy, although that depends on how you look at these types of projects.
This type of headliner is refereed to as WisperWall. The material is held up by a plastic track that's screwed in place. The material is pushed into this track to hold it up.
Here is a video I found from Regal Boats.
The video even shows several tools made from old putty knives.
I have removed some of my headliner already so I'm committed. I pulled down the old material above the sink, removed the track and pulled out all of the old staples. If you plan on stapling the new material up, be sure to use stainless staples.
There are 4 tracks that run the length of the boat. When the headliner was installed they stapled the headliner to the outside 1st. Then installed the strip that it gets pushed into. The material is inserted it into the middle track, then the second track, then the track screwed up after the edge was stapled. The middle track will also hold the piece on the other side of the boat.
Standard headliner width is 54" wide and the track width from the side above the windows to the middle is about 52" wide. The longest overall length is 15' so you'll need 30 yards of material to do the main salon. The original material is NOT foam backed but has a type of very thin cloth.
I found 2 places that sell material similar to what is currently there. marinevinylfabric.com and rochfordsupply.com. Marinevinyl has a very impressive description of their material having both UV and mildew resistance and is good for outdoor use AND the price is right. Plus you can order a sample pack for FREE. I purchased 1 yard of white material from marinevinyl.com as a test piece. The piece I got has no backing.
As soon as I install the sample I will take multiple pictures of the headliner removed, the tracks and what it looks like installed. I expect this to be a 2 person job and take about 1-1.5 hours per side after all old material is removed. I expect removal to take at least as long.
garmstro55
Senior Member
Upon closer inspection the sample I bought does have a cloth backing.
I assume you probably have the same ceiling vinyl as me with my 2004 MS400, what color did you end up ordering to get the best match to the current material? (Or did you get creative and order something else?)
Gary
Newtrawlerowner
Senior Member
- Joined
- Nov 16, 2019
- Messages
- 326
- Location
- USA
- Vessel Name
- PartnerShip II
- Vessel Make
- 2003 Mainship 400
I went with white. Rather than try and match, I'd rather have a brighter interior.I assume you probably have the same ceiling vinyl as me with my 2004 MS400, what color did you end up ordering to get the best match to the current material? (Or did you get creative and order something else?)
Gary
Skipjack99
Member
Dean Russell
Member
An interesting video on the subject by the Nordhavn expert.
https://youtu.be/DNMxOhv0ly8
https://youtu.be/DNMxOhv0ly8
backinblue
Guru
- Joined
- Jan 29, 2019
- Messages
- 3,937
- Location
- USA
- Vessel Name
- Blue Moon
- Vessel Make
- Mainship Pilot 355
All,
I'm looking for experiences in replacing a headliner, specifically in a Mainship 400, which is probably similar to a lot of other boats.
Can anyone let me know what the costs were and the time frame?
Did anyone do this themselves?
Thanks
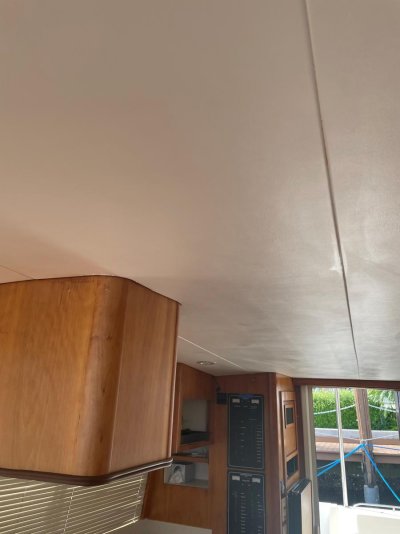
Why are you replacing? It's hard to tell from the picture but doesn't look bad.
backinblue
Guru
- Joined
- Jan 29, 2019
- Messages
- 3,937
- Location
- USA
- Vessel Name
- Blue Moon
- Vessel Make
- Mainship Pilot 355
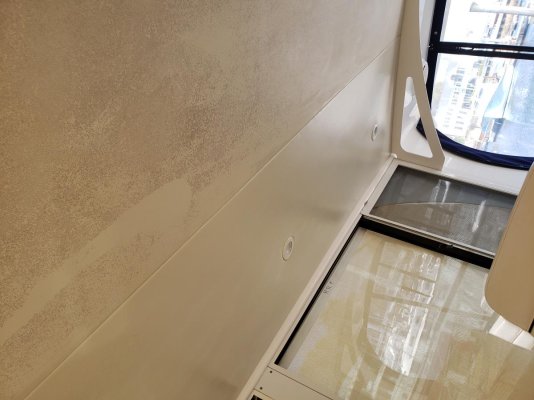
I'm not sure of the reasons that some of you here need to replace the headliner, but if it's only for cosmetic reasons, I can share my experience. My Mainship Pilot has a smooth cream-colored (vinyl?) headliner. As purchased used, it had terrible mold stains that I could not remove no matter what I tried. I remembered a product I used to restore some leather furniture and it worked fantastic. Looks like brand new material. It's available in many colors from https://www.wood-n-stuff.com/. Print the color chart for a color match. Mine was "cream". I wasn't sure it would work on something other than leather. Easy to apply and I admire it now every time I look up. A couple before/after pics attached part way through the process.
Attachments

Newtrawlerowner
Senior Member
- Joined
- Nov 16, 2019
- Messages
- 326
- Location
- USA
- Vessel Name
- PartnerShip II
- Vessel Make
- 2003 Mainship 400
MS 400 Headliner Update
I also included a drawing of how the material is installed at the factory. The outside edges were stapled, then the track installed. Otherwise the outside edge of the track will be visible after installation. See my drawing. They did the same at the front and rear of the boat using a piece about 1" wide. As I mentioned earlier I expect the whole job to take about 3 days between removing and reinstalling the lights, taking all outside tracks down, removing the old staples, stapling the new material to the outside edges, reinstall the tracks then push the new material into the tracks. A lot of patience will get the seams wrinkle free and looking like new. Also the material I used is mold and mildew resistant and is made for a marine environment, according to their website. The overall length is 15 feet so you'll need 10 yards of material. About $70 plus shipping. I won't be buying this for about 1 month so I'll see how it looks after 30 days and then decide to buy.
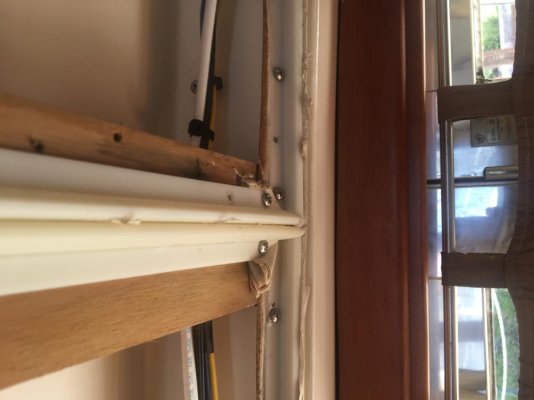
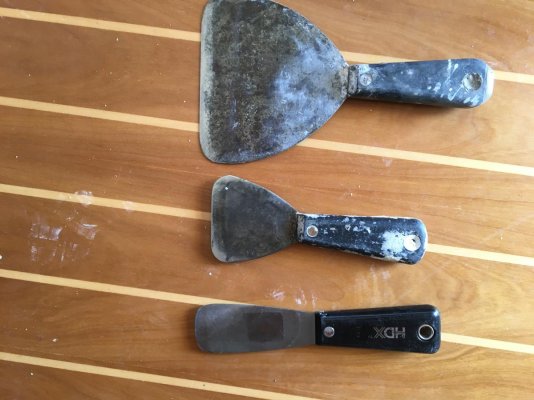
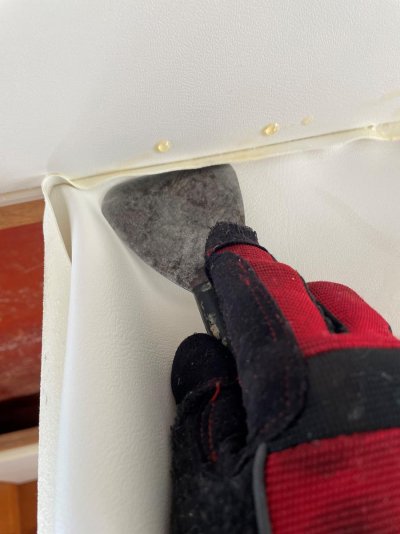
I removed a portion of the headliner and installed some vinyl material I purchased from marinevinyl.com as a trial to see what I was in for. My headliner absolutely needed replacing so it was this or some other idea. I went with white "Flexa" material. It was difficult to start inserting it on each of the tracks, but here's what I figured out. 1st step after removing the old headliner is to run your tool into the track and run it the length of the boat. That gets any old headliner material out and helps with getting the new materials started. Next spray soapy water solution on the track, the backside of the material and the outside. Start pushing the material into the track. You may notice some of the vinyl comes back out as you remove your tool. No worries. Once you have done a few more feet, go back with your tool and push it back in again. It takes a few tries, but it does work. I included a few more pictures as well as the section I did as a test. I spent about 30 minutes getting this piece up AFTER removing the old material, spraying the track, and getting it started. The materials I used is pretty stretchy in both length and width, so the tighter its installed the better it will look. Also after it sat a day, I went back and cleaned up a few wrinkles in the materiel at the seems by using the tool and "rolling" the tool into the seam. I also included a picture of the tools I made from old putty knifes. The small and middle size tool worked the best.I went with white. Rather than try and match, I'd rather have a brighter interior.
I also included a drawing of how the material is installed at the factory. The outside edges were stapled, then the track installed. Otherwise the outside edge of the track will be visible after installation. See my drawing. They did the same at the front and rear of the boat using a piece about 1" wide. As I mentioned earlier I expect the whole job to take about 3 days between removing and reinstalling the lights, taking all outside tracks down, removing the old staples, stapling the new material to the outside edges, reinstall the tracks then push the new material into the tracks. A lot of patience will get the seams wrinkle free and looking like new. Also the material I used is mold and mildew resistant and is made for a marine environment, according to their website. The overall length is 15 feet so you'll need 10 yards of material. About $70 plus shipping. I won't be buying this for about 1 month so I'll see how it looks after 30 days and then decide to buy.
Attachments
Newtrawlerowner
Senior Member
- Joined
- Nov 16, 2019
- Messages
- 326
- Location
- USA
- Vessel Name
- PartnerShip II
- Vessel Make
- 2003 Mainship 400
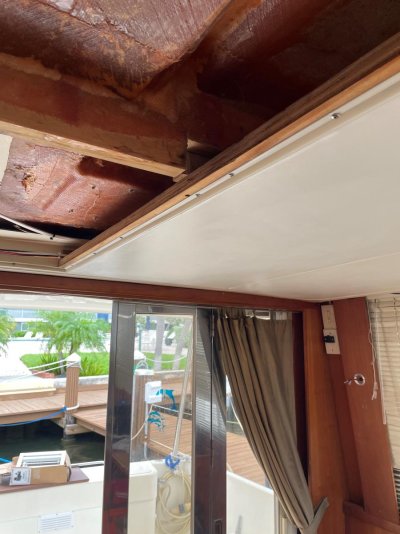
BTW the reason I decided to replace rather than restore as some have done is there was a large hole from the material shrinking. Plus the material was in such poor condition it tore quite easily. Some have posted about trying to "restore" the finish. I was not able to do that in my case. The other thing I noticed as how sticky the old material is. I placed a box on the shelf in the main berth that rubbed against the material. When I pulled the box off the shelf some the the material came off. I plan on replacing that as well.
garmstro55
Senior Member
BTW the reason I decided to replace rather than restore as some have done is there was a large hole from the material shrinking. Plus the material was in such poor condition it tore quite easily. Some have posted about trying to "restore" the finish. I was not able to do that in my case. The other thing I noticed as how sticky the old material is. I placed a box on the shelf in the main berth that rubbed against the material. When I pulled the box off the shelf some the the material came off. I plan on replacing that as well.
Thanks for being the pioneer on this project. Mine badly needs to be replaced but it was a project that I wasn't looking forward to doing. Based on the comments and contributions on this thread, I feel it is very do-able.
Gary
How to Clean Vinyl Headliner?
I believe I have the Whisperwall vinyl headliner. It gets tucked into the plastic tracks as described in this thread. Any recommendations on what to use for a general cleaning? There are no spots, just a film of dirt from being transported. Thanks!
I believe I have the Whisperwall vinyl headliner. It gets tucked into the plastic tracks as described in this thread. Any recommendations on what to use for a general cleaning? There are no spots, just a film of dirt from being transported. Thanks!
backinblue
Guru
- Joined
- Jan 29, 2019
- Messages
- 3,937
- Location
- USA
- Vessel Name
- Blue Moon
- Vessel Make
- Mainship Pilot 355
I believe I have the Whisperwall vinyl headliner. It gets tucked into the plastic tracks as described in this thread. Any recommendations on what to use for a general cleaning? There are no spots, just a film of dirt from being transported. Thanks!
I like to use 303 Protectant for cleaning and protecting everything on my boat that is vinyl, rubber, plastic, etc.
https://www.amazon.com/gp/product/B000XBCURW/ref=ppx_yo_dt_b_search_asin_title?ie=UTF8&psc=1
I recently discovered Z Cleaner as a good general cleaner if you think you need more of a heavier-duty cleaner. You can always use the 303 afterward.
https://ztuffproducts.com/pages/z-cleaner
Last edited:
Newtrawlerowner
Senior Member
- Joined
- Nov 16, 2019
- Messages
- 326
- Location
- USA
- Vessel Name
- PartnerShip II
- Vessel Make
- 2003 Mainship 400
All,
I'm looking for experiences in replacing a headliner, specifically in a Mainship 400, which is probably similar to a lot of other boats.
Can anyone let me know what the costs were and the time frame?
Did anyone do this themselves?
Thanks
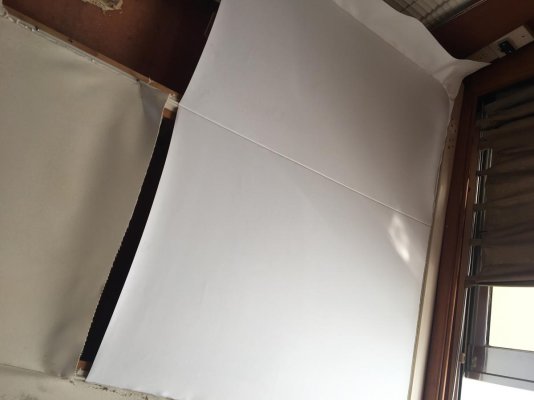
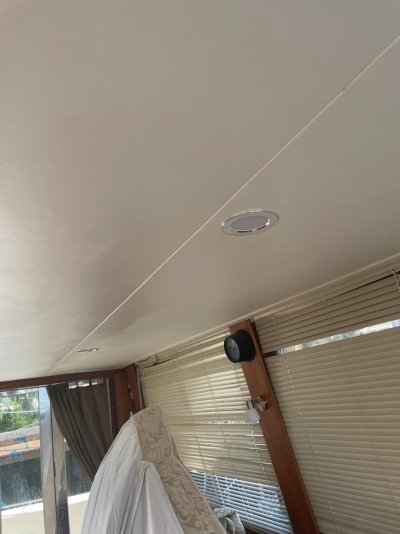
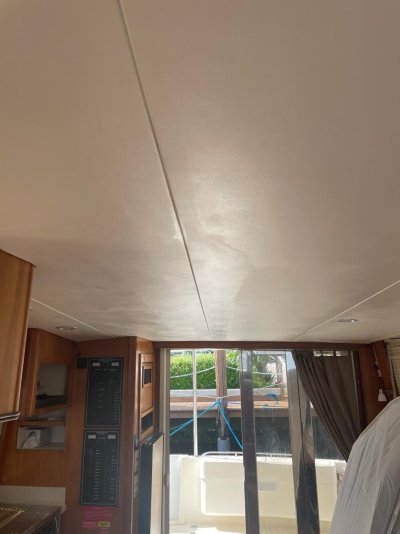
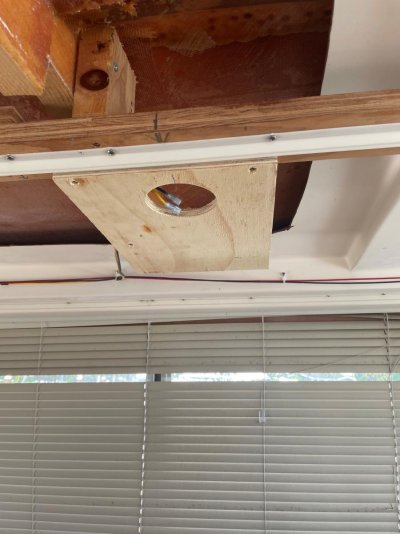
I finally finished installing a new headliner. I did the install by myself but it would have been much easier if I had a second person holding the material as I advanced. I found out the hard way to install each run as a separate piece. The material is just too heavy. I also found the most difficult part was going around the corners by the galley. I should have used something like a butter knife. I punctured the material as I pushed it into the track going around the corners. Also the original installers applied masking tape over the edge of the track as it went around the corner bends to soften the edge where they had to cut slits in the track. Otherwise those cuts in the track show through the vinyl. Total time to install once I got a going was about 45 minutes per run. That included trimming the excess and pushing that into the track as well. I also installed recessed puck lights as the pictures show. Much cleaner than using the old fluorescent lights. I was able to make light panels to snap the lights into using 3/8" plywood and shimming them to make the face of the plywood to be even with the bottom edge of the tracks. I also used a mixture of soap and bleach as a lubricant to spray on track and vinyl.
Attachments
Similar threads
- Replies
- 3
- Views
- 673
- Replies
- 16
- Views
- 1K