Top layer paint removal, how?

The friendliest place on the web for anyone who enjoys boating.
If you have answers, please help by responding to the unanswered posts.

LeoKa

Guru
Joined
Apr 15, 2017
Messages
1,150
Location
USA
Vessel Name
Ironsides
Vessel Make
54' Bruce Roberts steel sailboat hull, coastal LRC, 220HP CAT 3306.
I want to paint the topside next month, when the boat is pulled out at the yard for bottom paint/zincs/etc.
The top layer (white) on the upper side is peeling off heavily. The primer underneath the white, is a black paint and very solid. I’d like to keep the primer unharmed. What is the best way to remove the top layer?
I took down some of it with high pressure wash, but it is very slow and not all sections can be removed. See photo.
This morning I tried a heat gun, but the top paint did not even get soft.
So, what method any of you would recommend? I will have few days on hard.
IMG_0472.jpg
 
I'd try sanding it and see how readily it comes off. The color change should make it easy to see how far to sand.
 
I'd try sanding it and see how readily it comes off. The color change should make it easy to see how far to sand.


I will not have the time and equipment to sand. Plus, I want the black to stay intact.
 
I will not have the time and equipment to sand. Plus, I want the black to stay intact.


Time and equipment is the issue. Keeping the black intact with an orbital sander would be easy. Just sand the white areas and when it turns black, that area is done.
 
I would probably sand it off. I suspect that you will need to prime the area first before painting anyway. I would ask the paint manufacturer and follow their instructions to the letter. That is likely the reason for the paint peeling now, maybe wrong primer or improper application. Good luck.
 
Time and equipment is the issue. Keeping the black intact with an orbital sander would be easy. Just sand the white areas and when it turns black, that area is done.


You have a point.
Is there a sander you would recommend?
 
I would probably sand it off. I suspect that you will need to prime the area first before painting anyway. I would ask the paint manufacturer and follow their instructions to the letter. That is likely the reason for the paint peeling now, maybe wrong primer or improper application. Good luck.


Yes, something is not right with this paint job. The PO did hire out paint works, so I cannot tell, how was it done and by whom?
What do you think, if I continue pressure washing the paint, till no more peels off and sand the rest of it?
 
Second that.

The peeling areas have an adhesion problem while the paint my be well stuck in other areas. If you can feather the edges of the hard to get off white you might get an acceptable look without removing everything.
 
If that works, why not. I use Ridgid sanders. They have a lifetime warranty if you register it online within 90 days of the purchase. I had gone through several DA sanders before I learned about the lifetime warranty.
 
Improper preparation and or incompatible paint.
My question is why black.

Talk to the yard's paint shop to get their ideas.
Consider sanding down to the black then rough up the black just a little bit prior to painting it.

Is it going to sprayed or rolled?

In closing may I say, I dont know squat about painting or paints. Seek a professional for the proper advice and recommendation.
 
Last edited:
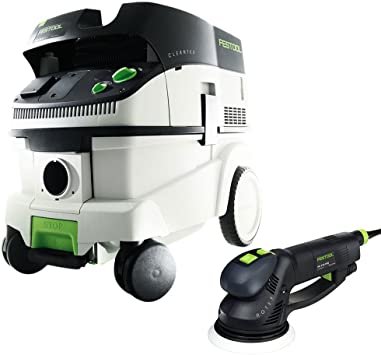
You don't mention the type of paint used so I assume your don't know. If you did, there may be a paint remover that will attack only the finish paint. For instance alcohol will remove latex and leave oil base, or International's paint remover will remove oil based piant and leave epoxy or gelcoat. If you are going to recoat you will have to sand the black anyway so sanding off the topcoat won't necessarily hurt. As to the type of equipment to use, if I were taking on a huge job, Festool, Fein, or Bosch PREMIUM 6" random orbital sanders with 3M Cubitron discs. Most yards will insist that you have dust collection equipment as well.
 
Improper preparation and or incompatible paint.
My question is why black.

Talk to the yard's paint shop to get their ideas.
Consider sanding down to the black then rough up the black just a little bit prior to painting it.

Is it going to sprayed or rolled?

In closing may I say, I dont know squat about painting or paints. Seek a professional for the proper advice and recommendation.


Why black? I have no idea. Some of the industrial primers are black. This is a steel boat, and lot of things are from the fishermen’s yards.

It will be rolled and brush.

I already have the new paint. Top coat only.
 
You don't mention the type of paint used so I assume your don't know. If you did, there may be a paint remover that will attack only the finish paint. For instance alcohol will remove latex and leave oil base, or International's paint remover will remove oil based piant and leave epoxy or gelcoat. If you are going to recoat you will have to sand the black anyway so sanding off the topcoat won't necessarily hurt. As to the type of equipment to use, if I were taking on a huge job, Festool, Fein, or Bosch PREMIUM 6" random orbital sanders with 3M Cubitron discs. Most yards will insist that you have dust collection equipment as well.


No, I don’t know the history of the paint.

I will do orbital sanding. Take down what I can and paint. I do not want make this too complicated.

I am looking at Makita 7 in corded disk sander. Home Depot has it for $211
 
No, I don’t know the history of the paint.

I will do orbital sanding. Take down what I can and paint. I do not want make this too complicated.

I am looking at Makita 7 in corded disk sander. Home Depot has it for $211


If it's this sander, it looks like a rotary sander, not an orbital. That'll be much harder to use and more aggressive at removing material.


https://www.homedepot.com/p/Makita-...isc-Sander-with-Backing-Pad-GV7000C/203162027


It's smaller, but I've sanded quite a bit of wood and bottom paint with one of these and haven't killed it yet: https://www.homedepot.com/p/Makita-...Orbital-Sander-with-Dust-Bag-BO5041/205671780


A 6 inch orbital would probably be a good option for that area.
 
With a big sanding job like that it's worth picking up a top notch sander.

I'd recommend a Festool Rotex RO-150. It will will do the job in half the time of most others. It has 2 modes of operation; rotary and random orbital. You can start with rotary until you start to see the primer then flick a switch and finish it off with RO.
It is a solid gear driven sander that will last a lifetime.
Perfect for stripping your bottom as well.
 
It is VERY simple, you get a rubber sanding block, and a box of 320 grit sand paper. Start sanding the entire boat until the primer is starting to show through. Total cost less than $50.00.
 
I would not undertake that job with hand sanding, way to much for my shoulders. Get a good DA sander, you don’t need the absolute best one. I prefer a 5” so I can get into tighter areas. I use a multi tool for the corners. I try to limit the hand sanding to what is absolutely necessary. Get a revealer dust so you can see the high and low spots. We painted our boat a couple of years ago, it was the 3rd boat we did a complete paint job on. The prep is key on how it will come out. You will spend 80+% of the time in prep. The actual painting is easy and relatively fast. Good luck.
 
With a big sanding job like that it's worth picking up a top notch sander.

I'd recommend a Festool Rotex RO-150. It will will do the job in half the time of most others. It has 2 modes of operation; rotary and random orbital. You can start with rotary until you start to see the primer then flick a switch and finish it off with RO.
It is a solid gear driven sander that will last a lifetime.
Perfect for stripping your bottom as well.


Sounds good, but I don’t want to spend $650 bucks on a sander. Although not cheap, but I’ve ordered the Bosch GET75-6N sander. I hope it will serve me well. The price $284.00
 
Sounds good, but I don’t want to spend $650 bucks on a sander. Although not cheap, but I’ve ordered the Bosch GET75-6N sander. I hope it will serve me well. The price $284.00

Those are well liked, so I expect it'll do the job well.
 
Sounds good, but I don’t want to spend $650 bucks on a sander. Although not cheap, but I’ve ordered the Bosch GET75-6N sander. I hope it will serve me well. The price $284.00

That is a good sander. I would start with nothing less than #80 paper. It's not a car body. Let the machine do the work.

Rob
 
That is a good sander. I would start with nothing less than #80 paper. It's not a car body. Let the machine do the work.

Rob

I would not go near 80 grit on the paint job. I would start around 220 and see how it goes. It may come off easily since it is falling off in places. Then you don’t have a couple hundred hours working your way back up to 320 which is where you want to be at a minimum in order to paint. From 80 grit you would need to work through 120 and maybe something between 120 and 220. May be able to go from 120 to 220 depending on the paint. But you still need to do 220 and then 320, and maybe 400 depending on the paint and the quality of finish you want.
 
I would not go near 80 grit on the paint job. I would start around 220 and see how it goes. It may come off easily since it is falling off in places. Then you don’t have a couple hundred hours working your way back up to 320 which is where you want to be at a minimum in order to paint. From 80 grit you would need to work through 120 and maybe something between 120 and 220. May be able to go from 120 to 220 depending on the paint. But you still need to do 220 and then 320, and maybe 400 depending on the paint and the quality of finish you want.

I think the biggest mistake people make is leaning on the machine. That is what leaves deep whorls and scratches. I got the impression this was wood which is very forgiving if worked with a light hand.

Maybe #80 is too rough but from the description of flaking paint I think the #320 would take an eternity and use a huge amount of paper.

My opinion. YMMV

Rob
 
I did not say use 320. I said try 220 and work to 320. Generally you start with one grit and work your way up through the various grits. You need to het to at least 320 to get a good finish. Starting with 80 grit would definitely take it off, probably much more than he wants to take off. But then working all the way up to 320 would take a looong time. Why not try starting with 220 and see how it goes. You can always go to a more aggressive grit but if you start with a really aggressive grit and find out it is too aggressive you are stuck with the results. In painting 3 complete boats I have found that out.
 
OP, you've got an older steel boat. You're going to roll and brush. I'm thinking a work boat finish rather than a glossy yacht finish. If I'm right about the work boat finish based on decades of maintaining steel boats I'd be stopping at 180, maybe 220 grit. Anything finer is for a glossy yacht finish.

Choose a small area, perfect your technique and see if you're happy with the results.

When you buy your sander get one with dust collection and connect it to a good vacuum. You'll cut your daily clean up by a lot.

Painting in the PNW in winter is a challenge. Following the paint manufacturer's specs for surface prep, primer, surface moisture, humidity and temperature. If you don't you risk it peeling off again.
 
It's a steel boat, it doesn't look like it's been faired, so it's lumpy. You're not going to be able to sand the topcoat off the low spots without, at the same time, sanding into the primer, or more likely sanding through the primer on the high spots.
Start around 80 grit, stop around 180-220 grit.
N
 
If you hook the sander to a vacuum, try to find the mesh sanding disks (looks like drywall screen). They work great for dust collection and they're harder to clog as well. The good ones last quite a while.
 
It all depends on how perfect you want it to look. Feathering ans using a little filler may be as good as a metal boay gets as the underlying fairness of the hull sides will show up at low sun angle no matter what you do..

painters talk of paint jobs in distance terms. A 6" paint job looks like a mirror from 6" A 3' job looks good from that distance but will show imperfections at closer distance.

Regardless they all will show the unfairness of the underlying surface.
 
I have some related concerns about prepping external wooden window/door frames and rub rails where the paint is flaking off—it’s also lifted off in places where I’d used masking tape, which makes me suspicious of the paint/primer compatibility. Or maybe it was too humid when he over-coated? Whatever, there are spots where bare wood is showing and places where just the top coat has peeled off revealing what appears to be sound layers beneath. I’d like to finish by going over everything with a uniform topcoat.

I have access to a Festool, which will cut down on the dust. Thinking I could remove most of the topcoat and get down to properly sanded primer. I have no idea what the PO used for either primer or top coat.

1) what’s the right way to approach this?

2) other than a two-part epoxy, what kind/brand of paint should I be looking at for longest life and UV resistance.

3) gloss, semi-gloss or other?

4) is the correct order to: sand, prime, caulk and then top-coat? Really want to know where the caulking stage fits in.

Thanks!
 

Attachments

  • EB4534CB-BDD1-49BC-AFE6-2EEA16BC927F.jpeg
    EB4534CB-BDD1-49BC-AFE6-2EEA16BC927F.jpeg
    24.5 KB · Views: 103
I have some related concerns about prepping external wooden window/door frames and rub rails where the paint is flaking off—it’s also lifted off in places where I’d used masking tape, which makes me suspicious of the paint/primer compatibility. Or maybe it was too humid when he over-coated? Whatever, there are spots where bare wood is showing and places where just the top coat has peeled off revealing what appears to be sound layers beneath. I’d like to finish by going over everything with a uniform topcoat.

I have access to a Festool, which will cut down on the dust. Thinking I could remove most of the topcoat and get down to properly sanded primer. I have no idea what the PO used for either primer or top coat.

1) what’s the right way to approach this?

2) other than a two-part epoxy, what kind/brand of paint should I be looking at for longest life and UV resistance.

3) gloss, semi-gloss or other?

4) is the correct order to: sand, prime, caulk and then top-coat? Really want to know where the caulking stage fits in.

Thanks!


3: That's just a matter of preference. Use what you prefer the look of.


4: That seems like a good order to me, provided you use a paintable caulk. It should seal everything up well, yet make the caulk less visible.
 
Just be aware that with narrow pieces like your rails, window and door trim that power sanders are only going to be able to do a fraction of the work and with them you have to be very careful of edges and profile. So be prepared for a lot of hand sanding.
It's likely that the PO just used an enamel so you're stuck with a single part paint. Pick Brightsides or something like that.

I have some related concerns about prepping external wooden window/door frames and rub rails where the paint is flaking off—it’s also lifted off in places where I’d used masking tape, which makes me suspicious of the paint/primer compatibility. Or maybe it was too humid when he over-coated? Whatever, there are spots where bare wood is showing and places where just the top coat has peeled off revealing what appears to be sound layers beneath. I’d like to finish by going over everything with a uniform topcoat.

I have access to a Festool, which will cut down on the dust. Thinking I could remove most of the topcoat and get down to properly sanded primer. I have no idea what the PO used for either primer or top coat.

1) what’s the right way to approach this?

2) other than a two-part epoxy, what kind/brand of paint should I be looking at for longest life and UV resistance.

3) gloss, semi-gloss or other?

4) is the correct order to: sand, prime, caulk and then top-coat? Really want to know where the caulking stage fits in.

Thanks!
 
Back
Top Bottom