Diesel tank leak

The friendliest place on the web for anyone who enjoys boating.
If you have answers, please help by responding to the unanswered posts.
Thanks!
All you input has been very helpful.
I’m kinda worried about the thickness of splash zone
It looks like it may be hard to work to a quarter inch.
I was thinking epoxy paint? Not sure, may get some splash zone to try it.
 
Great posts Glauko and Marco !

One thing concerns me is the surface preparation of the rusty bottom. How does one garrantee a good bond between the coating and the old surface?

From industrial practice I would want to abrasive blast the surface, but this is impractical (dry ice blasting?).

Also, I have seen other coatings (non epoxy) offered for, say, aircraft tanks. Are you using epoxy becasue it is readily available?

My fear is that the fuel gets behind the epoxy.

Nick
 
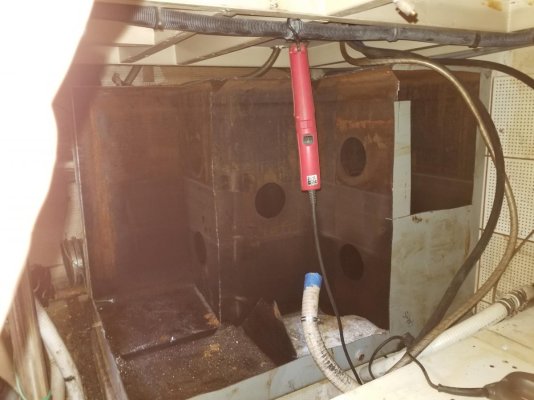
Been there, done that. 4 years and $12k ago. Our steel tanks looked like that, with the fiberglass sheath and inspection port. Sawed them out. Had new tanks made to a smaller capacity. Slipped 'em right in...
 
One thing concerns me is the surface preparation of the rusty bottom. How does one garrantee a good bond between the coating and the old surface?

My fear is that the fuel gets behind the epoxy.

My concern as well. The tank was cleaned with a pressure washer using a citrus soap and then rinsed. I couldn't detect any residue from the diesel and I really looked close. What was odd at first was that the tank wasn't allowed to dry out. Splash Zone is made to be used underwater (even mixed underwater) and adheres to a wet surface. If there was a speck of diesel left and the epoxy didn't bond completely it would still seal. It's one of those things that can be agonized over in theory but is safe and sound in practice.

One of the "tricks" that we came up with concerned keeping the fuel line exit fitting clean. My guy was wadding up a paper towel just right in order to goop around the fitting but not get any into the fitting. I just happened to have some wool daubers on board. Put one in the fitting, goop up the area, and gently pull it out with a twist. Took 10 seconds for a perfect finish.

 
It is available, but it’s consistency may be easier to apply, like with a brush and roller. Not sure which way to go. I am going to blast the tank with crushed glass to clean it and rough it up for whichever coating I choose.
Thanks for your input. All are great things to ponder!
 
Wow -

Glass blasting sounds like an effective process, but how do you keep glass from getting all over the boat and especially into the engine?

Have you considered dry ice blasting? I have no experience with this but it looks interesting.

One comment: after blasting a steel surface, the coating should be applied as quickly as possible - preferably within hours. Steel blasted to white metal develops mild rust extremely quickly.

Nick
 
To the OP:
I'm curious but must have missed it - what is the tank material?
 
I am seeing some good inside fuel tank pictures, but how do you work through an 8" opening, guessing at the inspection hatch size.
 
Re diesel leak

I have a 34 foot trawler and my leak was caused by non diesel pvc pipe going to the top of the diesel tank, also the valves weren't set right in the aft area. Make sure they are all open, turn all valves counter clockwise (wheel valves and levers) this stopped mine from leaking out of the hole in the side of the boat. (the vent)
 
I am seeing some good inside fuel tank pictures, but how do you work through an 8" opening, guessing at the inspection hatch size.

It's all done by feel. I had an LED light with a magnet on it that could be stuck to the top inside of the tank. It was a giveaway item from Harbor Freight, but I'm sure the also sell them. Apply, pull your arm out and look, get more goop, and back to work. It doesn't need to be beautiful and hopefully it will be the only and last time you look into your tank.
 
I've had great luck on two boats, a car, and a MC using Por-15 liquid and paste to repair fuel tank leaks and stopping rust in general. You need only remove loose rust scabs.
Use according to their instructions and your troubles are over. You can safely put it on both inside & outside however I have only used it on outside of boat tanks. Steel/iron only btw. Don't use epoxy based compounds especially on the inside.
 
Last edited:
I am seeing some good inside fuel tank pictures, but how do you work through an 8" opening, guessing at the inspection hatch size.

I duct taped a Maglite AA flashlight to the broomstick handle on my putty knife. I also held my cellphone precariously over the goop to get confirming photos and videos of the edges and corners.
 
Marco & FlyWritght. Thanks for that. Hoping not to have to do it, but seems like it is doable and worth considering. Prior to this thread the option was to hack it up and replace .
 
I've had great luck on two boats, a car, and a MC using Por-15 liquid and paste to repair fuel tank leaks and stopping rust in general. You need only remove loose rust scabs.
Use according to their instructions and your troubles are over. You can safely put it on both inside & outside however I have only used it on outside of boat tanks. Steel/iron only btw. Don't use epoxy based compounds especially on the inside.

That sounds amazing as I have noticed a bit of residual in the bilge and I can’t figure out where it’s coming from, do you just pour it in the tank?
 
Tomorrow will tell. Weeks of prep.
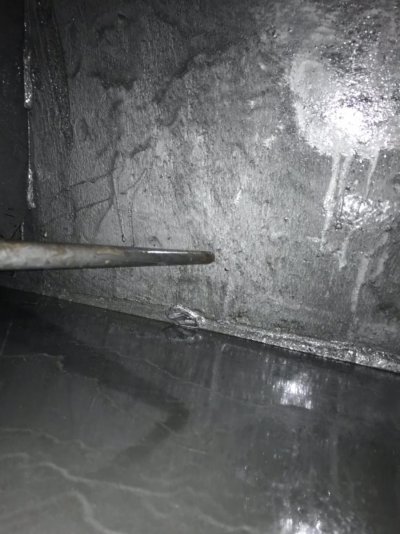
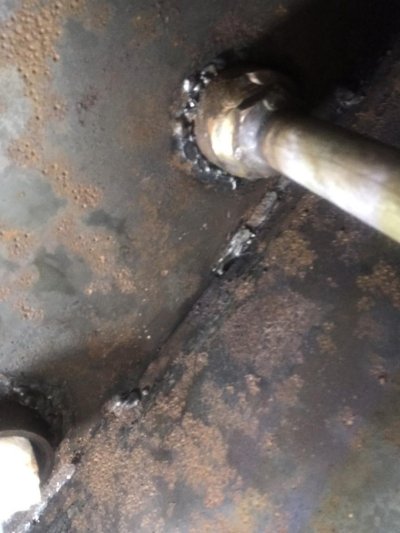
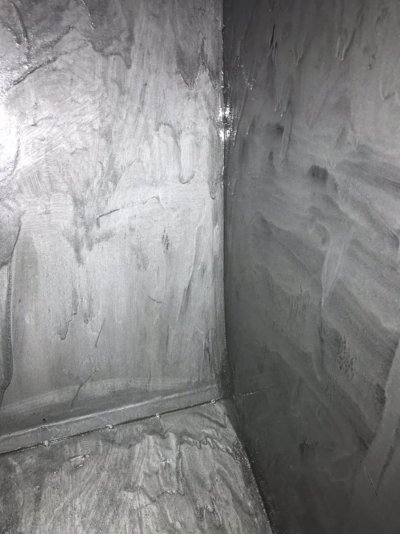
Sand blasting, de-greasing, metal prep. Of course it only may actually have been days of prep, and many days of recovering from the extremely awkward positions I put myself in! IMG_5756.jpgIMG_5734.jpgIMG_5760.jpg

I’ll put fuel in tomorrow! Fingers crossed
 
Have you thought about filling with fresh water to test. easy enough to get rid of water later.
 
It leaks diesel, but not air, not Dyed water.
Put it under pressure, disconnected all the lines.
But fill it with diesel, and it leaks....Ill keep ya'll posted on how it works out.
Yes, he did.
 
Good luck, keeping my fingers crossed that it will not leak.
 
William983, What did you decide to use to seal the tank? Is the last photo an image of the sealed surface?
 
That's a major exercise good luck to you doing that.
I had a galvanised diesel tank leak on my last boat, I removed the whole engine floor and lifted the engine to one side and was able to shimmy the old tank out and had new stainless one built to order with an inspection hatch and the fuel take off right at the bottom of the tank the same as a truck.
I fitted a Caterpillar fuel/water separator, that was ten years and many sea miles ago.
I helped the current owner check them and they are still perfectly clean inside.
Its expensive but stainless is future proof.
 
I studied a lot of different products and ended up using POR15.
Yes that is the coated tank.
 
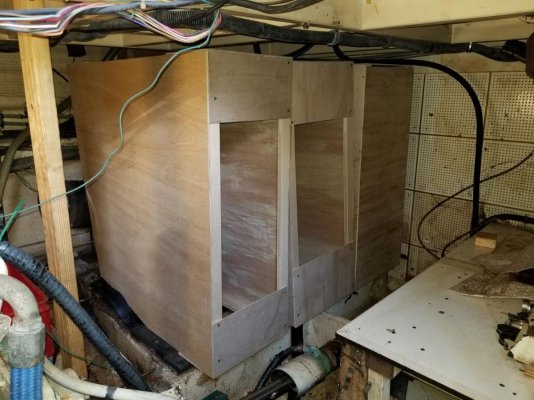
Been there, done that. I couldn't get to the back side of the tank where the leak was because of the baffels.
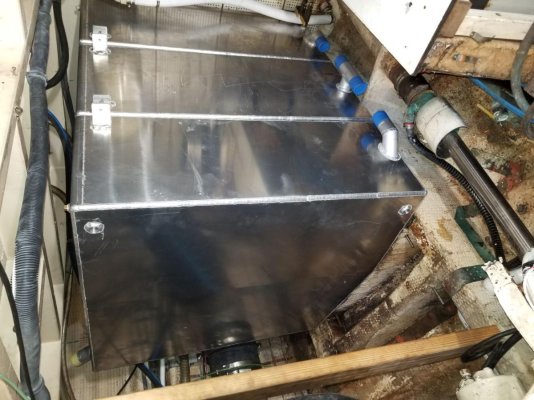
Sooo I made little ones out of the big one and replaced with 3 smaller (each side) .250" alum tanks that I could slide in behind the engines. Still have 308gal capacity on each side. A sawzall and dozens of blades later got em out.
The wood mock-ups made sure my fuzzy math was right.


Also had the chance to replace 30 yr old exhaust hose that ran behind each tank. Don't want to do it again. but glad I did.
 

Attachments

  • Three onboard resize.jpg
    Three onboard resize.jpg
    141.8 KB · Views: 34
  • mock-upresize.jpg
    mock-upresize.jpg
    145.5 KB · Views: 27
  • 20190314_172428.jpg
    20190314_172428.jpg
    102.7 KB · Views: 25
Tanks are in and holding fuel. All 3 tanks (pt. & stb.) are connected to their original vents overboard with a 1/2" elbow welded to the top of the fore and aft tank and a tee fitting on top of the center tank.

Tanks are filled from the orig. deck plate location going to the forward tank, then connected via hose on the lower inboard side.

The pick-up and balancing link are on the aft most tank, similar to the original set up.
I'll take some pics and post them when I can.
 
Back
Top Bottom