You are using an out of date browser. It may not display this or other websites correctly.
You should upgrade or use an alternative browser.
You should upgrade or use an alternative browser.
GB32 Woodie Under Contract: Lots of Questions :)
- Thread starter thebruce
- Start date
The friendliest place on the web for anyone who enjoys boating.
If you have answers, please help by responding to the unanswered posts.
If you have answers, please help by responding to the unanswered posts.
thebruce
Veteran Member
- Joined
- Nov 22, 2020
- Messages
- 59
- Vessel Name
- Barbary Ghost
- Vessel Make
- Grand Banks 32
Dolfinite is hard to find and is not permanent, it hardens up and allows leaks. Butyl tape is much easier to use and lasts a lot longer.
Ahh - this is great info. Yes, I could see all the old white bedding compound was hard and brittle.
There are multiple components sandwiched together in those windows and im wondering how much overlap/squeeze out of tape you want around each e.g.
- you first have the plywood superstructure with a notch the fixed window sits in. im assuming you want to tape between that and the fixed piece of glass
- then you have the aluminum window track for the sliding window that are screwed into the exterior wood frame. do you want compound on the two sides where the U channel track lays in the frame?
- then that entire frame is screwed to the superstructure with compound between them
- then once the frame is bedded, what would you use around the outside seam, or is the squeeze out good enough?
Last edited:
Xsbank
Guru
- Joined
- Sep 7, 2013
- Messages
- 3,791
- Location
- Canada
- Vessel Name
- Gwaii Haanas
- Vessel Make
- Custom Aluminum 52
It's been a few years since I did my wood windows so without pictures I would suggest that anywhere you need a sealant, use butyl. You can cut the strips smaller to fit. Never use silicone. Don't be tempted as all parts of a woody needs coatings and the silicone will ensure you have coating failures and bird's eyes in all your varnish.
Squeeze out is good with butyl, don't overtighten the fasteners, it's slow moving and you want to progressively tighten them over a few days or weeks, depending upon temperatures.
I remember the glass tracks with the felt were stainless. I would not recommend aluminum because of corrosion.
I really would recommend that you research new windows - this design is fine if you are happy doing this job over and over, are happy keeping the drain pipes clear of mud daubers and bird poop. The felt tracks will get crusty and crappy and you'll have to wash them regularly, then you will be chasing leaks that will only appear after they have damaged something. Also, water will sit in the felt tracks and eventually delaminate the safety glass. You're probably searching for glass now?
If you plan to sell her soon, just do the repair.
thebruce
Veteran Member
- Joined
- Nov 22, 2020
- Messages
- 59
- Vessel Name
- Barbary Ghost
- Vessel Make
- Grand Banks 32
@Xsbank - this is awesome info. Exactly what I needed. Do you by chance know how the center windshield (the pivot window) is removed? I read an article that said the windshield was removed from the inside but it looks like that center window you need to remove the quarter round trim from the outside to remove it.
Yes, the tracks are stainless, apologies. They are the Stanpro brand everyone uses. I picked up 6 or 7 of them, which should be enough for all windows.
And yea, I will replace a few more windows. I have 2 that are cracked and another ~3 that are delaminated. I have a local glass shop that will come onsite to cut the panels. I read these windows can be slightly different than the drawings, so will just have them cut as I take them out. Thats the focus for the weekend. Then next week will be removing and rebedding the deck molding.
Thx so much.
SteveK
Guru
- Joined
- Jul 5, 2019
- Messages
- 5,074
- Location
- Gulf Isalnds BC canada
- Vessel Name
- Sea Sanctuary
- Vessel Make
- Bayliner 4588
Rich, Looks great. Did you also glue the formica and teak? What glue
thebruce
Veteran Member
- Joined
- Nov 22, 2020
- Messages
- 59
- Vessel Name
- Barbary Ghost
- Vessel Make
- Grand Banks 32
Bruce - PO of boat must be tickled pink that you are restoring his old baby!
I hope so. I think the boat was a big part of his life. Everyone in the bay seems to know him. He, his dog and the boat were always shown anchored in McCovey cove during Giants game commercials.
Xlantic
Guru
headliner replacement
Some years ago I replaced the headliner in a 1979 GB42 I owned at the time.
I just came across a discussion from the now-discontinued Grand Banks forum that I had saved and which be of use to those contemplating the procedure.
Some years ago I replaced the headliner in a 1979 GB42 I owned at the time.
I just came across a discussion from the now-discontinued Grand Banks forum that I had saved and which be of use to those contemplating the procedure.
Attachments
Last edited:
thebruce
Veteran Member
- Joined
- Nov 22, 2020
- Messages
- 59
- Vessel Name
- Barbary Ghost
- Vessel Make
- Grand Banks 32
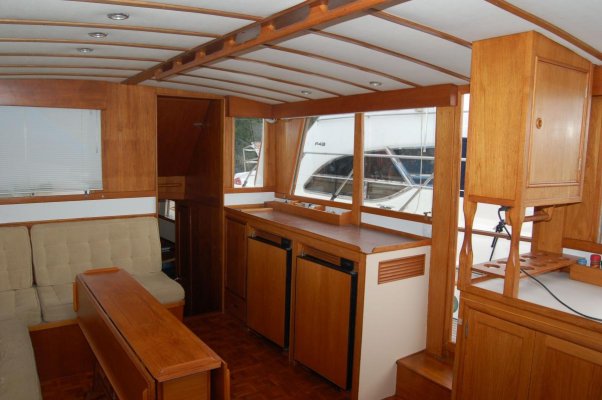
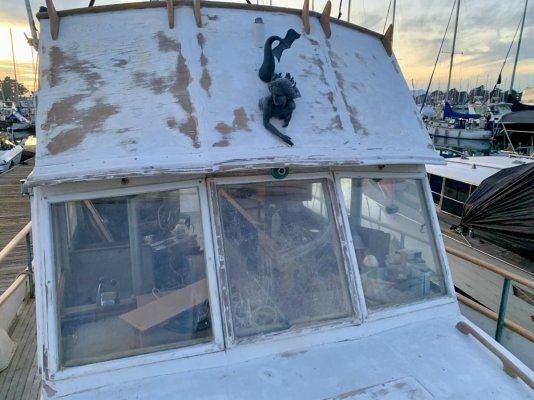
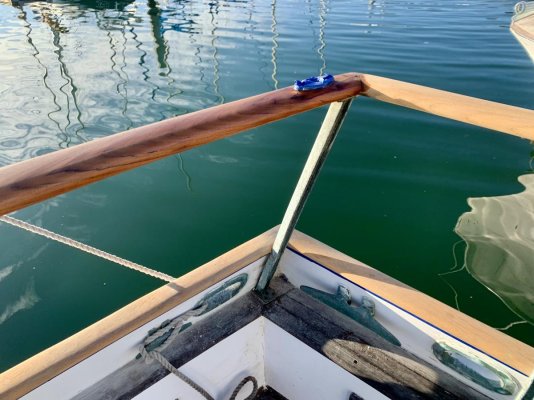
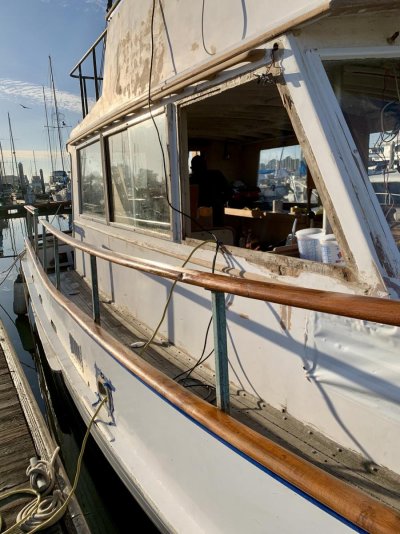
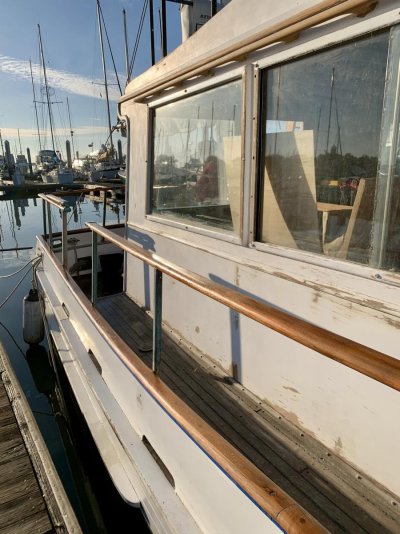
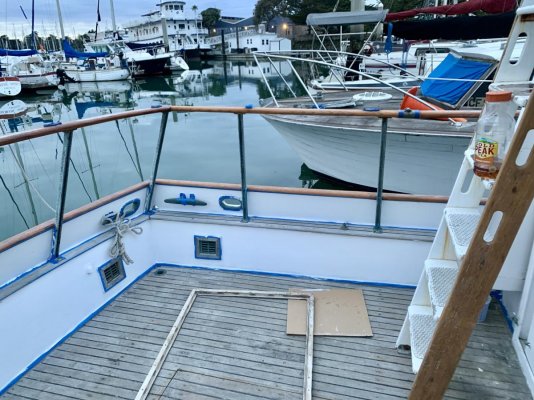
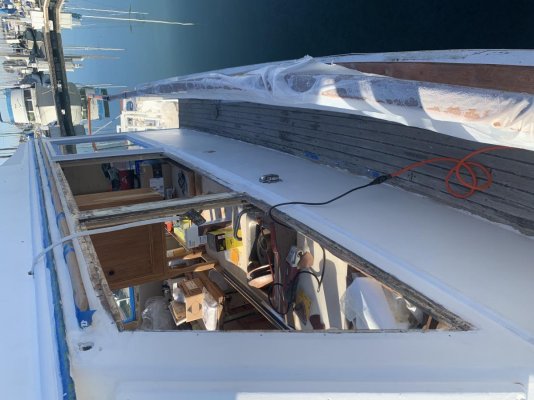
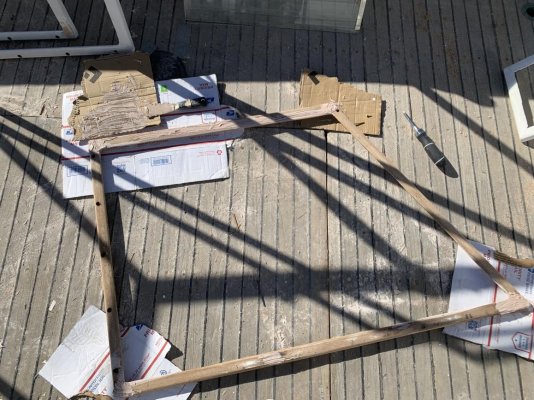
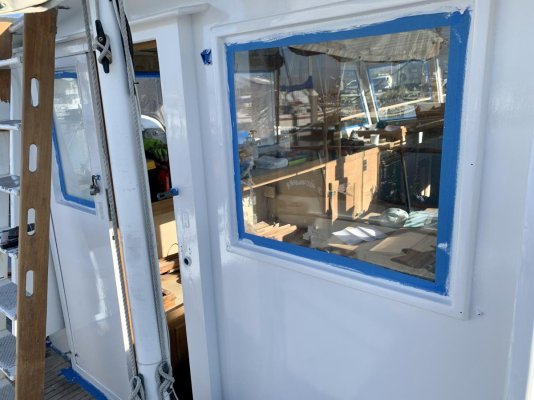
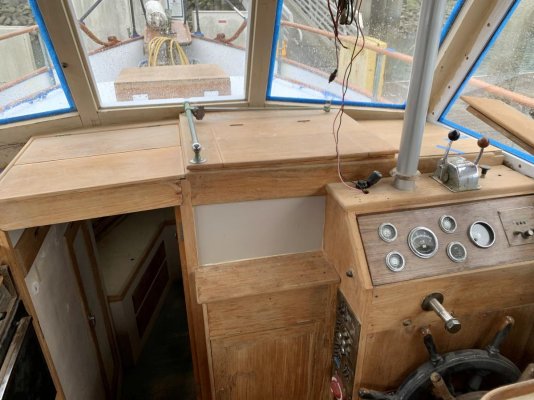
Progress update: windows are out, first coat of sealant is on, ready to prime the superstructure next week.
Attachments
-
 IMG_8971.jpg114.2 KB · Views: 12
 -
 IMG_8969.jpg130.1 KB · Views: 15
 -
 IMG_8970.jpg75.7 KB · Views: 14
 -
 IMG_8993.jpg133.3 KB · Views: 15
 -
 IMG_9050.jpg174.5 KB · Views: 19
 -
 IMG_9052.jpg152.1 KB · Views: 18
 -
 IMG_9059.jpg134.9 KB · Views: 16
 -
 IMG_9072.jpg137.1 KB · Views: 15
 -
 IMG_9088.jpg174.7 KB · Views: 13
 -
 IMG_9089.jpg165.1 KB · Views: 16
Last edited:
thebruce
Veteran Member
- Joined
- Nov 22, 2020
- Messages
- 59
- Vessel Name
- Barbary Ghost
- Vessel Make
- Grand Banks 32
Dolfinite is hard to find and is not permanent, it hardens up and allows leaks. Butyl tape is much easier to use and lasts a lot longer.
I had 7 new windows delivered, I have the stainless U channel cut and test fit for most of the windows, everything is prepped and the windows are ready to go back in tomorrow.
However, I had a couple last minute questions:
1 - butyl tape was the recommendation over dophinite. any disagreements speak. now or forever hold your peace
")
2 - on the sliders im assuming you add a layer of butyl between the fixed window and the superstructure, then another layer between the fixed window and the exterior frame, then another layer around the exterior frame.
3 - is there some new an improved way to bed the stainless U channel instead of using all those tiny screws?
4 - do you also use butyl tape to bed the stainless window channel in the window frame? im assuming so. there is some black stuff in my old tracks, but its so old its really hard to tell what it was.
5 - ive scraped all the frames and superstructure to bare wood, painted with penetrating epoxy, used fairing epoxy and plan to put a coat or two of primer on the frames before bedding. does this sound about right?
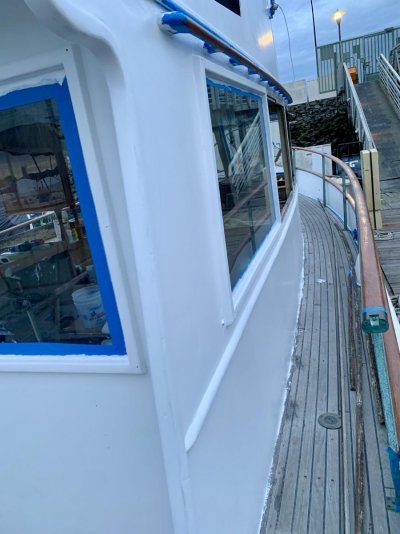
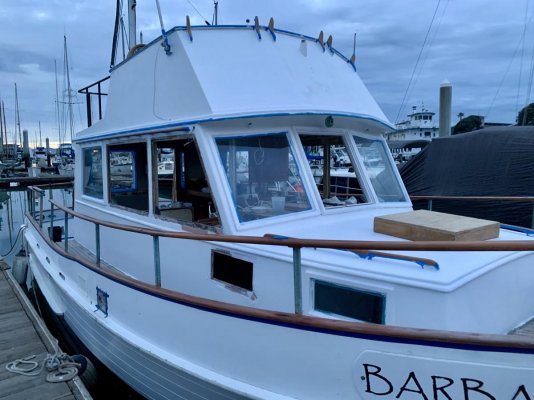
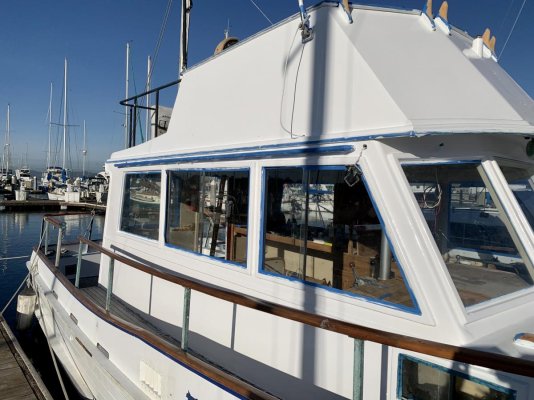
And, the first coat of primer is on today. Starting to look like a boat again. Its been an amazing transformation from a hot mess into a Grand Banks over the past 2 weeks.
Ps - and yes, im removing the name on the hull like that. It doesn't look very grand banks'ish. We will hopefully get topsides done next week (if the harbormaster doesn't get pissed).
Attachments

Last edited:
Brisyboy
Senior Member
- Joined
- Mar 7, 2015
- Messages
- 423
- Location
- Australia
- Vessel Name
- Malagari
- Vessel Make
- Island Gypsy 36 Europa
Hey Bruce,
Awesome pace so I am loath to ask you to interrupt your project schedule for the ceiling shoot of how the mast is braced from underneath the floor of the flybridge- I`m assuming there is something there.
Thanks
George
Awesome pace so I am loath to ask you to interrupt your project schedule for the ceiling shoot of how the mast is braced from underneath the floor of the flybridge- I`m assuming there is something there.
Thanks
George
Mike GB32
Senior Member
You asked so my opinion-
I did the windows on my ‘74 32 and I think polysulfide is a better choice for bedding the tracks. It’ll flow to fill the gaps where the butyl needs pressure to compress it to form a seal.
I did the windows on my ‘74 32 and I think polysulfide is a better choice for bedding the tracks. It’ll flow to fill the gaps where the butyl needs pressure to compress it to form a seal.
Xlantic
Guru
I like using butyl tape to fix metal hardware but find it too stiff to use on things like wooden window frames or quarter-rounds. There might be a trick too use it such as heating with a hot-air gun but I have not done that.
I have used Dolfinite in the past and it has worked well if rather expensive, messy and really hard to get here in Europe.
I recently bought but have not tried a product by Sika called SikaLastomer which looks promising. It is butyl-in-a-cartridge.
Confusingly, it is called SikaLastomer 710 in Europe and SikaLastomer 714 in the US.
https://usa.sika.com/en/industry/au...general-sealing-bonding/sikalastomer-714.html
thebruce
Veteran Member
- Joined
- Nov 22, 2020
- Messages
- 59
- Vessel Name
- Barbary Ghost
- Vessel Make
- Grand Banks 32
Hi all - quick update.
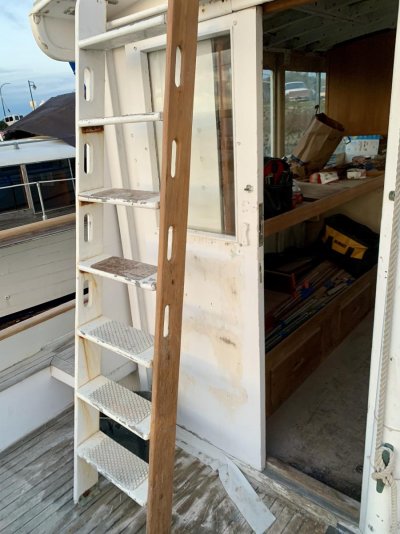
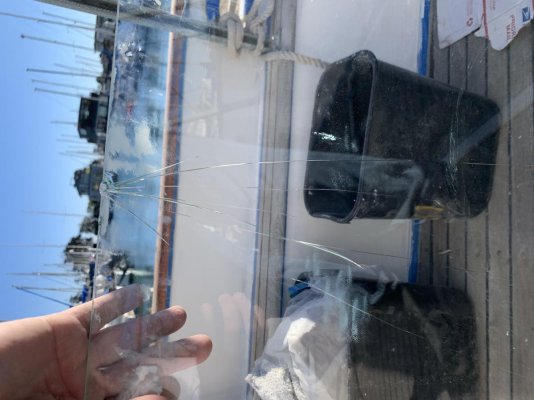
- 7 new windows are back in! What a pain in the ass Not a fun project - and not a project you should do single-handed. I had a clown show incident last weekend where the frame of one of the big sliders broke while I was installing and the window fell out of the bottom and shattered. Awesome.
- I will do a writeup on the window replacement procedure if anyone needs it. Lots of lessons learned the hard way.
- 2nd coat of primer is on. We will need to wait another week for the final paint since we have some rain coming up this week.
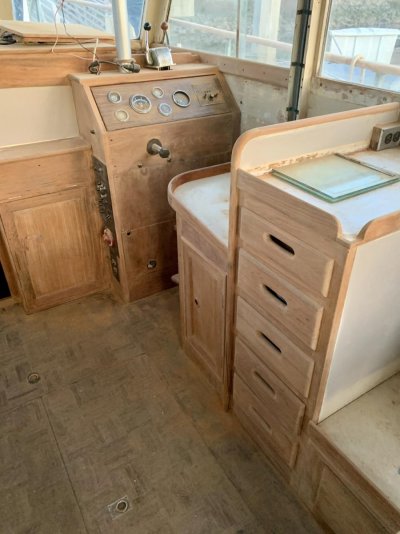
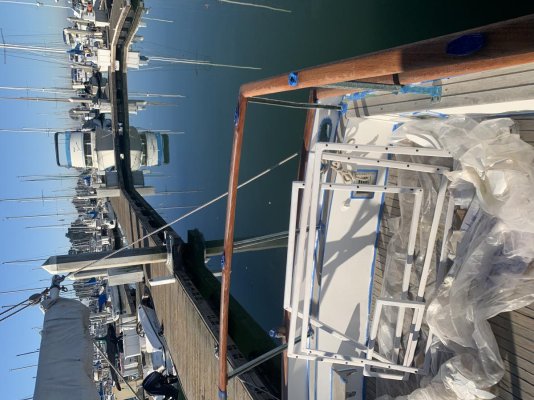
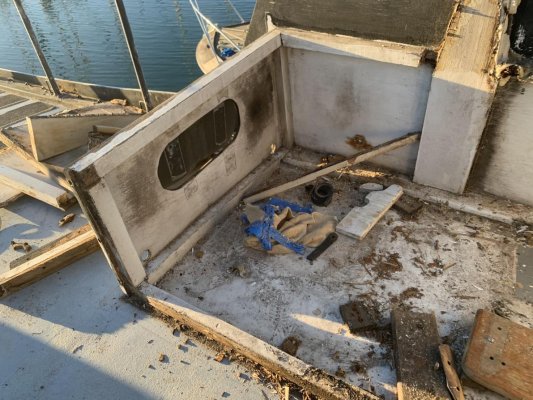
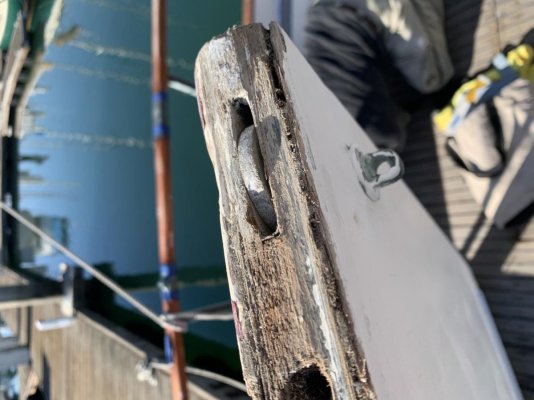
- there were some DIY rot fixes gone bad on the flybridge seats so decided it was easier to rip them out and replace vs trying to fix. thats the next project. they had been replaced 10 years ago and they rotted around all the edges of the marine ply. the frames were fine. so I will coat the new marine ply with CPES.
- I have all the parts in from American diesel so next Tuesday we will be replacing the motor support bracket, new transmission seal, zinc pencils, new transmission hoses.
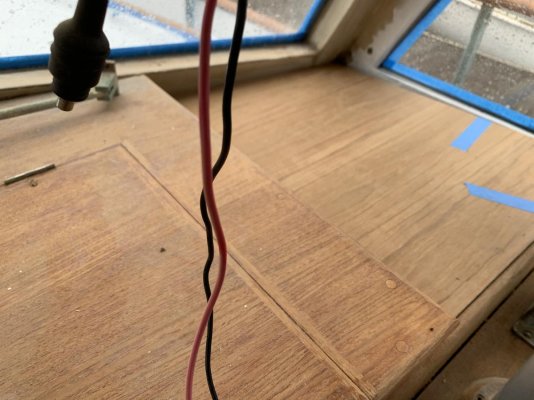
- I also had an electrician over for an initial review and we found a couple sockets were reverse polarity and coincidentally 15 mins after he left I found a short...and electrocuted myself for the first time It looked like some wiring to the fridge compressor had been cut in the past and the ends had frayed and shorted. I was a bit annoyed he hadn't seen them 1hr earlier. Anyway, he came back over and we shut down shore power until he can do a thorough check and map all wiring.
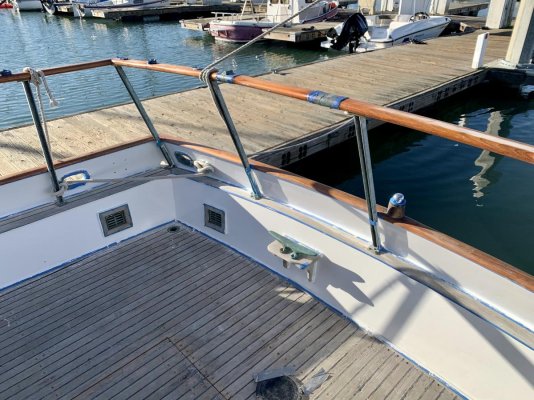
I need a good method to remove paint from the stainless railings and bronze hawseholes and rubrail. The prior owner had painted for some awful reason. The bronze seems particularly hard to remove since its softer than the steal. We tried paint removed and that was useless. I think a paint stripping wheel would be too aggressive. Right now our only option is a heat gun and scrapper, which wont be much fun.
We hopefully will get the first goat of primer on the interior soon. That will be a big milestone and make it start to look like a real boat again.
@Brisyboy - on the Gb32 the mast isn't attached to the superstructure. Its freestanding and sits about 6" behind it. Its supported with 2 wires to the flybridge railings.
- 7 new windows are back in! What a pain in the ass
Not a fun project - and not a project you should do single-handed. I had a clown show incident last weekend where the frame of one of the big sliders broke while I was installing and the window fell out of the bottom and shattered. Awesome. - I will do a writeup on the window replacement procedure if anyone needs it. Lots of lessons learned the hard way.
- 2nd coat of primer is on. We will need to wait another week for the final paint since we have some rain coming up this week.
- there were some DIY rot fixes gone bad on the flybridge seats so decided it was easier to rip them out and replace vs trying to fix. thats the next project. they had been replaced 10 years ago and they rotted around all the edges of the marine ply. the frames were fine. so I will coat the new marine ply with CPES.
- I have all the parts in from American diesel so next Tuesday we will be replacing the motor support bracket, new transmission seal, zinc pencils, new transmission hoses.
- I also had an electrician over for an initial review and we found a couple sockets were reverse polarity and coincidentally 15 mins after he left I found a short...and electrocuted myself for the first time
It looked like some wiring to the fridge compressor had been cut in the past and the ends had frayed and shorted. I was a bit annoyed he hadn't seen them 1hr earlier. Anyway, he came back over and we shut down shore power until he can do a thorough check and map all wiring. I need a good method to remove paint from the stainless railings and bronze hawseholes and rubrail. The prior owner had painted for some awful reason. The bronze seems particularly hard to remove since its softer than the steal. We tried paint removed and that was useless. I think a paint stripping wheel would be too aggressive. Right now our only option is a heat gun and scrapper, which wont be much fun.
We hopefully will get the first goat of primer on the interior soon. That will be a big milestone and make it start to look like a real boat again.
@Brisyboy - on the Gb32 the mast isn't attached to the superstructure. Its freestanding and sits about 6" behind it. Its supported with 2 wires to the flybridge railings.
Attachments
TY for all the info and photos.
Glad the glass window did not harm you as it fell/shattered. Safety glass?
Paint remover/stripper is only Item I can think of to at least get bulk of paint off SS... Jasco is the brand I use. Depending on paint layers sometimes more than one application is needed. Toxic stuff; protect what is underneath/around, it eats holes in some items and can stain.
Good luck with the wiring and try to stay shock-free!!
BTW - You get finished you'll have a near new GB!! Yea!!!
rgano
Guru
- Joined
- Oct 8, 2007
- Messages
- 4,995
- Location
- USA
- Vessel Name
- FROLIC
- Vessel Make
- Mainship 30 Pilot II since 2015. GB-42 1986-2015. Former Unlimited Tonnage Master
I would like some engine pics before you get serious there. I am certain your "after" pics will show a much improved situation. I spent some time earlier today giving some advice to a new 120 Lehman owner. See the "New owners of a trawler and..." thread.
Xlantic
Guru
I believe the best way to get paint off the metal is what you have tried: heat plus scraping with a scraper or metal brush or using paint stripper.
For the bronze hawseholes you could first dismount them. You could then place them in a metal container to soak in paint stripper. Alternatively you can heat them up in an oven to 200º to 300º and then take off the paint with a metal brush, scraper or sand-blasting.
Taking them off would give you a good opportunity to check the gunwale wood under the hawseholes for rot, seal with CPEs, prime and paint.
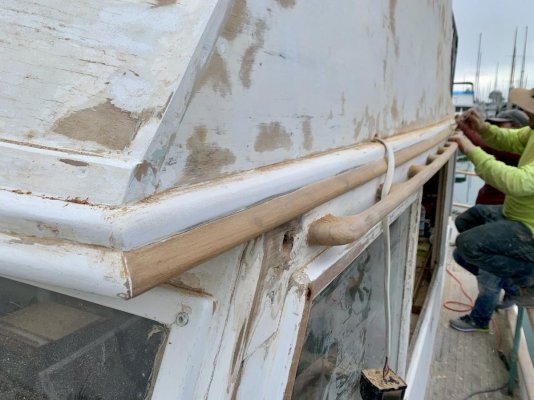
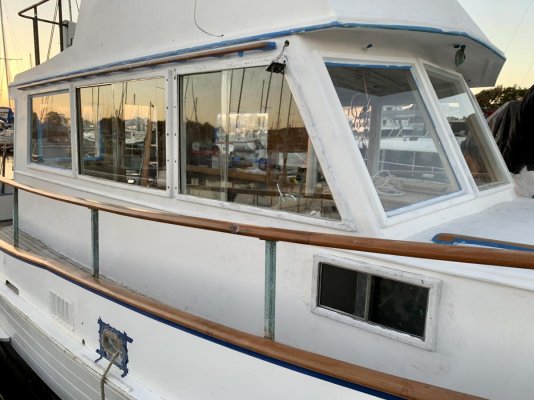
BTW, I noticed that you have not removed the hardware on the handrails before varnishing and, presumably, refinishing them. Your brightwork is likely to last longer if you remove the hardware first and then re-mount it after varnishing, using butyl. Otherwise you risk moisture penetrating and ruining the finish around the hardware.
For the bronze hawseholes you could first dismount them. You could then place them in a metal container to soak in paint stripper. Alternatively you can heat them up in an oven to 200º to 300º and then take off the paint with a metal brush, scraper or sand-blasting.
Taking them off would give you a good opportunity to check the gunwale wood under the hawseholes for rot, seal with CPEs, prime and paint.
BTW, I noticed that you have not removed the hardware on the handrails before varnishing and, presumably, refinishing them. Your brightwork is likely to last longer if you remove the hardware first and then re-mount it after varnishing, using butyl. Otherwise you risk moisture penetrating and ruining the finish around the hardware.
Last edited:
Brisyboy
Senior Member
- Joined
- Mar 7, 2015
- Messages
- 423
- Location
- Australia
- Vessel Name
- Malagari
- Vessel Make
- Island Gypsy 36 Europa
@Brisyboy - on the Gb32 the mast isn't attached to the superstructure. Its freestanding and sits about 6" behind it. Its supported with 2 wires to the flybridge railings.
Thanks for remembering
Thanks for remembering
thebruce
Veteran Member
- Joined
- Nov 22, 2020
- Messages
- 59
- Vessel Name
- Barbary Ghost
- Vessel Make
- Grand Banks 32


SteveK
Guru
- Joined
- Jul 5, 2019
- Messages
- 5,074
- Location
- Gulf Isalnds BC canada
- Vessel Name
- Sea Sanctuary
- Vessel Make
- Bayliner 4588
the wheel must have like a bolt and nut which is recessed and painted over
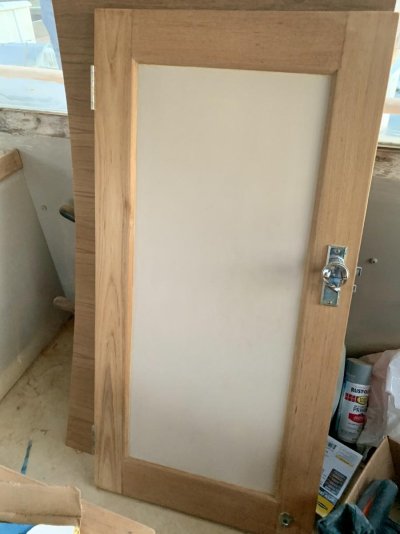
Does anybody know how to remove the wheels on the door slider? And where to get new ones? Mine are so worn its just sliding on the bottom of the door.
If you can get them out and send one to me I would me happy to make you a set. I am a machinist and have a 42 woodie I am working on. These are great boats glad to see someone else saving one.
I'm.....taken back......to be kind,as to the negativity of people that
A. Own a Grand Banks, a company started by a man who loved wood boats,and a company made famous by wood boats
B. People that seem to have lost the "romance"of owning one of these grand ladies if wood.
Have we become a population of"here's my checkbook, fix it"?
What happened to the guy(or gal) that loves his afternoons sanding and shining his baby,to stand back and look at what THEY accomplished.
Give me an old wood boat...any make....but especially a Grand Banks, the best of the best.
Go get your boat my friend. Don't be a weekend warrior, or a "boater"in name only. Be a Capt love your woodie,and "damn the torpedoes...full speed ahead ".
1969,42ft GB Hull #125. Built for Mr Robert Newton, founder/ CEO, and owner of American Marine Ltd (Grand Banks)
Well said I have 1970 42 Hull #150 and it is in excellent condition and can go anywhere, yes it has some work needed on the house mostly and it takes time to do it. Still love the boat and it rides like no fiberglass version of this boat.
Mike GB32
Senior Member
Regarding the sliding door wheels-
On my '74 they're made of a Bakelite type material. After investigating, it appears that a roller assembly was built into the frame when the door was made. I removed a caulk on the inside of the door panel and found a height adjustment on the shaft. Too far gone though. I believe the bottom of the door would have to be removed to service it.
On my '74 they're made of a Bakelite type material. After investigating, it appears that a roller assembly was built into the frame when the door was made. I removed a caulk on the inside of the door panel and found a height adjustment on the shaft. Too far gone though. I believe the bottom of the door would have to be removed to service it.
Attachments
Regarding the sliding door wheels-
On my '74 they're made of a Bakelite type material. After investigating, it appears that a roller assembly was built into the frame when the door was made. I removed a caulk on the inside of the door panel and found a height adjustment on the shaft. Too far gone though. I believe the bottom of the door would have to be removed to service it.
Just a small input here.... maybe a way to help you go.
Our Tolly has a slider on each side. Neither have bottom rollers and they "float" freely in a containment channel on top. The door bottom and channel it travels in are SS metal to metal. After 44 yrs little to no wear. That said... the doors do not "glide" as easily as do doors with wheels. And, it makes opening/closing the doors much easier by occasionally spraying the bottom track with WD-40 or the like.
So... you might think of what you might do to remove the need for rollers at all.
Best Luck!
thebruce
Veteran Member
- Joined
- Nov 22, 2020
- Messages
- 59
- Vessel Name
- Barbary Ghost
- Vessel Make
- Grand Banks 32
Quick Update -
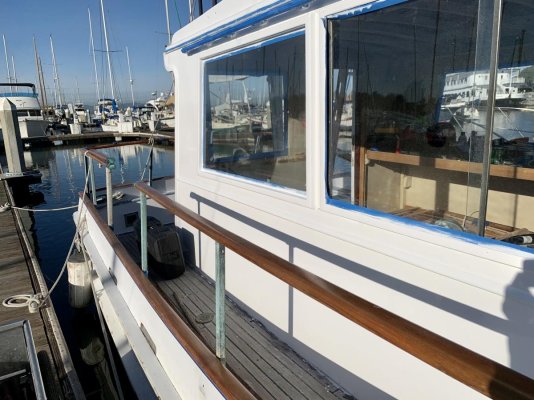
- first coat of paint is on. Looking pretty, but maybe a bit too gloss. We used Interlux Brightsides. The window frames need more attention...and since the superstructure is now so pretty, I guess that means we need to repaint the hull too
- fixed the cracked motor support. it was sheered in two. it was a much easier job than anticipated. had it replaced in maybe 2hrs. a hydraulic jack was key. engine is much smoother now that the alternator and mount arent rattling around.
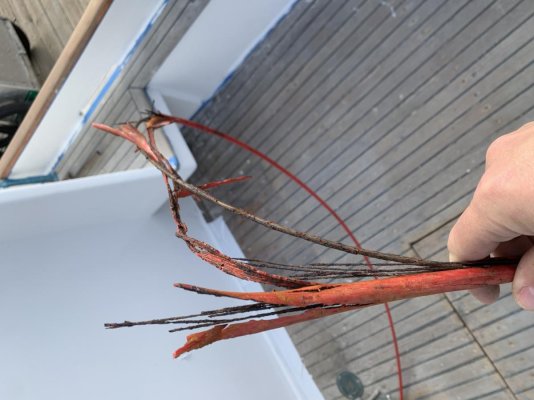
- replaced the frayed throttle cable. shocked it was still even functional.
- unfortunately I ordered the wrong transmission seal so we will need to finish that next week. but no hiccups decoupling the shaft and pushing it back. the coupler had some obvious play, so assuming thats from the worn seal. we did find oil and grease inside the coupler, which seemed strange. how does oil leak down the spline into the coupler? our theory was the grease was maybe a prior diy hack to reduce the oil leak?
- did some general maintenance while we were in there, including replacing the impeller and zinc. both looked newish, which was good.
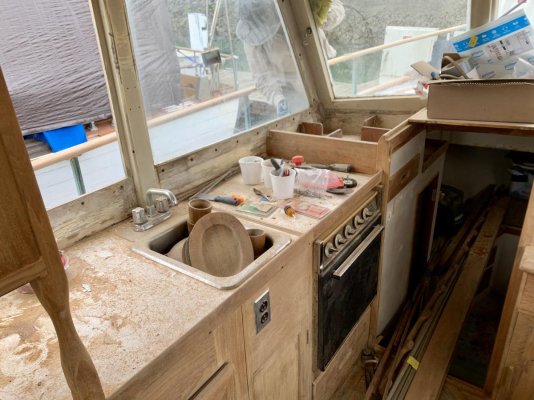
- interior is starting to come back together. will put the first coat of primer on that over the next week or so.
- first coat of paint is on. Looking pretty, but maybe a bit too gloss. We used Interlux Brightsides. The window frames need more attention...and since the superstructure is now so pretty, I guess that means we need to repaint the hull too
- fixed the cracked motor support. it was sheered in two. it was a much easier job than anticipated. had it replaced in maybe 2hrs. a hydraulic jack was key. engine is much smoother now that the alternator and mount arent rattling around.
- replaced the frayed throttle cable. shocked it was still even functional.
- unfortunately I ordered the wrong transmission seal so we will need to finish that next week. but no hiccups decoupling the shaft and pushing it back. the coupler had some obvious play, so assuming thats from the worn seal. we did find oil and grease inside the coupler, which seemed strange. how does oil leak down the spline into the coupler? our theory was the grease was maybe a prior diy hack to reduce the oil leak?
- did some general maintenance while we were in there, including replacing the impeller and zinc. both looked newish, which was good.
- interior is starting to come back together. will put the first coat of primer on that over the next week or so.
Attachments
-
 IMG_9406.jpg191.2 KB · Views: 20
 -
 IMG_9413.jpg146.6 KB · Views: 26
 -
 IMG_9420.jpg159.8 KB · Views: 20
 -
 IMG_9423.jpg120.4 KB · Views: 22
 -
 IMG_9447.jpg142.9 KB · Views: 22
 -
 IMG_9446.jpg116.6 KB · Views: 24
 -
 IMG_9429.jpg199.5 KB · Views: 23
 -
 IMG_9433.jpg95.9 KB · Views: 25
 -
 IMG_9439.jpg176.7 KB · Views: 29
OP if you’ve broken the gear free from the engine then consider replacing the damper plate. Also if you cannot reuse that wheel on the bottom of the slider door then can replace with a strip of Teflon. I did that on my Burger. Works well but is not too slippery like a wheel, so the door isn’t constantly sliding around at sea when partially open. Some friction is good.
Similar threads
- Replies
- 5
- Views
- 429