GB32 Woodie Under Contract: Lots of Questions :)

The friendliest place on the web for anyone who enjoys boating.
If you have answers, please help by responding to the unanswered posts.
...As for the partnership, its three good family friends and kids all about the same age. Ones a lawyer so we assigned a partnership agreement to him. The $s come out of everyone's fun budget so nobody really cares. But we do need to think through some scenarios on how we deal with them. The only thing we have decided so far is we will have quarterly board meetings with heavy drinking and a gavel. Good decisions are always made like that :)
Hell yeah!

This is supposed to be fun. Keeping the recreation in recreational boating. I like it.

In Canada, they are officially referred to as pleasure craft. Keeping the pleasure in pleasure craft sounds a bit creepy though.

Congratulations.
 
Congratulations and you guys are going to have fun with the boat! Look forward to hearing how it goes ... I’m on mine now.
 
@Art - I used Mike King, the local agent in my town. Great guy.

Michael J. King
Agent, State Farm Insurance

1610 Tiburon Boulevard, Suite 101
Tiburon, CA 94920
Office (415) 435-3600
Cell (415) 250-5238


@GoneFarrell - yea I was just thinking about the same thing. I had multiple of trips of shame to Harbor Freight in my early car projects. Luckily West Marine is only 10 mins away. If you know Tiburon, we have a slip reserved at the marina in the Cove at Tiburon apartments. They just put $300m into it and its gorgeous. They want boats to market apartments so slip fees are 50% of Sausalito.

@Northern Spy - :)

@Willin - will do! First projects should start this weekend:

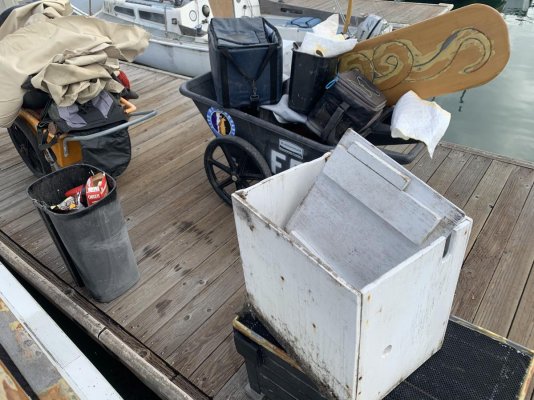
- accumulated crap removal.
- investigate faulty forward bilge. motor runs in manual but doesn't pump water. float switch doesn't seem to work.
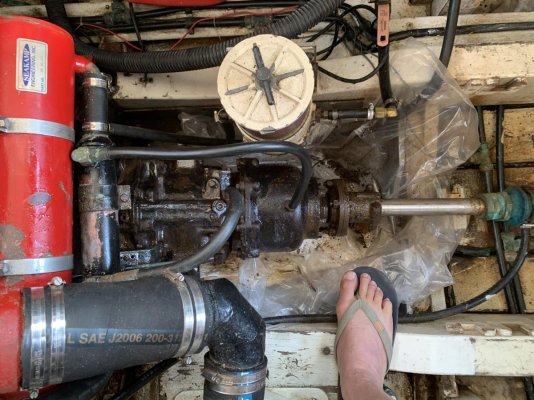
- start on initial rust remediation and repaint of transmission and rudder support
- remove fittings for paint prep

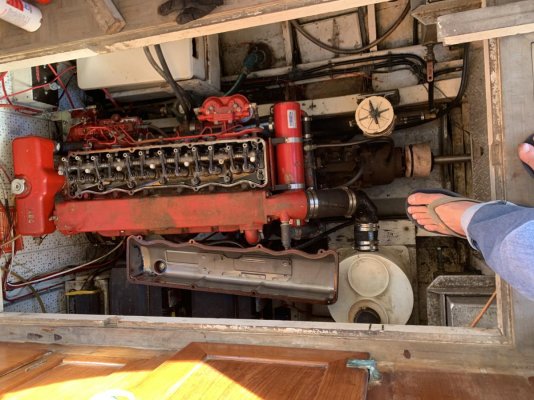
Then the diesel mechanic will let me work with him to replace the motor mount, transmission seal and fluids. Will be a good learning process to start figuring out the Lehman. Seems easier than a 911 engine but need all new SAE tools :(
 
Last edited:
Sweet

Sweet, glad you pulled the trigger. It's not a boat it's a lifestyle so many adventures for you and all involved! What a great foundation to start with I love the looks of that "57 chevy".
 
TY, Bruce - for ins lead! Got it in my folder.

After holidays and C-19 backs off a bit [as we all sure hope it does]... you and I may get chance to meet.

Best luck is your boat doings!
 
Last edited:
Hi all - I owe you all an update!

The Barbary Ghost GB32 #293 project is in full swing.

The good:

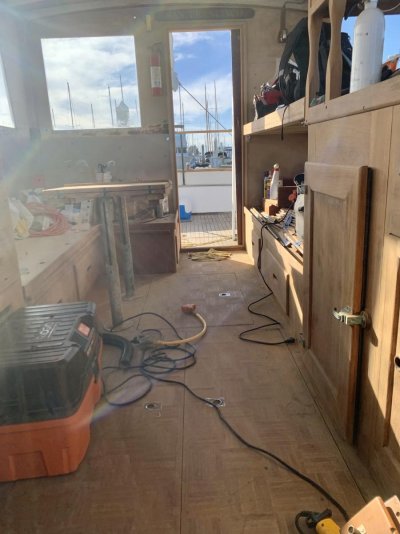
- We are two weeks in and making fast progress.
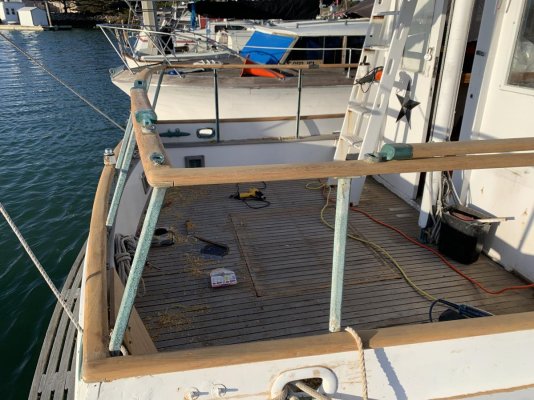
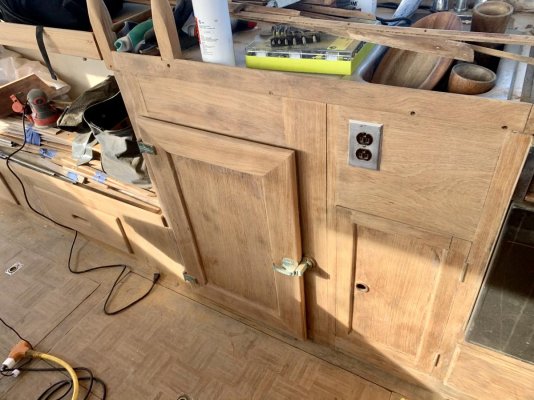
- All exterior jenky bits are removed
- Most prior owner DIY fails are removed
- Loads and loads and loads of boat crap are removed
- Did an initial clean of the bilge and engine to get the lay of the land
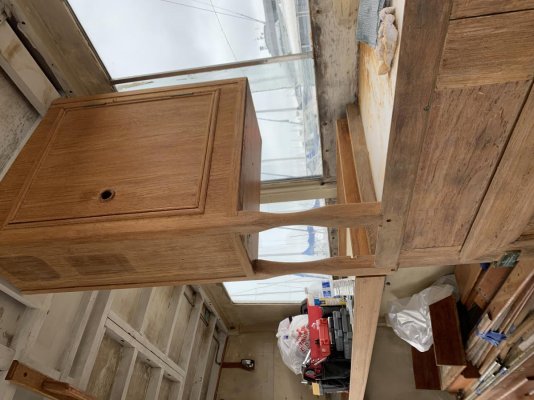
- All the interior trim was removed
- The 10 year old moldy vbirth headliner that was hiding the 40yr old moldy headliner was removed.
- The cabin headliner was removed. That ceiling looked good. Only a couple small leaks.
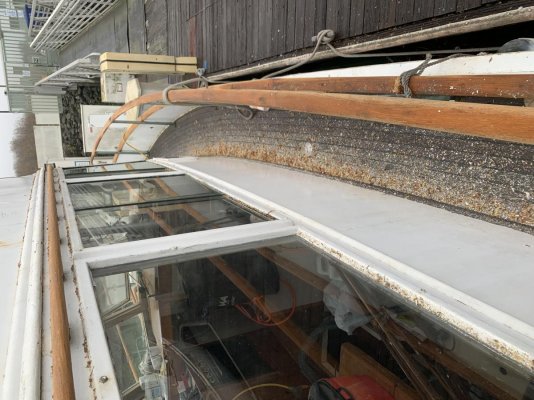
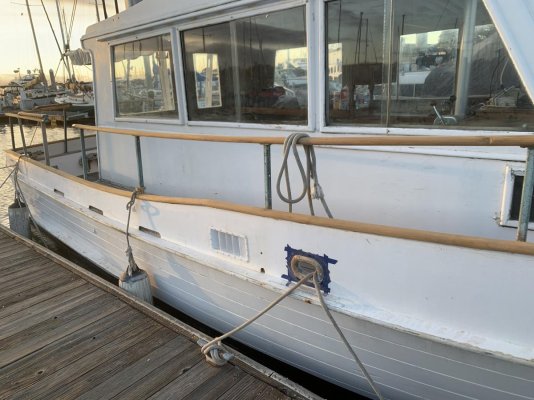
- 90% of the exterior brightwork is stripped
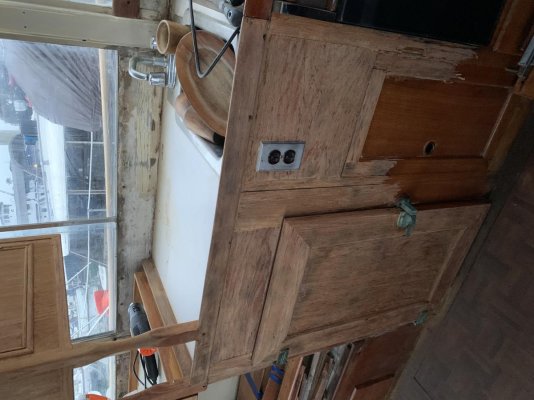
- 40% of the interior woodwork is stripped
- Initial rust remediation on the transmission and rudder support complete.
- Exterior window trim is stripped and new stanpro tracks are purchased. Just building up the courage to rip those off and rebuild them.
- All engine parts en route from American Diesel so the engine support and transmission seal should get done in the next week.

The bad:

- The leak in the foredeck is worse that I hoped. Once I had the headliner off it was clear it was coming from he bungs that had been caulked over. Unfortunately that DIY fail #17 made the problem worse. Water must have been trapped under that caulk which caused rot around 4 bungs. Have a wooden boat shipwright coming over to help me work up a plan. The basic idea is to drill them out wider and scarf in a small piece of subdeck below them.
- The electrician identified 2 outlets with reverse polarity so hes going to come back to trace all wires to make sure everything is safe and tidy.
 

Attachments

  • IMG_8491 2.jpg
    IMG_8491 2.jpg
    182.6 KB · Views: 23
  • IMG_8630.jpg
    IMG_8630.jpg
    188.1 KB · Views: 21
  • IMG_8633.jpg
    IMG_8633.jpg
    154.9 KB · Views: 23
  • IMG_8689.jpg
    IMG_8689.jpg
    181.5 KB · Views: 24
  • IMG_8748.jpg
    IMG_8748.jpg
    169.9 KB · Views: 24
  • IMG_8816.jpg
    IMG_8816.jpg
    185.8 KB · Views: 21
  • IMG_8557 2.jpg
    IMG_8557 2.jpg
    168.1 KB · Views: 24
  • IMG_8859.jpg
    IMG_8859.jpg
    176.6 KB · Views: 24
  • IMG_8825.jpg
    IMG_8825.jpg
    180.2 KB · Views: 21
  • IMG_8852.jpg
    IMG_8852.jpg
    140.7 KB · Views: 24
Last edited:
Good job so far

I have been there & done that.

You're now in too deep to stop now, so might as well go for it..

Good to see your enthusiasm.

So, Good Job So Far !

We are proud of you jumping in and tackling this.

Keep up the good work.

Can't wait to see the progress as you go.

Good luck.

Alfa Mike
 
Last edited:
Good on ya! Keep up the efforts to completion. No time to look back now!!
 
..
 

Attachments

  • IMG_8830.jpg
    IMG_8830.jpg
    149 KB · Views: 20
  • IMG_8832.jpg
    IMG_8832.jpg
    146.3 KB · Views: 19
  • IMG_8870.jpg
    IMG_8870.jpg
    129.5 KB · Views: 22
  • IMG_8616.jpg
    IMG_8616.jpg
    107.7 KB · Views: 20
Last edited:
While you're at it, you might wanna check the fuel tanks and the fresh water tank. If fuel tanks ok, I would give them a good scraping, especially on top and the rusty spots to the shiny metal, a good Rustoleum primer and a couple of epoxy base paint battleship grey.
 
Bolder than me
While I don't mind taking on a project I am not "ballsy" enough to rip everything apart and try and tackle it in one go.
I prefer to prioritise.
Some things need fixing now, some can wait a bit, use the boat in between to retain sanity.

Now you have done it, have at it.

Add: hold on, jumped in on this thread half way in, thought it was 3 pages long, seems I have more reading to do.
 
Last edited:
Bruce,

Great progress,

You may be able help with a post I made a day or so ago - how was the headlining attached to the ceiling beams and secondly, If your boat has a mast - what are the support arrangement under the ceiling. Any photos of either how the ceiling headliner attaches or the support for the mast would be appreciated.
Although our boat is an Island Gypsy Grand Banks and yours is a Grand Banks, they shared many similar construction techniques.

Keep the camera rolling - members of the Forum just lurv pictures

cheers
 
Lookin' good man, lookin' good. Have you considered leaving the ceilings exposed, they are sharp when taken back to their original wood, soda blasting can move things along quickly and not damage your underlying surface. This appears to be a great old girl and very worthy of your efforts plus I'm sure all those involved, including the dumpster guy, appreciate the employment! Happy New Year and full steam ahead =)
 
Nice work. Could't stop the master cabin leaks so we completely replaced our foredecks a couple of years ago and problem solved. Sometimes its better to go all in when working on a boat. The best money we ever spent and she keep providing us great enjoyment.
 
Bruce,

Great progress,

You may be able help with a post I made a day or so ago - how was the headlining attached to the ceiling beams and secondly, If your boat has a mast - what are the support arrangement under the ceiling. Any photos of either how the ceiling headliner attaches or the support for the mast would be appreciated.
Although our boat is an Island Gypsy Grand Banks and yours is a Grand Banks, they shared many similar construction techniques.

Keep the camera rolling - members of the Forum just lurv pictures

cheers

Its attached in an accordion fashion along the length of the boat. Each horizontal panel (that goes the width of the boat) has a 1 inch hidden seam between each panel that is tacked into the beam above.So your headliner panels equal the width of your deck/ceiling beams. Thats how's its kept tight with nice creases. The tacks are put in probably every 6" or so along each beam, so there are tons of them.

Around the outside you have a small piece of wooden trim (hidden) that goes between each beam. The headliner is wrapped around that and stapled to the back of it. I need to check more closely on that as some of the headliner looks like it went under that piece, but I dont understand how they would have attached it (since its completely hidden by the headliner). Those little trim pieces are how they keep the edges tight along the walls.

Then on top of this is the wood quarter round trim to hide the edge. But this has no "structural' value for the headliner itself.


As for pics, I have tons...but whats the deal with TFs photo attachments? If you try to add photos inline it gives you a URL. You need to add as attachments and they seem to orient randomly.
 
While you're at it, you might wanna check the fuel tanks and the fresh water tank. If fuel tanks ok, I would give them a good scraping, especially on top and the rusty spots to the shiny metal, a good Rustoleum primer and a couple of epoxy base paint battleship grey.

The good part is it had the tanks replaced maybe 15+ years ago with aluminum ones. The bad part is the port tank is corroded and needs to be replaced. A read in some old survey documents a leak near the fuel fitting 5+ years ago made quick work of it. But...the good part is since they were already replaced they are easy to slide in and out the cockpit lazarette. No need to cut them out. I will tackle that project along with repainting the bilges over the summer.

The water tanks, holding tank and electric toilet are all new'ish. The PO used the boat for SUP charter trips so the broker said "the engine, hull and toilet are all in great shape...everything else is a mess" ;-)
 
Its attached in an accordion fashion along the length of the boat. Each horizontal panel (that goes the width of the boat) has a 1 inch hidden seam between each panel that is tacked into the beam above.So your headliner panels equal the width of your deck/ceiling beams. Thats how's its kept tight with nice creases. The tacks are put in probably every 6" or so along each beam, so there are tons of them.

Around the outside you have a small piece of wooden trim (hidden) that goes between each beam. The headliner is wrapped around that and stapled to the back of it. I need to check more closely on that as some of the headliner looks like it went under that piece, but I dont understand how they would have attached it (since its completely hidden by the headliner). Those little trim pieces are how they keep the edges tight along the walls.

Then on top of this is the wood quarter round trim to hide the edge. But this has no "structural' value for the headliner itself.


As for pics, I have tons...but whats the deal with TFs photo attachments? If you try to add photos inline it gives you a URL. You need to add as attachments and they seem to orient randomly.

Thanks Bruce- I suspected it would be something like that - prepares me for getting it off and hopefully back on in one piece. Once you figure out the photo issue, pics under the mast would be great.

Thanks again
 
As for pics, I have tons...but whats the deal with TFs photo attachments? If you try to add photos inline it gives you a URL. You need to add as attachments and they seem to orient randomly.

Are you using your iphone for pix?
I found out quite recently that the phone camera needs to be at the top, whether you are taking portrait or landscape orientation. On my iphone, that means for landscape, tilt the phone to the left to keep the camera at the top. My pix now come out OK.
 
Some owners used meranti door skins as headliner panels, either covered in something like vinyl or painted and held on with Velcro strips. You can use some meranti and a glue gun to "spile" each panel for a perfect fit. That way lighting and wiring are readily accessible and, when you get it all open, you will see that GB built in a hatch for removing the engine from the roof. I hope not but that might need to be accessible one day.

Bronze deck nails can be just fine, they've been in there forever. 2 methods of repair, drive the nail deeper, drill out the bung hole deeper and use a glue of your choice (I used white glue that dried waterproof, you can wipe spillage with a wet rag) and cut off the bung with a Japanese draw saw. The other method is to use a small plug cutter (drill bit with a hole in the centre) to cut around the nail, then you can get a hold of it and pull it out. Then use a nice bronze screw. Some just pull the nail and fill with epoxy or similar, but you cannot make teak decks permanent so be careful using modern adhesives. The loudest cursing you will ever hear on this site is directed at previous owners who used 5200 to glue their boats together. Or silicone sealer, which is the other product from hell.

I found the best tool for deck work was a Swiss Army knife. Use the small blade to pry out the old bung and clean up the hole and the small blade cuts alongside the caulk very nicely. Lee Valley makes a nice set of wood screw-shaped drills with an included countersink and they sell a stop that sets with a set screw so you can't drill too deep.

Give some thought to replacing the windows with aluminum drop-ins. They are not as nice aesthetically but they pretty much permanently stop problems that will happen over and over again to wood windows. Investigate butyl tape for sealing things.

I used Le Tonkinoise varnish on my boat, no solvents at all so no worries about toxicity and it builds up very well. It is also excellent for corrosion resistance, paint it on your cleaned transmission for no more rust. I don't sell it or anything, just a really good product. Also, disposable foam brushes work well with it.
 
Last edited:
That's an awful lot of work in such a short time. What will you be doing to protect the project from rain while it is vulnerable?
 
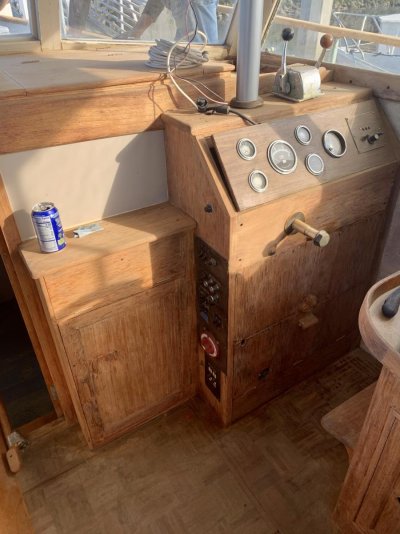
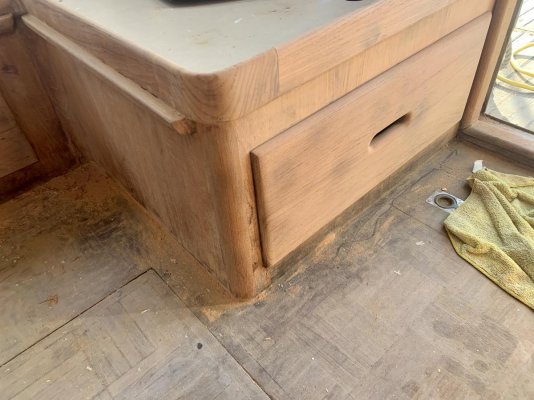
Progress continues at a good clip. Took advantage of 2 days of rain and the interior is now 70% prepped. Its a completely transformed boat in a couple weeks. Just need to finish sanding the the v-birth and head tmrw. The plan is to put a sealer coat on all the teak and then start sanding and prep'ing the superstructure.

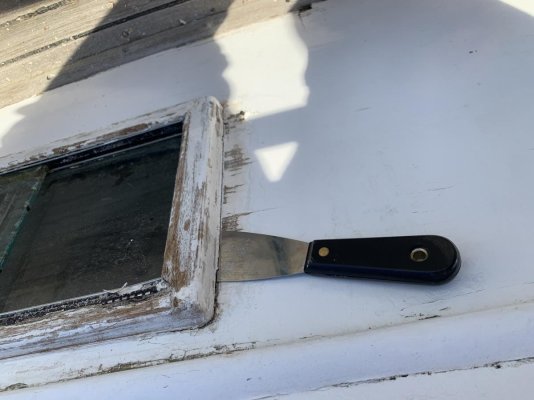
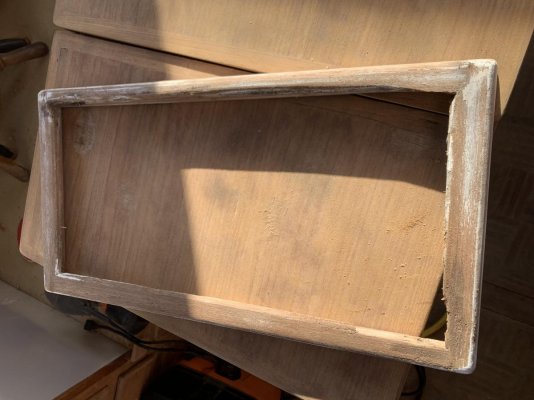
Biggest issue is we have a traffic jam developing between exterior paint prep, replacing the deck/coaming molding and replacing and rebeding the windows. I took out the head window today as a test. Its easier than I thought. I spent more time thinking about removing it than actually removing it :)

But I need to get all the windows out and over to the glass shop to be recut, then prep each window frame, get 1 new frame milled, cut new tracks, and get them rebed...all before it rains. And of course January is the only month of the year in SF that it actually rains.

I've heard Dolphinite recommended for rebeding the windows. Anyone have any input?

I'm planning to use penetrating epoxy around all window frames and on the mahogany exterior trim. The interior plywood window frames are very thin and degraded so im thinking about using some System 3 Sculptwood Paste to add some strength. Good idea?
 

Attachments

  • IMG_8925.jpg
    IMG_8925.jpg
    98.2 KB · Views: 13
  • IMG_8934.jpg
    IMG_8934.jpg
    120.9 KB · Views: 14
Last edited:
It looks a little bit less like a monday morning frat house each day :)
 

Attachments

  • IMG_8914.jpg
    IMG_8914.jpg
    145.5 KB · Views: 19
  • IMG_8915.jpg
    IMG_8915.jpg
    133.1 KB · Views: 16
  • IMG_8919.jpg
    IMG_8919.jpg
    145.3 KB · Views: 16
  • IMG_8920.jpg
    IMG_8920.jpg
    162.3 KB · Views: 17
  • IMG_8922.jpg
    IMG_8922.jpg
    110.6 KB · Views: 15
I picked on your choice of boats but now that you are in the thick of it here is a little practical advice. First thing I do before I start any boat work is put these on. Light weight, stay up well, washable and easy on your boats rapidly improving decor. Save your knees!:

https://tinyurl.com/y5lnz4p4
 
It looks a little bit less like a monday morning frat house each day :)

Wow, what the undertaking. I too had a GB Woody, the famous Whittlers Dream GB42-125 Whittler´s Dream GB42-125 that is now with NuttinFancy after getting hit by a tornado and sold for scrap pretty much.

We did three major refits in 15 years, the last one replacing 80% of the vertical plywood in the house structure, and fiberglassing the 7 layer German epoxied plywood in a similar manner that the horizontal surfaces had been done at the factory yard back in the late 60s.

I noticed that NONE of the marine plywood that had been coated with FG had any deterioration and we had already spend a fortune repairing and repainting sides around windows and doors, I wanted a permanent fix with new doors (from GB Ltd) and new clamshell aluminum windows. We also removed the trim and created fillets to allow great drainage and fewer intrusion areas.

The new plywood, windows and doors, like the 100% new 2000 tinned marine rewiring with subpanels, batteries and specialized alternators (one on port for two 8D starting/house 12 v batteries) and another on Stbd for 8 - 6v AGM for inverter subpanel functions) and new CruiseAir skids and paint/ each round cost more than the original purchase price. The asking price in 2000 was $79k, I signed contract at $69k, after $1100 survey we ¨whittled¨ the final price to $40k.

Then another $38k and a $15k pick-up truck in trade on refit #1.
Another slow and methodical refit #2 was well over $70k, and the 3rd one that was the smartest one with new windows and doors and new FG/Marine plywood sidewalls was about $80k. All in I sunk well North of $250k and thousands of personal hours into that boat and ended up selling her 4 times, (but that is another story all together). The net of the final sale was $24k in payments of $2-4k/month to a guy that had like 4 other woodies. He got nearly $50k in insurance when the tornado tore up the A Dock and sunk all the FG boats and only the stout woodie remained, holding up what was left of the dock and roof system.

The boat was pretty much given away after that and the member here picked her up for the value of the fuel aboard her and is doing a great job restoring her on a budget to suit his needs. He is lucky to have some great skills and friends with additional skills. She may make it to be 100 years old. That is my guess anyhow.

You can spend as little or as much as you can imagine, but I think you know that by now. Any suggestions you may need can be found on this forum. Good luck and remember to enjoy the journey, even when part of that journey is sweating and sanding and all. Nothing better than messing about in boats.
 
If you want a life long wood working project this is probably a good choice. If you want to go boating probably not so much. However find out if it was a six pack charter or an inspected vessel. If the later there should be a record of inspections, the findings, and needed repairs. Maybe a bright spot in an otherwise bleak picture boating wise.

I was going to say that too. If inspected the CG would have inspected every year, out of the water every fifth, and they're pretty darn picky. They can shut you down on the spot if they find anything bad. Uninspected passenger vessels have to abide by most of the same regs, but in most states no one checks to see you're doing it. Here in Michigan the DNR does inspect UPV's, and their requirements are way more stringent than the federal. I don't know if CA does that, kind of surprising if they don't considering their rules on other things. Anyway, if it was recently operated as an inspected vessel, it should be safe enough. And if CA inspects UPV's, even better.
 
:iagree:
Wow, what the undertaking. I too had a GB Woody, the famous Whittlers Dream GB42-125 Whittler´s Dream GB42-125 that is now with NuttinFancy after getting hit by a tornado and sold for scrap pretty much.

We did three major refits in 15 years, the last one replacing 80% of the vertical plywood in the house structure, and fiberglassing the 7 layer German epoxied plywood in a similar manner that the horizontal surfaces had been done at the factory yard back in the late 60s.

I noticed that NONE of the marine plywood that had been coated with FG had any deterioration and we had already spend a fortune repairing and repainting sides around windows and doors, I wanted a permanent fix with new doors (from GB Ltd) and new clamshell aluminum windows. We also removed the trim and created fillets to allow great drainage and fewer intrusion areas.

The new plywood, windows and doors, like the 100% new 2000 tinned marine rewiring with subpanels, batteries and specialized alternators (one on port for two 8D starting/house 12 v batteries) and another on Stbd for 8 - 6v AGM for inverter subpanel functions) and new CruiseAir skids and paint/ each round cost more than the original purchase price. The asking price in 2000 was $79k, I signed contract at $69k, after $1100 survey we ¨whittled¨ the final price to $40k.

Then another $38k and a $15k pick-up truck in trade on refit #1.
Another slow and methodical refit #2 was well over $70k, and the 3rd one that was the smartest one with new windows and doors and new FG/Marine plywood sidewalls was about $80k. All in I sunk well North of $250k and thousands of personal hours into that boat and ended up selling her 4 times, (but that is another story all together). The net of the final sale was $24k in payments of $2-4k/month to a guy that had like 4 other woodies. He got nearly $50k in insurance when the tornado tore up the A Dock and sunk all the FG boats and only the stout woodie remained, holding up what was left of the dock and roof system.

The boat was pretty much given away after that and the member here picked her up for the value of the fuel aboard her and is doing a great job restoring her on a budget to suit his needs. He is lucky to have some great skills and friends with additional skills. She may make it to be 100 years old. That is my guess anyhow.

You can spend as little or as much as you can imagine, but I think you know that by now. Any suggestions you may need can be found on this forum. Good luck and remember to enjoy the journey, even when part of that journey is sweating and sanding and all. Nothing better than messing about in boats.
:iagree:

While you have her apart, now would be the time to invest in good aluminum windows, the originals will be a point of failure and ongoing maintenance for eternity. Great project, thanks for the updates!
 
Wow Bruce - Wow! From one Marinite to another WOW!!

Get It On!!!
 
Cabin overhead

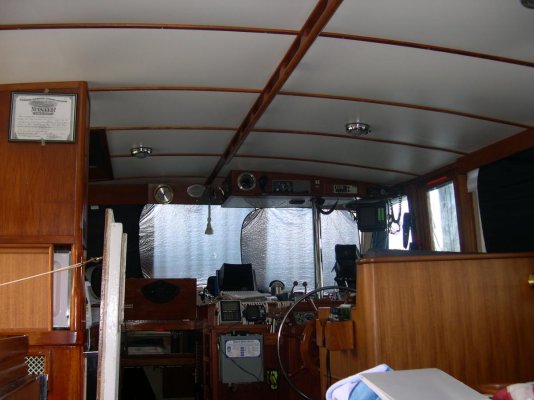
When I got rid of the ratty old perforated vinyl, I found ZERO insulation under the overhead deck. I cut and glued in 1.5 inches of solid foam insulation which made a huge difference. Rather than a soft overhead, I installed white Formica with teak strips between each piece. Neat and clean looking.
 

Attachments

  • DSCN0010.jpg
    DSCN0010.jpg
    109.7 KB · Views: 16

Latest posts

Back
Top Bottom