Engine flush

The friendliest place on the web for anyone who enjoys boating.
If you have answers, please help by responding to the unanswered posts.

jimdavi

Senior Member
Joined
Aug 18, 2014
Messages
466
Location
USA
Vessel Name
Couple’s Retreat
Vessel Make
2019 North Pacific 45
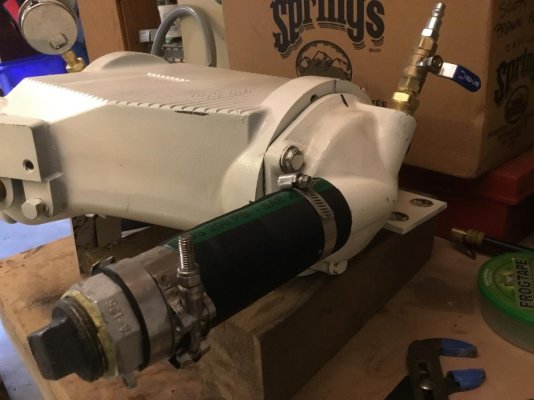
I have read many threads on this but have an additional question. Engine is about a year old, ( Cummins 6.7L 250HP) and had difficulty removing the zincs on the heat exchanger. For some reason they don’t come out easy. Removed the composite end cap and cleaned out the old particles, zincs etc. I did notice the start of lime/build up. No change in engine temp and crud is minor.
Here’s the question- for preventative maintenance ( I don’t flush freshwater currently) what’s the difference between circulating barnacle buster for several hours with a bucket, pump etc. versus something like Sea Flush, which sucks in the fluid, let it sit for several hours, then re starts. The Sea Flush seems simpler, e.g not removing hoses, impeller. For preventative maintenance, wondering if the Sea Flush is effective. Looking to limit disassembly. Planning to do this annually between component removal, clean and testing as required.
 
If they are like other Cummins they are a tight fit in the exchanger and when they swell or corrode the end cap screws out but leaves the zinc in the exchanger.

A threaded rod join nut available from home depot or Lowes can screw onto the zinc and provide a purchase to wiggle and pull the zinc.
 
Seaflush is a mechanical device that sits on top of your strainer and lets you supply the engine with fresh water for flushing or an acid solution to remove scale. It has nothing to do as far as I can tell with the acid solution itself. You buy that from Barnacle Buster, Rydlime or your local Home Depot.

But I can tell you this, filling and soaking does not work as well as circulating the acid solution. Circulation brings fresh acid to the deposit whereas soaking can deplete the acid locally and no further scale dissolving occurs.

In the heavy industrial world we always used circulation when we could.

David
 
We used Barnacle Buster on our engines a couple of years ago. I didn’t want to remove the impellers since one of mine is a bugger to get to so I did the fill and soak method. Let it sit for about 6 hours or so then started. One engine dropped 10 degrees and the other 5 degrees. So I was very satisfied as to how it worked. The circulation method may work better but I will not do that due to access. We used a Sea Flush winterizing adapter to run the BB into the engine just like winterizing it. It is simple and easy to do. Just take the top of the strainer and basket out and stick in the Sea Flush adapter and start the engine and run it until the BB is sucked in. Shutdown engine replace basket and top of strainer and wait. Then start engine and you are done.
 
We used Barnacle Buster on our engines a couple of years ago. I didn’t want to remove the impellers since one of mine is a bugger to get to so I did the fill and soak method. Let it sit for about 6 hours or so then started. One engine dropped 10 degrees and the other 5 degrees. So I was very satisfied as to how it worked. The circulation method may work better but I will not do that due to access. We used a Sea Flush winterizing adapter to run the BB into the engine just like winterizing it. It is simple and easy to do. Just take the top of the strainer and basket out and stick in the Sea Flush adapter and start the engine and run it until the BB is sucked in. Shutdown engine replace basket and top of strainer and wait. Then start engine and you are done.

That’s exactly how I was thinking. Understand the circulate may be better, but I don’t want to take apart everything, and know build up is very low. Engine temp has not budged and boat is only 1 yr old.
 
Many new engines have aluminum and other metals in them so be careful of acid flushing until you are certain of the metals in your engine..
In any event every year seems overkill to me.

FYI I had Cummins 8.3L and serviced the after cooler every few years but the rest of the raw water cooling system was in good shape after ten years when I disassembled it entirely for cleaning. It was very clean inside but hoses and clamps needed replacement.
 
Last edited:
Regularly freshwater flushing the raw water side will eliminate the need for any "acid" cleaning as an interim measure between the "full" off engine servicing of the raw water components.

The item most needing regular attention is the aftercooler (every 3 or so years according to Tony Athens). Besides anode changes, it needs to be taken apart off the engine and cleaned, new o rings, greased up at mating surfaces (see sbmar.com for full instructions) and importantly pressure tested. Acid cleaning on engine will possibly help remove the build up on the raw water side (tubes), but will not do anything to clean up the air side, nor reduce or even check on ongoing internal corrosion, nor ensure that there are no internal leaks. The air side gets very "gunky" after a while and will inhibit the air supply to the engine. Any internal leaks (hence the need for pressure testing) will allow salt water to be ingested by the engine resulting in major issues if not caught early.

Another item of concern would be the gear oil cooler. A leak here could result in major transmission damage. Many coolers don't have anodes, so internal corrosion could be a problem. A good "off engine" regime of servicing the "other" (aftercooler more often) raw water components every 5-6 years (changing the antifreeze at the same time) is important to reduce any potential for overheating your engine(s). Regular freshwater flushing will prolong the life of all raw water cooling system components.
 
Thanks much. My gear cooler has a zinc and I will plan to remove and service all components at year 2.
 
That’s exactly how I was thinking. Understand the circulate may be better, but I don’t want to take apart everything, and know build up is very low. Engine temp has not budged and boat is only 1 yr old.

A couple of comments. I think your perception of having to disassemble "everything" is a bit off the mark unless pulling two hose connections apart is "everything." The exit connection from the engine's raw water pump and the seawater inlet connection at the exhaust mixer at the end of the line of coolers are usually quite easily accessed. Heading out the back door to the boat via the tool shed to pick up my descaling kit-in-a-bucket and installing the hose adapters into each of the aforementioned hoses takes a total elapsed time of 20 minutes or less.

Zincs checked at three-month intervals will usually not be difficult to pull. A good idea mentioned here by people smarter than I am is to grind the external threads off of a brass zinc holder such that it can be threaded onto the exposed threads of a recalcitrant zinc. Continuing to turn it in a clockwise direction will often break it free.
 
You can add some fittings and valves the first time "you take everything apart" and thereafter you attach a couple hoses and open some valves when you want to flush.
 
A couple of comments. I think your perception of having to disassemble "everything" is a bit off the mark unless pulling two hose connections apart is "everything." The exit connection from the engine's raw water pump and the seawater inlet connection at the exhaust mixer at the end of the line of coolers are usually quite easily accessed. Heading out the back door to the boat via the tool shed to pick up my descaling kit-in-a-bucket and installing the hose adapters into each of the aforementioned hoses takes a total elapsed time of 20 minutes or less.

Zincs checked at three-month intervals will usually not be difficult to pull. A good idea mentioned here by people smarter than I am is to grind the external threads off of a brass zinc holder such that it can be threaded onto the exposed threads of a recalcitrant zinc. Continuing to turn it in a clockwise direction will often break it free.

What time will you be over tomorrow?
 
A couple of comments. I think your perception of having to disassemble "everything" is a bit off the mark unless pulling two hose connections apart is "everything." The exit connection from the engine's raw water pump and the seawater inlet connection at the exhaust mixer at the end of the line of coolers are usually quite easily accessed. Heading out the back door to the boat via the tool shed to pick up my descaling kit-in-a-bucket and installing the hose adapters into each of the aforementioned hoses takes a total elapsed time of 20 minutes or less.

Zincs checked at three-month intervals will usually not be difficult to pull. A good idea mentioned here by people smarter than I am is to grind the external threads off of a brass zinc holder such that it can be threaded onto the exposed threads of a recalcitrant zinc. Continuing to turn it in a clockwise direction will often break it free.


On my boat the starboard engine water is almost not accessible. I can reach it by lying on the engine and reaching down, but I have to work by feel as you can’t see it except for a bit if you look through the hoses and pipes. There is no way that I will disassemble it just to pump the descaler through the engine. Putting the descaler in and letting it sit is good enough and better than nothing.
 
When you strip threaded parts out of the engine.
If you wish them to be permanently reinstalled use 'Threadlock' compound smeared around the thread before refitting.
If it has the be removable for servicing at a later time use 'Copperslip' anti seize compound smeared around the threads.
Think easy future servicing.
 
When you install new zincs/anodes in the caps hold the cap in a vise or a suitable box end wrench and use a pair of pliers to tighten the anode into the cap. It is unlikely it will separate after that. THe threads are not an accurately formed thread on the anode so just screwing them into the cap is not enough. They will loosen,

I also put some, small bit, Rectorseal #5 on those threads and the cap threads, then do the snugging. You shouldn't lose them in the future.

I have been purchasing the complete zinc anode and Cap assy. From boat zincs.
 
Jim,
Disassembling everything at the 2 year mark is a bit "overkill" according to many experts, but certainly is your call. Very prudent. However, you may want to service the aftercooler at that point, as often the factory does not grease them up to better protect the internal surfaces from corrosion and pitting.

It sounds like you are a true believer in PM.
 
Folks, lots of good stuff here, thanks. One question...can I remove the aftercooler end caps insitu to lubricate them, rather than full disassembly? Recall the engine is 1 yr old.
 
Jim,
I have not worked on that exact engine, mine is a Cummins 6BTA. The first time my aftercooler was serviced (while I owned the boat), we were suffering an exhaust hose overheat issue and were away from our home port. I hired a mechanic to do the work. He, as a part of the service/troubleshooting, disassembled my aftercooler in place on the engine. He reinstalled it with new o rings and lightly greased the components and DID NOT PRESSURE TEST. At the time, I did not know what I have since learned, and I now service my own aftercooler. The aftercooler leaked a small bit at the cap to cooler body interface and had to be retorqued, but that fixed it and all was fine.

So, short answer is I would think you could, but since the sealing surfaces are going to be disturbed to put the grease in, etc., if it were my unit I would definitely want to pressure test it. Look at sbmar.com for photos of home made pressure test setups. I have attached photos of mine.
Removing mine from the engine takes less than 30 minutes and involves removing 4 hoses, 2 bolts, and one electrical connection. Yours may be different.
Good luck.
 
Sorry, for some reason the photos did not attach. Try again.
 

Attachments

  • Aftercooler test kit.jpg
    Aftercooler test kit.jpg
    92 KB · Views: 17
  • Aftercooler test kit 2.jpg
    Aftercooler test kit 2.jpg
    102.3 KB · Views: 13
Folks, lots of good stuff here, thanks. One question...can I remove the aftercooler end caps insitu to lubricate them, rather than full disassembly? Recall the engine is 1 yr old.

No, you have to pull the cores to replace the o-rings that seal them to the shell and lubricate them. Just removing the end caps won't get you there.

David
 
Great input! I Wasn’t thinking about the leak test. I’ll look into making fittings/hoses to leak test. Big thanks to all.
 

Latest posts

Back
Top Bottom