Lag bolt in skeg.

The friendliest place on the web for anyone who enjoys boating.
If you have answers, please help by responding to the unanswered posts.

JDCAVE

Guru
Joined
Apr 3, 2011
Messages
2,902
Location
Canada
Vessel Name
Phoenix Hunter
Vessel Make
Kadey Krogen 42 (1985)
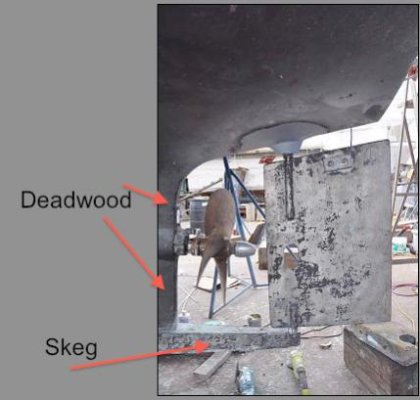
So a PO has used a lag bolt screwed into the skeg, just above the shaft tube to hold on a zinc to protect the mounting brackets for the line cutters on the shaft. This is a poor approach and involved sikaflex in a half-assed attempt to keep the bolt in place. I’m going to drill out and tap the bracket to put on a bolt.

I’ve bored out this hole to remove all traces of the caulking and it’s now about 5/16” and penetrates a little over an inch. Initially I wanted to fill it with thickened epoxy but that’s proving the devil to get in place.

Is there some sort of epoxy putty that can be rolled into a cylinder, inserted into the hole and tamped into position before it sets? I wonder if this JB weld product might be suitable?

https://www.jbweld.com/product/waterweld-epoxy-putty

If that isn’t suitable, suggestions?

Note: nothing is particularly structural here.

Jim
 
Last edited:
Maybe Six-10. It comes in a tube like caulk and it prethickened.
 
I think that 5200 will just run out of the hole since it is pretty runny.
 
MarineTex will stay in place.
 
I much prefer the idea of thickened epoxy vs. caulk. Why is it not going into place (not sure I'm visualizing it correctly).

Some ways I have gotten epoxy into a blind hole (many quite a bit smaller than 5/16")

First, wet out the inside of the hole with liquid epoxy with no filler. That will "soak in" to the substrate. Then get some pieces of clear packing tape (or blue tape) ready. If you let the initial plain epoxy "tack up" then the thickened epoxy will kind of stick to it (may not be necessary because of the tape).

Next, thicken the epoxy with something like colloidal silica. The thicker it is the less it will want to come back out; but the thinner it is the stronger it is. Put it into a syringe (or if you don't have one, you can cut the corner off of a baggie sort of cake-decorator style).

Now you can jam it in there, so your next challenge is to not trap air (because blind hole). I have done this a few ways, depending on the situation. One is a tiny relief hole somewhere connected. Two is getting the syringe down into the bottom of the hole and filling "upward" (or you can put part of a drinking straw on as an extension). Three is just flooding the thing and letting excess epoxy and air come pouring out while you keep on going (wastes epoxy but maybe you mixed too much anyway, not that I would ever do that :whistling:). Four is to agitate the filled hole with a toothpick or something (not very practical if hole faces downward).

Once the hole is filled, you can slap the tape over the top to keep the epoxy in there. If it is perfectly flat, great. If proud, then wait until it gets to the green (hard cheese) stage, remove the tape, and slice excess off with a chisel (or sand off after cured). If low then add more in the green stage (chemical bond) or let it cure then wash/sand/add more.

If it were "structural" (or if it were wide and shallow fiberglass area) then you could add cloth over the top. Since you are just keeping the water out, and it sounds like it is narrow and deep, then just thickened is probably okay.
 
JB Weld is thicker than Marine Tex, so it should mold into place much better. I think it will do the job perfectly.
 
You know, I think I misunderstood and thought you were filling a hole in fiberglass but it's actually in metal. If so, nevermind!

(Into fiberglass I like the "grip" and penetration of starting with a thin epoxy to soak in before the thickened; but obviously that is not the same with metal.)
 
I’ve used stick epoxy similar to the JB Weld and it should work fine. You just slice off a piece and knead it until it’s uniform in color. It is the consistency of modeling clay. I’m thinking you could roll little balls of it and press them into the hole with a stick.
 
Perhaps I’ve misnamed the location as “skeg” the location is shown in this photo, with the zinc in place on the bracket holding the line cutter above the shaft. After working with the thickened epoxy and struggling with getting it to stay in the hole (it keeps coming out with the packing tool) I’m leaning toward using a putty, which hopefully will stay in place.
Zincs on Rudder shaft and spurs.jpg
 
I would do like Frosty said. Make the epoxy as thick as you can and still get it in place. You can also use a baggie with a straw taped into it. Place the straw in as deep as it will go and fill on the way out. Over fill a little and use a piece of packing tape to hold it in place while it sets.
 
Perhaps I’ve misnamed the location as “skeg” the location is shown in this photo, with the zinc in place on the bracket holding the line cutter above the shaft.

Now I feel kind of silly, but I still can't "see" what area you mean :blush:

If whatever you are filling is fiberglass, I stand by what I posted earlier. If it's metal, then I don't know.

I'm no expert, but this is what I would call the two areas -- recognizing that the terms come from "wooden days" and are not even exact for that (or maybe just wrong).

Or maybe the hole is someplace else?
 

Attachments

  • parts.jpg
    parts.jpg
    24.9 KB · Views: 54
Now I feel kind of silly, but I still can't "see" what area you mean :blush:

If whatever you are filling is fiberglass, I stand by what I posted earlier. If it's metal, then I don't know.

I'm no expert, but this is what I would call the two areas -- recognizing that the terms come from "wooden days" and are not even exact for that (or maybe just wrong).

Or maybe the hole is someplace else?


I believe the hole is just below your top arrow where you call 'deadwood'.
 
I believe the hole is just below your top arrow where you call 'deadwood'.

Okay, so between the upper arrow and the shaft log? That makes sense, since it has something to do with line cutters. Then I think it would be into fiberglass.

Thanks for clarifying.
 
Your local farm supply has large sized cheap plastic injection stuff.

Simply use one injector to fill the bolt hole and put a piece of tape over the spot till the epoxy hardens . No needle is required the thick epoxy will go OK from the unit
 
If you are trying to fill a blind hole stuffing anything in creates air pressure that pushes it back out. You will need to put it in with a small stick an build it up from the back a bit at a time.
 
Look above the shaft, you will see a bracket with a zinc on it.
IMG_3923.jpg
 
Could be an optical illusion but doesn’t look like you could draw your shaft through the hole in the rudder. Is it too low or just seem that way ? As Frosty says apiece of tape will retain until cured. You don’t want a dry mix on this but something that is wet enough to penetrate for a deeper bond. Not sure where you are talking cause the skeg looks to be a bolt on metal ?
 
Fill the hole with JB weld and drill and tap a new hole?

It appears you will have to use a bottoming tap. I've pull out threads from Belzona and JB Weld with a bottoming tap before. Not a lot of shear strength in the thread. Go cautiously.

Helicoil? Maybe not. Just adding another metal to protect.

What material is the "skeg" made out of?
 
JB Weld is thicker than Marine Tex, so it should mold into place much better. I think it will do the job perfectly.

I don't believe there's much weight or tension on this hole that is made for keeping a zinc in place. So the JB will have the strength you need. Just pack in moderate size pieces and compress into place with a dowel or similar tool. Once hardened, you can drill it and install the bolt. Be sure that there is a wire going from the zinc to the cutter device for proper protection.

You might try installing the bolt with a washer, headfirst into the hole and pack the JB around it. The bolt will likely be more permanent this way. Cheers.
 
I see the situation now, thanks for the larger photo.

Is that raised area (painted black) not already metal? It kind of looks like part of the shaft long in the photo. Wouldn't that be bronze or similar?

If so, what about filling any "extra" hole that goes into the fiberglass (as outlined in prior post), and then tapping the bronze for a stud. Then put the zinc over the stud and tighten a nut/lockwasher.

Or.... how are these usually done? I can't imagine just screwing into fiberglass each time (even though I have had good luck tapping structurally thickened epoxy, I wouldn't do it for something that needed to be taken in and out on a regular basis).

I guess I don't know how these are done normally, but I can't see "screwing" into fiberglass every time you change an anode.
 
Last edited:
I don't believe there's much weight or tension on this hole that is made for keeping a zinc in place. So the JB will have the strength you need. Just pack in moderate size pieces and compress into place with a dowel or similar tool. Once hardened, you can drill it and install the bolt. Be sure that there is a wire going from the zinc to the cutter device for proper protection.

You might try installing the bolt with a washer, headfirst into the hole and pack the JB around it. The bolt will likely be more permanent this way. Cheers.
Your last idea is a good one. Just use a release agent on the bolt. Like mineral spirits.

Molded threads may be easier than tapped threads in this case.
 
I am looking to fill he FRP material on which the bracket is held. I would rather leave the bracket in place rather than take it off. The bracket is stainless steel. No corrosion is evident on the stainless.

I intend to drill and tap the stainless and fill the FRP material behind it. As I mentioned I tried the thickened epoxy route and was not successful. Perhaps too thick.
 
Last edited:
I am looking to fill he FRP material on which the bracket is held. I would rather leave the bracket in place rather than take it off. The bracket is stainless steel. No corrosion is evident on the stainless.

I intend to drill and tap the stainless and fill the FRP material behind it. As I mentioned I tried the thickened epoxy route and was not successful. Perhaps too thick.
Ah. Carry on then. Interlux Watertite would be my choice. Only because I already have some. JB Weld would be fine.

I have used JB weld in a turbulent, abrasive, hot, contaminated water application in industry (in a pinch, not by specification) and it was still fine after several years.

Wondering why we spent so much on Belzona in the past...
 
Is tapping the next tap size out of the question?


:iagree:

This is the route I would go.


Most keels are a slurry of resin and other material for strength.


I would just go up one size, retap at least a couple inches deep if possible, and use a threaded rod smeared with epoxy.


That's how my cutlass carrier is installed for the shaft....this isn't resisting much pull.
 
Read post 23.

He IS going to drill and tap the SS.

He needs a solution for the hole in the fiberglass behind the hole in the SS created by the PO sticking a lag bolt in there.

Silly PO.
 
You might try a piece of all thread and epoxy it into the hole and then put a nut on the all thread to hold the bracket on. If the hole is 5/16” you could use a 5/16” all thread and slather it with thickened epoxy and then insert into hole and let it harden. That way you would be glueing the all thread in and not using a tap to thread the epoxy. I think that the all thread will glue in pretty securely. Clean the all thread with some acetone or similar before glueing it in.
 
Yes, I “attempted” to tap the stainless after drilling with 3/8” bit and 7/16” tap. Broke the tap off in the material GRRRR! The happy ending (for today) is I was able to back the broken tap out with a hammer and screw driver. Still have to finish tapping.

Be kind! It was my first attempt every at using a tap.

I got a cylinder of epoxy putty from Industrial Plastics and will use that to fill the FRP behind the plate.
 
JD you mention it was your first attempt to use a tap. I broke one the first time also. I learned you have to stop and turn the tap backward when ever you feel resistance. This can be quite often, like every 1/4 or 1/2 turn of the tap. You will feel the chip break off when you reverse the turn. When the chip breaks you can go forward again. Oil helps too.
 

Latest posts

Back
Top Bottom