Uniflite 42 Double Cabin Refit

The friendliest place on the web for anyone who enjoys boating.
If you have answers, please help by responding to the unanswered posts.

sbman

Guru
Joined
Jul 25, 2017
Messages
828
Location
USA
Vessel Name
Second Chance
Vessel Make
42' Uniflite Double Cabin
The Uniflite isn't a trawler, but I thought some might be interested in what goes into refitting an older fiberglass boat purchased at a low price, of course it costs more than you think it will, by quite a bit.

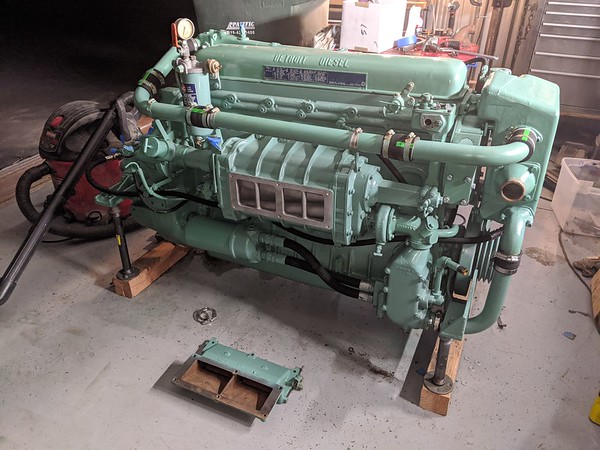
This particular Uniflite is a 1977 model with dual Detroit 671N engines, a double cabin layout with two heads, one shower, a dinette and down galley.

Prior to my ownership, the boat had been a live aboard at a mooring in San Diego for about 15 years. Two owners before me had not operated the boat much in that time.

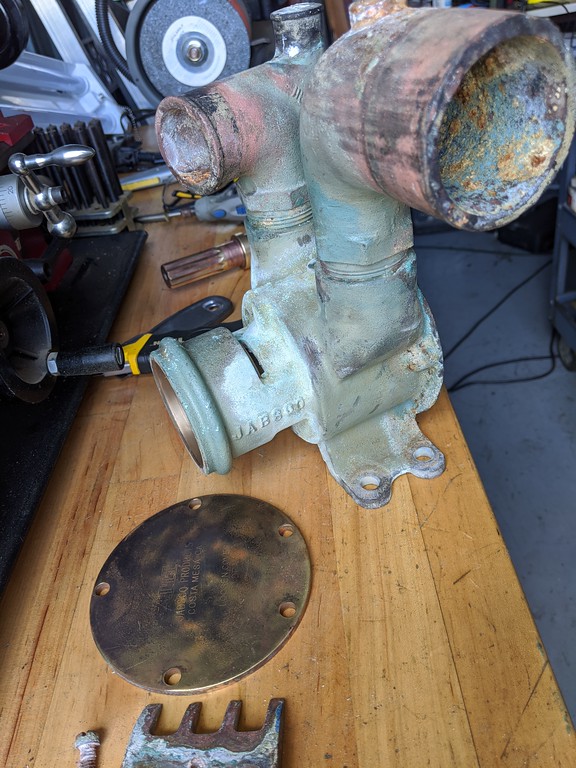
A new owner bought the boat sometime in 2016 with the thought of fixing it up, and spent quite a bit of money getting the starboard engine sorted out, as the previous owner had used it regularly. However, the Port engine was rusted up and had been neglected from non-use and was locked up, needing an overhaul.

He managed to tear the starboard shaft log tube (I think they were original tubes) and the boat was slowly leaking water continuously through this torn shaft log. With temporary repairs in place, the boat needed to be hauled out for both the shaft log issue as well as port engine repairs among other system upgrades and repairs. I purchased the boat at a very low price and scheduled a haul out as well as transportation to a working yard where I'd be able to do most of the work myself.

The list of work to be completed while out of the water includes:

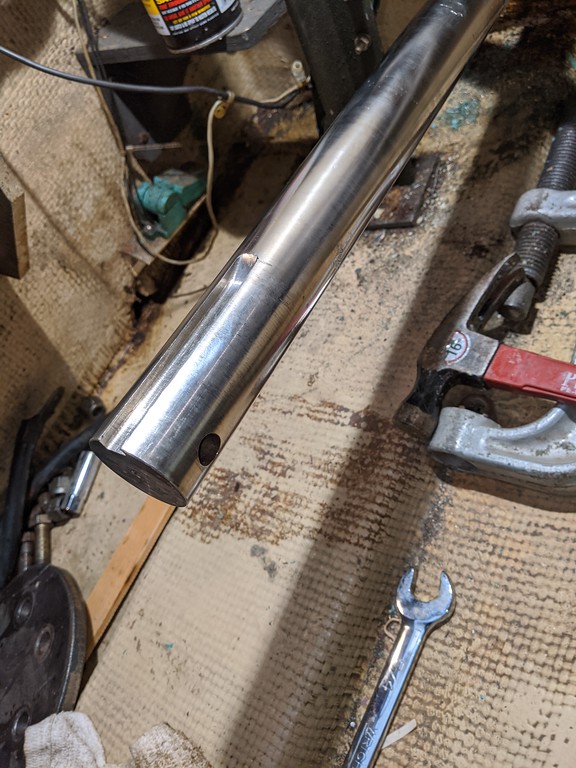
  • Shaft log tube replacement, both sides
  • Stuffing box cleaning and repacking, both sides
  • Port engine rebuild
  • Onan generator removal (it is non functional)
  • Cutlass Bearing replacement, both sides
  • Prop replacement
  • Below waterline blister repair, epoxy barrier coating
  • Steering system overhaul (rebuild pumps, put new fluid)
  • Add inspection ports to fuel tanks and clean out
  • Paint hull above waterline
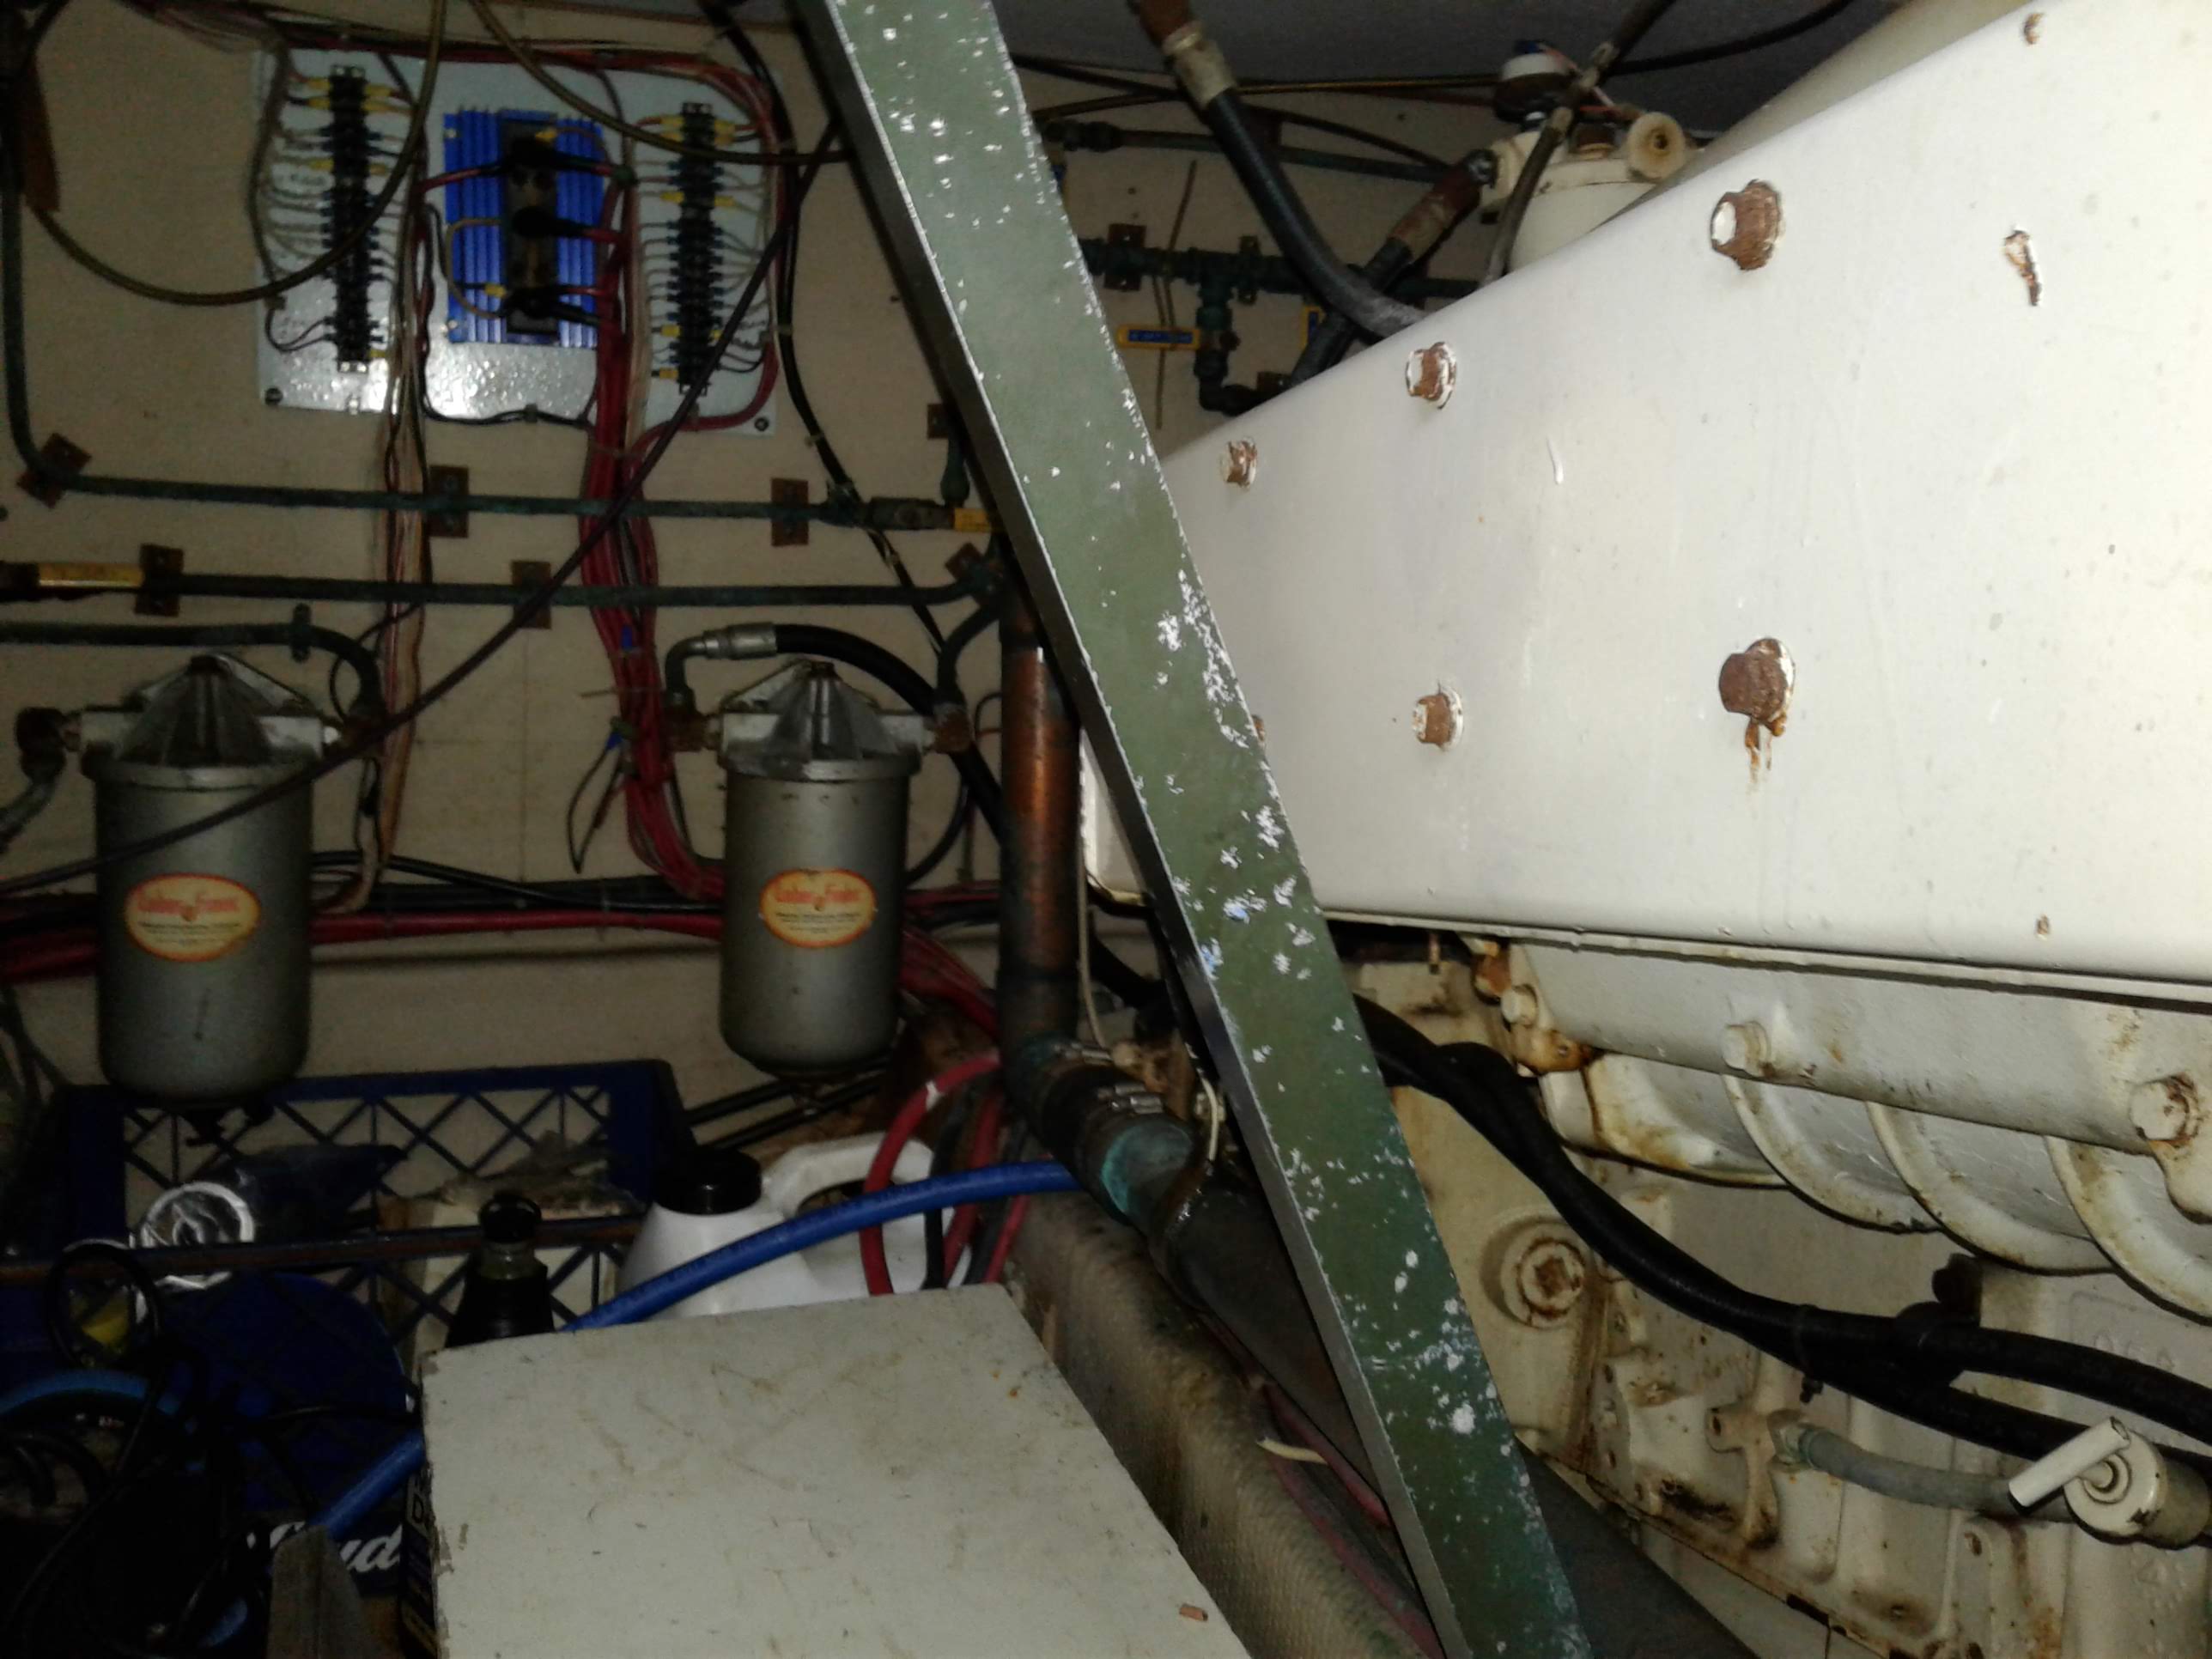
  • Misc Electrical repairs
  • Service and/or replacement of all thru hulls
  • Bilge cleaning
 
I purchased the boat in late 2017, and had it hauled out and began repairs, focusing on the blisters below the waterline. Grinding them out, adding glass structure back in where the blisters were ground out.

This has been mostly completed and the focus was turned to the steering system overhaul. I created a thread for that, I rebuilt the pumps and have them ready for installation, they will be installed soon, for now they are on the shelf waiting.

https://www.trawlerforum.com/forums/s31/fixing-leaking-70s-era-capilano-250v-helm-steering-station-44475.html

Next up, I removed the port engine with a crane and rebuilt it at my workshop, which I also started a thread about:

https://www.trawlerforum.com/forums/s6/overhauling-j-t-detroit-671n-44309.html

From this:

i-L2W6Skq-M.jpg


To this:

i-3DTLnFx-M.jpg
 
Been watching your progress on the other thread and learning from your 671 overhaul. The engine looks like new!
 
I remember growing up in 70's the Uniflites and Tollycrafts were the premier locally made FG boats. Uniflite had a terrific reputation for strong seaworthy boats. I don't recall if the 42 had a skeg/keel but I know that the 36 didn't...from personal experience it could use one. If you're doing bottom repairs anyway you might consider that. I've seen it done on Uniflites before.
 
I remember growing up in 70's the Uniflites and Tollycrafts were the premier locally made FG boats. Uniflite had a terrific reputation for strong seaworthy boats. I don't recall if the 42 had a skeg/keel but I know that the 36 didn't...from personal experience it could use one. If you're doing bottom repairs anyway you might consider that. I've seen it done on Uniflites before.

Yes the Uniflites have a good reputation. It does seem to be heavily built and they used high quality components which makes it possible to fix up an older model. My 42 does not have a skeg/keel and adding would be a project beyond what I'd want to attempt.
 
With the engine rebuild basically done, I'm now focused on getting the engine bay ready for the engine to go back in. Doing the shaft work with the engine out seems to make sense to me, there's a lot more room to work with.

Getting the shaft coupler off the shaft has been a problem. I have tried every manner of puller on it, including a custom built one and not been able to move it. I recently discovered it is cross-pinned with a 1/2" diameter steel pin. After discovering that I've tried to remove it by supporting the shaft with boards and then pounding it out with a hammer and a brass drift. It's come out about 3/8" in total as seen in this pic, the pin is protruding from the bottom of the picture:

i-fgNWgMw-L.jpg


Supporting the shaft on the boards and then on the fiberglass just doesn't give a solid surface for all of the energy to go into the pin, a lot of it is absorbed by the structure of the boat. Now I'm trying to press it out, but the pin is mounted within 1/2" of the flange so there is no room to get traditional tools onto it. A friend loaned me a press designed for ball joints that is kind of the right shape and size, but I need some extensions for it that I'll have to fabricate from steel rod in order to work around the flange itself.

i-JcF3BM5-L.jpg
 
The engine looks great, gotta love the screaming green leakers, had a couple of 6V53s in a previous boat. They ran like tops but they did drip a bit of oil.

That coupler looks like a PITA. Does it have a key in addition to the pin? If so why the pin?

I am putting my port engine back in tomorrow, hopefully. Keep up the good work.

Yes it also has a key. I don't know why it has both. Three methods, key, pin and bolts. The only function I can see for the pin is to keep the shaft from being able to work itself aft, out the end of the coupler. The bolts should do a good job of that though.

I read through your thread, did you think about putting inspection ports into your tank instead of replacing it? After all that I've learned about old tanks, it's something I've decided to do before I go back to the water, add ports and clean the tank out properly.
 
I thought about putting ports in but I still would have to rip out the insulation and plywood that is covering the tanks and I didn’t think that I would be up to all that with my back. I have just been able to get what I have gotten done so far. I still have a lot to do before launch and my boat is one of the first to come out of the barn. So if I am not ready to come out when the weather breaks then I am holding up everyone else that is behind me. I have quite a bit of electrical work to do once the engine goes back in and I will be able to get to the main electrical panel. I have lots of work to do on the bonding system in the lazarette but with the engine out I can’t get to it because of all the hatches piled up in the aft cabin. Then we have to paint the toe rails after we finish sanding them. I have 2 through hulls that were removed and have to finish the glass work. So I still have my hands full to finish up by the end of the month. I am able to work a couple of hours about every other day.
 
As far as the pin, since you have a key and bolts, I would think about putting a bolt back in instead of the pin so if you ever have to remove it again it will be easier.
 
I made up some various length spacer pins to get the puller to push on the pin in the drive flange. I started with a bolt, cut off lengths with the bandsaw.

i-Hq3zSXn-M.jpg


Then I trued them up on the lathe so they are nice and square.

i-PcZSsx8-M.jpg


The result was three spacers I could use to push the pin out in increments.

i-HSMbs8W-M.jpg


Spacers applied, puller applied, force applied.

i-nXzKGs5-M.jpg


The pin will not move with this puller. I applied heat and it moved a tiny bit with a 'pop' but will go no further. I'm at a crossroads here. The options are:

  • Drill out the pin
  • Find/Make a stronger puller
  • Cut the whole thing off and get a new drive flange

If I drill out the pin, my concern is that I will over-size the hole and not be able to replace it with a new pin. The pin is installed so close to the flange that there is no room for a bolt or anything except a driven-in pin, anything else will interfere with the bolts on the drive flange to transmission mount. Suggestions?
 
Couple of ideas, not sure if they are good ideas or not. 1. Drill out the old pin and if the hole gets messed up you still have 2 bolts securing the coupler with a key. Then replace it with a pin slightly smaller than the current one. Drill a hole through the new pin on each side of the coupler to put a cotter pin through. That will hold the pin in in case the bolts and ket somehow come loose. 2. Cut this coupler off and buy a new split coupler. I replaced my coupler on the shaft because I couldn’t press it back on. It cost about $350 if I remember correctly. The new coupler went on easily, just 1 pop with a sledge hammer and it went right to the line where I wanted it to.
 
I went to the boat this weekend prepared to drill out the pin. I chucked up the heavy duty corded drill and was ready to tear into it when I decided to give the puller one more shot. I discovered the puller was pushing on a lip on the flange previously and with some re-alignment of the puller I was able to get it to move farther. With further persistence and a good part of the day as well as generous amounts of heat from the torch, the pin was removed.

Based on all of the marks on the pin, I'm not the first one to have some difficulty removing it.

i-5cpWKpc-M.jpg


Next up it's back to struggling with the drive flange itself, hopefully it will come off now that the pin has been removed.
 
Couple of ideas, not sure if they are good ideas or not. 1. Drill out the old pin and if the hole gets messed up you still have 2 bolts securing the coupler with a key. Then replace it with a pin slightly smaller than the current one. Drill a hole through the new pin on each side of the coupler to put a cotter pin through. That will hold the pin in in case the bolts and ket somehow come loose. 2. Cut this coupler off and buy a new split coupler. I replaced my coupler on the shaft because I couldn’t press it back on. It cost about $350 if I remember correctly. The new coupler went on easily, just 1 pop with a sledge hammer and it went right to the line where I wanted it to.

Where did you get the new coupler? Depending on how the rest of this goes, I may want to get one. The ones I've seen so far are quite a bit more than $350
 
We I got the split coupler at General Propeller. It is for a 2” shaft and cost $274. They were very responsive and good to deal with. No affiliation.

Glad you got the pin out. I took a piece of 1/4” steel plate and drilled 6 1/2” holes in it to press the old coupler off. Put a socket in between the shaft and the flat steel plate. Tightened the 6 bolts and the coupler gradually came off. I knew that I would not be able to press it back on so I went with the split coupler.
 
Last edited:
We I got the split coupler at General Propeller. It is for a 2” shaft and cost $274. They were very responsive and good to deal with. No affiliation.

Glad you got the pin out. I took a piece of 1/4” steel plate and drilled 6 1/2” holes in it to press the old coupler off. Put a socket in between the shaft and the flat steel plate. Tightened the 6 bolts and the coupler gradually came off. I knew that I would not be able to press it back on so I went with the split coupler.

Thank you for the reference. Mine is 1.75" diameter. I made the same setup but with 1/2" steel plate. Hopefully it won't be so hard to get off.
 
I read this article:

https://stevedmarineconsulting.com/wp-content/uploads/2019/06/ShaftCouplings179FINAL-PBB.pdf

I found the information there very useful. I'm also glad I persisted in working to get the pin out. The article calls it a 'Clevis Pin' and the couplers I have are split couplers which I did not realize the meaning of until the pictorial examples shown in the article. Mine are painted and are not corroded. Hopefully it will slide off of the shaft pretty easily now that the clevis pin is out. I'll have to find or make up some steel wedges to open the split up a bit before trying it.
 
My new split coupler would slide on all the way except about 1/4”. I hit it one time with a hammer and it slid pretty easily right up to the mark that I had made. May not need any wedges.
 
Well, I am glad I saw this thread. I have a '81 42DC that I have done a lot of work on, and am still doing. Most recent project is to replace shaft log hoses, since I don't trust them. I tried getting the shaft coupler off, but it wouldn't budge. I finally hired it out. He is supposed to do it today or Monday. I didn't see a pin in mine, but I will have to look closer. It does have a bolt in the side, though. Real pain to work on with the engine and tranny installed.
 
Wow, what a challenge, I love a happy ending. Persistence generally pays off. Think how easy it will be on the other side or next time.

I'm not real familiar with Uniflite but I have seen a number of them around and believe them to be good boats. When I read your first post with your "bucket" list, all I could think was, "I hope he got it really cheap or free"

Will you be in the water this Spring?

By the way.. Great photos!

pete
 
What were the total hours on those 671Ns?
I only ask because it is easy to get 2000-3000 hours out of those engines easily.
Also they look like Gray Marine DDs instead of JT Tower.
 
Last edited:
What were the total hours on those 671Ns?
I only ask because it is easy to get 2000-3000 hours out of those engines easily.
Also they look like Gray Marine DDs instead of JT Tower.

They definetly J&T, they have J&T labels on them. I believe the engine I rebuilt had about 250 hours on it. The rebuild thread goes into detail about why it needed rebuilt, it was not worn out in any way.

Wow, what a challenge, I love a happy ending. Persistence generally pays off. Think how easy it will be on the other side or next time.

I'm not real familiar with Uniflite but I have seen a number of them around and believe them to be good boats. When I read your first post with your "bucket" list, all I could think was, "I hope he got it really cheap or free"

Will you be in the water this Spring?

By the way.. Great photos!

pete

Thanks! The boat was basically free, yes. It's still expensive to do, and will cost just as much or more as a functional/ready to go boat. This way I'll know exactly what I've got though and am ending up with a lot of updated systems.
 
i-2V7fk72-XL.jpg


With the flange removed, it was time to remove the stuffing box. I used some all thread, some nuts and the plate that I used to remove the flange to pull the entire stuffing box off still assembled. There was too much salt deposits and such holding the nut in place and it would not come apart easily in the boat.

i-Rcm5dMF-XL.jpg


The shaft is in really nice shape, so that's great news.

i-kxF4FtR-XL.jpg
 
With the stuffing box on the bench, I was able to take it apart easily.

i-BQpn7Lb-XL.jpg


After a clean up, it looks good.

i-NnJd3vD-XL.jpg
 
i-zt2HFTh-XL.jpg


i-tPRcKcF-XL.jpg


Next I turned my attention to the raw water pump. I was able to get it all apart, with some press work it did come apart, but not easily. The impeller was completely seized to the shaft and I didn't know was that it was damaged by the press. An internal flange that holds the mechanical face seal was broken off the body rendering the entire pump useless.

I had to find a replacement pump.
 
With this Covid thing going on, I'm not working so I'll be focused on the boat full time for a while, and posting up progress as I go.
 
I've been watching your progress...your Uniflite was built close to where I live. Your overhaul on the 671 Detroits was particularly impressive. You'll have a great boat when you're done.
 
Looks good. We have those same stuffing boxes. I redid one this winter. What was strange is that there were 6 layers of packing in it. I thought that there would be 3 or 4 layers. Put new hose on and new AWAB non welded T bolt clamps. The clamps are awesome. Keep up the good work on your baby.
 
3Yt8kzZs244AePbf8

Built like a tank!
No one builds boats like they did.
Uniflite used the highest quality parts like that stuffing box you pulled.
 
Last edited:
FB-IMG-1587233435668.jpg


Built like a tank.
No one builds boats like they did.
I'm running a pair of JT Tower 671N clocking close to 8000 hrs in mine.

20180402-182558.jpg
 
Last edited:

Latest posts

Back
Top Bottom