1990 Island Gypsy 36 Project Boat

The friendliest place on the web for anyone who enjoys boating.
If you have answers, please help by responding to the unanswered posts.

Jeff.P

Member
Joined
Apr 6, 2014
Messages
18
Location
Canada
Vessel Name
Knot on Time
Vessel Make
Island Gypsy 36
Hi Everyone,
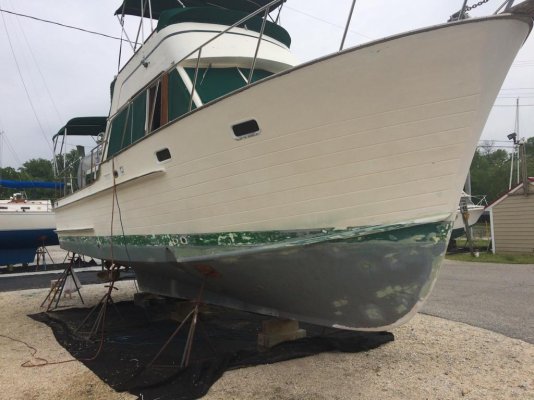
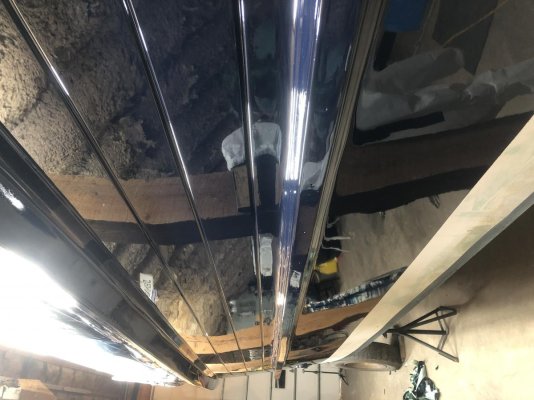
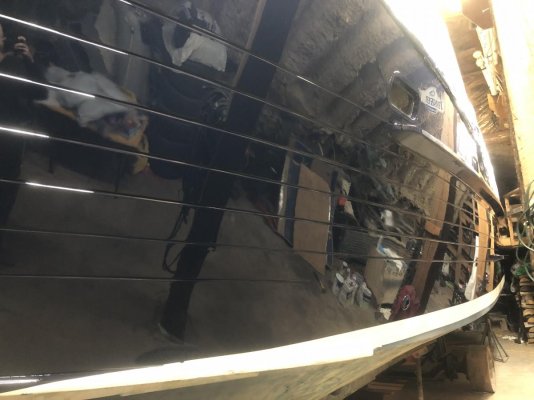
Working on bringing this neglected Gypsy back to life. I was lucky enough to stumble across this project boat and after a few minutes of research realized its potential! It has low hour Sabre L225’s and westerbeke 4.4kw Gen. All started right up with fresh fluids and ran smooth on the hard for a test run.

If anyone has any experience with this design I would appreciate suggestions on potential weak points to focus on. I already have a lengthy project list but don’t want to miss anything while it’s easy to work on in a heated shop beside my house!

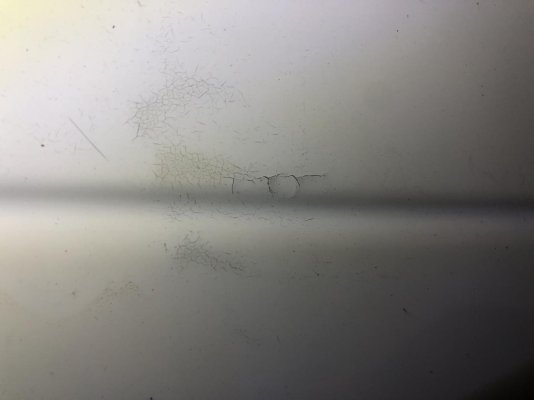
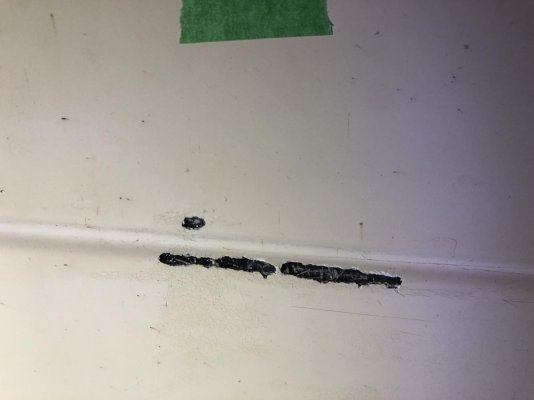
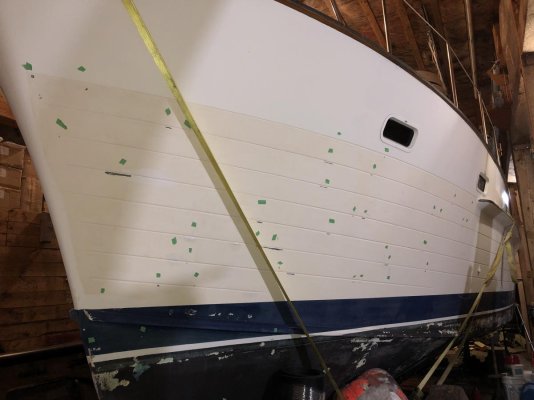
One thing that I did run across is a lot of voids between the gel coat and the first layer of glass. I’m currently working through painting the hull and have had to repair 500+ air pockets. It’s an easy fix with epoxy but I haven’t seen this before. Below the waterline I had it sandblasted and there are 1000’s of BB size holes that look like bubbles. I’m planning on using an epoxy fairing compound to do the entire hull before sealing it. Just wondering if this is something anyone else has run across and how they fixed it?
IMG_4367.jpgIMG_4377.jpgIMG_5340.jpgIMG_4867.jpg
 
If they are tiny just sand them open. Let them dry for a while and your barrier coat should fill them.

pete
 
Identical problem with my 85 IG. Blistering and IG's are synonymous it seems.

Barrier coat must be put over a solid surface. I started with hp power washer to take the top of the 1000's of BB bubbles. I then roughed the surface with 60G RO sander. Poked around with a pointed blade for days to remove what the washer missed. If I could see mat, I dremeled and sanded as needed. Then it's a simple (but time consuming) project of fill/fair/sand/coat/paint.

The faux planked hull was a real pain. I followed the cracks with a dremel until I reached solid bonded material. Then filled and faired. I used West with microballons. (not UV or waterproof so several primer coats advised) I put some tongue depressors to the belt sander and formed them to fit the groove. Made applying filler easier. Filler should be peanut butter consistency. (When you pull mixer out, the peaks of the filler should not fall over)

The key to success was sanding the edge of a piece of 3/8 plywood to the shape of the groove. I could then wrap a piece of sandpaper around the plywood and it was a perfect fit. It was then easy to blend the repair into the existing groove.

Note that the blisters are cosmetic. The boat isn't going to sink. IG had poor quality control. Many theories as to cause. Poor mix ratio, high humidity, cheap chemicals, shoddy workmanship, nothing definitive. I installed a through hull and the hull is thick and solid. I have no concerns about seaworthiness.

(I can post pics if needed)
 
Last edited:
Congrats on your new boat. We have a 1996 36' IG Classic (aft cabin) hull build number 135. Curious what your hull number is? We did not have any bottom work per say. However lots of other issues with interior leaks. All I can say is after putting our boat back in order we really like owning it. They are great boats hope you enjoy yours. John and Miri.
 
Thanks for the reply’s! It’s nice to know that the air bubbles or gaps between the glass and gel coat are common and cosmetic.

The faux planks make the hull look amazing especially once painted. However they are an absolute pain to work with. I can see how they missed a few spots or had the glass pull and lift around them when some poor guy was in the mould rolling out the first layer.

The boat is Hull #114. This boat has aluminum windows but several leaked and also damaged the interior. Some wood work and new floor in the salon are on the project list. One of the first things I did on the boat was remove every window and re-bed them with fresh 4200.
 
Keep up the good work! Believe it or not the fact I worked so long and hard on putting our boat back in shape has made me appreciate it even more. You will learn a lot and have the opportunity to upgrade many systems. Our holding tank and waste line system were horrible, the tank had metal fittings about ready to fail. Every boat is a work in progress. The end result will be worth it.
 
Greetings, I have 1987 36" IG classic. My boat was neglected for almost a decade. PO for one reason or another just lost interest in this boat. I came to the rescue and bought her I know I overpaid a little but she (the boat) paid me back with the smooth and amazing home delivery trip of 2600+ nautical miles. As far is gelcoat voids, my boat has 20-30 spots just like you show on the pictures. It is pretty easy to fix them, I open them let them dry, clean with dewaxing solution, just like you would if you ready to paint, than I used P14 compound if the void is small and Total Boat fairing compound or thickened epoxy for larger voids. All came out great, just remember, you would have to repaint the hull. I've being reseting for a while and decided to use Alexseal topside paint. I will post the pictures once it is done. Same applies to the underwater part of the hull except I use nothing but epoxy based products. Then 4 coats of Interlux barrier coat and 3 coats of bottom paint.
Well I hope this will help you in some way.
If you have any questions please feel free to ask. Will be delighted to help you any which way I can.
 
Last edited:
Here some pictures of my project.
 

Attachments

  • IMG-20190507-WA0001.jpg
    IMG-20190507-WA0001.jpg
    97.4 KB · Views: 46
  • IMG-20190507-WA0002.jpg
    IMG-20190507-WA0002.jpg
    106.5 KB · Views: 42
  • IMG-20190527-WA0005.jpg
    IMG-20190527-WA0005.jpg
    104.8 KB · Views: 43
  • IMG-20190527-WA0004.jpg
    IMG-20190527-WA0004.jpg
    128.4 KB · Views: 43
Vadim, exploring the difference between "gelcoat voids" and osmosis, what is the distinguishing feature? The absence of the "vinegary"smelling fluid in the opened blister versus nothing?
Do the voids lie under the gelcoat layer?
 
Vadim, exploring the difference between "gelcoat voids" and osmosis, what is the distinguishing feature? The absence of the "vinegary"smelling fluid in the opened blister versus nothing?
Do the voids lie under the gelcoat layer?

I wish I would make step by step pictures. Voids initially looked like a thick hair crack, but if you pick it with the blade it brakes exposing larger open area pocket. As far as blisters I had many of them, but they were all surface type and not an osmosis. Thank god.
 
.. Voids initially looked like a thick hair crack, but if you pick it with the blade it brakes exposing larger open area pocket. As far as blisters I had many of them, but they were all surface type and not an osmosis. Thank god.
Void pics would have been interesting.
What if anything did you find inside those you identify as non osmosis surface type blisters?
 
This is what the "Voids" looked like on my hull. Exactly like Vadim described. They look like cracks but when you tap on them with a screwdriver they break though exposing an air pocket between the gelcoat and the first layer of glass.

The location on the hull where they show up the most makes me think it was just a poor job rolling out the first layer of glass in the mould. It would have been hard with all of the faux plank ribs to keep the glass from pulling as it was rolled out against the mould surface.
 

Attachments

  • IMG_4404.jpg
    IMG_4404.jpg
    47.5 KB · Views: 40
  • IMG_4383.jpg
    IMG_4383.jpg
    43.4 KB · Views: 43
  • IMG_4405.jpg
    IMG_4405.jpg
    54 KB · Views: 41
  • IMG_4377.jpg
    IMG_4377.jpg
    43.3 KB · Views: 38
  • IMG_4378.jpg
    IMG_4378.jpg
    69.4 KB · Views: 40
  • IMG_4406.jpg
    IMG_4406.jpg
    91.6 KB · Views: 41
Following. Will be pulling my 2001 Halvorsen Gourmet Cruiser this spring. Hopefully a short-haul. Fingers crossed.
 
Thanks for the Pics Vadim. The hull looks great! I have the barrier coat sitting beside the boat. Below the waterline might be the next project. How did you find it to apply? Did you roll and tip or does it level out enough if just rolled?

I strongly recommend Alexseal Paint. I just sprayed the boat with flag blue last night. The finish is literally like a mirror. This is my first time painting but I was expecting the primer to cover over more flaws than it did. When sprayed pin holes and small cracks show right through. I went around and dabbed primer with no reducer on small problem areas to build them up and found that worked well. Then sanded everything smooth with a pneumatic random orbit and 400grit.
 

Attachments

  • IMG_6075.jpg
    IMG_6075.jpg
    126.3 KB · Views: 37
  • IMG_6077.jpg
    IMG_6077.jpg
    90.3 KB · Views: 33
  • IMG_6078.jpg
    IMG_6078.jpg
    101.3 KB · Views: 38
The barrier coat is just roll on, no tipping. With 2 part paint any imperfections will show through. Primer won’t cover them, they need to be filled and sanded before priming. Or just live with the minor imperfections. It has to look so much better than it did.
 
Thanks for the Pics Vadim. The hull looks great! I have the barrier coat sitting beside the boat. Below the waterline might be the next project. How did you find it to apply? Did you roll and tip or does it level out enough if just rolled?

I strongly recommend Alexseal Paint. I just sprayed the boat with flag blue last night. The finish is literally like a mirror. This is my first time painting but I was expecting the primer to cover over more flaws than it did. When sprayed pin holes and small cracks show right through. I went around and dabbed primer with no reducer on small problem areas to build them up and found that worked well. Then sanded everything smooth with a pneumatic random orbit and 400grit.

Your top coat paint job looks great I hope when this spring I will do my boat she will look the same. It will be my first time painting by myself. I got Fuji spray HVLP system, one of my marina neighbor did his sailboat last spring and he told me that somewhat good spray job is better then best roll and tip job. I am not an expert but I will take his word, because of the result. As far as pinholes and other imperfections, I was told to use high build primer as first coat than send than finishing primer and only then paint. Again I am not an expert but spend enough time with people of trade to talk about it and get some valuable tips and advices from them. It would be valuable information for me to hear about your spray system setup. How much of the paint did you mix and so on. Thank you.
 
Jeff P. I see that you painted portlights as well. What did you do to prep them? I think that you we help with an advice more than I would help you. LOL.
 
Jeff P. Just like Comodave wrote two part epoxy barrier coat by Interlux is applied by roller only in the spots near prop shafts I use brush. This maybe helpful, I used two colors white and gray barrier coat paint so I can see if I covered all the area, again I am not a pro but I found this very helpful.
 
I used a relatively inexpensive HVLP 2 QT pressure pot system and found it worked great! I agree with the spray vs roll and tip. I've never done it before but my understanding is that tipping should be done vertically to avoid horizontal sags from the brush lines. This would be impossible with the faux planks.

Spray was really easy to apply. I actually split the paint into 2 areas. I painted just the starboard hull outside and the port and aft sections in my shop. I did this only because there is little to no access to starboard side of the boat once inside.

I found it took around 2.5 to 3L of mixed 442 primer to do one coat on the port hull and aft section. The paint went further. Around 1.8 L for the same area.

I more or less just followed the 1:1 with a 35-37.5% reduction for the topcoat. I did also use the accelerator. I was paranoid about evening dew and dust destroying the finish so the accelerator was just for peace of mind. I couldn't find any downsides to using it.

I used a pot pressure of 12 psi and gun pressure of around 55-60 psi. I found you get about 70-80% coverage on the first coat. Any more than that and it will sag in places. Second coat it looks solid and perfect. I found the 3rd coat really difficult. With the dark blue it was impossible to see what you were spraying and what hadn't been done yet because its so shiny. With a full mask on and climbing up and down a ladder its not easy to keep track of where you just sprayed. I actually got a buddy and 2 laser pointers to help with the 3rd coat. He stood back and just kept track of the progress and used the laser pointers to show me where I left off.

-Jeff
 
Jeff P. I see that you painted portlights as well. What did you do to prep them? I think that you we help with an advice more than I would help you. LOL.


For the portlights I didn’t do anything special. The frames were painted white already so I just did the same compatibility test with the primers reducer as on the existing hull paint. It had no effect so just sanded with 180 and primed overtop of the old paint. I’m sure if they were bare metal it would have been more complicated.

Our boats look very similar in layout. Would love to hear about engines and any other projects you have done on yours!
 
Jeff P. What about the spray gun pin size 1.3 or 1.0? What about over spray? 55psi @ spray gun, now I am concerned because I did get pretty expensive turbine spray system that is nowhere near such capabilities. But I spoke with both Fuji spray and Alexseal engineers and both were sure about that Fuji spray Platinum Q5 is more than capable. Jeff P. How much time it took you between the coats? And what did you use to clean the spray gun? Sorry for so many questions, but this is what the forum is for. Thank you.
 
Wow, the Alexseal coating looks great. Congrats. I'll be painting my topsides and decks this spring/summer. In a covered slip, so no spraying allowed, so will roll and tip with Alexseal - but as much as I love a dark hull, I think I'll stay with white.
 
Jeff P. In did we do have twins. My boat is equipped with twin Lehman's SP225 and Westenbeak 6.0 kw generator. I was told that my boat was setup as a long range trawler. What makes her the long range, I am not quiet sure. Maybe fuel tankage, she is equipped with 4 tanks 2 in the middle of the boat @225 US gallons each and two on the outside of each engine ( day tanks) @ 75 US gallons each. Three tanks of fresh water about 300 US gallons. One major thing I am doing now is redesigning fuel manifold system, adding installed fuel polishing/transfer system and replacing my existing Racor 500's fuel separators to new Racor 900's. I already upgraded all new electronics to Raymarine ES series MFD's, new Raymarine sonar, ran NMEA2000 back bone, currently working on adding Actisence EMU engine data module, on board PC with Coastal Explorer, LED navigation and interior lights, new custom aluminium foldable mast with boom. And allot more. I love this boat and we ( the entire family) decided that she is the the one we were looking for for a long time. So we all agree she needs some beautification and tune up the way we like it. Later we will do more. But this is later, now I am prepared for paint job.
 
Jeff P. What about the spray gun pin size 1.3 or 1.0? What about over spray? 55psi @ spray gun, now I am concerned because I did get pretty expensive turbine spray system that is nowhere near such capabilities. But I spoke with both Fuji spray and Alexseal engineers and both were sure about that Fuji spray Platinum Q5 is more than capable. Jeff P. How much time it took you between the coats? And what did you use to clean the spray gun? Sorry for so many questions, but this is what the forum is for. Thank you.

The spray gun has a 1.0 nozzle. Found I had to open up the volume adjust at least halfway for the primer (think they spec a 1.3 for that) but it worked great. For the paint I wouldn't want anything bigger than a 1.0. I had a good solid pattern at only about 20% open on the volume adjustment. The downside of my set up is the really big and expensive compressor. I went this way because I already had a 18.5CFM 80GL 220V compressor in my shop. I wouldn't want to use a conventional compressor much smaller either. It keeps up with no issue but the extended run time starts to warm the tank. Don't know the technical side but things are supposed to go downhill if the tank and air get too hot.

Your system would work differently and be much more mobile. The paint is really easy to work with I'm sure your set up will work great. Just practice on a panel or something to make sure it atomizes well and its not going on too heavy. I think with Alexseal your paying a little extra for some witchcraft in the can. Its amazing how it tightens up over the first 48 hours. Lots of spots the spray was less than perfect with some orange peel when sprayed flattened out nicely after sitting overnight. Few spots I screwed up where the hose caught on the ladder or I went too slow have sags in the paint but the fact it can be wet sanded and fixed should make it an easy fix.

The primer dries extremely fast. After spraying its almost ready to go by the time you mix up the next batch and set up. Paint is slower, I waited about 90min or so between coats. Just means there is time for a beverage while painting lol.

I used the reducer to clean most of the gun out. If I was running low lacquer thinner seemed to work even better.

Just make sure you do the solvent test on your paint with the reducer of the 442 primer to make sure it will work before you buy the paint!
 

Latest posts

Back
Top Bottom