Major Wood Project

The friendliest place on the web for anyone who enjoys boating.
If you have answers, please help by responding to the unanswered posts.

menzies

Guru
Joined
May 11, 2014
Messages
7,233
Location
USA
Vessel Name
SONAS
Vessel Make
Grand Alaskan 53
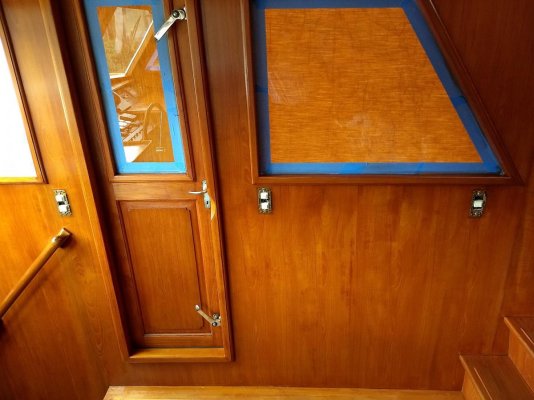
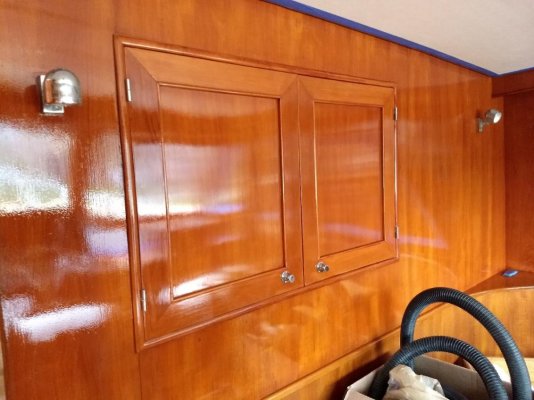
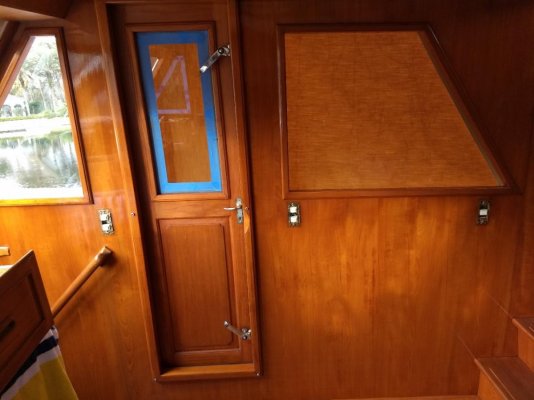
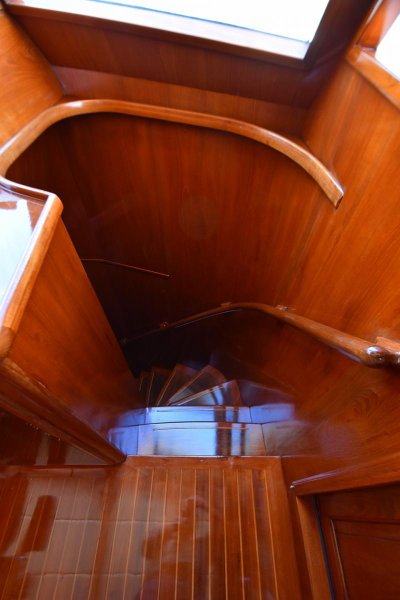
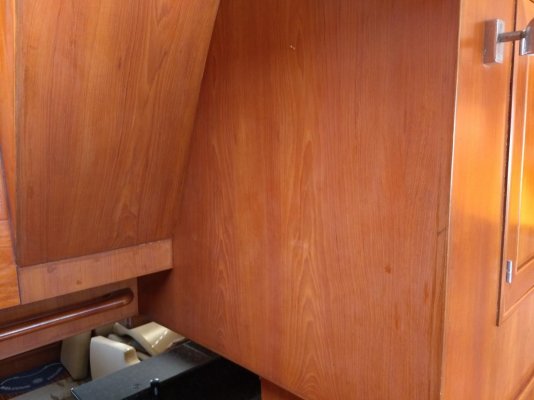
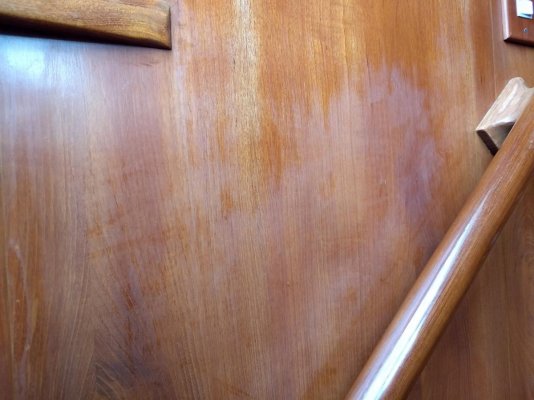
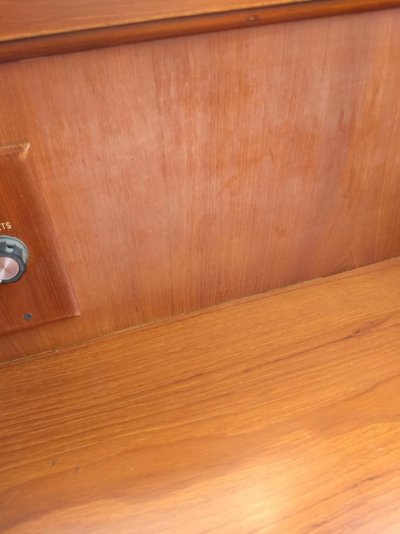
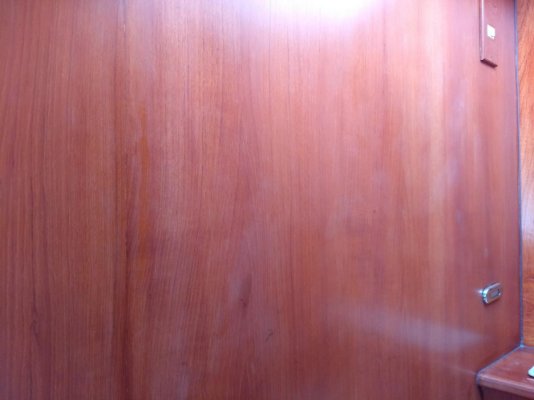
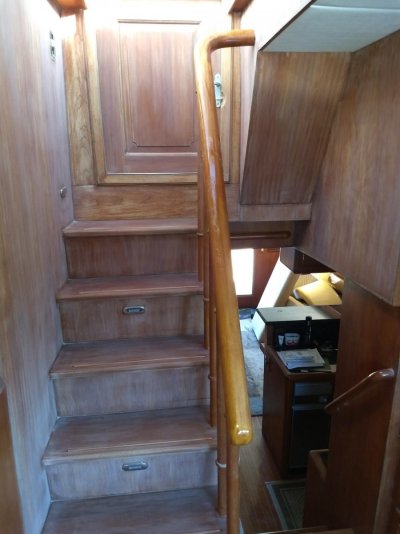
When we got Sonas the outside curtains on our pilot house windows were made of a fine mesh material. Over the years this had let in lots of sunlight, to the extent that the wood had become discolored. We have now replaced those with lined Sunbrella.

Last year we had a couple of people who specialize on boat wood come and look at the job. Nobody would touch it.

So we called in the guy who did the complete interior and exterior painting on our home when we bought it four years ago. Asking if he could do it and was willing to. His eyes lit up. Not just because of the contract value, but as he told us, he and his dad used to build small wooden boats when he was young and in fact that is how he started in his profession.

So he laid out his plan. Sand the wood down so that it becomes porous. Rub on the stain - in our case Pecan. Leave the oil based stain for three days so that it completed soaks in and dries. Put on the first coast of clear coat poly. After that dries, use "four ought" steel wool and rub the first coat with the grain to rub the poly into the stained wood. Then add a second coat of poly.

Estimate is three to four weeks of work. He started yesterday. Will update as it moves along. Not inexpensive, but it needs done.

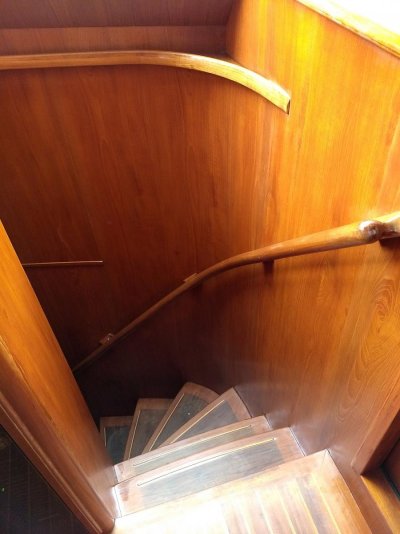
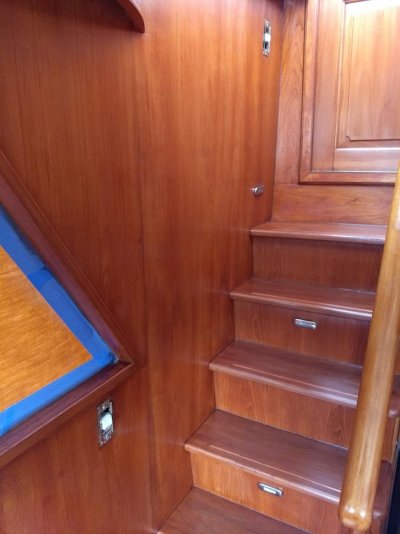
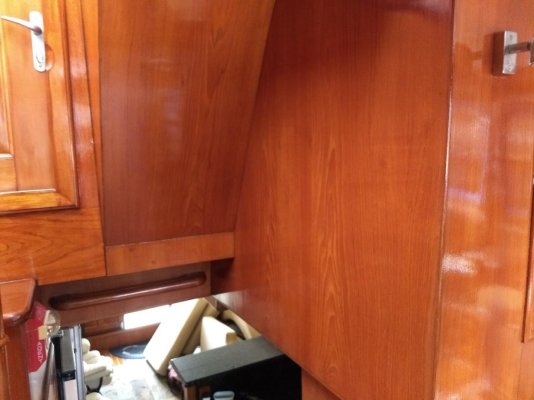
Photos are of the wood prior to starting.
 

Attachments

  • IMG_20190119_135120563.jpg
    IMG_20190119_135120563.jpg
    116.2 KB · Views: 137
  • IMG_20190119_135133016.jpg
    IMG_20190119_135133016.jpg
    86.6 KB · Views: 145
  • IMG_20190119_135141109.jpg
    IMG_20190119_135141109.jpg
    125.8 KB · Views: 139
  • IMG_20190119_135151158.jpg
    IMG_20190119_135151158.jpg
    86.1 KB · Views: 144
  • IMG_20190119_135155401.jpg
    IMG_20190119_135155401.jpg
    98.8 KB · Views: 146
  • IMG_20190119_135200862.jpg
    IMG_20190119_135200862.jpg
    80.4 KB · Views: 142
  • IMG_20190119_135207469.jpg
    IMG_20190119_135207469.jpg
    93.6 KB · Views: 145
  • IMG_20190119_135214669.jpg
    IMG_20190119_135214669.jpg
    73.8 KB · Views: 140
  • IMG_20190119_135218034.jpg
    IMG_20190119_135218034.jpg
    89.8 KB · Views: 145
  • IMG_20190119_135220646.jpg
    IMG_20190119_135220646.jpg
    83.9 KB · Views: 142
Last edited:
First area sanded.
 

Attachments

  • IMG_20190124_162547074.jpg
    IMG_20190124_162547074.jpg
    91.1 KB · Views: 127
Are you sanding areas that have veneer? If so then it might end up splotchy. Your treatment steps might overcome that, but there is significant risk to doing it.

I would completely finish the one area that has been sanded already to confirm the steps taken give a good result, before sanding any more areas. Hope it turns it well, I'm sure it will no be cheap!
 
I have used furniture grade steel wool with furniture wax on reproduction "antique" furniture finished with a bright gloss varnish. It tones down the varnish and produces a mellow softer "older" finish,giving the piece a way better look. Your expert`s method brings it to mind.
 
The solid wood shouldn't be a problem at all. It should come up great with those steps, but I agree with Brian - the veneer is very delicate; not much margin for error.
Hopefully the initial original coat wasn't overly thin and didn't soak in too far, or at least is consistent.
 
I guess the goal of your guy is not to sand to bare wood but just to g a rough surface so next coat will set. I would be careful with the steel wood as metallic particles can result in bad stain, be sure to vacuum and rub areas so no steel dust or wool piece remain. Personally I would use thinned varnish and wipe 5+ coats to get a build up (one coat a day), no need to sand between coat and wiping is very easy and give amazing finish.
Just for saying...

L
 
Are you sanding areas that have veneer? If so then it might end up splotchy. Your treatment steps might overcome that, but there is significant risk to doing it.

I would completely finish the one area that has been sanded already to confirm the steps taken give a good result, before sanding any more areas. Hope it turns it well, I'm sure it will no be cheap!

We absolutely did discuss the approach with the veneer. However it seems that there is veneer and there is veneer! He showed me the edges where you could see and measure the veneers on Sonas. She has 1/4 inch wood veneer. Most veneers are less than 1/8 inch. So he is comfortable with the approach. Regardless, if you look at photo #1 above, anything will be an improvement!

See veneer pics below.
 

Attachments

  • Sonas Veneer 1.jpg
    Sonas Veneer 1.jpg
    109.3 KB · Views: 117
  • Sonas Veneer 2.jpg
    Sonas Veneer 2.jpg
    98.8 KB · Views: 117
I guess the goal of your guy is not to sand to bare wood but just to g a rough surface so next coat will set. I would be careful with the steel wood as metallic particles can result in bad stain, be sure to vacuum and rub areas so no steel dust or wool piece remain. Personally I would use thinned varnish and wipe 5+ coats to get a build up (one coat a day), no need to sand between coat and wiping is very easy and give amazing finish.
Just for saying...

L

Lou, the goal is to get the wood so that it takes the matching pecan stain first. I personally think this is the biggest challenge to get an even stain. Now if the stain is a perfect match to what is there, will that be an issue. Don't know, but will soon find out!
 
Another worry I had is the sanding dust getting into the electronics and controls. So I made him cover them all with old bed sheets we have! :)
 
We absolutely did discuss the approach with the veneer. However it seems that there is veneer and there is veneer! He showed me the edges where you could see and measure the veneers on Sonas. She has 1/4 inch wood veneer. Most veneers are less than 1/8 inch. So he is comfortable with the approach. Regardless, if you look at photo #1 above, anything will be an improvement!

See veneer pics below.

Well, it ain't pretty, I agree.

I have had good results stripping veneer. Admittedly this was veneer that had years of being oiled, it wasn't varnished.

The problem with veneer is the thickness of the top ply, and any high spots. Sanding veneer is a brave approach, needs skill. You may just have th guy for the job though. And dust, yes it will go throughout the boat, Don't worry about it. A good detail clean at the end sorts it out.
 
NEVER, NEVER, EVER let steel wool on a boat! Spend the money, buy bronze wool and avoid the rust stains.
 
And dust, yes it will go throughout the boat, Don't worry about it. A good detail clean at the end sorts it out.

Already scheduled as we leave for Exuma early March. In fact I suspect (actually know) the missus is using this as an excuse to have the whole boat deep cleaned - including the cabins, heads etc. which are no where near the work!
 
Quick update.

It is going really well, and I mean really well.

I will post a more detailed update on the process, he is dragging us down to the boat at the end of every day to show us what is happening (even though we were going down after he left anyway!). He is clearly proud of the results.

I will post before and after pics later of each areas of the PH. These are just random photos for now, showing the first Poly coats which he will wire wool and then do a second and, because it is going better/quicker that he had expected, a third coat for the same project cost!
 

Attachments

  • IMG_20190209_160951805.jpg
    IMG_20190209_160951805.jpg
    122 KB · Views: 104
  • IMG_20190209_160958704.jpg
    IMG_20190209_160958704.jpg
    103.4 KB · Views: 110
  • IMG_20190209_161004616.jpg
    IMG_20190209_161004616.jpg
    104.7 KB · Views: 103
  • IMG_20190209_161011443.jpg
    IMG_20190209_161011443.jpg
    88.6 KB · Views: 102
  • IMG_20190209_161036083.jpg
    IMG_20190209_161036083.jpg
    105.8 KB · Views: 99
  • IMG_20190209_160943748.jpg
    IMG_20190209_160943748.jpg
    96.7 KB · Views: 108
Last edited:
Don`t you just love a boat with a spiral staircase. Looks great.
 
Looks very nice. What poly product and sheen are you using ?
I need to get busy on mine.
 
Don't know what poly he is using, must look tomorrow, We choose Gloss over High Gloss or Semi.
 
Second coats are on, the helm area is getting a third since it gets more sun. Floors and steps last to be done.
 

Attachments

  • FinishedFBDoor.jpg
    FinishedFBDoor.jpg
    92.7 KB · Views: 80
  • finishedFBStair.jpg
    finishedFBStair.jpg
    95.5 KB · Views: 86
  • FinishedGalleyStairWell.jpg
    FinishedGalleyStairWell.jpg
    88.9 KB · Views: 79
  • FinishedPHWall.jpg
    FinishedPHWall.jpg
    114.9 KB · Views: 100
  • FinishedStarboardSide.jpg
    FinishedStarboardSide.jpg
    95 KB · Views: 86
Based on the early results, I hope he's got some free time in the future. I imagine he just established a new niche market for himself.


Looks great!
 
I will make a comment but please don't shoot the messanger, to be honest I took long time to decide if I should post it or not so please don't mind me, there is nothing bad behind it.
For my eyes (and my eyes mays be wrong), the end result is not so astonishing. On the picture named PHWall I can see "orange peel" finish that does not look pleasant. On some pics ( the lat one but also others) some areas looks lighter and show sanding pattern.
Ok now that I posted my comment you can think I am picky and a jerk but this is a comment in honesty (and yes I am very picky on wood finish as I know it is very hard to achieve a really good one).

L
 
Lou, in Florida we have something called sun! If we do happen to get a cloudy day, I will take a couple more for you! But no "orange peel" involved! :)
 
Here you go Lou. The greatest thing about having your boat at the bottom of the garden is that you can just stroll down to her!

Not the sharpest of photos from my phone because, well, there's no light at this time of night! :)

BTW, what you see reflected is my helm instrument covers!
 

Attachments

  • night1.jpg
    night1.jpg
    89.8 KB · Views: 113
  • night2.jpg
    night2.jpg
    69.1 KB · Views: 112
My apologizes I did not want to make you go take pictures in the middle of the night.

L
 
My apologizes I did not want to make you go take pictures in the middle of the night.

L

No problemo - I am always looking for an excuse to walk down there! :D

Plus I bet there were others thinking the same thing, and just didn't say!
 
Last edited:
Wow...I think it’s beautiful!
We have some discolored wood but I think ours is more from leaks than just sun.
It’s on David’s list of things to do. We’ll see. Lol
 
OK, it is all done. It took him six weeks - but the results are well beyond what we thought he could do!
 

Attachments

  • DSC_5507.jpg
    DSC_5507.jpg
    119.1 KB · Views: 83
  • DSC_5508.jpg
    DSC_5508.jpg
    130.6 KB · Views: 82
  • DSC_5509.jpg
    DSC_5509.jpg
    88.2 KB · Views: 82
  • DSC_5510.jpg
    DSC_5510.jpg
    77.2 KB · Views: 78
It certainly looks very good! My initial scepticism was unfounded, the guy knows his stuff. Could you post before and after pics of one of the most damaged areas?
 
Some of the before pics. Stairwell, floor, wall, door up to FB, wall down to galley.
 

Attachments

  • IMG_20190119_135120563.jpg
    IMG_20190119_135120563.jpg
    116.2 KB · Views: 62
  • IMG_20190119_135133016.jpg
    IMG_20190119_135133016.jpg
    86.6 KB · Views: 65
  • IMG_20190119_135151158.jpg
    IMG_20190119_135151158.jpg
    86.1 KB · Views: 61
  • IMG_20190119_135218034.jpg
    IMG_20190119_135218034.jpg
    89.8 KB · Views: 58
  • IMG_20190119_135220646.jpg
    IMG_20190119_135220646.jpg
    83.9 KB · Views: 60

Latest posts

Back
Top Bottom