78 MK1 Total redo documentary thread w/ pics!

The friendliest place on the web for anyone who enjoys boating.
If you have answers, please help by responding to the unanswered posts.
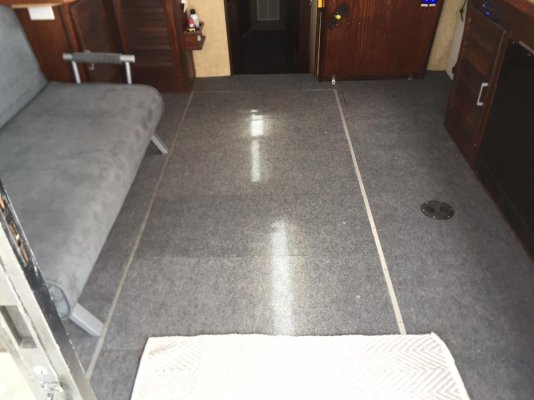
On my olde 78 MSI the steps lift off to access storage, looks factory by the workmanship, might have been a previous owner

:socool:

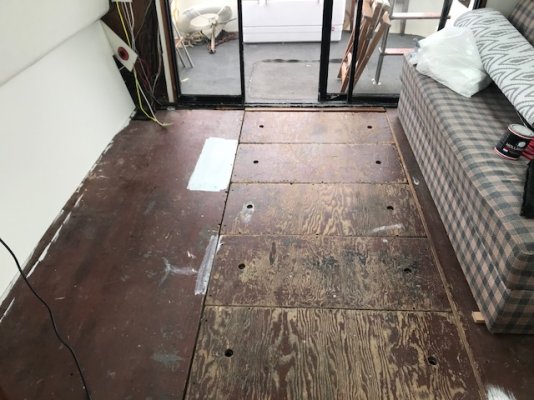
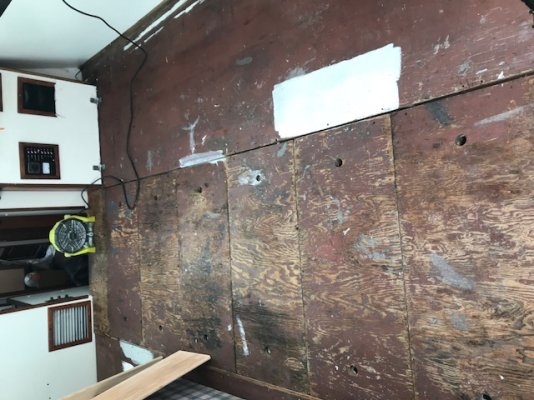
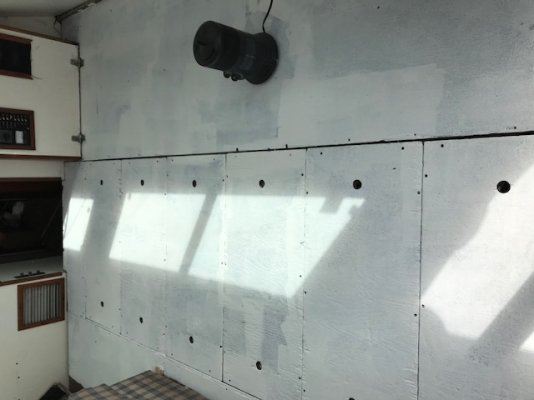
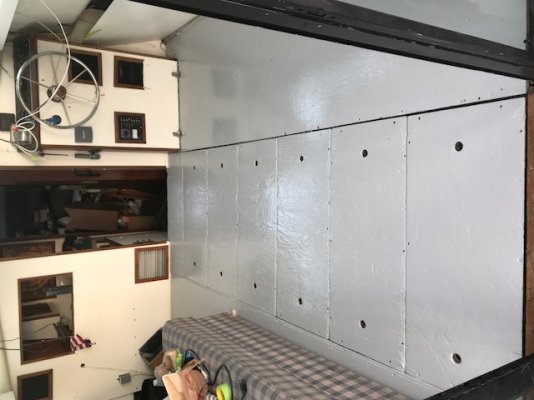
I agree guys, wasted space. I built these to have hinges on the stairs so they flip up. I just have the treads sitting on top at the moment just for use and so I can just pull outside and paint etc.

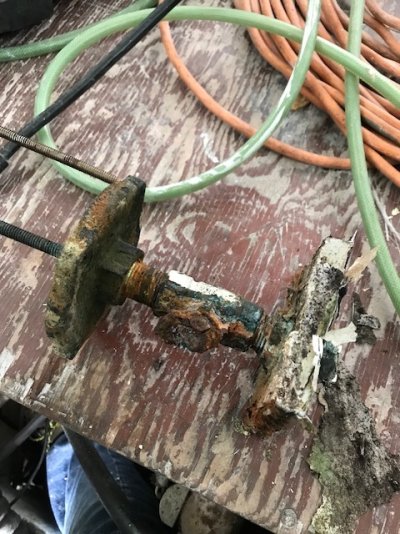
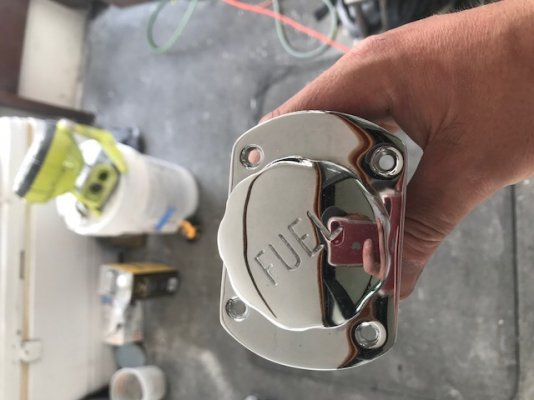
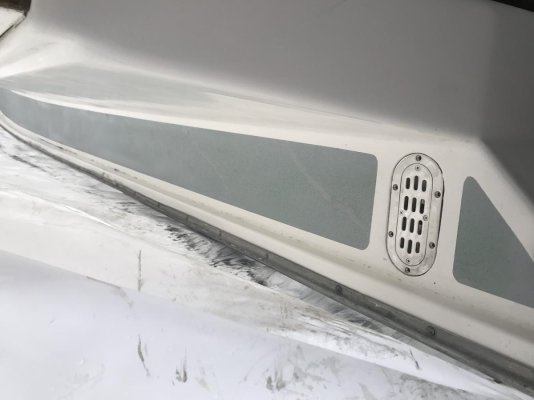
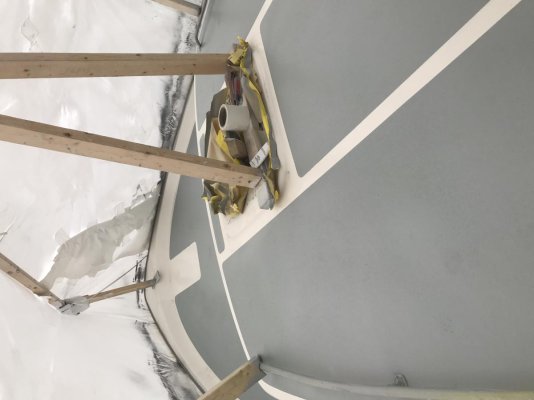
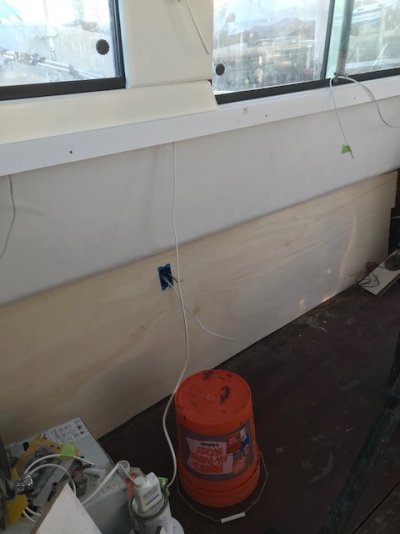
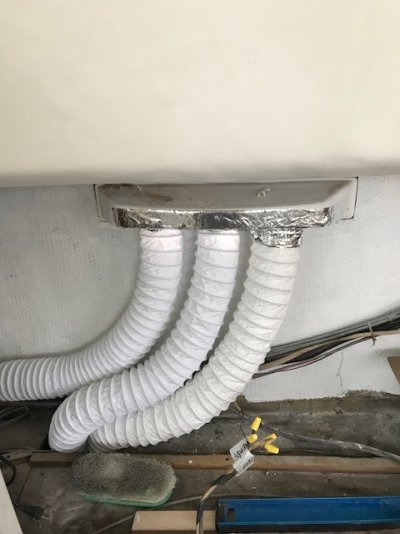
Couple pictures from yesterday. Nothing like waiting until the last minute here on thru hulls. Knew I had to do them but just getting to it. Glad I did!! :eek:
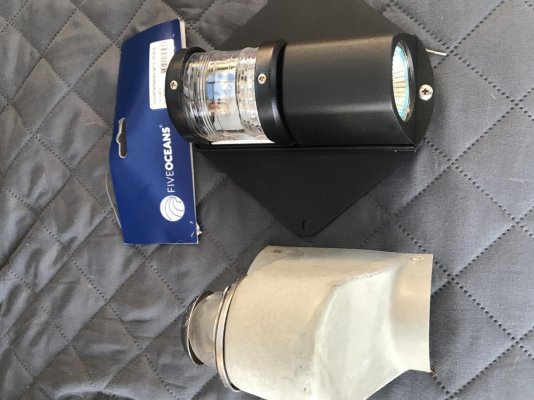
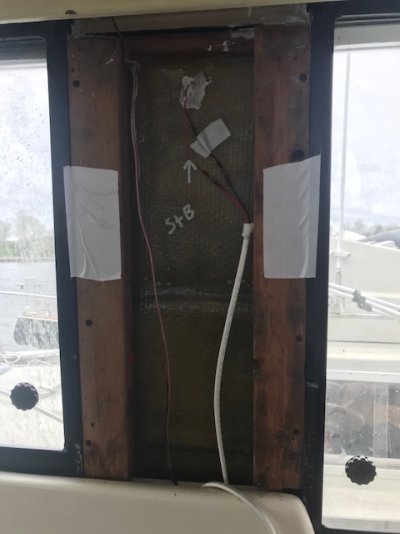
I just removed the generator one (gene needs a rebuild or new) and the old Ray-Jeff depth finder transducer. I glassed up both holes as we are splashing Friday and can drill new ones when needed in the Fall when we come out.
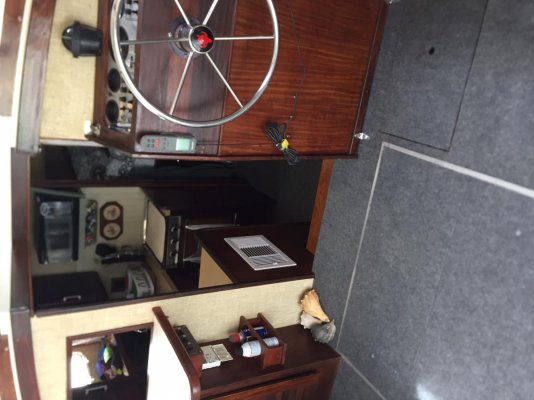
Not sure what I'm doing yet on both fronts so best to start new.
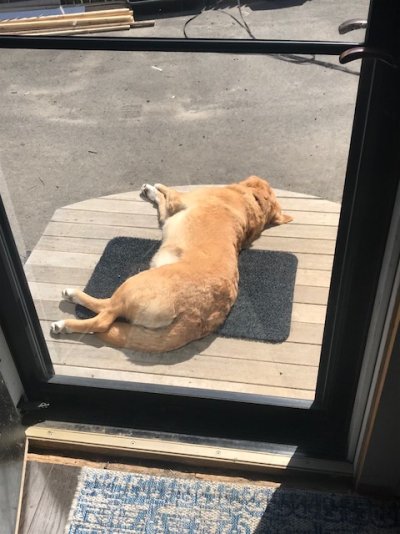
Last is one of our dogs "Cash" napping in the sun at our house dreaming of dinghy rides and swim platform swimming.
 

Attachments

  • IMG_1360.jpg
    IMG_1360.jpg
    143.3 KB · Views: 67
  • IMG_1361.jpg
    IMG_1361.jpg
    88.1 KB · Views: 70
  • IMG_1351.jpg
    IMG_1351.jpg
    102.1 KB · Views: 61
Question

Once I lay the glass and polester resin on the outside holes what do I paint the raw fiberglass with so its waterproof and ready for antifouling paint? Thanks in advance.
 
For a repair like that, and as small as the area is, I would use epoxy resin and follow the resin manufacturers recommendation for painting as well as noting the bottom paint manufacturers priming recommendations.

:socool:


Once I lay the glass and polester resin on the outside holes what do I paint the raw fiberglass with so its waterproof and ready for antifouling paint? Thanks in advance.
 
Once I lay the glass and polester resin on the outside holes what do I paint the raw fiberglass with so its waterproof and ready for antifouling paint? Thanks in advance.

No paint, use gelcoat over polyester.
3 or 4 coats will be fine. Keep the gelcoat cold and you can easily apply 4 coats with one batch of gelcoat mix.
Use a "cool can", a small plastic cup (like a yogurt cup) with gelcoat and a larger cup (like a margerine cup) filled with some ice.

IF you choose epoxy then paint is fine. But I like to keep my resins the same if possible because they can expand/contract at a different rate as they cure.


Thanks, I sanded down to bare fiberglass, tapered to the hole a bit, used 3 layers of cloth, and polyester resin. Can I just sand, paint a coat or two of a product like "Gluvit" for a barrier coat and then bottom paint?
 
Thanks, I sanded down to bare fiberglass, tapered to the hole a bit, used 3 layers of cloth, and polyester resin. Can I just sand, paint a coat or two of a product like "Gluvit" for a barrier coat and then bottom paint?

I don't know what gluvit is.
A small can of gelcoat is cheap.
 
"3 layers of cloth" Do you mean mat? 3 layers of cloth would make me nervous

:socool:


Thanks, I sanded down to bare fiberglass, tapered to the hole a bit, used 3 layers of cloth, and polyester resin. Can I just sand, paint a coat or two of a product like "Gluvit" for a barrier coat and then bottom paint?
 
"3 layers of cloth" Do you mean mat? 3 layers of cloth would make me nervous

:socool:


Good catch, I used 1708. Then coated with Gluvit. It's labeled as a "waterproof epoxy. I wanted to get it as I was making 2 backing plates for thru hulls out of MDO and wanted to soak them in the Gluvit first.
 
Phew.. some long nights and yesterday was a bear. Was supposed to splash but couldn’t get things to where I wanted them and didn’t want to rush. Couple pictures of the latest. Tons of small items done but not very exciting for pictures. Guy who did glass, gel coat and non skid is from MJM yachts here in Boston. Learned a lot of cool stuff, great guy.
Got the original fuel fills re chromed. A page back or so I showed them before they got done. What a difference!! Had too as the fills are 1 3/4.
The admiral came down to bottom paint. It’s a tradition now. She and I both noticed a big difference from painting the old 26. Lot more work but easier to get underneath the mainship.
Dolled up the water line. Previous owner had red bootstripe, white, Black, blue paint...a lot going on. I did black bottom, white bootstripe and the original black paint stripe. Will take a photo today. Came out pretty good. Certainly a lot better but just some lipstick as I will bead blast the entire bottom next year and redo them proper. But for a couple rolls of 1 inch bootstripe and about an hour it’s a big improvement.

Will try and take some more pictures today.. long day ahead wish it was later in the morning as I’m ready to go now but it’s 3:30 am ha.
 

Attachments

  • 3A4F0E36-52AB-4C68-8555-F86F26D1A5A4.jpeg
    3A4F0E36-52AB-4C68-8555-F86F26D1A5A4.jpeg
    73.4 KB · Views: 38
  • 600E5253-47AF-4CAB-9E95-885E301F17C8.jpg
    600E5253-47AF-4CAB-9E95-885E301F17C8.jpg
    63.3 KB · Views: 44
  • E9136FE1-813D-4595-AAD3-F73562DB67B1.jpg
    E9136FE1-813D-4595-AAD3-F73562DB67B1.jpg
    70.4 KB · Views: 42
  • E1038EE2-28C2-4D01-B09B-B509BB09D164.jpeg
    E1038EE2-28C2-4D01-B09B-B509BB09D164.jpeg
    73.4 KB · Views: 43
  • 6F11DDF2-E34A-4EB7-8CFB-E56FEE941224.jpg
    6F11DDF2-E34A-4EB7-8CFB-E56FEE941224.jpg
    70.2 KB · Views: 44
  • 5F9D147A-A147-4A39-B82B-D27DC2D883B5.jpg
    5F9D147A-A147-4A39-B82B-D27DC2D883B5.jpg
    142.2 KB · Views: 45
Last edited:
Mid May update

Hi everyone! some pictures to share and some context.
We are in! Last Monday actually. All went well. new seacocks and fiberglassed thru hull holes all good. Engine ran great, new shift and throttle cables I did end of last year did the trick and smooth as butter n the flybridge.

It is now time to get the interior work going!!!
New trim, vinyl and lower wallboard. Ran new electric and added a usb 110v outlet as well as a new 12v panel (phone died right as I was talking that photo, but I will update with a descriptin of some fun and fuctional lighting I'm installing.
New engine vent hoses. All secured strategically in the bilge. New ports installed in the galley with )pvc beadboard) and the head (still working on those walls.)
Put the new vinyl on those side panles as well as shown. New white buttons. New wiring for interior and exterior gunnel light shown.
Nice shot of the new decks and nonskid and all new hardware I put on. More to come. Always open to suggestions or comments as I'm just one guy out here trying to figure it all out as I go. What I wouldn't give to have another set of hands on a Saturday. I have a buddy who is great but he's so busy, buying a house, his own boat that I would never ask him for a day. All good though we are floating and we have beer and music! Hope everyone is enjoying the now spring here or wherever you may be boating!
 

Attachments

  • IMG_1416.jpg
    IMG_1416.jpg
    56.8 KB · Views: 50
  • IMG_1414.jpg
    IMG_1414.jpg
    72.8 KB · Views: 50
  • IMG_1405.jpg
    IMG_1405.jpg
    60.6 KB · Views: 47
  • IMG_1408.jpg
    IMG_1408.jpg
    47.3 KB · Views: 50
  • IMG_1411.jpg
    IMG_1411.jpg
    59.3 KB · Views: 46
  • IMG_1412.jpg
    IMG_1412.jpg
    38.4 KB · Views: 49
  • IMG_1404.jpg
    IMG_1404.jpg
    54.7 KB · Views: 53
You've really been pouring the coal on the repairs & they look first class ,too. The rechromed fuel fills are works of art & the deck drains are impressive.
 
You've really been pouring the coal on the repairs & they look first class ,too. The rechromed fuel fills are works of art & the deck drains are impressive.


Thanks Boomerang, much appreciated. Such a large project can swallow you at times so nice to hear.
Chroming was done by South Shore Plating in Quincy,MA. Fellow boat club member, great guy and is very familiar with doing Marine hardware. Just wanted to post here as I've been tying to list out where I have bought stuff etc as to hopefully help a future reader. I'm sure South Shore Plating would ship and do boat hardware so good to add here.
Deck drains- I got the idea from a great MK1 rehab website called :
34' Mainship Trawler - 1978 '34 Mainship Trawler Micro Yacht Renovations

Truly an amazing total rehab they did. Its unreal and I saw these deck drains in there photos and searched for weeks for them. Found them on Ebay. One other vendor online had them as well if I remember. Here they are all caulked and screwed in last night, port side wall panel and some GFCI outlets tonight and a beer as it's been a long week and I'll bet I run out of steam early tonight..I try to always do something for the boat each day not easy while being a business owner and working about 60 hours a week. :blush::
 

Attachments

  • IMG_1439.jpg
    IMG_1439.jpg
    59.6 KB · Views: 53
  • IMG_1438.jpg
    IMG_1438.jpg
    64.3 KB · Views: 56
Lots of work done, starting to get some tools out. Primed the salon with Petit "easy prime" then a coat of "Fine paints of Europe" excellent paint. Hard to find but my local store I have an account at has it and the stuff is top quality. The petit easy prime which I had never used was also great. I think the best one part primer I've ever used. vacuum, cleaned with TSP,dry, prime, top coat.
Fun shot of my buddy who he and his brother just got dive certified and wanted to check out their moorings so I spotted.
 

Attachments

  • IMG_1470.jpg
    IMG_1470.jpg
    107.1 KB · Views: 44
  • IMG_1472.jpg
    IMG_1472.jpg
    111.1 KB · Views: 52
  • IMG_1478.jpg
    IMG_1478.jpg
    63 KB · Views: 43
  • IMG_1480.jpg
    IMG_1480.jpg
    61.1 KB · Views: 49
  • IMG_1483.jpg
    IMG_1483.jpg
    77 KB · Views: 48
  • IMG_1484.jpg
    IMG_1484.jpg
    90.7 KB · Views: 42
I am watching this closely since I own a VERY original MS 34, #95. Still has the original automotive bulbs.


I assume that couch is original as it has the same fabric as mine!! But I note that it is on the port side and mine is on the starboard side!


Has my couch been moved, or was yours?


What number is your boat?
Jim,
Although our boat didn't have a sofa on it when we bought it, we opted to put one on the starboard side,too. The TV is mounted on the port side so it made more sense.
 
I am watching this closely since I own a VERY original MS 34, #95. Still has the original automotive bulbs.


I assume that couch is original as it has the same fabric as mine!! But I note that it is on the port side and mine is on the starboard side!


Has my couch been moved, or was yours?


What number is your boat?


Hi Jim, I'll assume where you see it is where it always was I the starboard side had ( I pulled them out) cabinets with a counter. Forward of the couch was another set of cabinets (both of which I assume you have) so the couch fit just right where it is shown.
Been picking away at the new cabinets at home. Using 1/2 marine plywood very similar design to the old. Going to order some remnants of Corian online for counters on them. Enjoy your MK1 ! :)
Oh.. I'll get the hull number today. Someone on here asked awhile back and I forgot! Sorry. Will add here.
 
Mainship 34

Lots of work done, starting to get some tools out. Primed the salon with Petit "easy prime" then a coat of "Fine paints of Europe" excellent paint. Hard to find but my local store I have an account at has it and the stuff is top quality. The petit easy prime which I had never used was also great. I think the best one part primer I've ever used. vacuum, cleaned with TSP,dry, prime, top coat.
Fun shot of my buddy who he and his brother just got dive certified and wanted to check out their moorings so I spotted.

My floors looked very similar to yours.
Finished the carpet job on my floors recently. Enjoying your progress.
 

Attachments

  • IMG_2058.jpg
    IMG_2058.jpg
    101.4 KB · Views: 36
  • IMG_2082.jpg
    IMG_2082.jpg
    104 KB · Views: 40
Hi Jim, I'll assume where you see it is where it always was I the starboard side had ( I pulled them out) cabinets with a counter. Forward of the couch was another set of cabinets (both of which I assume you have) so the couch fit just right where it is shown.
Been picking away at the new cabinets at home. Using 1/2 marine plywood very similar design to the old. Going to order some remnants of Corian online for counters on them. Enjoy your MK1 ! :)
Oh.. I'll get the hull number today. Someone on here asked awhile back and I forgot! Sorry. Will add here.


I have only the helm on the starboard side forward of the couch, and a small built in desk and drawers on the port side. I have two deckchairs and a coffee table behind the desk on port side.
 
The desk on the port side is best described as a navigators desk under the opening into the galley and wrapping a foot or more around the port side with drawers inside behind a door.
 
Couple updates, new berth cushions were done! We got our first night out on a mooring in beautiful weather down at worlds end in Hingham, ma.
She ran well, pups and 1st mate were happy! I have a feeling the chime slap will require ear plugs for us but it’s to be expected. Painted the galley floor to match the salon. Got pex and water heater going. Actually cleaned the decks?! Who knew we would actually get to that point?! Tons of work still do for off season but up and running good enough for now and to enjoy the boating aspect.
Will continually update on smaller projects now, wiring, some cosmetic items.

Also made a ramp for the pups! Just a quick shot of the dry fit. Got some non skid on it and helps them get on from the dock.

With this good weather we have been having I am tackling painting the exterior window frames white.
I kept the guy who did the decks garbage as it had dried up gel coat containers. I bought rustoleum topside oyster white and white and mixed till it matched about %95. So the boat will “ flow” as far as the color and not have bright white frames.
Will add pictures of that tonight as that project is underway!
 

Attachments

  • 78098301-4776-4315-BBB2-F02600CBBC76.jpg
    78098301-4776-4315-BBB2-F02600CBBC76.jpg
    181.4 KB · Views: 50
  • 31E67FD2-0E7A-4F02-B70C-70C18FBADDD7.jpg
    31E67FD2-0E7A-4F02-B70C-70C18FBADDD7.jpg
    113.7 KB · Views: 55
  • DE43BB17-096C-4FE8-A1AF-D44FB00952EF.jpg
    DE43BB17-096C-4FE8-A1AF-D44FB00952EF.jpg
    123.2 KB · Views: 61
  • D79B10F1-E6D2-43BA-97FE-0F6A6F0A5592.jpg
    D79B10F1-E6D2-43BA-97FE-0F6A6F0A5592.jpg
    93.5 KB · Views: 45
Looks fantastic, and its great to see you got her in the water and your enjoying it!
 
Thanks Senair! Slow weather start to the season here so looking forward to the 4th.

Bought a new mast light, desperately needed and glad to switch to LED. Bonus as it has a lower deck wash light. The package included in case anyone else is interested. Will get more photos tonight of some other small projects. Some nice shots from my buddies boat I took the other evening
 

Attachments

  • E1034B1C-0BD6-4CE9-9A9C-C7A706D7D81A.jpg
    E1034B1C-0BD6-4CE9-9A9C-C7A706D7D81A.jpg
    142.9 KB · Views: 39
  • E63FD45F-F7DF-4C0E-A80B-54730D91A3F1.jpg
    E63FD45F-F7DF-4C0E-A80B-54730D91A3F1.jpg
    97.2 KB · Views: 35
  • 31A10C4C-E595-4821-93C7-9A0E2B26FD18.jpg
    31A10C4C-E595-4821-93C7-9A0E2B26FD18.jpg
    88.9 KB · Views: 41
It looks like a nice assembly. We looked at that same light as a replacement for ours, too, as the base was getting deteriorated. That idea got scrapped when we added a radar mast on the back deck & removed the original Mainship mast forward.
Are you going to run another wire for the additional deck light? Since Mainship ran 2 pairs of wires, one anchor 12v + & negative and one steaming 12v + & negative, I had figured I was going to combine all 3 of the negatives on one wire & that would give me an extra wire for the deck light. There wouldn't be too much load on the shared negative wire since the LED lights draw less and there wouldn't be a case where all 3 would be burning at once anyway.

Hi There, I get what your saying and I like it! I only have a hot and ground going to this location/light so going to just have the entire unit light up with the one switch. On the top of my mast is another light that I think is a different switch.. still a TBD. No night running for the next 2 weeks that I see so I have some time to figure this one out. Will keep us posted here though.

Not that people are losing sleep over my new pictures but I keep saying I'll post some and I hope to get them tomorrow.
 
Congrats on the launch. We just laynched ours after painting the topsides and installing 11 new portholes.
 

Latest posts

Back
Top Bottom