Prairie 36 Improvements

The friendliest place on the web for anyone who enjoys boating.
If you have answers, please help by responding to the unanswered posts.
Agree with Tom's comments.

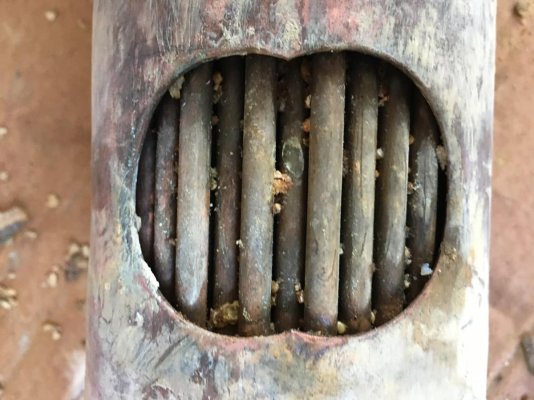
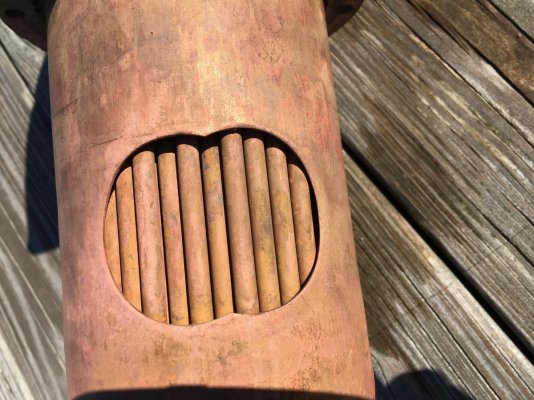
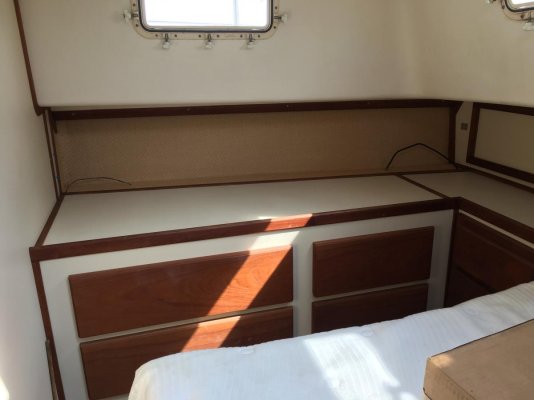
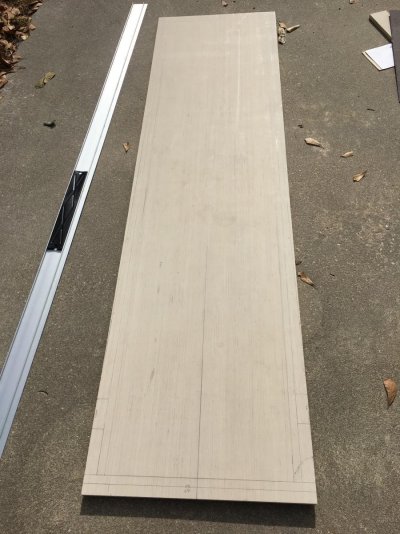
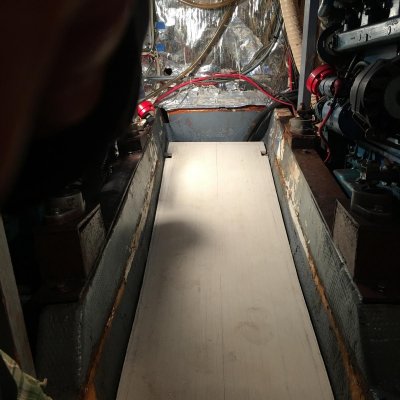
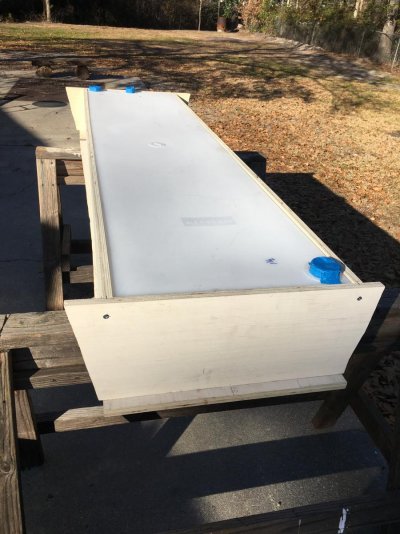
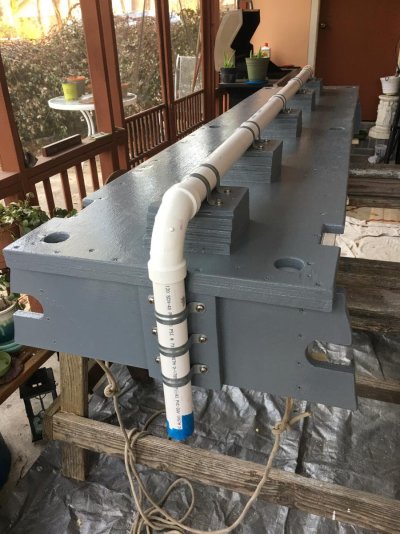
Owning several sailboats and rebuilding my last boat gave me valuable insight as what to look for in an old boat. But I still used an excellent surveyor who caught a few things I missed. However, there will always be a few other items where the only solution is a good cash reserve. Some of my reserve was used to replace the starboard fuel tank a month after purchase.

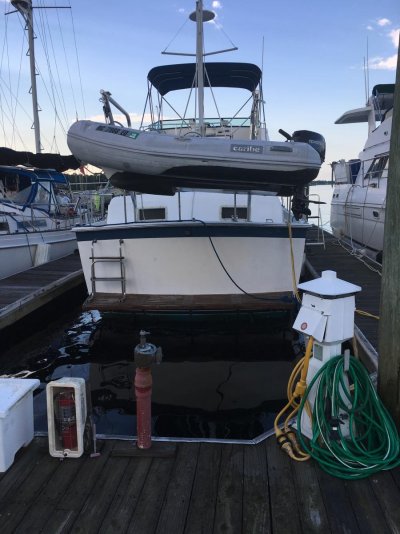
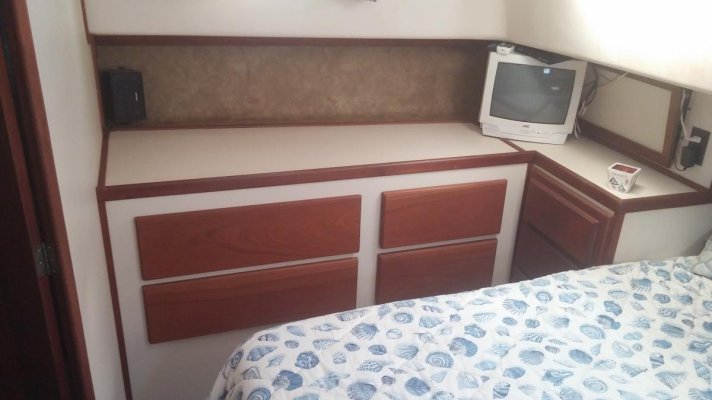
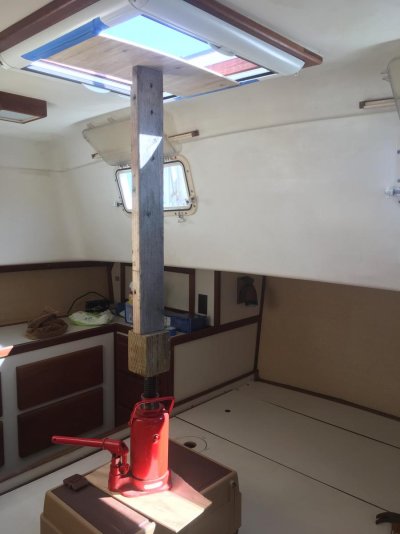
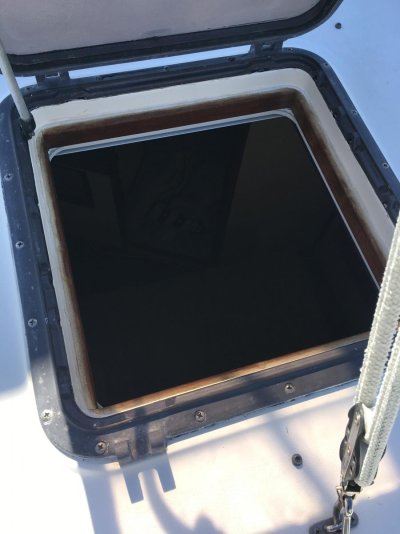
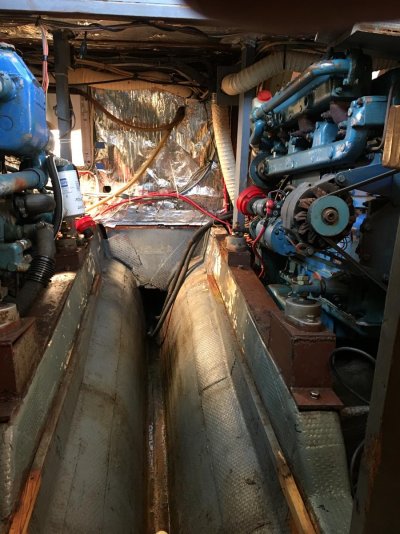
I started this thread to talk about and get feedback on the improvements I had in mind for our Prairie 36. But there have also been several fixes and maintenance items I have addressed along the way. So I hope I didn't give anyone the wrong impression with all of the Prairie praise that our Prairie 36 is without flaws, it's not.

As with many things in life, a boat is just another compromise.

The only perfect boat is the one you just bought, ....
or is it the next one you're planning to buy. :D
 
FOG;
Having decided on a Prairie, this time I have to learn, plan and see what others are doing has been great.
I enjoy seeing what others are doing and why and learning from others' trials.....I know I have had many on other vessels.

Thank you and others on this forum for their input and honesty.
 
FOG;
So how is the work on the Prairie 36 coming along?
Any time to cruise some?

Just continuing to wonder how pleased you are and what you are learning about her?

Thanks.

Tim
 
I'd like to know how Fog is doing too. As for myself, I;m pretty happy with Islander. We did a 200 mile week long trip over Memorial day holidays and had a grand time. We've been doing day and week end trips and may do another week long trip later this year anchoring out more. So far I've had to replace my Magic Chef fridge but it's replacement seems to be doing well. I've been replacing the old opening ports with new ones and have 4 more to go in the aft cabin. I will be keeping busy with more updates to come.

Kevin
 
Well guys I'll have to admit that my Prairie 36 improvements have taken a back seat over the past few months. Some family issues, home projects, and a recent trip to California have taken priority.

However, we have managed to purchase some wallpaper for the aft cabin, plan and do a little work on the new dinghy davits for the stern, continue to procrastinate on the purchase of the holding tank from Ronco and accomplish some more unexpected maintenance.

I'm also almost done with cleaning and re-installing the port engine heat exchanger. We decided to move the boat to a marina in Carolina Beach. Our year lease was up and we wanted a different location, plus it saved us a few hundred on another year lease.

I went to the boat the day before we were to move it to the new marina; start the engines and just generally check things out before the 5 hour trip down the inter-coastal. A year before this I did the same thing before we moved our boat to a new marina and I discovered the fuel leak in the starboard tank. Both times we were out on a day cruise about a week before the check day and everything was fine.

Anyway this time I noticed the port engine coolant overflow tank was over flowing. I shut the engine down, drained the overflow tank to the proper level and re-started the engine. My thought was that I over filled the tank on the engine. After about a half hour the tank is over flowing again. My thought now is that I have a leak in the heat exchanger and I'm getting raw water into the coolant.

So I rigged the line (plastic tubing) that goes from the coolant tank on the engine to the overflow tank to go into the bilge. I figured as long as I have raw water circulating where the coolant should be circulating it should keep the engine cool. The next day, moving day, all went well. I checked the plastic over flow tube a few times during the trip and there was a small constant trickle of water going into the bilge.
The next day after the move I removed the heat exchanger and flushed the coolant side of the engine with fresh water from the dock hose.

When I got the heat exchanger home I hooked up my air compressor to the inlet and duct taped the outlet. With just a little bit of air pressure air was coming out around the end cap that goes inside the coolant tank. I took the end cap off and there was some kind of putty compound stuff that just crumbled away - no gasket! Took off the other end cap, same thing - no gasket.

On my previous boat, a Mariner 50 Motorsailer, I also had a Perkins 6.354. So I knew that the heat exchanger end caps had thick rubber gaskets at each end. On my next trip down to the boat I did confirm that the starboard engine heat exchanger exterior end cap did have a rubber gasket. The interior end cap that goes inside the coolant tank I'm not sure of. And I'm not going to remove the heat exchanger from the tank just to check.

I believe that if it's not broke, don't try to fix it. I also broke 3 heads off of the 8 bolts removing the port engine heat exchanger from the coolant tank. Fortunately I was able to remove the broken studs from the tank without having to use an easy out.

Here are a couple of before and after pics of cleaning the heat exchanger portion that goes inside the coolant tank using a biodegradable descaler.
Also a pic of the end cap that was inside the coolant tank. Notice the 2 cracks. I didn't see or feel any air coming from the cracks when I did my testing as I didn't know the cracks were there until I cleaned things up.
 

Attachments

  • IMG_0613.jpg
    IMG_0613.jpg
    121.9 KB · Views: 88
  • IMG_0730.jpg
    IMG_0730.jpg
    169.8 KB · Views: 82
  • IMG_0731.jpg
    IMG_0731.jpg
    151.3 KB · Views: 90
FOG;
Thanks you for your detailed reply. I am living vicariously through you and other boat owners right now; so I enjoy learning and seeing what is happening.

Indeed so many small issues with an older boat, but at least you know as you repair/replace, what systems you can trust and what systems still need some work.

I hope you are getting closer to your Loop trip. And plans are coming along well in that area.

May you get out some these days and enjoy her!

Tim
 
Fog: Did you have cooler re tubed, plug the two leakers or buy a new core? Source? Or local radiator shop?

Have you been able to figure out if there was an underlying cause? Age, no zinc, low antifreeze?
 
Last edited:
Fog: Did you have cooler re tubed, plug the two leakers or buy a new core? Source? Or local radiator shop?

Have you been able to figure out if there was an underlying cause? Age, no zinc, low antifreeze?

Not planning to re-tube, or a new core. Just cleaned it up with a descaler and replace the cracked end cap and new gaskets. Purchased the gaskets, the end cap and a spare from Trans Atlantic Diesel.

I don't know the cause but suspect that the cracked end cap was from age/fatigue or inferior manufacturing. The cracked end cap is not as thick as the other end caps and from a different manufacturer.

However, I don't think the crack in the end cap was the cause of the leak. I believe not using the proper rubber gasket on the end cap was the cause of the leak. Trying to use some type of sealant compound on the end caps that eventually hardened and cracked was not the correct solution.
 
Ok. Misunderstood. I didn't Catch the crack in the end cap. Just want to keep an eye on mine.
 
New Dinghy Davits

I'm almost done with my new dinghy davits. Still need to build and install a crossbar for support, lights and maybe downstream solar panels.
The main objective of getting the dink off of the aft cabin so I can get the hatch fully open has been accomplished.
 

Attachments

  • IMG_0742.jpg
    IMG_0742.jpg
    154.7 KB · Views: 106
  • IMG_0751.jpg
    IMG_0751.jpg
    135.3 KB · Views: 90
Sweet!!! I may be e-mailing you for plans...
 
Plans ......... ???????

I don't use no stinking plans. :D


Just kidding. I did start out with some plans, but have made a few mods along the way. Hey, it's a boat. Happy to share with you if you don't mind a lot of "White Out".
 
Ooc, How are the bases bolted to the gunnel, and how did you back up inside? Is that accessible up above the headboard?
 
Ooc, How are the bases bolted to the gunnel, and how did you back up inside? Is that accessible up above the headboard?

The bases are bolted to the deck and the top of the gunwale (toe rail?). I inherited these davits from a previous boat that I sold. Long story. So I flipped them up side down, did some cutting, made new bases and had them weld up to fit the Prairie 36.

The tubes are 2" Stainless Steel with a 1/8" wall. The bases and backing plates are 1/4" Stainless Steel plate. There is a 4" x 6" backing plate under the 4" x 4" deck bases that pick up the 3 of 5 most forward 3/8" bolts. The other 2 bolts missed the 3/4" plywood core so they just have fender washers.

Avoiding the headboard and overhead area with protruding bolts was the objective. Fortunately there are access cabinets on each side of the bed that allow enough room to reach the inside sections for through bolting. Of course some boat yoga is required.

The trick was the port side mounts because they needed to be sandwiched between the headboard bulkhead and a stanchion. I must have measured that area a thousand times. :banghead:

I decided to beef up one of the gussets, so the davits are off of the boat, ..... again. :facepalm:

Once I get them re-installed, I'll take some detailed pics and post them if you're interested.
 
Nice conversion. Just make sure dink drain plug is clear. A dink full of rain would overcome the physics of the arch I believe. Especially the one on the engine end. It's nice to be able to modify your earlier parts on a new boat.
 
I'm thinking if I did the same thing, I'd mount the bases on the swim platform, and bolt it to the outside of the transom. I'd need davits that swing out of the way when not in use. I already take up every inch I'm allowed in my slip.
 
How about the same type of davits but removable? I have three rod holders on the transom cap. The tubes can bury about 12" deep in them, that should be enough to take up to 150 lbs.
 
Nice conversion. Just make sure dink drain plug is clear. A dink full of rain would overcome the physics of the arch I believe. Especially the one on the engine end. It's nice to be able to modify your earlier parts on a new boat.

Thanks.
I figured I'd save quite a bit by using what I already had.
Another nice thing about this style of davits is the ability to raise the dinghy bow much higher than the stern to get good drainage. Provided you remove the plug. :rolleyes:
 
Aft Cabin

Replaced the wall covering in the aft cabin and installed an Oceanair Skyscreen on the hatch.
I have always liked these as you can have a bug screen, solid cover, or open.
I got my buddy, Jack, to help center it on the hatch for installation.
 

Attachments

  • 1117151430a.jpg
    1117151430a.jpg
    73.8 KB · Views: 65
  • IMG_0817.jpg
    IMG_0817.jpg
    70.8 KB · Views: 69
  • IMG_0819.jpg
    IMG_0819.jpg
    105.8 KB · Views: 70
  • IMG_0826.jpg
    IMG_0826.jpg
    46.5 KB · Views: 75
  • IMG_0828.jpg
    IMG_0828.jpg
    55.3 KB · Views: 74
  • IMG_0824.jpg
    IMG_0824.jpg
    77.4 KB · Views: 82
Could you put an exterior pic up when it's done. Looking down into the hatch. TY
 

Attachments

  • IMG_0846.jpg
    IMG_0846.jpg
    89 KB · Views: 113
  • IMG_0848.jpg
    IMG_0848.jpg
    88.5 KB · Views: 115
FOG!
Is the boat (and you guys) about ready to escape for the Loop yet?

Any other improvements or changes you are doing to your very nice looking boat?

Tim
 
FOG!
Is the boat (and you guys) about ready to escape for the Loop yet?

Any other improvements or changes you are doing to your very nice looking boat?

Tim

Tim - thanks for asking. We are still planning to start the Loop in April.

Currently working on installing a new holding tank, aft head toilet, and associated plumbing. I'll post some pictures soon. Hopefully this will be the last major project before we leave.
 
How exciting! Loop begins in a couple of months...so much to do, so much to consider and the escape!

You have done some MAJOR refits on your boat and I like what you have done.

Why did you choose to move from "electra san" back to holding tank? I thought most would have moved the other direction.

So aside from working on the boat....planning the Loop must take some major considerations and planning....care to share?

Thanks.

Tim
 
Holding Tank Installation

After researching several holding tanks for installation in a number of locations on our Prairie 36. I decided to install it in the bilge area of the engine room.
BTW my wife calls my research, procrastination. Whatever!

I bought a 45 gallon tank at Ronco Plastics in Irvine, CA. and had it shipped to North Carolina. No accident, I had purchased a holding tank from Ronco many years ago to replace a rubber bladder on one of my previous sail boats when we lived in Southern California. I think they make a quality tank, but with anything boat, check the measurements. I found them to be a little off, so measuring all sides is instrumental to a good fit.

I have had some people ask why I'm replacing or installing a holding tank. My Prairie 36 didn't come with a holding tank. It had 2 Lectra San marine sanitation devices (MSD). One for each head and that's it. Treat the waste and dump it overboard. There are a number of areas along the Great Loop that have No Discharge Zones (NDZ). Which means you cannot discharge treated waste, even from a qualified MSD. New Hanover county, where we live in Wilmington, NC is also a designated NDZ.

So I decided to go with a holding tank with a deck pump out. I may also go with a macerator pump out to empty the holding tank when I'm over 3 miles off shore. But that may be problematic because I've read that you have to disable it when in the Great Lakes by removing the sea cock handle or plugging the discharge hose. From what I've read the fine is high and the disablement is unclear. So I may forego this option for now and just stay with the deck pump out.

Here are some pics to show my progress so far. I need to do another final fitment to make sure there aren't any gotcha's. Then I'll glue and paint the plywood tank enclosure, drop it in the bilge area and proceed with the plumbing.
 

Attachments

  • IMG_0965.jpg
    IMG_0965.jpg
    151.9 KB · Views: 54
  • IMG_0966.jpg
    IMG_0966.jpg
    176.1 KB · Views: 65
  • IMG_0967.jpg
    IMG_0967.jpg
    202 KB · Views: 68
  • IMG_0968.jpg
    IMG_0968.jpg
    174 KB · Views: 59
  • IMG_0969.jpg
    IMG_0969.jpg
    146.5 KB · Views: 60
  • IMG_0970.jpg
    IMG_0970.jpg
    154.9 KB · Views: 60
Nice! Mine has 2 tanks, which appear to have been stuck in as an afterthought. Neither is big enough. This looks like a great solution.
 
Nice! Mine has 2 tanks, which appear to have been stuck in as an afterthought. Neither is big enough. This looks like a great solution.

I considered 2 tanks, one for each head, but couldn't find a good location to install them. Where are your tanks located? How many gallons each?
 
I considered 2 tanks, one for each head, but couldn't find a good location to install them. Where are your tanks located? How many gallons each?

The aft one I replaced. I know that is only 15 Gallons. It's under the sink, behind the drawers. Horrible location, no way to get anything larger in there.

The forward one is probably about the same size, under the v berth on the port side, just forward of the bulkhead for the head.

I notice that both heads had some major lay-out changes in later models. There was also a galley-down design. Mine has galley up, v berth forward, aft of that is the head to port and stowage to starboard. The aft head has the sink on the far left-hand side as you enter. I think that changed later, too.

I think your layout is the same as mine. In the aft head the Lectra San unit was under the sink, behind the drawers. The other Lectra San unit was under the v berth on the port side, just forward of the bulkhead for the head. Both seem to have been in the same location as your holding tanks.

One option I considered was replacing the Lectra San units with holding tanks in the same location. I think the forward head would have been fine. But the aft head was a concern because the bottom of toilet was only about 7 inches above where bottom of the holding tank would be under the sink. I just couldn't see getting a proper downhill flush into a tank in that location.

So once I started looking in the engine room it opened up other location possibilities. The down side was it was going to be much more work. But the up side was a larger single holding tank.
 
Holding Tank Progress

I've made a little more progress on installing the holding tank over the past few days. I screwed, glued, and painted the plywood enclosure then dropped the Ronco tank inside.

My plan was to do the plumbing required for the bottom of tank before I install it on the boat since it won't be accessible once installed. So two of the pictures show the bottom side with the PVC plumbing and it's supports.

The other picture shows it in it's final resting place on the boat. I still need to finish up the top, which will become the new floor in the engine room. Then finalize the plumbing to connect the toilets, deck pump out, and vent line.
 

Attachments

  • IMG_0972.jpg
    IMG_0972.jpg
    164.1 KB · Views: 80
  • IMG_0973.jpg
    IMG_0973.jpg
    160.3 KB · Views: 82
  • IMG_0977.jpg
    IMG_0977.jpg
    98.6 KB · Views: 68

Latest posts

Back
Top Bottom