What next ??

The friendliest place on the web for anyone who enjoys boating.
If you have answers, please help by responding to the unanswered posts.

KEVMAR

Senior Member
Joined
Aug 5, 2014
Messages
289
Location
USA
Vessel Name
Delphina
Vessel Make
President 43
I am replacing the aft port side window which has leaked very badly over the years . There was black mold ? St the lower cornors so I proceed to do nvestigste and now have a mess . The wood was so wet it just peeled off and now am down to the Fiberglas.. I’m sure I need to have the plywood replaced before I install the replacement window but how do we go about doing so ?? I have a 1983 36 albin
 

Attachments

  • 6DC5F171-687A-4FA8-9D8F-E79E31A1C9A8.jpg
    6DC5F171-687A-4FA8-9D8F-E79E31A1C9A8.jpg
    105.2 KB · Views: 179
  • 96D38AB3-2101-4264-A2B5-E118BCED1344.jpg
    96D38AB3-2101-4264-A2B5-E118BCED1344.jpg
    142.8 KB · Views: 198
  • 4A260A48-1329-4D52-9A0A-BE4E6E452E44.jpg
    4A260A48-1329-4D52-9A0A-BE4E6E452E44.jpg
    114.6 KB · Views: 188
I just epoxied in new pieces of plywood to fill in the rotton spots.
 
In my case, I marked the highest point of damaged wood on the wall involved, made a horizontal cut across the entire wall and replaced everything below it with new marine plywood before installing new window.
 
After you put the plywood down what was next ?
 
Cut back the damaged ply until you hit solid wood. Make a template...you can use cardboard, thin masonite, etc. Butter the new ply generously with epoxy and clamp in place...you can clamp through the open window, brace from the inside, etc.

Then you can skin the inside with Luan ply using any convenient adhesive and a notched trowel.
 
How do you get the depth/height right so the finishing ply fits flush? I suppose you use the same ply thickness underneath, but even so,to this non carpenter it sounds tricky.
 
It may be easier to just pull the window and replace the whole panel at once with new 1/8" luan ply. That's what I did some years ago with my small Nimble Kodiak. Save the old ply to use as a template to cut out the window opening, etc.
 

Attachments

  • duringwindows.jpg
    duringwindows.jpg
    73 KB · Views: 130
  • duringoverallaft.jpg
    duringoverallaft.jpg
    67.1 KB · Views: 150
  • finishedaft.jpg
    finishedaft.jpg
    91.7 KB · Views: 137
  • finishedfwd.jpg
    finishedfwd.jpg
    107.9 KB · Views: 137
  • stbdsetteewithcushions.jpg
    stbdsetteewithcushions.jpg
    97.1 KB · Views: 144
I cut out all the bad spots and made sure I stopped the leak. Next fill back in with marine grade to match existing plywood. I then matched the veneer, if you want to match the boats existing wood finish. I bought my veneer at Cabinet Warehouse. I bought samples and shipped first, then ordered full sheets. Luck was on my side as the damage was not that bad. Will be doing a video on it soon. I really liked the final repair and cosmetic look. What is more important I fixed the leak and the Admiral was happy with the interior finish:flowers::dance:
 
Second the kudos for Boathealer!

As for the repair strategy, I suggest coating out all wood repair materials with epoxy. No need to have to replace the repair later, and things always eventually leak again.
 
Been there, done that.

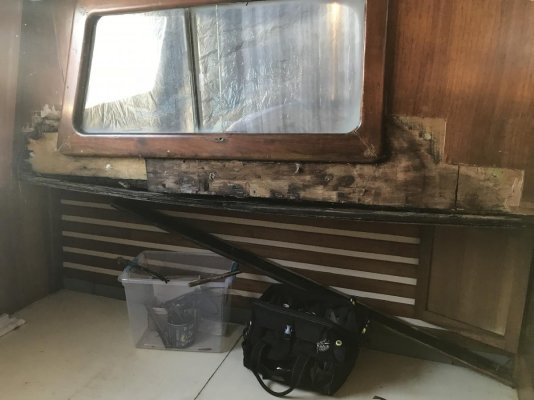
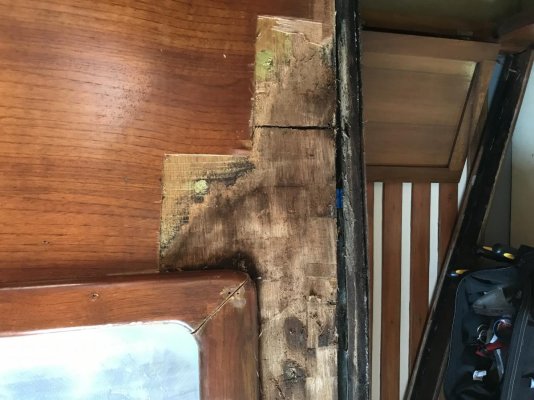
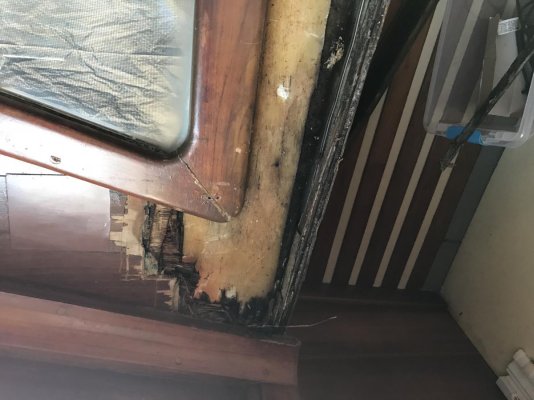
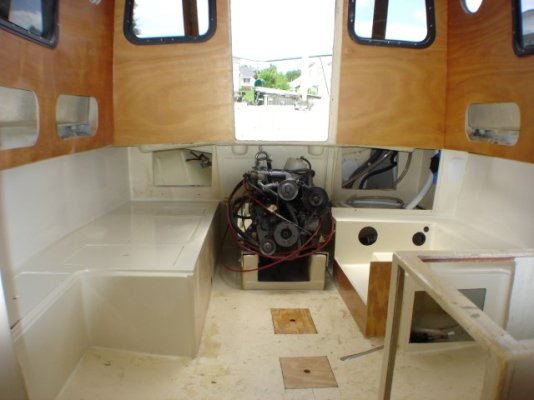
Start with a hammer and well sharpened chisel and remove all rotten wood. Use a Dremel in some areas just like you were drilling a cavity in a tooth. Don't worry about leaving a flat surface, just get all the soft wood out.

Saturate the wood with west system epoxy thinned to milk consistency with MEK.

Flatten the substrate with epoxy thickened with wood dust, fairing compound, whatever, leaving slightly more depth than the thickness of whatever you are going over the repair. So, of it is 3/8", make the depth 13/32". When this is starting to thicken, press flat with a small piece of wood wrapped in wax paper.

Tape construction paper over the repair area, and with a razor knife cut out the paper by tracing the edges, then use this to cut your repair. Coat this on the backside with thickened epoxy and press onto place. Coat the edges so any gap is filled. Don't worry about clean edges, you can cut these down with a head gun and a scraper.
.
You can get fancy with the repair piece of you want, orienting grains, etc.
 
What Delfin said to a tee. Been there, done that. First time wrong, second time right.
 
Back
Top Bottom