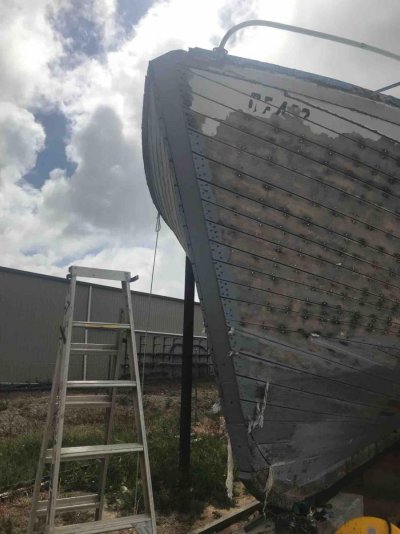
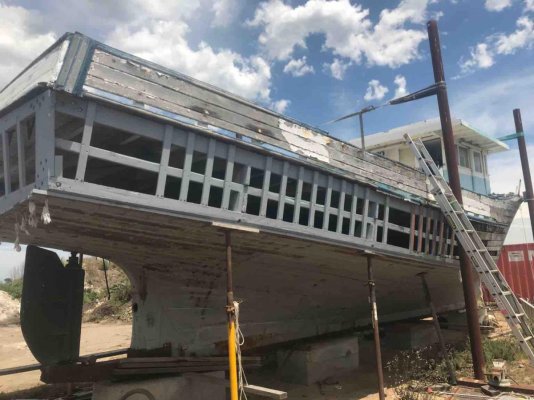
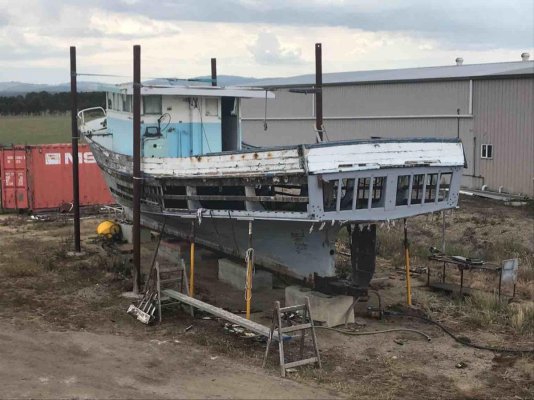
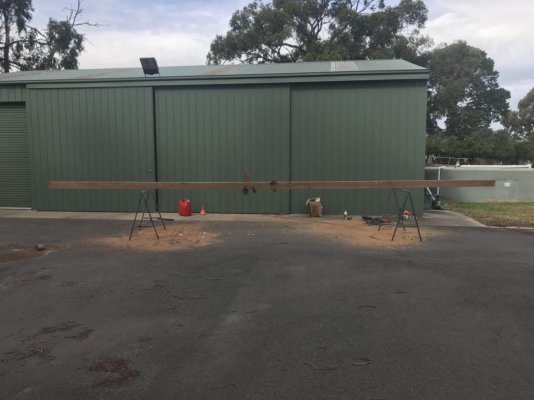
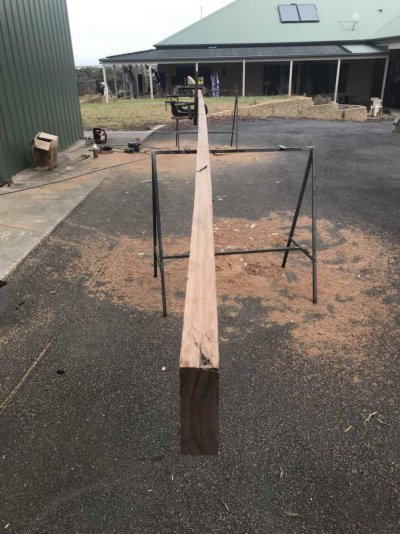
Evans Head NSW to Port Albert Vic in a 49ft McLaren Timber trawler

The friendliest place on the web for anyone who enjoys boating.
If you have answers, please help by responding to the unanswered posts.
Adorochelle
How are you mate,
Putting the Gardner 6lxct back in her have given her a freshen up be a while before it goes back in plenty to do
How is you girl going and up to date pictures?
Troy
 
IMG_3172.jpgIMG_3173.jpgIMG_3192.jpgIMG_3196.jpgIMG_3034.jpgIMG_3035.jpgIMG_3040.jpgIMG_3203.jpgIMG_3208.jpg
 
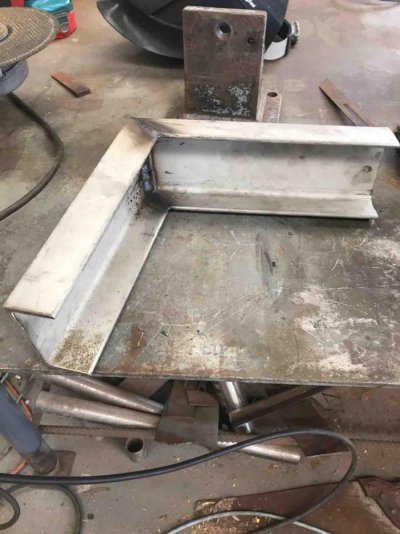
Hi all few more updates for your viewing pleasure new stem fitted and installed made s/s knee for the deck stringer and transom frame bolted in transom frame painted started on port side deck stringer needs the same as starboard side but it’s easy now I’ve done one after that has been bolted up have to replace three side frames on the port side shouldn’t be to bad of a job and once that has been done wait for it the bloody deck beams from front of wheel house to the stern have to be replaced as where the bolt onto the deck shelf are all split out and rotten so new beams new ply and glass over ( am still toying with the idea of putting a laid deck of about 20mm think hardwood over the glassed deck ) any thoughts also whilst deck is off I’ve changed my mind with the truck tanks and was leaning towards plastic moulded tanks around the 1500 lt where do the make them and any in Victoria thanks in advance
Troy
 
Troy, try and increase your fuel tankage, as I say you can make water but you can't make fuel. It keeps a bit of weight in her and minimises port stops.
All looking good ,
Cheers
Benn
 
Benn
You made your fuel tanks yourself out of mild steel if you had your time again would you use a different material / SS 316 or 304 or aluminum or plastic if you would still use mild steel what did you use to paint inside and out and thickness of steel and did you tap your inspection ports or weld studs I’m still way up in the air on this have no problem building them but want to do it right from the start think I should get to about 2500lts in total and was thinking of bolting a tank to the bulk head properly supported on the engine beds at the bottom and bolted to the deck beam ( your thoughts on this ) this tank will be about 450lts and main tanks should Carry bit over 1000lts each.
Regards
Troy
 
I'm sure Benn will have good input, but I'll throw in my 2 cents anyway.

I replaced my tanks. The old ones were 5/32" steel with fairly minimal original coating, made in 1981 but they lasted 30 years. They rusted from the outside, due to poor engine room vent design that allowed rain entry. From there, it was only a matter of time...

The points to note are that steel tanks will last a very long time. Add modern coatings, install properly, and they are almost forever.

IMO avoid aluminium. Tricky to install properly to avoid poultice corrosion. Similarly, SS does not hold up well if it gets wet from time to time and has poor oxygen levels where wet eg at mounting points.

Even for steel, best is to mount on nitrile rubbers pads. If you use steel, remove scale (if required, better to use pre-primed steel to begin with) then clean and prime carefully. Use multiple coats of an epoxy paint.

I think welding in threaded sockets for tank fittings is the way to go. I had some 10" inspection ports fitted, but the kits were $200 each and I'm not sure that I would bother doing that again. I needed one for each baffled compartment, so it added up! Pic is painted tank showing inspection ports, and welded in fitting for drain, sight gauges etc. This tank has a full division, and is really two tanks - rear is day tank of 385 l capacity. I have draw points from the top - pickup tube to within a few mm of the bottom for my fuel polisher, and 10mm from bottom for engine supply. A bottom fitting, with t-piece (one outlet for engine, one for drain) would be a simple way to go.
 

Attachments

  • Fuel tank new 9.jpg
    Fuel tank new 9.jpg
    78.7 KB · Views: 61
Last edited:
Brian had it pretty well covered there.
I used mild steel, all lightly grit blasted to remove scale. No coating inside, all fittings were sockets welded to tank. I coated the tanks with tar epoxy and then enamel paint as top coat. ( not looked on as the best top coat (fire risk) but 22 years down the track I have no complaints. Just ensure that all deck fittings are tight and no moisture gets onto tank tops and the tanks are ventilated all round.
 
My tanks are supported at the base on main frames and supported/bolted to the deck cross beams.
 
Thank you Brian and Benn,
Well great information boys, this has helped make up my mind up will get some mild steel tanks folded up to fit shape of boat bring them home quick sand blast weld them up and paint. Glad I ask was originally going the truck tanks aluminum, then changed to stainless steel, and plastic now mild steel thank for the sound advice.
Cheers

Troy
 
Hey Troy,
Its all looking good so far!

I replaced my tanks with 2mm stainless, but they were only 120 litres each. Mild steel is probably better for the size you are considering.

I agree with using sockets; There's not enough meat on even heavy plate to tap proper threads.

One other thing. A tank will last a lifetime if you can keep it free from water inside and out.Id recommend installing your tanks on a slight slope, with a sump at the lowest point of each tank. Since mine was flat bottomed, I mounted it on wedge shaped supports (cut from synthetic decking) to slope the bottom down to the drain point. I tied this drain point to a sight glass, so I can immediately see if there is any water in the tanks when I check the fuel level.
 
AusCan, has a valid point there that I did not mention. Install a nice little sump in each tank, Mine are approx 120 mm square and 150 mm deep. 1/2 "socket with a ball v/v and cap for draining of the nasties.
 
It could be beneficial to angle the tank slightly away from the fuel pickups and install an inspection port on that end. This would help contain all the sediment to one area and may make clean outs a bit less frustrating.
 
Hello to all that replied to the fuel tank conversation. Ok if you had a fuel tank that say held 1000lts as an example, and instead of having it full all the time to decrease condensation build up inside. If I made them into three separate tanks in one and only kept one full or there abouts and left the other two empty and only fill for extended cruising this saving having all this fuel onboard not being used ( thinking out loud ) how would you stop the empty tanks from getting surface rust on them coating of oil or keep spraying with diesel as a coating. love to hear from the boys with mild steel tanks.

Troy
 
I have not had any fuel issues from condensation, but perhaps your climate might be different. I would just have a drain valve at the low point of the tank, and drain off a bit of fuel occasionally to check for it. I would not create multiple tanks to deal with it. Install a Racor, or better twin Racor's ahead of the engine filters and keep an eye on the bowl for water. Carry plenty of filters, but unless you get a bad fill (bottom of suppliers tank) you probably wont need them either.
 
How are you mate,
So you think just build them as big as I can make them only one tank with a good sump, twin filters and a good inspection port. The possible capacity will be close to 1500lts each would this change anything and was thinking a of a day tank off around 300lts also any more advise will be consider very very carefully
Troy
 
Were a bit bigger with a 60 ft milkraft ex trawler.
3500 litre tanks either side of the nta855 cummins primary
Crud sump and drain in the bottom corner and pickup above that
Pickups running to 1000fg x2 then on to engine.
Had her for two years and had about 3500 litres of old diesel when we bought her, crud sump gets checked every few months, always clean
Still running the original filters, have a dozen spares but no sign of pressure on the gauges so haven't changed them.
 
As I stated before , one large tank either side with inbuilt sumps and drains are the way to go.
I maintain mine pretty full but every 2 years run them down to about 400 lts per side and then polish the fuel from one side to the other and in the process open each tank when empty to clean out ant large crap or sediment. Change all filters every 12 months weather they need it or not as the filter material will break down and it also give you peace of mind that you are fully on top of the situation.
 
Originally I had 4 tanks with capacity of 3850 litres. When they had to be replaced (one had started to leak after 32 years) I made the aft tanks larger, and split off 380 litres from each of the lateral tanks to use as day tanks. I now have 4700 litres in total, in 6 tanks. The day tanks can only be filled via the polisher. The extra capacity was for a planned LA-Hawaii crossing. But freight rates reduced dramatically so I ended up shipping her back to Australia.

Were I starting again I would likely just stay with the original tank configuration and size. But still install a polisher. I have only once picked up any water/crud in a fuel fill, and it was just in one tank. This with 25,000 litres of fuel used in total. Probably about 300 ml of water with small amount of debris, easily drained from the polisher's Racor. The polisher pickups almost touch the bottom of the tanks, whereas the engine pickups are about 5mm from the bottom. The twin Racors for the engines have never got any water in them.

Now, if you were planning on travelling to developing countries and were getting fuel delivered in 200 litre drums it would be different as contaminated fuel is then more likely. The set-up I have might then be very beneficial. Bottom line - day tank probably not worth the extra work/cost to install.
 
Well this is great information from all of you and my job of making them myself is becoming easier with every conversation so let me get it straight the larger capacity diesel will be fine to stay in for extended periods I still think I like the idea of the day tank even if it is not used straight away need to put it in before new deck goes on. Having a good size crud sump is a no brainer with welded sockets, slopping top of tank inwards so no water can not sit on top for any reason sit tanks on some good timber bearers ( anything on the Bearers or just straight on top) a large inspection port dual filtering system changing filters once a year or as required beforehand. Now let’s talk about baffels was thinking about full height but can be easily talk out of this Benn how have you arranged yours with your inspection port and do you think it’s important to get to every corner of the tank from the one inspection point getting closer boys for the final decision on design. How have you boys gone about sight glass arrangements or have you got gauges list how many sockets am I going to require sump drain, delivery line, 2 for the sight glass, breather socket. 2” filler socket would you add any more for down the track really appreciate your input boys cheers once we finalize design will post a drawing for you all to look over before we go to build stage.
Troy
 
I used tared tape as a betting on the timber when I installed my tanks, I don't know if it is still available.
Baffles full height with limber holes in each corner plus a reasonably sized opening in the middle. Inspection ports so that you can get to each division or at least one each end.
When you have them fabricated it may pay to have them rolled so that you only weld in the ends , top and sumps. or bottom and sumps.
I didn't do this only thought of it about a week after I had completed welding my tanks.
Sight glasses with quick closing valves on the bottom, they are available but hard to find. I will see what I can dig up and let you know. Always add an extra socket at the bottom and at the top, you never know what you may want to add later.
 
Thanks Benn and to all the other boys for your thoughts if you think of anything else to add to the topic please do so will post an update when I return from work on the progress of the boat just started the port side structural timber work pretty much the same as the starboard side but a bit longer in the deck stringer this side is about 9.5 meters long the port was only 6 meters long. Thanks again to all.
Troy
 
Thanks mate appreciate your help on this better to ask people who know then to do the job and have to do it again cheers Benn
Troy
 
Have a 1" socket on the bottom so you can cross-link the tanks for self levelling of fuel levels. But include valves in case you want to have more fuel in one tank to get trim right.

In addition to Benn's comments, which are spot-on, paint the tanks with epoxy paint. An alternative bedding is nitrile rubber, which is what I have.

For sight tubes, mine look like this. Installed in the US, not sure if available locally.
https://www.google.com.au/imgres?im...zaAhUMxbwKHYA2CsYQMwiEASgJMAk&iact=mrc&uact=8
 
Brian, yes Nitrile rubber would be a very good bedding material for the tanks.
The self closing valves for the sight glasses is a survey requirement and when I was building I was building to survey until I realised that I didn't like people all that much so just built to survey standard and not in survey.
My fuel tanks were painted with tar epoxy and then final coated with enamel , so far after 23 odd years they are in very good condition.
 
Hello people
Just a few photos of the small progress iv made over the last few months bugger work.
 

Latest posts

Back
Top Bottom