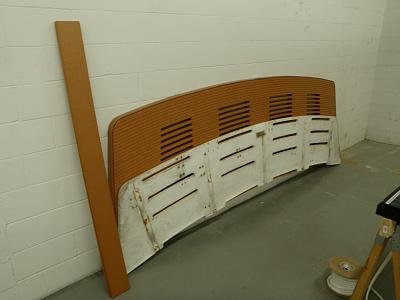
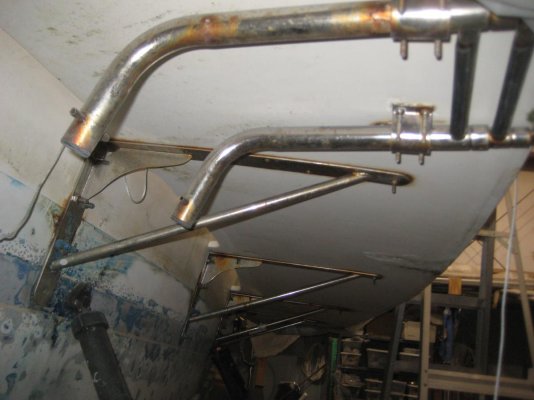
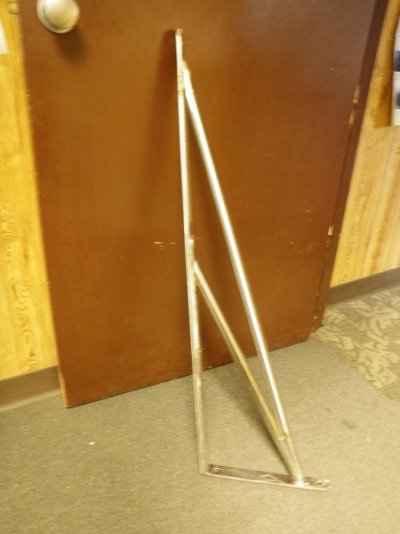
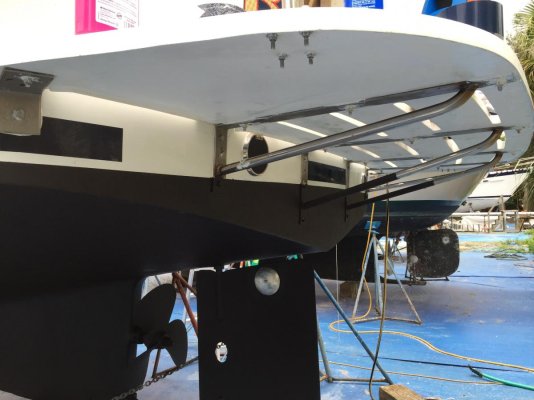
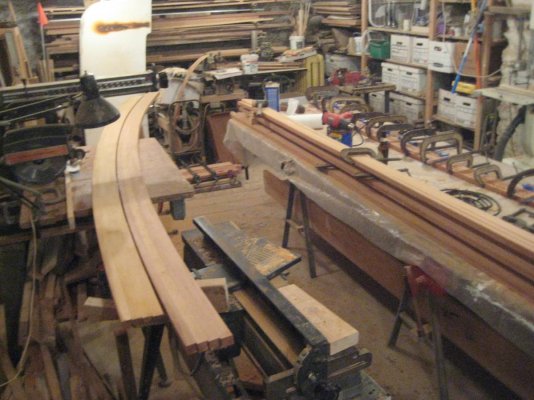
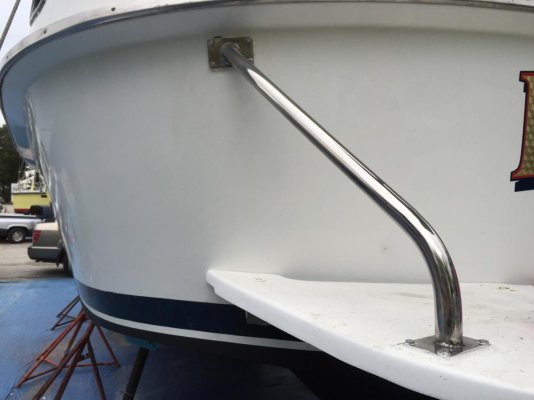
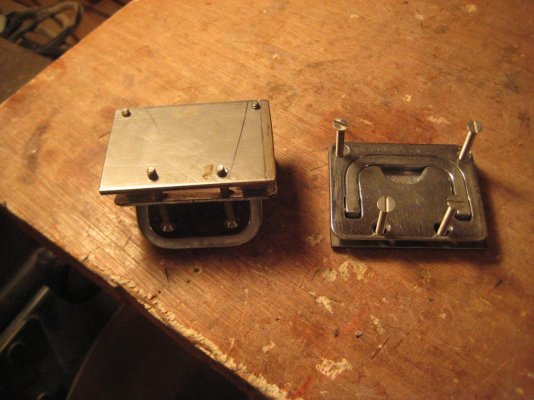
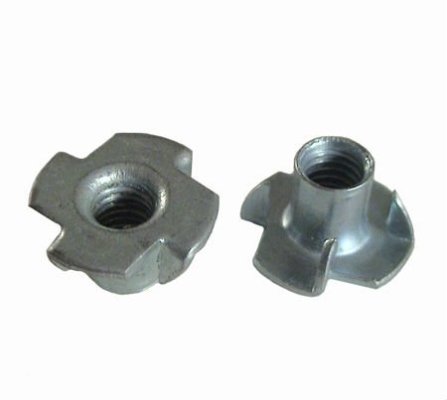
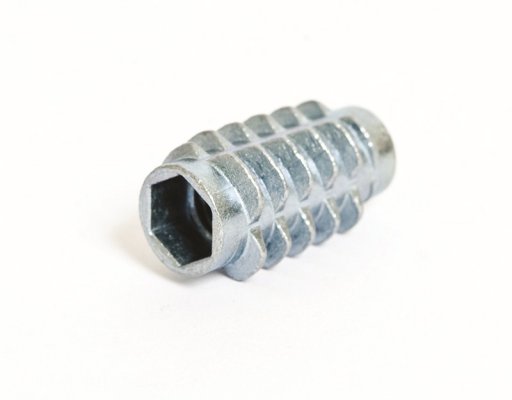
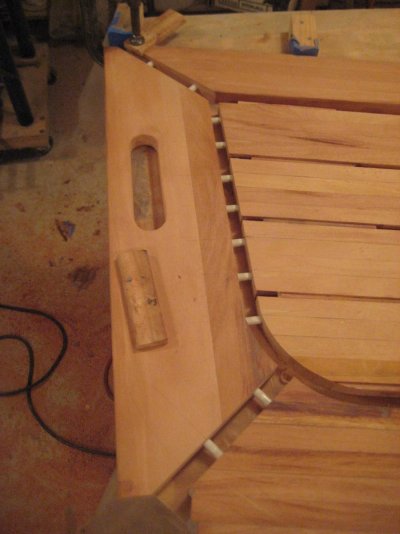
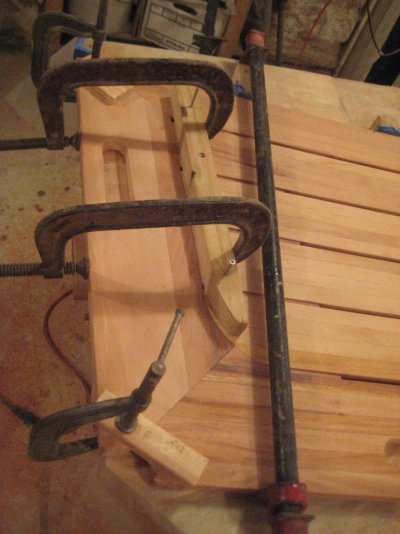
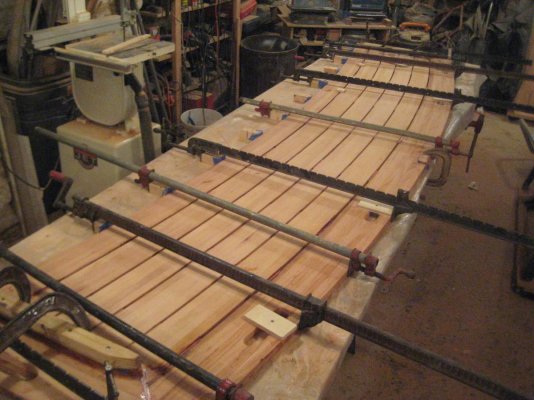
New Swim Platform

The friendliest place on the web for anyone who enjoys boating.
If you have answers, please help by responding to the unanswered posts.
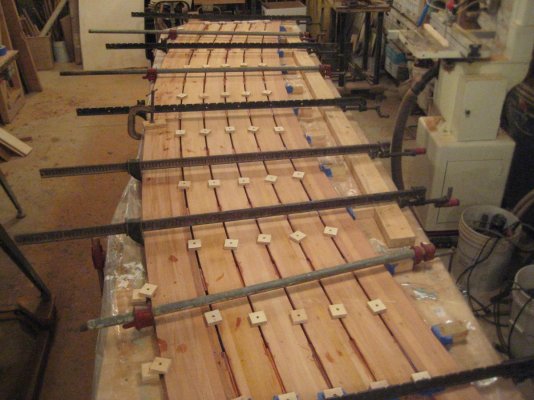
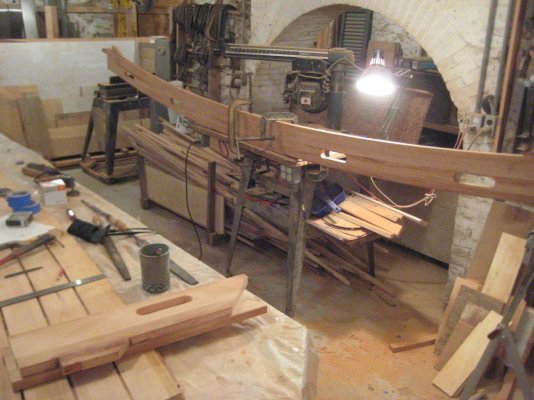
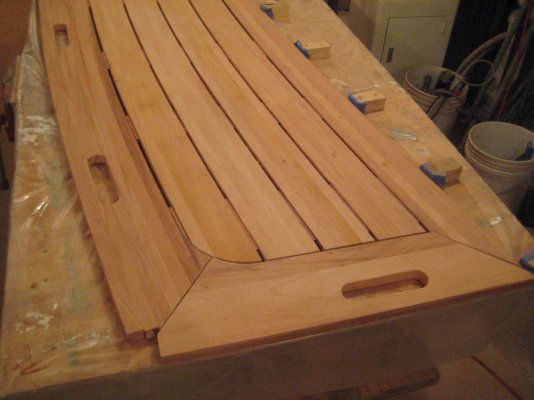
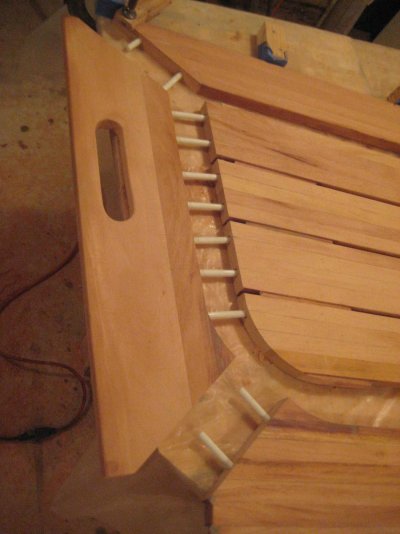
Thank you for your kind comments! One reason I post this stuff is to show that it really is not all that difficult. Al, you just start and then persevere.

Marty, indeed 'African Mahogany' is Khaya and is well-thought-of for rot resistance. https://en.wikipedia.org/wiki/Khaya Since Honduras Mahogany was no longer available, I made the deck of my restored Flying Dutchman out of Shelmarine Khaya marine plywood (and sadly, Shelmarine no longer makes Lloyds rated BS 1088 plywood out of Khaya).
 
Fascinating, following this one closely.

It is on my to do list, but I don't feel confident enough yet have a go at it.
 
For what it's worth, I had my new platform made @ PlasTeak It was about your length ( 12' +/- ) but I added 16" to the width. The platform was about 3200.00 USD all in.

I made a tracing of the old platform and mailed the paper trace to them c/w new dimensions and that was it.
 

Attachments

  • P1010009.jpg
    P1010009.jpg
    13.7 KB · Views: 244
Ex, looks good! What did you do about supporting the extra width? It would seem to me that new brackets and bigger backup blocks within the transom would be required.

I think my stainless steel brackets are a bit light. They might be rust damaged. The bolts leak into the boat, and the glassed-in backup blocks are probably rotten. (And that swim ladder has got to go!)
 

Attachments

  • 2016-02-24 Swim Platform 001.jpg
    2016-02-24 Swim Platform 001.jpg
    94.8 KB · Views: 61
Ex, looks good! What did you do about supporting the extra width? It would seem to me that new brackets and bigger backup blocks within the transom would be required.

I think my stainless steel brackets are a bit light. They might be rust damaged. The bolts leak into the boat, and the glassed-in backup blocks are probably rotten. (And that swim ladder has got to go!)

I was not sure if a bracket extension was even needed, but I welded 1/4" stainless flat bar ( 16" longer ) on top of the existing brackets and added an extra diagonal tube towards the front of the ( new ) extended bracket.
Also, I made adjustments to the ladder going up from swim platform to the Sun Deck by bolting it to the swim platform so it would take some of the extra weight.
 

Attachments

  • P10100022 (1).jpg
    P10100022 (1).jpg
    92.6 KB · Views: 75
Last edited:
That's the Heckrotte we all know here...carving out his signature wood artistry. Those brackets do look a bit light though. Is your transom cored? An equal percentage of work when installing my own platform was the bracket backing plates and a few extra measures where bracket bolt holes went through cored areas, etc.. I'm sure this project will produce your usual quality outcome.
 

Attachments

  • image.jpg
    image.jpg
    106.2 KB · Views: 78
Ex, looks good! Larry, thank you!

No, my transom is not cored. It's something shy of 1/2" thick with glassed-in wood backing plates. Hard to estimate from photos, but both Ex and L appear to have brackets whose vertical legs against the transom are shorter than mine. Means the inward and outward loads are higher and closer together. Obviously, the upper fastenings can be easily reinforced with backing plates - basically a very large washer. The lower backing plates would work adequately and easily, but aesthetically unacceptably if mounted on the outside. I'm leaning toward cleaning the inside surfaces at each bracket down to the fiberglass transom, removing the old backing plates in the process, and epoxying in new storebought (McMaster-Carr) G10 fiberglass panels. A pretty unpleasant hour or two, and it's unhelpful that the trim tab hoses and the hydraulic steering tubing are mounted on the backup plates' 'glass. Somehow, I'd have preferred the PO to have left the lazarette dirty rather than that paint job.

Meanwhile, today's progress: Two finished planks and the third glued.
 

Attachments

  • 2017-03-17 SwimPlatform 002.jpg
    2017-03-17 SwimPlatform 002.jpg
    153.1 KB · Views: 80
  • 2016-04-19 InsideTransom 008.jpg
    2016-04-19 InsideTransom 008.jpg
    87.3 KB · Views: 77
  • 2016-04-19 InsideTransom 011.jpg
    2016-04-19 InsideTransom 011.jpg
    77.5 KB · Views: 81
Hard to estimate from photos, but both Ex and L appear to have brackets whose vertical legs against the transom are shorter than mine. Means the inward and outward loads are higher and closer together. Obviously, the upper fastenings can be easily reinforced with backing plates - basically a very large washer. The lower backing plates would work adequately and easily, but aesthetically unacceptably if mounted on the outside.

True. The full displacement hull on our boat rises out of the water on both sides and leaves little to work with underneath the platform. The brackets are 3/8" plate SS with 1.25" tubing. Backing plates are bonded 3/8" 5052 aluminum dipped in zink oxide primer and Tef-Gel coating on the 3/8" SS bolts. I had considered using G-10 plate on the outside but had already cut and fit the brackets to mate the platform against the hull. Might have been a good idea too, but I'm pleased with how solid the mounting feels.
 

Attachments

  • brackets lightened.jpg
    brackets lightened.jpg
    197.2 KB · Views: 81
  • backing plates.jpg
    backing plates.jpg
    151.1 KB · Views: 71
  • top bracket.jpg
    top bracket.jpg
    69.5 KB · Views: 81
I suggest domed nuts on the bolts protruding through and under the swimstep. They can do a lot of violence to the unwary inflatable which gets itself under the swimstep.
 
Larry, really good looking!

Bruce, quite right, though we call 'em 'acorn nuts'. Tough on swimmers, too. My preference for such things is a tapped hole in the backer plate, or affixed item, and no nut at all. Other options that I've used include: tapped holes in reinforced epoxy or into fiberglass, nuts epoxied into recesses into the back of epoxied-in backer plates, nuts welded onto the concealed side of the item, 'permanent nuts' which are basically threaded inserts, and 'tee' nuts. Everything smooth and flush, top and bottom.
 

Attachments

  • 2016-03-08 LazaretteHatch 001.jpg
    2016-03-08 LazaretteHatch 001.jpg
    135.2 KB · Views: 66
  • tee nut.jpg
    tee nut.jpg
    14 KB · Views: 50
  • insert nut.jpg
    insert nut.jpg
    35.3 KB · Views: 70
  • welded nut.jpg
    welded nut.jpg
    81.5 KB · Views: 61
  • IMG_0241.jpg
    IMG_0241.jpg
    113.3 KB · Views: 58
  • IMG_0242.jpg
    IMG_0242.jpg
    118.7 KB · Views: 58
When you fix nuts using epoxy what is your technique not to get epoxy coming into the nut? Any secret tip or advice?
 
Lou, several ways to keep the threads clear: 1, be neat! 2, wax, or Teflon Slip Spray, the bolt, wet out the recess with neat epoxy, install the washer and the nut and the bolt, fill the remaining space with thickened epoxy. You're only doing this to keep the nut from turning on final assembly; the nut and washer are doing their job from the backside of the assembly. 3, on large items you can wrap the threads with Teflon tape. 4, remove the bolt when the epoxy is stiff enough, but not so stiff that you cannot get the bolt out, and clean out any mess after cure with a tap.

One more nut type: The threaded insert suitable for relatively light loads is knurled and often sold for use with undermount sinks in solid countertops. You epoxy the insert into a bore in the bottom of the countertop.

These things actually come in all sorts of sizes and materials. They're often sold for retaining the rock in mines and tunnels; stick the bolt and insert package into the hole, turn it to mix the epoxy, wait for the cure, tighten the bolt. Remember the threaded inserts epoxied into the concrete tunnels on "The Big Dig" in Boston? They were used to carry concrete ceiling panels but were fatally proven inadequate because of bad epoxy.
 
I use a threaded screw/bolt into the epoxied nut to keep the threads protected. Then I remove the screw/bolt after the epoxy has set up and before it's completely hardened.
 
Thank you D & Al for these tip.
I read on another forum a guy was filling the nut thread with vaseline before setting it in epoxy, I rather prefer your tip of using a bolt and remove it before epoxy is hardened.

L.
 
Just thinking outside the box here, but that looks like a big surfboard. If it was me, I'd be tempted to visit a local surf shop and ask where is the best local board builder, and bring your swim deck over to him for a conversation.
 
Too easy, A-2010.

And, I'm having too much fun. On to layout for cutting, cutting hand holes, locating the spacer blocks, fitting the ends.
 

Attachments

  • 2017-03-21 SwimPlatform 001.jpg
    2017-03-21 SwimPlatform 001.jpg
    142.6 KB · Views: 61
Final gluing done today. Decided to glue all the bits together and t'hell with the forces due to expansion due to water. But, I pinned/doweled the perimeter joints with 3/8" fiberglass rod (McMaster-Carr). A certain bit of fun was had since, due to springback of the curved laminations, fitting could only be done when the long, curved pieces were clamped. The fun continued while fitting the pins and gluing; epoxy had to be applied and the perimeter pieces simultaneously slid inwards together. I cheated; the pin holes are 7/16" and the pins are 3/8"; epoxy takes up the annular space for a 'perfect' fit. See the 'dress rehearsal' pics and others taken over the last few days.

Sanding and cutting the corners to round tomorrow, then it's off to the boat.
 

Attachments

  • 2017-03-22 SwimPlatform 001.jpg
    2017-03-22 SwimPlatform 001.jpg
    148.8 KB · Views: 64
  • 2017-03-23 SwimPlatform 001.jpg
    2017-03-23 SwimPlatform 001.jpg
    144.2 KB · Views: 60
  • 2017-03-24 SwimPlatform 001.jpg
    2017-03-24 SwimPlatform 001.jpg
    111.7 KB · Views: 61
  • 2017-03-25 SwimPlatform 001.jpg
    2017-03-25 SwimPlatform 001.jpg
    106.4 KB · Views: 70
  • 2017-03-25 SwimPlatform 003.jpg
    2017-03-25 SwimPlatform 003.jpg
    105.4 KB · Views: 71
  • 2017-03-25 SwimPlatform 005.jpg
    2017-03-25 SwimPlatform 005.jpg
    132.1 KB · Views: 64
  • 2017-03-26 SwimPlatform 001.jpg
    2017-03-26 SwimPlatform 001.jpg
    153.3 KB · Views: 69

Latest posts

Back
Top Bottom