Krogen 42 Fuel Tank Replacement

The friendliest place on the web for anyone who enjoys boating.
If you have answers, please help by responding to the unanswered posts.
:socool: 
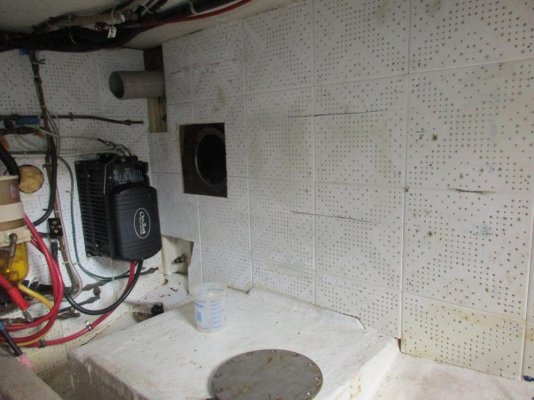
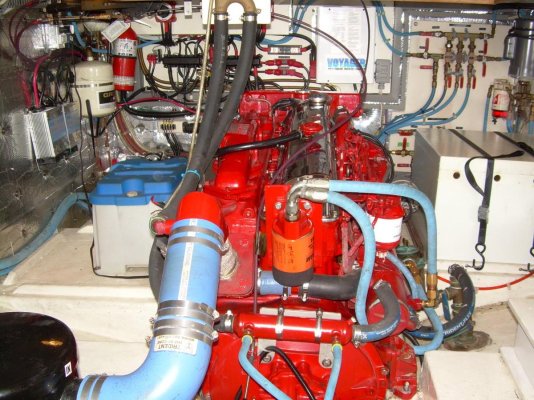
We thought about it but with the totally white walls, ceiling and bilges, we're going with the Lehman red. We do have the chrome rocker arm cover that's pretty cool though.

Yeah it's hard to argue that Ford red with a touch of chrome doesn't make an all white engine space pop.

Especially with nice bright lighting.
 
Larry - I was sharing your pain a couple of months ago. I basically followed D'Antonio's advice for tank isolation as well as providing an air gap to allow circulation under the tank to prevent/minimize condensation. I wound up using starboard slats to provide non-porous support. Used 3/8" thick scraps my yard manager donated for the cost of a burger and a beer.
 
I'll see you next week. Want to see the cavern when tanks are gone. Impressive amount of work in a short time, Larry and Lena. Captain Dons urging , rings true.
 
Are you planning to coat your new aluminum tanks?
The tank fabricator for the tank I had replaced a few months ago recommended a coal tar epoxy coating.
 
I'll see you next week. Want to see the cavern when tanks are gone. Impressive amount of work in a short time, Larry and Lena. Captain Dons urging , rings true.

Looking forward to seeing you also and thanks for the use of your utility trailer. I delivered the engine to Bomac with it this past weekend and will use again on Friday to get the tanks to RDS in Perry, FL. We owe you a dinner at least. :thumb:
 
Are you planning to coat your new aluminum tanks?
The tank fabricator for the tank I had replaced a few months ago recommended a coal tar epoxy coating.

We talked about to coat or not to coat the tanks and decided not to. I was concerned that after coating the tanks, that the finish would be scratched or gouged putting the tanks back in. This would allow water/moisture to get under the coating. After getting the first tank out today, there is no way we'll get the replacement in with out at least scratching the finish. :facepalm: 
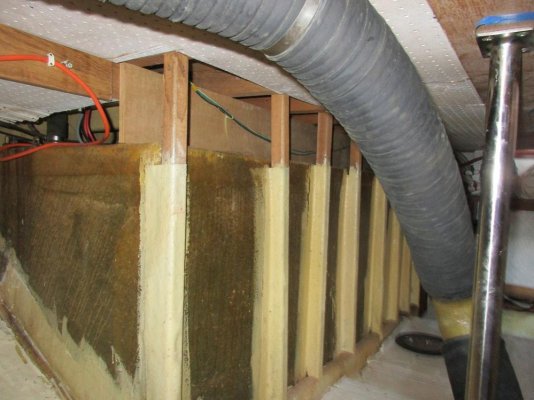
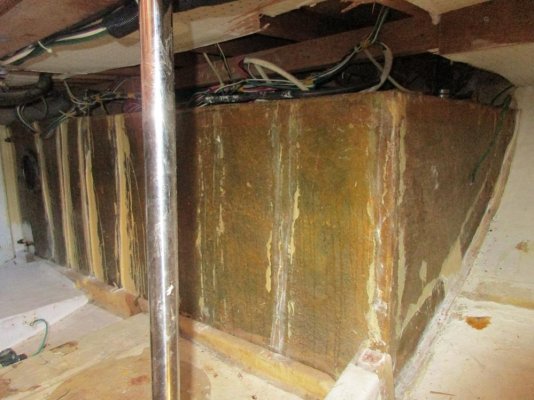
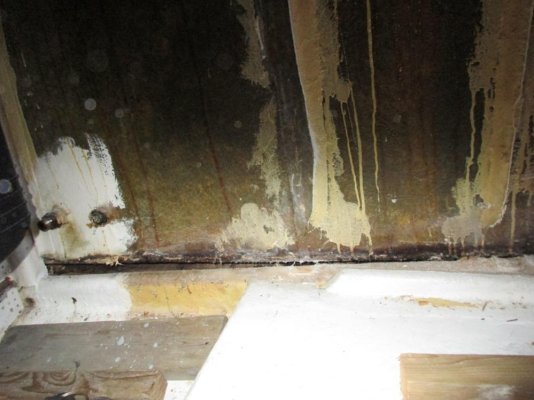
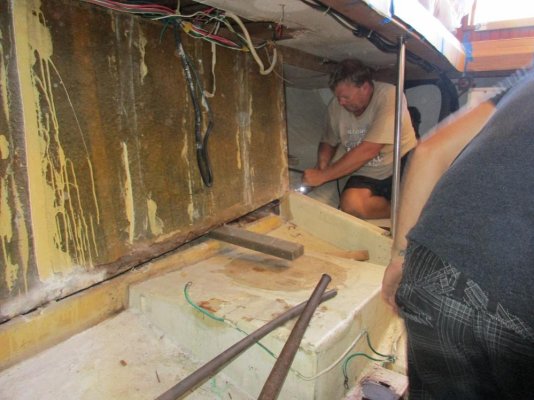
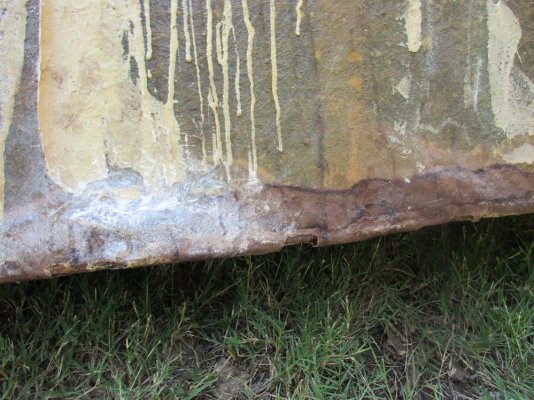
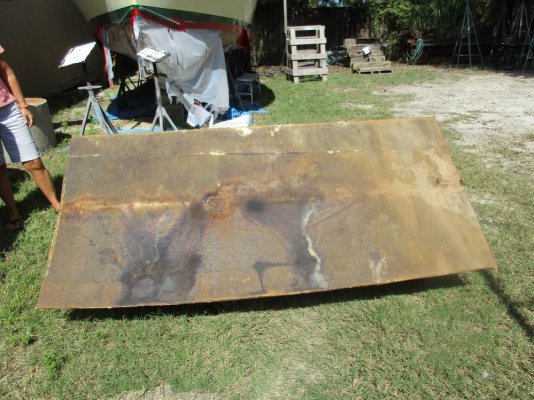
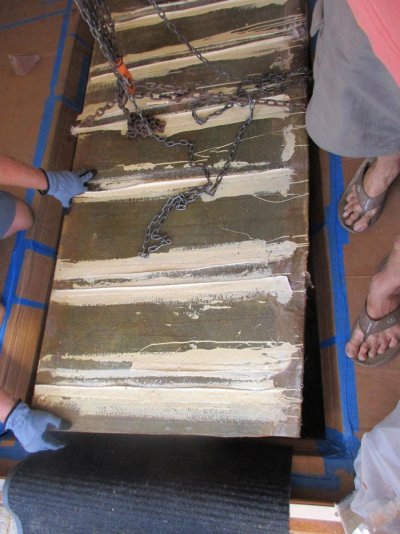
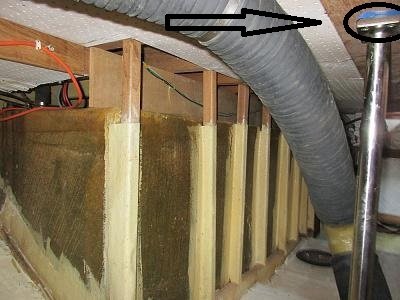
If the tanks were going in easy, I would probably coat them as we did on our last boat.

My understanding is that as long as the tanks aren't sitting in water or moisture, that's what the GPO3 is for, uncoated aluminum should be fine. Steve D'Antonio and David Pascoe have both written articles about installing tanks. I've read both and they seem to make sense. Hopefully the tanks will be good for another 30 years.
 
Last edited:
The first tank came out with a little more work than I had figured, but it still less than a days effort for 3 of us. As it turns out there was no way we were going to get the tank out in one piece and we did try. :banghead: 
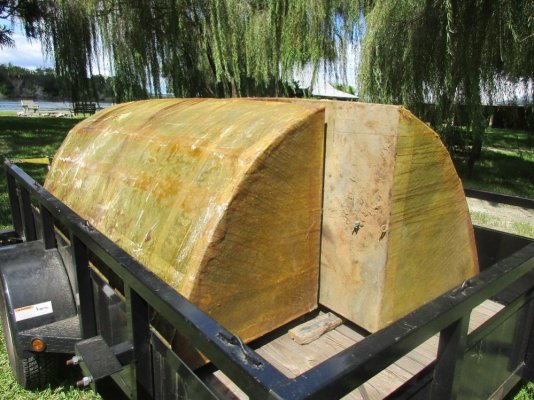
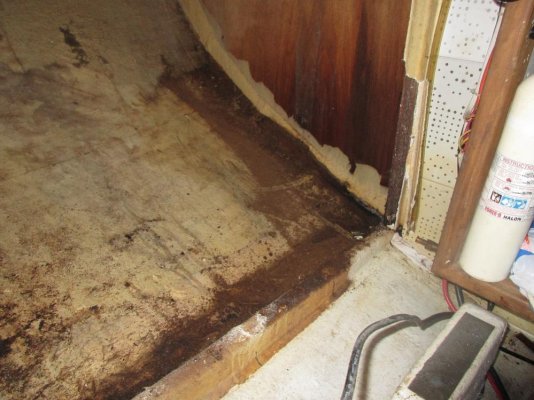
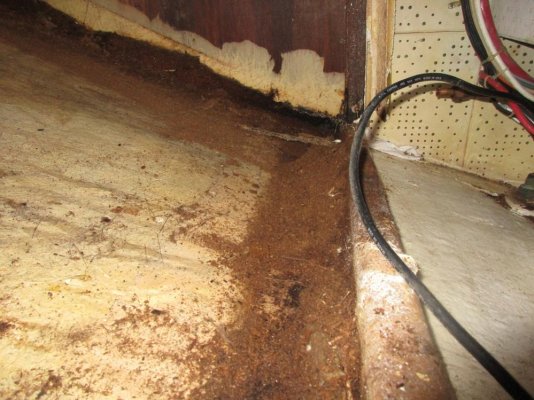
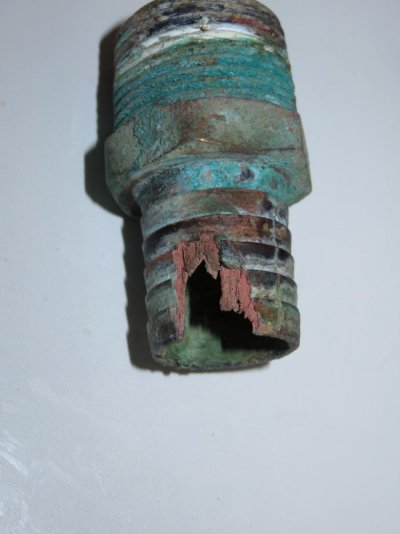
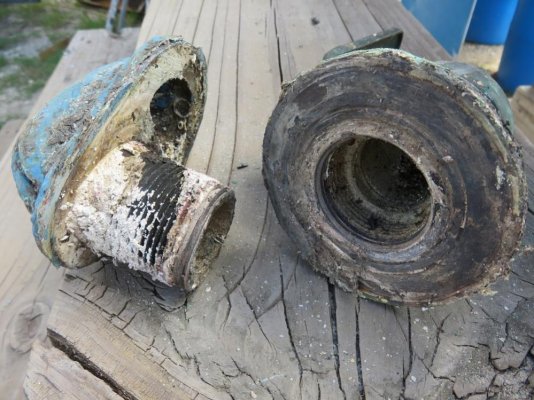
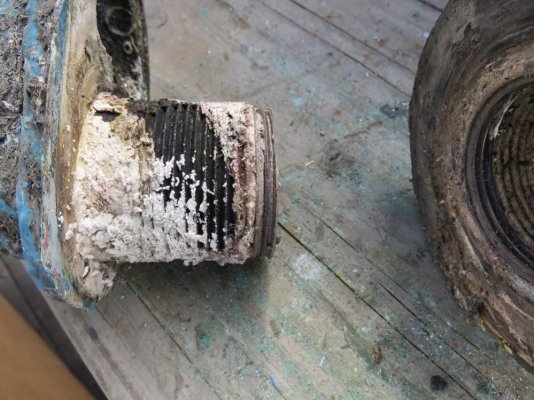
We just couldn't rotate it to slide it out diagonally. So, time to get the sawzall out, not once, but twice. When we were done, the tank was 1/2” shorter than the floor board opening. :dance:

Once we got the tank free, you could see rust where the fiberglass coating of the tank had been compromised. From the looks of the lower, inside edge, it was only a matter of time before the tank leaked/failed. The top had some water stains/rust but was solid.

After the sawzall, the nock-off fein tool was indispensable. :thumb:


Tomorrow tank 2.
 

Attachments

  • 1.jpg
    1.jpg
    96.8 KB · Views: 226
  • 2.jpg
    2.jpg
    94.2 KB · Views: 226
  • 3.jpg
    3.jpg
    101.9 KB · Views: 257
  • 4.jpg
    4.jpg
    83.4 KB · Views: 234
  • 5.jpg
    5.jpg
    100.5 KB · Views: 237
  • 6.jpg
    6.jpg
    149.1 KB · Views: 231
  • 7.jpg
    7.jpg
    88.4 KB · Views: 368
  • 8.jpg
    8.jpg
    109.6 KB · Views: 254
  • 9.jpg
    9.jpg
    161.2 KB · Views: 237
Good work Larry! I only just found this thread, after we exchanged emails about your plans. Good luck with everything! Wish I could be more help but, the PO did the heavy lifting on my boat. Not sure what product he used to protect the tanks once installed. Fingers crossed that he did it all correctly!


Jim
Sent from my iPad using Trawler Forum
 
Since Bomac is going to be painting the engine, you should see if they would paint it white.


That would be very yachty and unique as well. :D


ALL Leman's MUST be red and have chrome valve covers! It's the law! ;-)


Jim
Sent from my iPad using Trawler Forum
 
KK42 Tank replacement

Larry

We are just back on the grid so am a bit behind on this thread.

Golden Dawn's (KK42-82) tanks were replaced by the previous owner in 2001 after a sinking. The two tanks were replaced by four aluminum tanks. I will hunt down the photos and post tomorrow.
 
Larry

We are just back on the grid so am a bit behind on this thread.

Golden Dawn's (KK42-82) tanks were replaced by the previous owner in 2001 after a sinking. The two tanks were replaced by four aluminum tanks. I will hunt down the photos and post tomorrow.

Thanks. I'll look for them.
 
Good work Larry! I only just found this thread, after we exchanged emails about your plans. Good luck with everything! Wish I could be more help but, the PO did the heavy lifting on my boat. Not sure what product he used to protect the tanks once installed. Fingers crossed that he did it all correctly! Jim

Your PO definitely did a nice job that's for sure. I have to believe he did it right from the way your engine room looks. :thumb:
 
The tanks are out! The port tank was definitely a leaker as you can see at the forward bulkhead.

Also, it was very considerate of the builders to leave that extra sawdust to absorb any liquids that spilled.

Next, we figure out the new engine room configuration.
 

Attachments

  • 1.jpg
    1.jpg
    74.5 KB · Views: 221
  • 2.jpg
    2.jpg
    143.3 KB · Views: 209
  • 3.jpg
    3.jpg
    120.1 KB · Views: 241
  • 4.jpg
    4.jpg
    147.4 KB · Views: 241
  • 5.jpg
    5.jpg
    109.8 KB · Views: 227
  • 6.jpg
    6.jpg
    124.5 KB · Views: 181
  • 7.jpg
    7.jpg
    108.9 KB · Views: 186
Larry, I'll be curious about component placement, storage, and flooring configuration. I knowthe built in non continuous fiberglass boxes on the flooring were a pain to me.
 
Man, you guys (gals) don't mess around on your projects! Looks like y'all are almost halfway done. Impressive.

Conversely, I will sit here for weeks stressing over painting my window frames. ?
 
Larry, I'll be curious about component placement, storage, and flooring configuration. I knowthe built in non continuous fiberglass boxes on the flooring were a pain to me.

The forward ones we are looking at keeping. The 5 battery boxes for the house fit there. I may cut ~3-4" off the inboard side though.

The aft starboard one, where the water heater was, we are thinking we will remove it. We'll relocate the water heater to the end of the starboard tank. The domestic water pump, I'll mount to the covering on the tank wall.

The aft port platform, where the water lift is, we may shorten and move outboard a little. The engine start batteries, we may put at the aft end of the port tank. We've been using Optima's, so watering isn't an issue like the house bank.


This is todays plan away and you know what that means. lol

We haven't figured out where to reinstall the water maker yet though.
 
Last edited:
Man, you guys (gals) don't mess around on your projects! Looks like y'all are almost halfway done. Impressive.

Conversely, I will sit here for weeks stressing over painting my window frames. ��

Thanks Dude. We found the leaking tanks in May and hauled last week, way to much time to think about it. :lol:

I've been a PIA to everyone who said they would help and right now we're holding their feet to the fire (nicely). We've got a great crew. Now it's up to the tank manufacturer and Bomac for the engine rebuild. For the next few weeks we have a lot of what Lena calls, "fussy work".
 
Nice, for the water maker, the membranes dont like too much heat. I considered putting the membranes in the lazz on the bulkhead and all the other components on ER side... Now I just have temp sensors & alarms in ER in case the blowers were to fail w/o me knowing. Oh I'm so enjoying this!!
 
Golden Dawn Tank Removal & Install

Larry,
I have 17 photos of old tank removal (probably too late to help) and new aluminum tank install. The new aluminum tanks are 800L & 300L fore & aft on each side.
GD_Fuel_Tanks_Oct01_01sml.jpg

GD_Fuel_Tanks_Oct01_02sml.jpg

GD_Fuel_Tanks_Oct01_03sml.jpg

GD_Fuel_Tanks_Oct01_04sml.jpg

GD_Fuel_Tanks_Oct01_05sml.jpg

GD_Fuel_Tanks_Oct01_06sml.jpg

GD_Fuel_Tanks_Oct01_07sml.jpg

GD_Fuel_Tanks_Oct01_08sml.jpg

GD_Fuel_Tanks_Oct01_09sml.jpg

GD_Fuel_Tanks_Oct01_10sml.jpg
 
Golden Dawn Tank Removal & Install (continued)

All photos taken in 2001 before I owned the boat. Higher resolution photos available.

GD_Fuel_Tanks_Oct01_11sml.jpg

GD_Fuel_Tanks_Oct01_12sml.jpg

GD_Fuel_Tanks_Oct01_13sml.jpg

GD_Fuel_Tanks_Oct01_14sml.jpg

GD_Fuel_Tanks_Oct01_15sml.jpg

GD_Fuel_Tanks_Oct01_16sml.jpg

GD_Fuel_Tanks_Oct01_17sml.jpg
 
Last edited:
John: The pictures are great. Thanks! Question though, did they secure the tanks to the front vertical members?
 
Man, you guys (gals) don't mess around on your projects! Looks like y'all are almost halfway done. Impressive.

Conversely, I will sit here for weeks stressing over painting my window frames. ?

No kidding! Sheeeeesh!! I was just sitting here patting myself on the back for adding oil to the engines, checking water levels on all batteries and changing a water filter. Now I feel like a real slacker! :facepalm: I better get back to work! :D

Great thread, Larry!
 
No kidding! Sheeeeesh!! I was just sitting here patting myself on the back for adding oil to the engines, checking water levels on all batteries and changing a water filter. Now I feel like a real slacker! :facepalm: I better get back to work! :D


Great thread, Larry!


Tomorrow I might go to the boat to install a helm chair swivel, drink some beers, and search for boats on YW.

That's a big day.

?
 
Larry,

I can't see any way that the front end of tank was secured other than the vertical posts visible in the photos. The insulation was already installed on the forward engine-room bulkhead prior to the new tank install. And I do not see any welded fittings on the new tanks that could be used to fasten to the bulkhead.

I haven't pulled off the sound proofing that covers the tanks. And they covered over the clean-outs. I have been dreading pulling off the sound proofing but need to access the clean-out soon as I have a bit of weeping - probably failure of the flange gasket.

Th attached shows the engine room looking forward. Fuel manifold and transfer pump at upper right. You can see the insulation over the tanks to the left. Getting to the clean-out is going to be a bit of a challenge.
 

Attachments

  • Engine_looking_forward.jpg
    Engine_looking_forward.jpg
    194.3 KB · Views: 778
...I can't see any way that the front end of tank was secured other than the vertical posts visible in the photos. The insulation was already installed on the forward engine-room bulkhead prior to the new tank install. And I do not see any welded fittings on the new tanks that could be used to fasten to the bulkhead...

Thanks. I think we'll reinstall ours similar to yours and the way they were installed at the factory other than adding air gaps with the GPO3. When we exposed the tanks there was a cleat at the top of the tanks to the floor above. That with the lip along the floor, the vertical posts and the aft end of the tanks being glassed to the hull, the boat could probably roll upside down and the tanks wouldn't move. :eek: :dance:
 

Attachments

  • 2.jpg
    2.jpg
    94.2 KB · Views: 109
Let's hope not! Going to take in a Jaguars game while you're there? Thought I'd take your mind off of engine rooms for a few jours. Sue and I will be around after the 27th. We're all watching your progress, cause it's something we all face.
Fantastic how much you can from day to day.
 
Is that an isolation medium of some kind at the top of the stanchion? Do the fasteners go through it? Nicely done KK

:socool:
 

Attachments

  • 2.jpg
    2.jpg
    44.5 KB · Views: 885
Is that an isolation medium of some kind at the top of the stanchion? Do the fasteners go through it? Nicely done KK

:socool:

Nothing as cool as an isolation mount, it's a piece of blue tape.

The stanchion is a floor support for the salon. When we removed both (one on either side) to pull the tanks, we were surprised that the floor didn't sag. I did put them back till the tanks go back in.
 

Attachments

  • 5a.jpg
    5a.jpg
    182.1 KB · Views: 97
Last edited:
Things you find that you shouldn't.

We've been doing clean up and renewing parts for the engine room before it all goes back together. I have been amazed on how many dropped nails we've found. This one came out of the sawdust by the forward tank end.

Today, we disassembled 3 raw water screens in the engine room to bead blast and replace the gaskets. On one, 4 of the 6 bolts broke off with little effort on the engine screen. Some crevice corrosion and crap SS. I wish I remembered where I bought the bronze nipple though. I installed it. More crap. :mad:

The thru-hull was a little unsettling. It had maybe 2 threads attached. Less than 2 turns and they were apart. :eek: Now is the time to find it; scary but it did last 29 years.
 

Attachments

  • 1.JPG
    1.JPG
    150.7 KB · Views: 126
  • 4a.jpg
    4a.jpg
    149.1 KB · Views: 121
  • 4b.jpg
    4b.jpg
    118.4 KB · Views: 140
  • 5.jpg
    5.jpg
    108.9 KB · Views: 141
  • 5a.jpg
    5a.jpg
    73.5 KB · Views: 141
  • 7.jpg
    7.jpg
    127 KB · Views: 140
  • 8.jpg
    8.jpg
    127.7 KB · Views: 139
Larry, remember we broke planer blades when peeling my hull, because a nail was embedded in the glass. They must have been throwing alot of nails around that place. I don't recall my thru hulls when I was ripping them out, but scary, goes to show you what you can get away with, with some good sealant, huH?!
 

Latest posts

Back
Top Bottom