A Bad Monkey Tail

The friendliest place on the web for anyone who enjoys boating.
If you have answers, please help by responding to the unanswered posts.
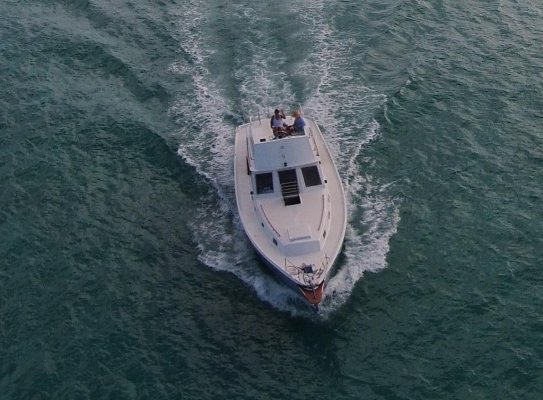
Pictures as promised.
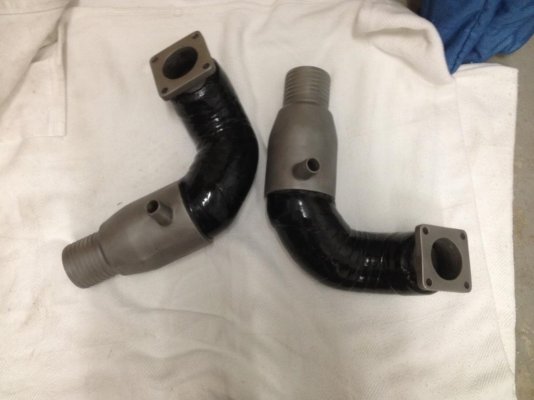
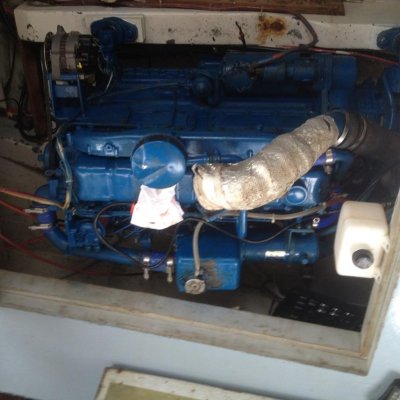
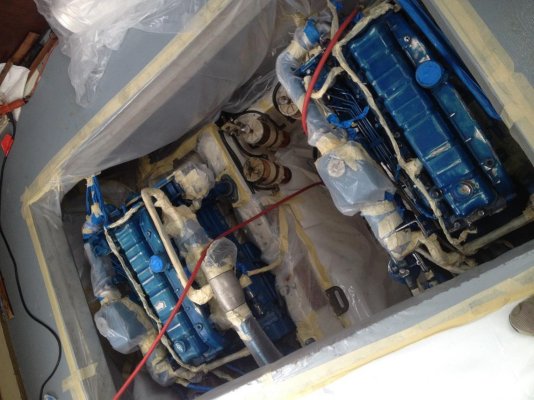
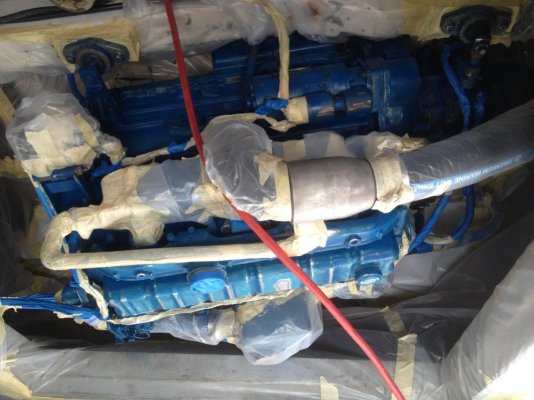
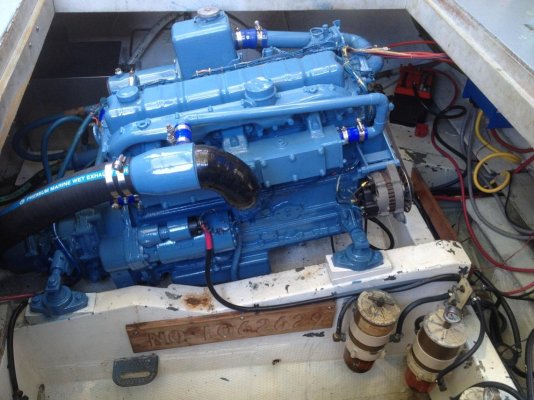
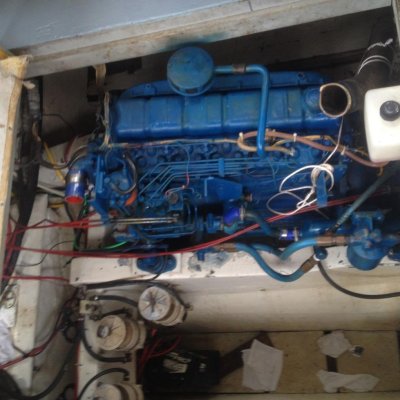
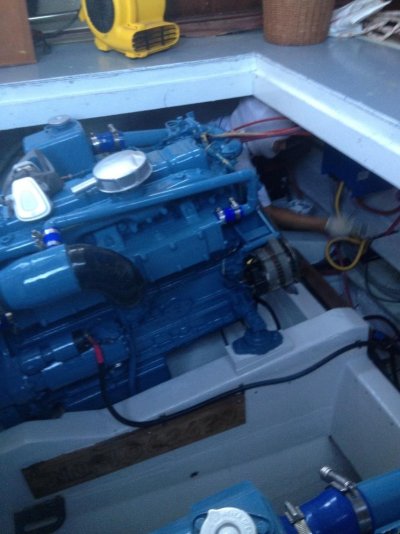
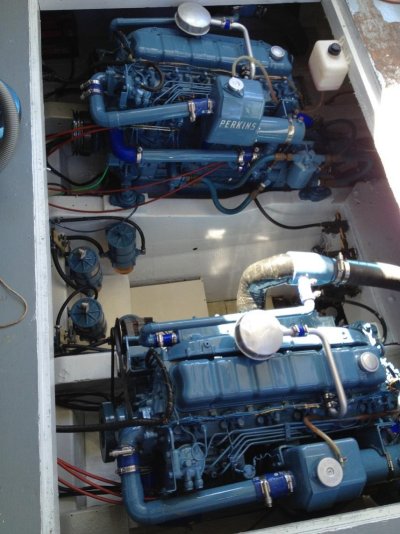
The exhaust mixers - Thanks to Eugene!
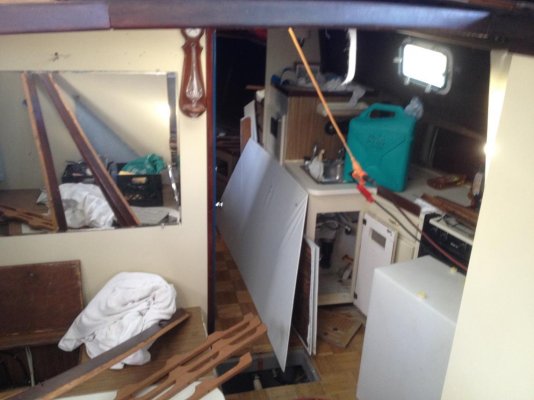
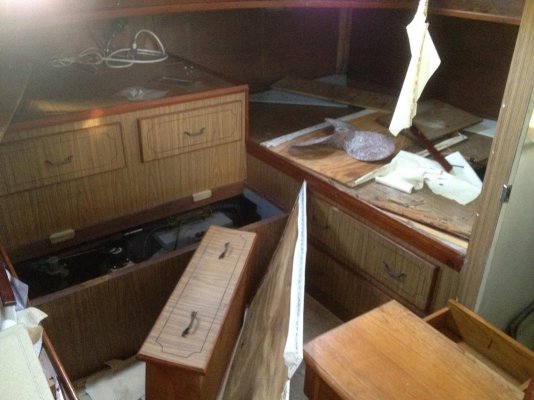
Interior war zone!
The bedding, cushions etc. are being recovered and will come back on the boat in stages.
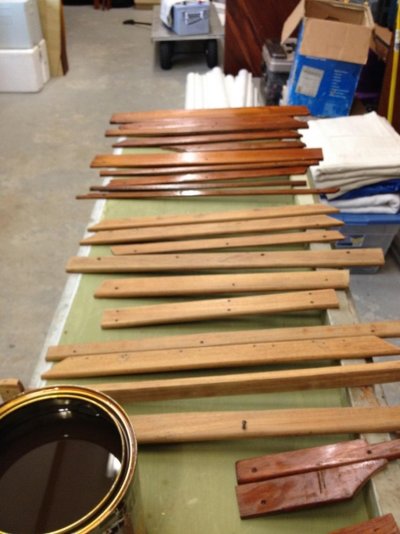
New flooring is ready to go and will be put down as each area is completed.
So there is a rough plan of how it will come together. :ermm:
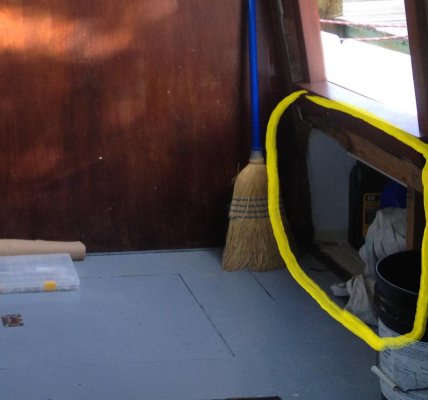
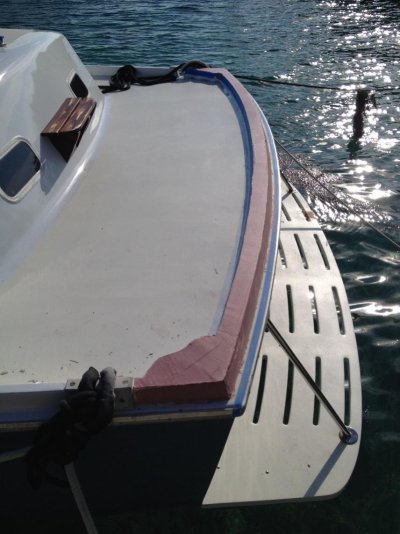
Need to replace some framing in the main salon. Does anyone know what I should use for this?
See you in a couple of weeks.
Capstan
 

Attachments

  • Post 4 (1).jpg
    Post 4 (1).jpg
    86 KB · Views: 244
  • Post 4 (2).jpg
    Post 4 (2).jpg
    201.1 KB · Views: 252
  • Post 4 (9).jpg
    Post 4 (9).jpg
    74.8 KB · Views: 259
  • Post 4 (3).jpg
    Post 4 (3).jpg
    75.7 KB · Views: 264
  • Post 4 (5).jpg
    Post 4 (5).jpg
    124.8 KB · Views: 259
  • Post 4 (4).jpg
    Post 4 (4).jpg
    105.7 KB · Views: 281
  • Post 4 (6).jpg
    Post 4 (6).jpg
    88 KB · Views: 266
  • Post 4 (7).jpg
    Post 4 (7).jpg
    100.2 KB · Views: 278
  • Post 4 (8).jpg
    Post 4 (8).jpg
    118.4 KB · Views: 268
wow! you are racing through this project. Wish I could get mine to go half of your pace. Keep up the good work. Some of us need all the inspiration we can get!

Thanks Brian,
What is the Florence A? Is she an old lobster boat? How old is she?
Capstan
 
Capstan what type of frames do you mean stringer?
 
Capstan what type of frames do you mean stringer?

Nothing that involved! It is just the framework that is in the main salon from the floor up to deck level and ply sheeting/skin goes on it up to the overhead.
Some in picture attached.
Capstan
 

Attachments

  • IMG_2178.jpg
    IMG_2178.jpg
    70 KB · Views: 225
Ok I got ya thnaks
 
Very nice job - enjoying following your progress!

John
 
This posting will bring us up to September 12, 2015 which is today.
So moving forward the postings will be monthly.


Week 26
Cut new exhaust elbow gasket
Port engine exhaust elbow in place.
Replace 1st section of wet exhaust hose.
4 gallons of antifreeze.
Prime engine.
Run / stop
Raw water pump bearing failing.
Make template for forward window cover
Cut material and sew new fwd. window cover and Stbd window cover

Week 27
Replace port eng raw water pump with spare.
Run/stop no flow
Remove and change impeller, pack with grease Run engine idle for 2.5 hours
Install snap fittings and fwd. window cover
Cut and sew Stbd window cover and install snap fittings
Clean tools and pack away
Clean Port propeller
Sort screws, bolts, nuts etc. into new storage containers
“Take Bad Monkey for 2 hour cocktail cruise."
Take oil sample from Port engine and Port Gearbox
Change oil Port engine.
Bridge deck Steering pump reinstalled
Steering oil changed and system bled

Week 28 – 29
Away sailing at worlds in Ottawa.
Vessel secured for Hurricane Erika
A no show, thankfully
Oil analysis for Port eng all clear. No traces of water

Week 30
Purchase new 24v 175amp alternator + regulator
Pick up new 3000w inverter
Remove flywheel damper Stbd main for new twin pulley fabrication to drive 24v alt.
Too hot to work on boat!

Week 31
Remove insulation from engine room overheads
Vacuum engine room
Wash engines and engine room, clean bilge.
Order new “house” batteries
Move engine start batteries

These weeks have seen a major step forward with the commissioning of the port engine.
During this time the oil analysis for the engine cameback and was given the all clear.
One particular job I had been procrastinating for over acouple of months was removing the old insulation. It was by far the worst jobthat we have had to do. It is finally done.
The engines and engine room are now washed and ready for painting in the near future.
It’s great to have both engines working as we can nowplan on getting the vessel to Spanish Wells for a bottom job and survey in the near future.
Cheers,
Capstan
 
Last edited:
Getting there is half the fun. Keep up the good work and a few pictures would be nice if you have the bandwidth available. :thumb::thumb:
 
Nearly the 4th quarter! Nearly 8 Months that the girl has been under the knife. Hard to believe. More mistakes and more progress below.
Week 31
Remove existing Inverter and replace with pure sign wave 3,000 Watt inverter
Remove old wiring from engine room.
New wiring for inverter for shore power.
Run new battery cables to starter, house batteries and 24v alternator.
Remove old hoses from engine bay.
Pick up Dampener and newly machined twin pulley for Port engine.
Tent and tape engines.

Week 32
Prep engines
Prime engines
Paint engines
Seal Stbd fwd window
Seal Door frames
Too humid for type of sealant – remove and redo with fast cure 5200
Remove tenting and tape from engines
Remove most of aft cabin panels (To be used for templates)
Install Stanchion bases on aft cabin top and seal


Next will be Engine Bays, aft cabin and electrics.
 

Attachments

  • Engines Painted (1).jpg
    Engines Painted (1).jpg
    123 KB · Views: 229
  • Engines Painted (2).jpg
    Engines Painted (2).jpg
    119.1 KB · Views: 223
  • Engines Painted (3).jpg
    Engines Painted (3).jpg
    131.2 KB · Views: 228
  • Engines Painted (4).jpg
    Engines Painted (4).jpg
    119.6 KB · Views: 240
  • Engines Painted (5).jpg
    Engines Painted (5).jpg
    119.9 KB · Views: 247
  • Engines Painted (6).jpg
    Engines Painted (6).jpg
    142.5 KB · Views: 251
  • Wrong sealant.jpg
    Wrong sealant.jpg
    75.8 KB · Views: 249
  • ER (5).jpg
    ER (5).jpg
    102.5 KB · Views: 236
Week 33
Cut out, repair and glass Port deck crack
Remove last of aft cabin panels
Vacuum aft cabin, engine bays and main salon
Remove batteries and Racor fuel units to ready area forpainting
Spanish wells unable to do survey on hull and engines!!
Strip and sand 3 x interior ladders

Week 34
Away

Week 35
Engine bay area prepped and painted
Copy and cut aft cabin panels
Strip trim pieces of varnish and sand
Remove aft cleats, (new bolts needed)
Remove timber from transom toe rail
Remove adhesive sand and fill area
Prime aft toe rail
Install 2 x LED’s on transom
Repair port window frame


Week 36
Pick up recovered cushions and mattresses
Install new 8d gel batteries
Install new isolation switch for invertor/8D batts
Connect Batteries in Series and connect to inverter.
Charge Batteries from inverter.
Re-install harmonic balancer with new Pulley to Stbd engine.(Tighten Grade 8 bolts to 25lbs)
Mask and paint nonskid tread on 3 x interior ladder steps
Strip varnish from entrance area to aft cabin
Sand and paint Racor filter housings
3 coats of finish on aft cabin trim pieces

Week 37
Paint aft toe rail
Install poop deck stanchions
Paint repaired area port deck
Order A/C from Mathews Marine
Fabricate and paint cover for 8 D batteries
Do something really really stupid!!!!
Reinstall and fill Racor fuel filter housings
Run Port and stbd engines
1 x coat on entrance area to aft cabin
Reinstall aft cleats.
 
As you can see we are still moving along. It is coming to the end of 9 months!!
Have found some dry wood termites in a couple of the drawers. Not too bad - it's that horrible particle board that all the cheap furniture is made out of, they love it! Thankfully these critters are the slow eating type!!!
Just another job. Fabricate some draws!
I was thinking about replacing the laminate as it is very dull and tired looking. We tried sanding a one piece with 220 grit and put a few coats of Cetol on it and it comes up better than new. That saves a lot of work and better still a lot of money.
I will have some pics of that next time.
Till then :thumb:
 

Attachments

  • IMG_2258.jpg
    IMG_2258.jpg
    60.7 KB · Views: 199
  • IMG_2296.jpg
    IMG_2296.jpg
    113.6 KB · Views: 199
  • IMG_2302.jpg
    IMG_2302.jpg
    97.8 KB · Views: 192
  • IMG_0509.jpg
    IMG_0509.jpg
    86.7 KB · Views: 219
  • IMG_2284.jpg
    IMG_2284.jpg
    104.8 KB · Views: 225
  • IMG_2323.jpg
    IMG_2323.jpg
    128.3 KB · Views: 223
Anyone who does this once must be admired (and a little crazy). I'm working on my third and am surprised they haven't put me away in a straight jacket.

Congratulations a wonderful achievement.
 
To quote a Jim Croce song: And oh that girl looked nice!
 
More from the Monkey.
Work has been slow but that’s OK. Trying to get the A/C and aft Cabin done so we can spend a night out on the girl but with the change in time I don’t get to spend the hours in the evening on the project that I was before.
Realistically I will only get to spend another 20-30 hours over the coming 6 weeks.
Still need to:
Install A/C and ducting
Fabricate base for Installation of 24V alternator
Hook up 2 x 12v batteries for 12 volt house supply.
Run electrical for lighting and stern light
Install backing plates for Stanchion bases
Then I can:
Prime ply panels and install.
Put in bedding and away!

The following takes us to the 15th of November.

Week 37
Paint aft toe rail
Install poop deck stanchions
Paint repaired area port deck
Order A/C from Mathews Marine
Fabricate and paint cover for 8 D batteries
Do something really really stupid!!!!
Reinstall and fill Racor fuel filter housings
Run Port and stbd engines
1 x coat on entrance area to aft cabin
Reinstall aft cleats.

Week 38
Remove water damaged main cabin floor in entry ways.
Patch floor area. Wrong quantities! Remove.
Remove Door aft cabin, sand and coat
Remove timber on bridge, sand, fill, prime and paintsurface.
Sand off paint in aft cabin walls
5 x coats on 3 x interior ladder steps

Week 39
Install Bridge deck ladder, stanchions and railings
Measure and order 4 x main cabin windows and send for quote (glassonly) Too expensive
Install fridge
Sand, mask and coat all aft cabin laminated surfaces
Mask, prep, prime port window frames
Build shelf in aft cabin cupboard for A/C

Week 40
Remove all aft cabin drawers. Remove trim, laminate andhardware.
Make 6 x new draws, sand and coat laminate, strip and coattrim and re-assemble.
Mask, prep, prime Stbd window frames
Remove port framework Main cabin and copy in PT timber
Awlfair patched floor area and sand


Photos to follow
 
Our 1st real trip out on The Bad Monkey after 10 months of rebuild.:dance:
a small 3.5 hour trip to Normans Cay and back with a stop at the newly re-opened McDuffs for a burger and salad.
No issues with the engines:)
Got the Autopilot to work, Gauges and radios and inverter all worked.
Not working:
Nav Lights - dead short. Will have to run new wiring to all except stern light.
12v charger for start batteries and 12v house batteries.
Work continues on the aft cabin.

Capstan
 

Attachments

  • Day 1 BM (1).jpg
    Day 1 BM (1).jpg
    130.4 KB · Views: 209
  • Day 1 BM (2) - Copy.jpg
    Day 1 BM (2) - Copy.jpg
    153 KB · Views: 219
  • Day 1 BM (2).jpg
    Day 1 BM (2).jpg
    119.4 KB · Views: 198
  • Day 1 BM (3).jpg
    Day 1 BM (3).jpg
    93.4 KB · Views: 190
  • Day 1 BM (4).jpg
    Day 1 BM (4).jpg
    84.6 KB · Views: 199
  • IMG_2494.jpg
    IMG_2494.jpg
    97.5 KB · Views: 227
  • IMG_2495.JPG
    IMG_2495.JPG
    170 KB · Views: 223
Well done! What did you use to take the overhead photos?
 
Incredible! Thanks for sharing and please keep the updates coming!
 
I love the hull color you chose.


We started selling Splash Drones in my store. One of my employees bought one and has a ball with it. I may have to buy one.
 
Happiness is having it the way you want it! Lots of satisfaction being part or all of the process!

Ted
 
Back
Top Bottom