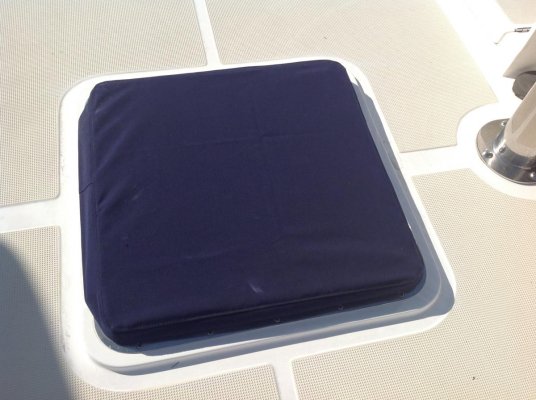
DIY Canvas Tips, Tricks, Recommendations

The friendliest place on the web for anyone who enjoys boating.
If you have answers, please help by responding to the unanswered posts.
Hatch cover

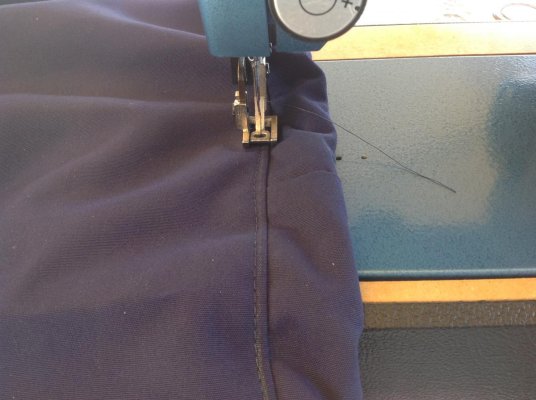
Now you just fold over the gusset with the bungee cord and start sewing. Try to follow the mark you made on the big piece.
Then when you get almost half way around, stop about six inches or so from the v notch. You did put one of those on the other side right?
Now turn the project over, and start sewing from where you originally started and sew that half, also stopping about the same distance from the v notch.
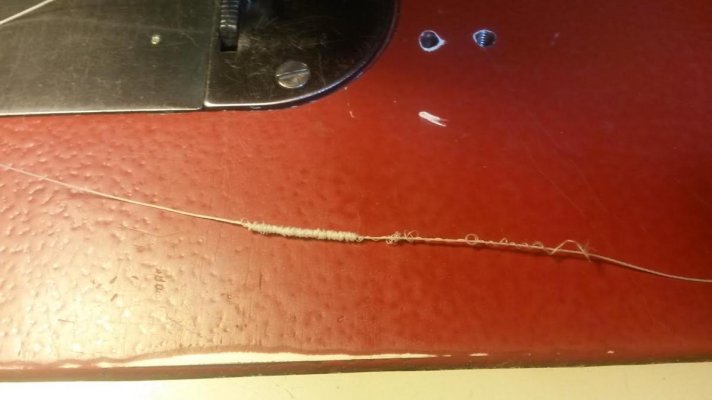
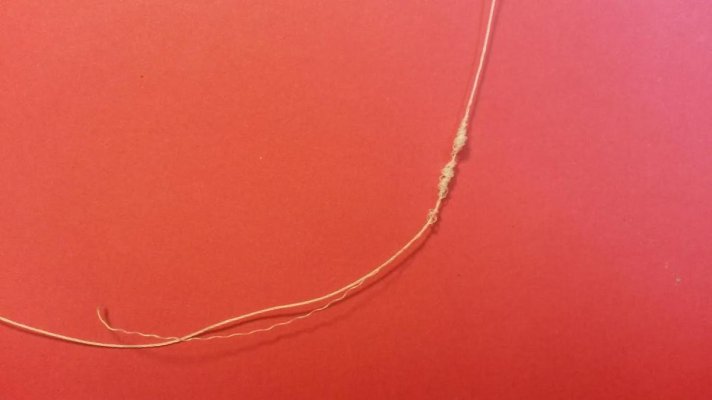
Now you need to sew the ends of the gusset together so that it fits nice. This may seem like a pain, but when you sew around corners to make a curved fit the gusset will always end up either too long or maybe even too short.
The picture I took for this step didn't turn out, sorry.
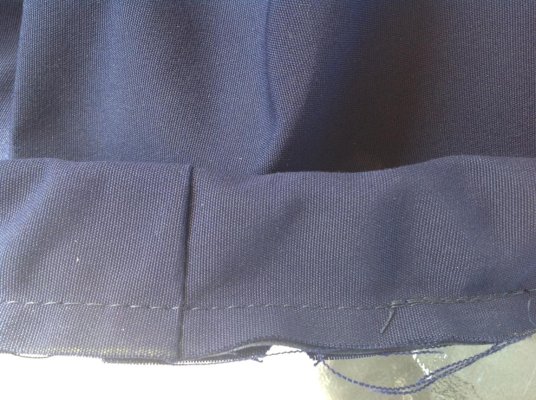
Now that you have sewn the gusset in, it's time to topstich. In this picture you can see the topstich is done and if you look close you can see where the gusset was joined as Discribed above.
 

Attachments

  • image.jpg
    image.jpg
    133.3 KB · Views: 98
Hatch cover

Maybe this pic will show a little better the sewing of the gusset.
 

Attachments

  • image.jpg
    image.jpg
    197.6 KB · Views: 84
So now, I just take my weller gun with the flat tip and sear the edges of the raw finish. I don't have a nice heat iron, and trying to cut the material initially with the weller is a PITA.
So I just melt it all together at the end, just be careful with the iron or you'll be starting over.
And the finished product. This took me a little over an hour.

If you take your time and do the easy projects first, before you tackle the full enclosure, you'll enjoy the results. And don't get bummed if you make a mistake. We all do!
 

Attachments

  • image.jpg
    image.jpg
    150 KB · Views: 84
Thanks

Thanks for the tutorial on the hatch cover. I know you put a lot of work into that, and it is very much appreciated.
 
Oiling the Sailrite LS-1

My new LS-1 came with a bottle of oil, which to me kind of implies that it is supposed to be oiled. But I cannot find any instructions in the user manual which indicate where those oiling points are. Sailrite does sell a DVD for $19.95 which purports to give maintenance instructions, and I suppose that if I have to then I can buy that. But it seems to me that the basic oiling instructions should be in the user manual.

So I am just venting!
 
Great job CC!!


1983 Present 42 Sundeck
Twin Lehman 135's
✌️
 
Just flip it over and oil everything. Well, anywhere pieces touch. Mostly just pull all the lint and threads out of there. I've had my LSZ-1 for 16 years and it's a workhorse with little maintenance (oil every now and then and clean out the lint and threads often.)
 
Just flip it over and oil everything. Well, anywhere pieces touch. Mostly just pull all the lint and threads out of there.
Agree w Lollygag...pull the cover off the had ...left end...and flip the whole machine up....run it slow and clean and oil all moving parts.
Generally I notice a quieter operation when done.
Don
 
My new LS-1 came with a bottle of oil, which to me kind of implies that it is supposed to be oiled. But I cannot find any instructions in the user manual which indicate where those oiling points are. Sailrite does sell a DVD for $19.95 which purports to give maintenance instructions, and I suppose that if I have to then I can buy that. But it seems to me that the basic oiling instructions should be in the user manual.

So I am just venting!

My theory, and what the Navy taught me was, if it moves, oil it. We did weekly PM on all machines back then, you use your best judgment on how often. By taking the covers off you can hand turn it and see what moves. Try and blow everything with an air nozzel first. If you know the machine is gonna sit for a long time clean her up good oil every thing and then coat a rag and wipe everything down. Especially if your leaving the machine on the boat.
 
Thanks for the tutorial on the hatch cover. I know you put a lot of work into that, and it is very much appreciated.

LOL, yep! It took longer by far to do the write up and post the pics than it took to make the darn cover.

Thanks everyone for the kind words and encouragement.
 
My new LS-1 came with a bottle of oil, which to me kind of implies that it is supposed to be oiled. But I cannot find any instructions in the user manual which indicate where those oiling points are. Sailrite does sell a DVD for $19.95 which purports to give maintenance instructions, and I suppose that if I have to then I can buy that. But it seems to me that the basic oiling instructions should be in the user manual.

So I am just venting!

John
I checked my LS-1 manual when I got back home and note I have 2 pages (pg5 & 6) of photos of oiling points.
If you want I'll scan and post.
 
I checked my LS-1 manual when I got back home and note I have 2 pages (pg5 & 6) of photos of oiling points.
If you want I'll scan and post.

Not necessary, but many thanks for the offer. Just color me stupid, I guess, because after I read your post I looked in my Guidebook that came with the LS-1 and it has the info I need in a section called "Ultrafeed maintenance." Pages 21-24 in mine -- perhaps it is a newer version of the manual. Anyway, it has all the info, with lots of pictures.

Again, thanks a lot.
 
End of zipper - does it come off?

I am ready to pull the first panel from the wrap-around side canvas on the boat, so that I can clean it, resew with Tenara, and then put back up. So went down to the boat today to take it off. But although each panel seems to be separate, and has a top zipper which holds it to the bimini top which,when unzipped, will detach it from the bimini top, there is also a zipper running from top to bottom which holds it to the next panel.

I can unzip that top to bottom zipper, except that it only goes to the top and then stops without completing the unzipping process. I feel that surely it must detach completely, but am afraid to try forcing the issue without knowing more about it.

So am attaching a photo of what I am talking about. You can see where the zipper at the bottom would come up to the top and then stop. Does the little piece lettered "YKK" somehow come off there? Anyone know? (The photo is sideways -- the zipper goes from top to bottom)
 

Attachments

  • IMG_0175.jpg
    IMG_0175.jpg
    194.3 KB · Views: 76
Hi,
That looks like an ordinary coat zipper, only larger.
Should work the same.

Ted
 
Hi,
That looks like an ordinary coat zipper, only larger.
Should work the same.

So you think that just pulling down firmly on one side of it at the top would pull it out? I tried that, and it does not come out, so did not want to try again without finding out more about it. I speculated that perhaps the "YKK" piece just comes off from both of the sides perhaps.
 
Separating Zipper

John
Looks like a std YKK separating zipper to me.
see Sailrite site #10 YKK zip zoom in on the end pieces. You should note one side has a hollow or hole in the end - that's the side that's fixed - the solid side is the removable one and the end piece is slightly longer than the fixed side.

One side will stay w/ the top piece marked YKK and the zipper pull.
I can't tell for sure which one but I'm guessing it's the top side in your photo that detaches... you may be able to tell w/ a closer inspection - one side is fixed to the YKK top piece (and has the hole or hollow recess at the end view) and the other slides into it.

First unzip the top zipper on the side you think will come out of the other (top side in your photo if my guess is right) and leave the other side attached at top zip... then Raise the verticle zip pull all the way to the top against the YKK piece then pull gently on the right side panel - if it sticks try lifting the bottom panel slightly using the zipper pull and try to pull the top panel down.

Hope the description isn't too confusing - take a closer look at one of your other zips that you can separate and the pieces & operation should be clearer.
 
So you think that just pulling down firmly on one side of it at the top would pull it out? I tried that, and it does not come out, so did not want to try again without finding out more about it. I speculated that perhaps the "YKK" piece just comes off from both of the sides perhaps.

Yes, just wiggle it a little when you get to the bottom. The canvas does shrink some so it might be very tight. It should come off. does it move but not want to unhook? Maybe try some Vaseline?

OR, check to make sure there isn't a stitch across the zipper from the perpendicular seam.
 
Thanks, Don. That should give me what I need on it. I'll do a full report after I get back down to the boat. Which, unfortunately, will be next week -- out of town obligations coming up. Back when I was married, I thought that I had obligations. But turns out they were nothing compared to what I have as a single guy. :)
 
YKK Separating Zip

John

Here is another shot of a YKK separated - this sould give you an idea of how they go together / come apart...

Note the right hand side piece is slightly longer and is separated from the left & zip pull and the YKK end piece stays w/ the left side & the pull.
 

Attachments

  • YKK zip 1.jpg
    YKK zip 1.jpg
    139.1 KB · Views: 70
Last edited:
John
Looks like a std YKK separating zipper to me.
see Sailrite site #10 YKK zip zoom in on the end pieces. You should note one side has a hollow or hole in the end - that's the side that's fixed - the solid side is the removable one and the end piece is slightly longer than the fixed side.

Didn't go out of town after all, so went down to the boat today and checked this out. And sure enough . . . you were right on the money! Thanks. So now one piece is removed and at home.
 
DIY Canvas Sewing Machine Discussion

I noticed a parallel discussion focused on sewing machines for canvas work...thought I'd provide the link for anyone interested.

Sewing Machines for Canvas Work
 
Ideas for securing dingy cover drawstrings?

What a great thread this is!
I am almost finished with my project to make a sunbrella cover for our 8' dyer dingy.
We resolved almost all the main issues, like using a fiberglass tent pole for the center support, and have a method for securing the cover at the bow, but we are trying to find the best method for ensuring that the drawstrings (sta-set braid 3/16 dia) don't loosen up.

The barrel cord lock closures aren't large enough to pass two 3/16 lines through.

Any thoughts? I will be posting the project from start to finish on our blog, and will also share a few photos on this forum too.

By the way, I've been using my 20 year old New Home sewing machine for the entire project. Other than some issues with thread tension, it is working fine for 4 layers of Sunbrella.

Thanks!
 
...we are trying to find the best method for ensuring that the drawstrings (sta-set braid 3/16 dia) don't loosen up.

The barrel cord lock closures aren't large enough to pass two 3/16 lines through.

Any thoughts?

Thanks!
You can get different size barrel locks. ..
Or how about using one on each cord?
If they both run through a grommet above should work OK
Looking fwd to photos & a link to your blog
 
Barrel Lock Solution

The barrel cord lock closures aren't large enough to pass two 3/16 lines through.

Any thoughts?
Thanks!

Autumn...
Here's your answer - Double Barrel Lock
Sailrite is a great source for hard to find sewing related stuff.
 

Attachments

  • Dbl Barrel Lock.jpg
    Dbl Barrel Lock.jpg
    58.8 KB · Views: 73
All Done

Thanks for the suggestions on the barrel locks. Turns out the captain wanted one on each end of the rope any way, and I managed to find two in my hoard of plastic bits.

The cover is finished - here's a link to our blog post: https://wordpress.com/read/post/feed/664303/895253517

I'll also post on the projects page!
 
Thread Problem & Sailrite Machine Adjustments

I recently experienced a problem w/ thread "shredding" and balling up ahead of the needle. I tried the usual needle bar adjustment with little improvement.
I also removed a couple of burrs on the gib hook and polished it using a felt wheel & polishing compound.
I contacted Sailrite and rec'd a reply w/ link to the videos on gib hook adjustments.
I did the adjustment and solved the problem - thought I'd post pics of the problem as well as the link for the fix.
Sailrite has been excellent about helping users of their machines learn to do this kind of tuning themselves - nice to know how to keep your your machine in top shape.

The adjusting videos can be found at
Cap-Spring-Hook-Needle-Bar-Driver-Timing-for-Ultrafeed
 

Attachments

  • Thread balling 1.jpg
    Thread balling 1.jpg
    60.1 KB · Views: 58
  • Thread balling 2.jpg
    Thread balling 2.jpg
    40.9 KB · Views: 64
OK guys, I guess I'll be learning a new skill :)

I just bought a Sailrite ultrafeed, zig zag sewing machine, a whole bunch of sewing tools, and enough supplies to do some serious practicing.

First step will be to learn. I'll practice some, then build something like a duffel bag as my first project.
 
OK guys, I guess I'll be learning a new skill :)

.

Welcome to the TF Sewing Circle :thumb:

The online videos are a really very good place to get started.
 

Latest posts

Back
Top Bottom