DIY Canvas Tips, Tricks, Recommendations

The friendliest place on the web for anyone who enjoys boating.
If you have answers, please help by responding to the unanswered posts.

Bacchus

Guru
Site Team
Joined
Nov 20, 2014
Messages
7,858
Location
US
Vessel Name
Bacchus
Vessel Make
MS 34 HT Trawler
First credit where due... Crusty Chief posted his DIY canvas project and was the inspiration for this thread. I though it deserved it's own thread vs hijacking his but maybe this will inspire more canvas project posts to show off your handy work. Maybe it's best to keep this one for tips, tricks, hints, etc.

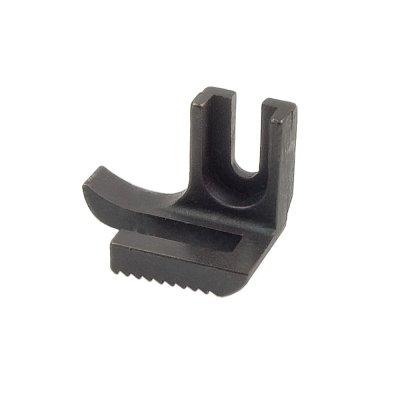
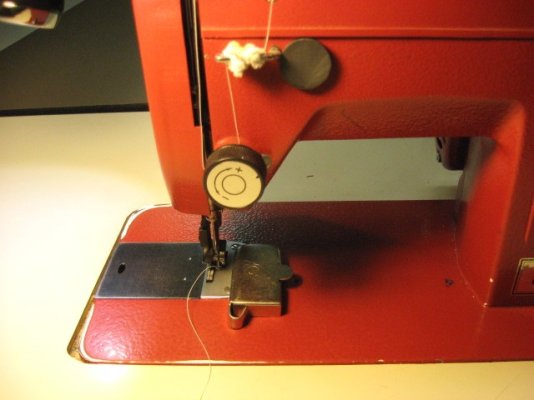
I started doing my own canvas work several boats ago with an old fashioned Singer machine - very heavy & built more rugged than modern machines. I quickly learned that it was OK for some simple repairs but I had trouble feeding the material uniformly. I learned that all of the commercial canvas machines were "walking foot" machines that moved the material positively and uniformly.

Machines
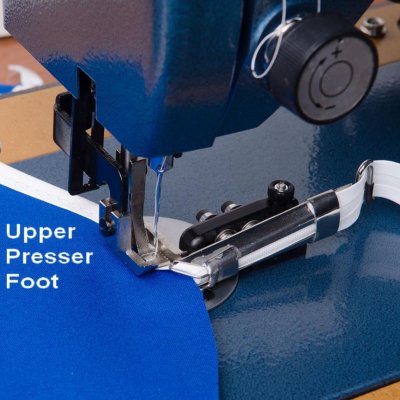
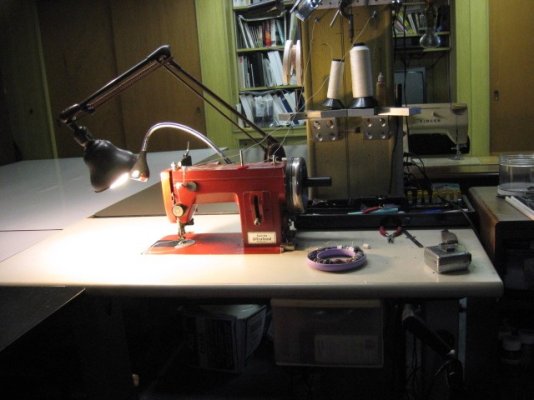
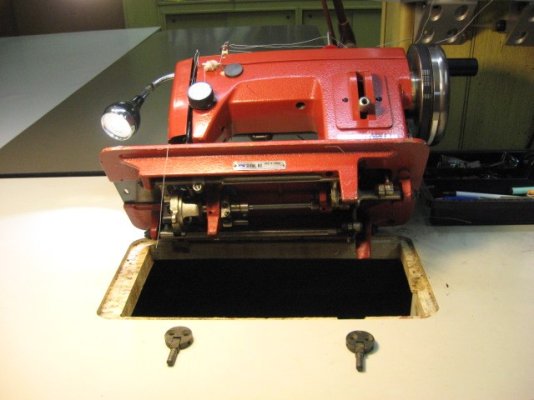
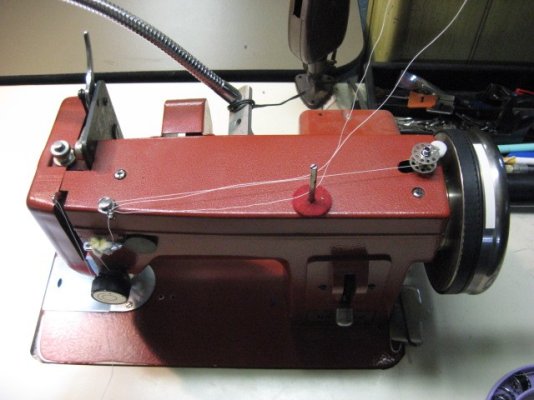
I purchased a hardly used Sailrite LS-1 (straight stitch) machine and have been using it for about 10 yrs. Straight stitch is adequate for almost all canvas work. The Zig-zag version LSZ-1 is nice but not essential IMHO - others may feel differently.
Many other heavy duty walking foot machines are out there and may have advantages over the ones mentioned. I only have experience w/ the LS-1

Accessories - highly recommended or essential - available from Sailrite or other sources
- Binding attachment for 3/4 edge binding
- Monster wheel - reduces the speed and increases the power
- Sturdy table for the machine - I inset my machine and recommend it - you can buy tables that accept machines
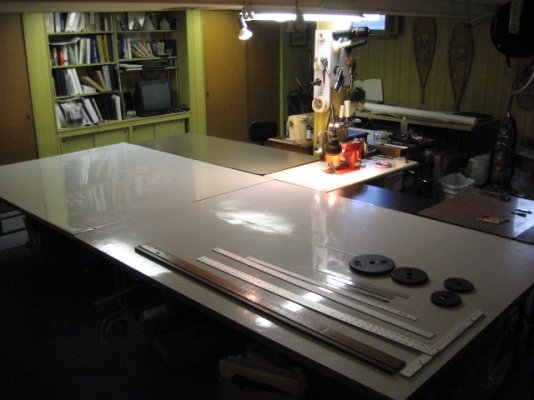
- Work tables - large & many - helpful to do layout and keep large work pieces flat while sewing - I used 4 flush doors and added folding table legs and Formica surfaces - w/ quick clasps to hold them all together. Another "outfeed" table keeps the material from falling off the back of the machine & pulling

Tools & Supplies
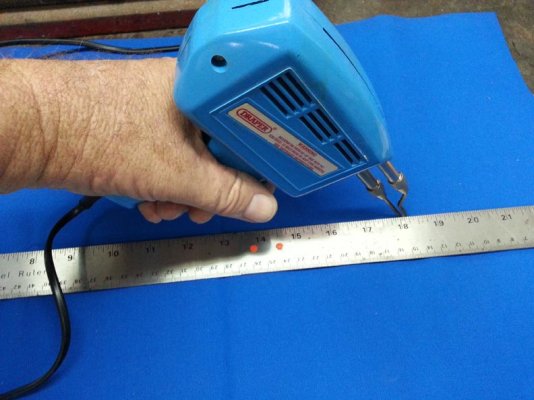
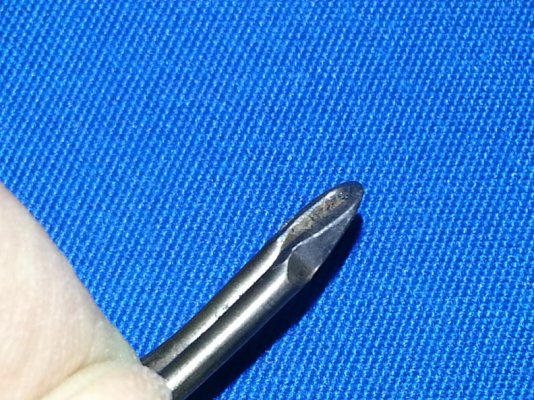
- Pres-N-Snap tool for snap installation - forget the hammer & punch approach - these are not inexpensive but do a professional job quickly. It will also do grommets with additional dies.
- Quick-Fit positioning system - allows you to temporarily locate pattern material or fabrics to snap studs on the boat.
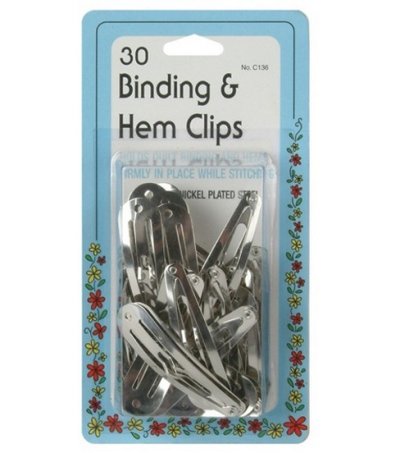
- Spring clamps - to hold pattern mat'l & fabric to frames
- Seam tapes - double sided adhesive tape allows easy & positive positioning of zippers, vinyl window insets, ect
- hand held stapler - the kind retail clerks staple paper bags shut with - used to do temp fabric attachments, form darts in place to improve fit, etc

Tips
- Plastic sheet can be used to make templates which avoids waste with the actual fabric and enables a better job than fitting & cutting fabric in place
- Different color Sharpies allow easy marking of seam lines, cut lines (with additional seam allowance added later), zipper locations, window locations, etc
- See the Sailrite How To Videos for specific project help - many basic are free and pretty helpful getting started.

I will try to get a few photos of my work space setup and post them.
Lets keep this going - anyone w/ experience feel free to add your hints, tips, tricks, learnings, etc.
 
Thank you. Looking forward to learning from yours and other experience.
 
Don,
Thanks for setting this up, You da Man!

Great tips so far and most of them I use. Instead of sharpies, cuz I'm not perfect and sharpies make a mark that lasts, I use chalk. In case I make a mistake, which I do, it just rubs off or use a little windex and a rag it comes right off.

When you are making the reinforcement along edges or to protect the canvas from sharp edges from chafing a pencil works great for that as the chalk dosent Mark well at all.

Spend the money on the snap setter, less headache and will last forever. It will set No.1 and No. 2 grommets saving big bucks on the punch and die set.

If you use the 1inch taper attachment, your corners will look better and is easier to use.

Buy a Star punch it makes setting the snaps easy, especially when going through several layers.

Last but not least, when sewing, go slow. All machines will get away from you if your not careful. Don't be afraid of turning the wheel by hand. It helps you to feel the material better than breaking the needle, especially when going through several layers.

I'll try to think of some other tips and on the next trip up to the boat, I'll make an entry here on how to make a simple hatch cover.
 
This is great guys!! I've checked once- and remember that Grandma's old Singer did have the material feed. I'll pull it out and post some pics so we can see. Gonna hope to set up the Power Pulley soon. Standing by...


1983 Present 42 Sundeck
Twin Lehman 135's
✌️
 
As has already been pointed out, one of the main differences between the Sailrite LSZ-1 and the LS-1 is that the LSZ-1 has the ability to do a "Zigzag" stitch and the LS-1 does not. That said, and I realize that this is a "Trawler" forum (sorry Marin) but I thought I should point out that when repairing sails the "Zigzag" stitch is used frequently (as most owners of sailboats already know).
 
Last edited:
As has already been pointed out, one of the main differences between the Sailrite LSZ-1 and the LS-1 is that the LSZ-1 has the ability to do a "Zigzag" stitch and the LS-1 does not. That said, and I realize that this is a "Trawler" forum (sorry Marin) but I thought I should point out that when repairing sails the "Zigzag" stitch is used frequently (as most owners of sailboats already know).

This is absolutely correct...zigzag is definitely needed for sails, not so much for window coverings or Bimini's. Yes, you can get decorative with zigzag stitch, but it's not necessary.
 
Shop & Machine Set-Up

Chapter 2 - Here is my shop & machine set-up

NOTE: When others add postings w/ tips etc Please add a title that describes the subject matter - This will make finding topics much easier when using Hybrid Display Mode - if aren't familiar with it give it a try - by selecting the Display Mode button at the top of the thread and change to Hybrid Mode.
I have found this very helpful finding topics within a long ongoing thread.


Basic shop layout - lots of flat work / layout space.... more on layout in Chapter 3

- Work / Layout Area - Lg white area - 4 flush doors w/ folding legs & "Formica" tops & clasps to hold them together tight. I picked these up at our locat Habitat for Humanity ReStore for next to nothing along with the white laminate I used on the tops.
- Note infeed & outfeed tables are not perfectly squard and they often catch zippers / draw strings, etc in the open corner and prevent a smooth feed

- Infeed & Outfeed tables - Brown

- Machine table w/ machine recessed (routed cutout) and sewing machine hinges used to enable tilting machine for cleaning, adjustment, etc
Also note optional SailRite "Monster" flywheel - slows machine & adds power (ala low gear) and allows running the machine manually w/ the handle on the wheel - used often in tight spaces, rounding corners, etc
- Work lights are in addition to general area fluorescent lighting

- Note set-up for 2 spools of thread - I chose to mount these vs a table spool holder - I like up, out of the way & permanently fixed vs potential for falling over / off the table - enables winding bobbins as you sew vs a separate operation - saves time
I use a portable spool stand for working in locations other than my shop

-Also convenient storage of wound bobbins - available from sewing supplies - JaAnn Fabrics I believe

- I can remove the machine and transport it to other locations (boat) but MUCH PREFER working in the shop and avoid working remote if at all possible.

- I use and prefer a rolling adjustable ht mechanics stool vs a chair - I think this one was from Harbor Freight but I had to add a spacer to raise the seat a bit
 

Attachments

  • Stitch Shop_04.JPG
    Stitch Shop_04.JPG
    80.9 KB · Views: 328
  • Stitch Shop_05.JPG
    Stitch Shop_05.JPG
    105.7 KB · Views: 238
  • Stitch Shop_06.JPG
    Stitch Shop_06.JPG
    84.2 KB · Views: 264
  • Stitch Shop_12.JPG
    Stitch Shop_12.JPG
    77 KB · Views: 278
  • Stitch Shop_08.JPG
    Stitch Shop_08.JPG
    86.2 KB · Views: 270
  • Stitch Shop_09.JPG
    Stitch Shop_09.JPG
    65.5 KB · Views: 320
Last edited:
Layout - Tools & Tips

Layout tools are rather basic...

- Layout space - last Chapter 2 for photos but you can't have too much layout / work space!!

Tools
- Assortment of straight edges - I have several sizes, widths to suit both small & lg projects
- Scissors - again an assortment helps but I use a large scissor for most fabric cutting - these should be sharp enough to cut the fabric by pushing it into the fabric w/o much / any "scissor" action - mine come apart and I do touch up the edge periodically on a med & fine sharpening stone. This takes a little practice but saves time and - I believe - can produce a straighter cut than "scissoring"
- On my "Wish List" is a Hot Knife that cuts and heat seals the fabric edge in one step - a little pricey but has advantages

- Barbell wts come in handy to hold fabric & templates while marking for cutting
- I have (but haven't shown) an assortment of spring clamps that work well for holding fabric / patterns at the edge of the work tables

- Large "T" Square - allows easy 90* mark / cut of fabrics by aligning one edge along the work surface and using the T Sq to mark for a cut

Marking - An assortment of markers is req'd depending on what you are marking (L to R in the photo)
- China Marker - useful for vinyl windows
- Chalk & chalk "pencil" - tailors chalk or "quilting pencils" useful for dark fabrics
- Lg soft pencil - useful for light fabrics
- Sharpies used for marking plastic template material only! - different colors for different features - basic finished shape; added seam / hem allowances to get to "cut lines"; window insert locations, zipper loc'ns, etc
 

Attachments

  • Stitch Shop_01.JPG
    Stitch Shop_01.JPG
    75.2 KB · Views: 229
  • Stitch Shop_02.JPG
    Stitch Shop_02.JPG
    44.7 KB · Views: 227
Last edited:
Misc Tools & Tips

Here are a few misc tools & tips more to come as I think of them & get more photos...

- Thread trimmers - 2 types of trimmers that are useful for trimming thread ends at start / finish of a stitch The one on the L is basic & not easily resharpened - the one on the R is a higher quality, more comfortable to use and can be separated for resharpening.
Both are easier / quicker to use for trimming than a pair of shears

- I tried but gave up on pinning anything - I do use the binding & Hem Clips shown to hold work while sewing - especially when seaming full width fabrics together to make larger width pieces - they keep the fabric fairly flat; are easy to place & remove & no sharp points

- Magnetic edge guide - shown in place on the machine - very useful for stitching a fixed distance from an edge - several styles available from SailRite & others

.
 

Attachments

  • Stitch Shop_03.JPG
    Stitch Shop_03.JPG
    45.5 KB · Views: 196
  • Stitch Shop_11.JPG
    Stitch Shop_11.JPG
    79.4 KB · Views: 196
  • Stitch Shop_10.JPG
    Stitch Shop_10.JPG
    68 KB · Views: 209
  • Binding & Hem Clips.jpg
    Binding & Hem Clips.jpg
    51 KB · Views: 200
Last edited:
This is great!
Here is the rig I'm hoping to work with. I contacted Singer and they told me it's a 1911 model. Not sure why the carrying case has a place for the electric pedal? I know a lot were upgraded to a motor, but would think electricity would be scarce back then ;). As I see it it does move the material like I need??
ImageUploadedByTrawler Forum1441230374.801397.jpgImageUploadedByTrawler Forum1441230392.888775.jpgImageUploadedByTrawler Forum1441230406.555148.jpg


1983 Present 42 Sundeck
Twin Lehman 135's
✌️
 
OK, you guys brought this on yourselves. :) I have decided that I want to get into this, and so obviously the first thing to do is to buy a Sailrite sewing machine. I looked at the Sailrite website and there are a lot of choices! So which machine & what accessories for just basic canvas work? No need to spend more money than I have to, but also want to get what I need. Thanks.
 
Singer 1911 Machine

Forklift...

I'll bet this machine was originally in a treadle cabinet and later moved to a portable carry case - just guessing.
I can't tell for sure from the photos whether this is / isn't a walking foot machine. I kind of doubt it but you can confirm it - see below.

If it is not a WF machine you will likely have material feed problems - I did and CrustyChief confirms the same.

I included a close-up of the SailRite machine - the foot on the top (Presser Foot) moves to the rear of the machine along with the bottom grooved feed (feed dog) - the top then raises and moves forward for the next cycle.
That's what the bar & mechanism above & behind the upper feed dog does and I don't see anything similar on your machine.

You should be able to test this easy - just rotate the side wheel by hand and see if the top foot moves or is stationary & only exerts force down.
 

Attachments

  • SR presser foot.jpg
    SR presser foot.jpg
    72.1 KB · Views: 177
  • SR feed dog.jpg
    SR feed dog.jpg
    12.1 KB · Views: 2,452
  • SR Walking foot.jpg
    SR Walking foot.jpg
    126.3 KB · Views: 200
Last edited:
John,
I picked up the LZ1, they had a package deal that included the light, a few more tools and the box. The reason for the LZ1 is because of two things. First, it sews straight and ZigZag. Second, the LZ1 allows you to move the needle bar either left, right or center, thus you don't have to by separate pressure feet for taping or sewing zippers and the like. I got the good box because I'm so far from the boat and wanted to be mobile. If your close to your boat from home, you might be able to save the hundred bucks and spend that on a nice work table like Don did above. I also bought the swing away taper attachment. I suggest the 1" taper, much easier to use, especially going around corners.
Also ordered an extra package of needles and some extra bobbins. I haven't found the prewound bobbins from anyone other than Sailrite. Hint, if your doing a lot of sewing, wind all your bobbins at the same time.
Good luck!
 
So which machine & what accessories for just basic canvas work? Thanks.

jnwall

read thru my & others comments...

I have done a lot w/ a straight stitch LS-1 - see the DIY Canvas Show Off Your Project Thread for examples

I have tried to cover accessories etc in the posts so look back -
- the monster wheel is a real plus in my book - don't know why they don't sell a version w/ it already installed
- binding attachment, snap tools & other misc items get you started but it never ends if you continue...

I have used the $ I get from projects I do for other boaters - friends & others in my marina - to add to the tools so the increased capability hasn't cost me much / any "out-of-pocket"... just my time.

I found my machine on Craigslist and I've seen a SailRite machine advertised on TF before - if you are patient you may find a deal. There are also lots of used machines available from other manufacturers but I don't know much about others - if you find a deal you might check w/ a commercial canvas guy to get his/her reaction.

Good Luck and stay tuned or "subscribed" as I'm expecting many more comments from folks
 
Last edited:
OK, the LS-1 and a monster wheel ordered. Will report back.
 
New LS1

OK, the LS-1 and a monster wheel ordered. Will report back.

Don't be surprised if you become the new " favorite guy " on the docks. Seems like everybody needs a small repair.
 
I just sent a note off to SailRite to see if by chance they would offer any sort of discount to TF members - I'll let everyone know if/when I get a response.

BTW For anyone interested there is SailRite Forum you might want to look at / join in... maybe more / different experience level there vs on TF?
 
Last edited:
I just sent a note off to SailRite to see if by chance they would offer any sort of discount to TF members - I'll let everyone know if/when I get a response.

That would be great. I want to change the color scheme of my boat and that means all new canvas.
 
Forklift...

You should be able to test this easy - just rotate the side wheel by hand and see if the top foot moves or is stationary & only exerts force down.

Don,
I think that my rig is gonna get side lined as "Light duty":banghead:
Crap- I'm into Patricia for about 3 1/2 BoatBucs already.
Actually this is the rig that Oma brought over from Germany. My mother has another one that Oma made slip covers and drapes with when she worked for her self later in life. Let me check- maybe it will have the feed??:thumb:
 
Don't be surprised if you become the new " favorite guy " on the docks. Seems like everybody needs a small repair.

Not likely. I'm starting from ground zero on this thing. But I know that I will need new canvas within the next two years, and so figure that this opportunity to learn from experts is not something which will come along again. Hopefully, within two years I will become able to do what I need to do. And so far have spent less than a $B (boat dollar). :)

Next step is to look at the Sailrite videos that you guys have talked about.
 
BACCHUS: quote
"- On my "Wish List" is a Hot Knife that cuts and heat seals the fabric edge in one step - a little pricey but has advantages"

For less than $20 you can buy a garden variety soldering iron with exchangeable tips, one of which will be a v-shaped flat blade. It'll cut and seal Sunbrella for a whole lot less that a hot knife.
http://www.amazon.com/Adjustable-El...qid=1441240875&sr=8-5&keywords=soldering+iron
 
Solder Gun vs Hot Knife

ARoss...

You are correct there are alternatives... I have and use a soldering gun w/ a flat blade tip...

IMHO they are not equal but can be a reasonable compromise for small projects.

Solder gun works well for heat sealing the ends of binding, creating zipper stops, etc but is fairly slow for large scale fabric cutting compared to a hot knife...
 
I have an old SailRite Yachtsman machine - does straight and zigzag stitches and handles multiple thicknesses of heavy fabrics. If you can fold up thin aluminium sheet (or do origami) then you can make covers etc with Sunbrella. I find the lighter slippery sail cloths much more difficult to work with

Use acrylic basting tape. This is the very stick double-sided sticky tape specifically made for use with Sunbrella-type materials. It lets you fold and "assemble" projects, then run the seams through the sewing machine.

I use a soldering gun against an aluminium straight-edge for cutting acylic cloth. The removable tip can be ground to a knife edge which cuts as it melts.
 
I use a soldering gun against an aluminium straight-edge for cutting acylic cloth. The removable tip can be ground to a knife edge which cuts as it melts.


Great ideas! Next time you get a chance can you snap a picture of this set up- I'm interested in possibly using it. Thanks


Forky
1983 Present 42 Sundeck
Twin Lehman 135's
✌️
 
Lots of great information and suggestions here. I'll add that it is a good idea to invest in a hot knife. Sailrite now has their own branded version that is much less expensive than the Engle hot knife we bought with our machine. It is also handy for cutting and sealing the ends of various lines/ropes. Second, make sure you get a couple seam rippers. They are inexpensive and come in very handy when you need to undo a stitch (and you will need to take some appart and restitch at some point). I've told people that if you can run a band saw, you can run a Sailrite or similar type of machine. Finally, realize that when you are working with canvas projects, measuring only gets you so far. When we did our bimini, we took general measurements to determine how much fabric to buy and to sew up several pieces in the initial stage, but all final fitting was done by eye, laying the fabric over the frame and marking the cuts and seams.
 
Don,

I think that my rig is gonna get side lined as "Light duty":banghead:

Crap- I'm into Patricia for about 3 1/2 BoatBucs already.

Actually this is the rig that Oma brought over from Germany. My mother has another one that Oma made slip covers and drapes with when she worked for her self later in life. Let me check- maybe it will have the feed??:thumb:


Bad news for me- Grandma's machine got sold years ago before she passed. Well- one more item checked on the wish list. Gonna need to get a sewing machine.


Forky
1983 Present 42 Sundeck
Twin Lehman 135's
✌️
 
Steve,
Look at the bright side, the machine is just the beginning. Next, your gonna need to retrofit the house to compete with Dons canvas room. May be a second or third career here. Sure glad I'm retired again.
 
Originally Posted by Shoalwaters

I use a soldering gun against an aluminium straight-edge for cutting acylic cloth. The removable tip can be ground to a knife edge which cuts as it melts.

Great ideas! Next time you get a chance can you snap a picture of this set up- I'm interested in possibly using it. Thanks

Forky, Sorry for the delay in replying. I may have made it sound more technical than it is. The steel rule shows up better in the pic. A big advantage of using a hot-knife is that it seals the edges of the cloth nicely.
 

Attachments

  • Hot-knife 1.jpg
    Hot-knife 1.jpg
    90.2 KB · Views: 113
  • Hot-knife 2.jpg
    Hot-knife 2.jpg
    162.8 KB · Views: 114

Latest posts

Back
Top Bottom