A Bad Monkey Tail

The friendliest place on the web for anyone who enjoys boating.
If you have answers, please help by responding to the unanswered posts.

Capstan

Senior Member
Joined
Jul 19, 2015
Messages
171
Location
Bahamas
Vessel Name
Bad Monkey
Vessel Make
Gulf Star 43
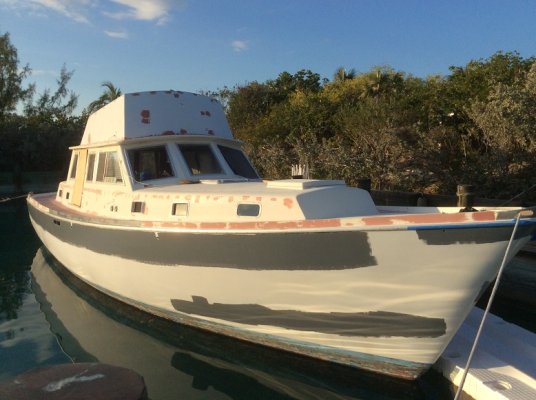
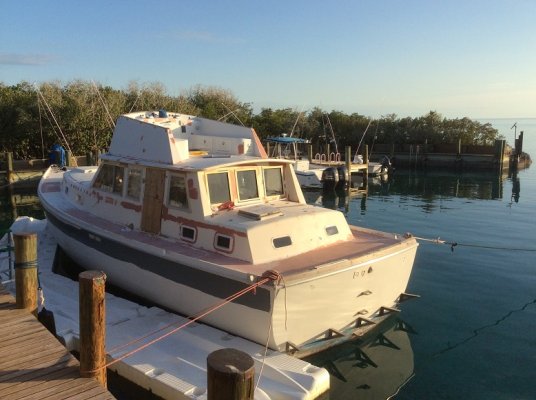
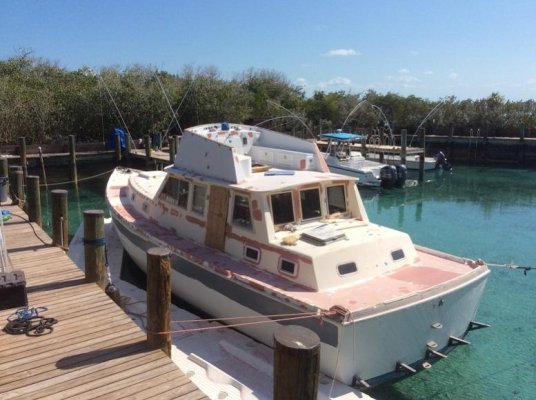
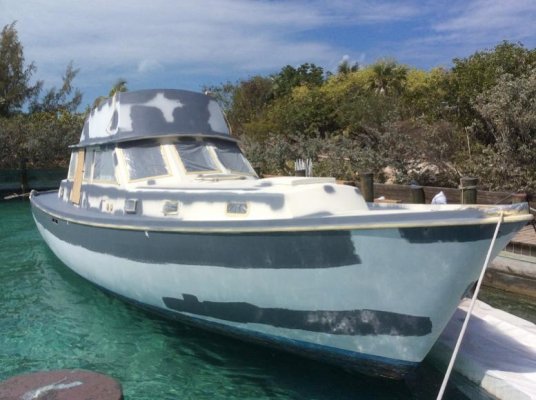
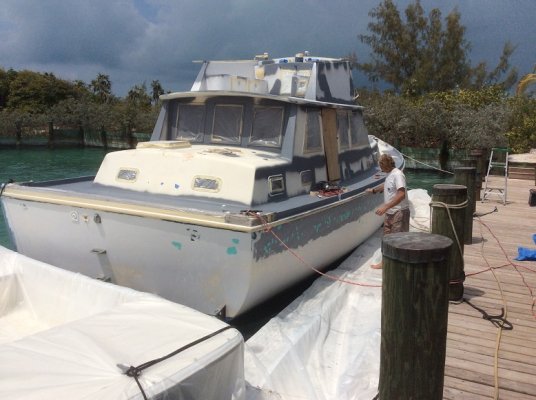
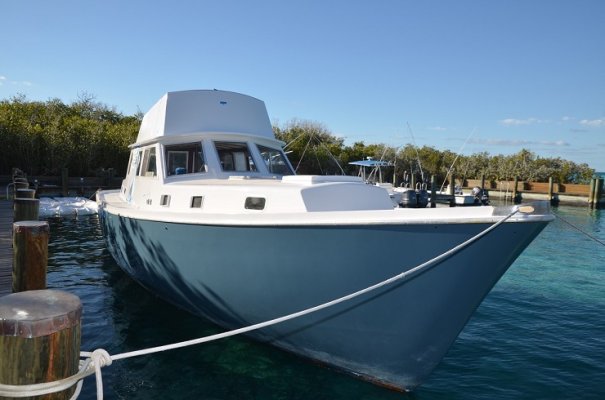
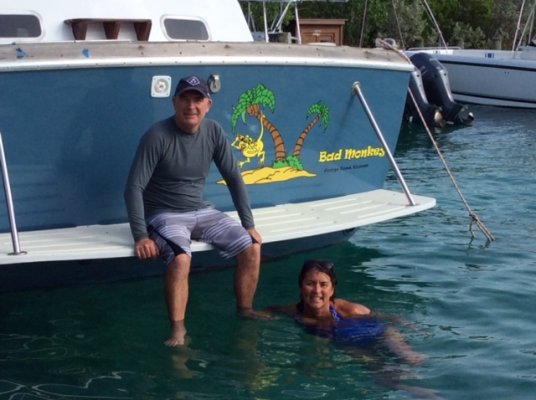
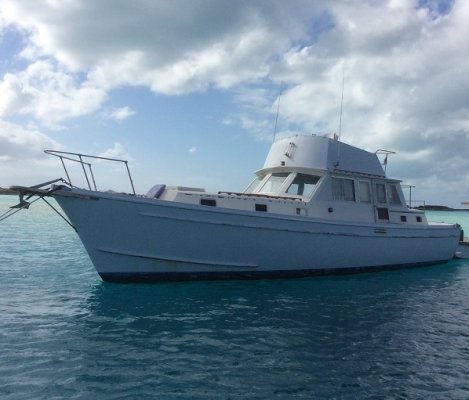
In February this year we purchased a Gulf Star 1973 Trawler, Hull # 59 for well under $10,000. after we discussed the pro's and cons we decided it was just too cheap to say no and the Admiral gave her OK. (The Admiral was surprised by the head room inside the vessel, that was the winner). Of course we knew it was a project boat but felt we had enough spare time after work and on the weekends to make us comfortable taking on a such a project.
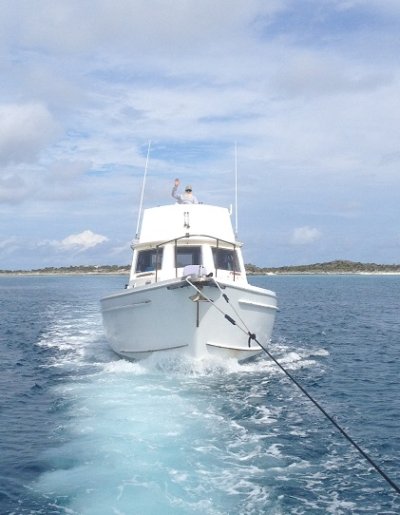
We ran the engines for 10 minutes before taking oil samples of both mains and the Stbd result was very, very poor. However with the boat being moored only 4 miles away we took possession and not wanting to run the engines until we did some investigating we towed her across the “Wide Opening” to her new home.
Having access to tools, dockage and storage is a must to undertake a project like this. As we all know, these cost a lot over a period of time and need to be carefully considered when contemplating a rebirth for a new family member. Having all three at our disposal, I was sure, and still am, that we would keep that hole in the ocean fairly small with a reasonable/acceptable outpouring of coin.
Our backgrounds help as well: Earlier on in my career I spent 6 years engineering. I hold a valid 3,000 ton Master license and in 98-99 cruised 10,000 miles throughout the Pacific on my own sailboat before meeting my wife. I can honestly say the purchase decision weighed heavily upon my mind for the following reasons: “Can we stay focused? Do we have the skills? Do I really have an understanding of what this will cost? Will it become a burden and then a cause of tension between us?
Up until two weeks ago some of these questions were still unanswered.
I had thought about this purchase for over 3 years. Since we arrived at our job, nearly 6 years ago, The vessel had been swinging on a mooring 4 miles away. It took 3 years to finally ask if we could see her, and, if our friend the Park Warden, was contemplating selling her.
As they say “Timing is everything.”
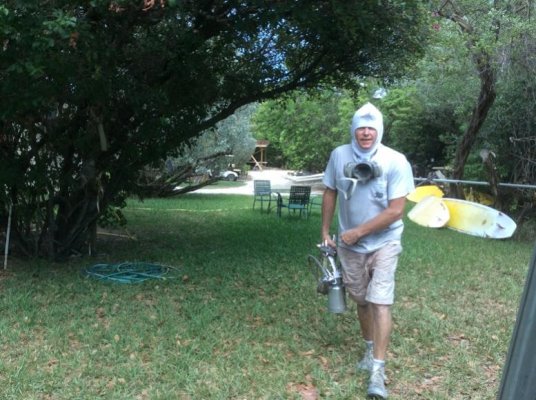
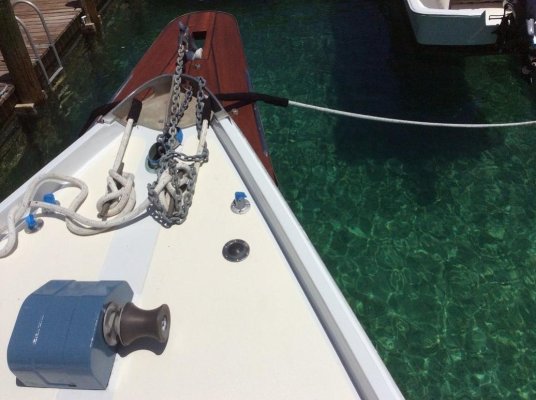
Some pictures attached and below my work list we set and complete. The following are jobs completed in the 3 weeks of February. Next week I will post March and pictures if there is interest, and so on.
I will answer any questions I can on the little journey of our “Bad Monkey”.
“Up Ya Kilt”
Capstan
PS please let me know if this is in the wrong Thread/forum?

Weekly work list
Week 1
9th Feb Tow boat to marina
Remove all from interior and exterior hatches
20 hours to unload. That does not include sorting!
Vessel now sits 7.5" higher in the water!

Week 2
Start SS polishing of removed pieces
Replace oil coolers with new found in stern of boat.
Sort engineering spares
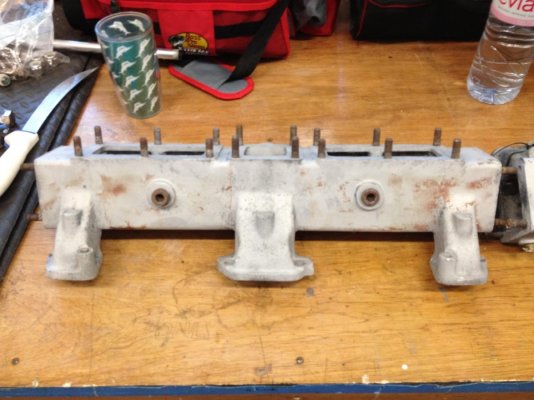
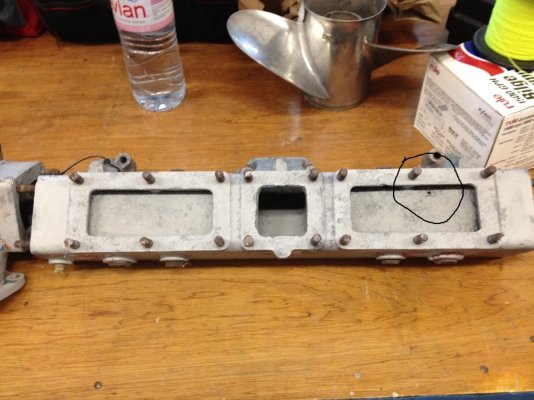
Remove heat exchangers
Remove exhaust manifolds and mixers

Week 3
Lemons and French friends and Godchildren.
Continue SS polishing
Remove snap fittings around windows and fill holes, sand
Jump off boat every day with the kids!

Week 4
Remove all stanchions, bases and railings Polish all Make a list of all.
Polish fuel in tank then remove
Send bases and fittings for quote for refinishing
45 pieces = $2,900. No thank you!
Drawing of hand rails to Andre
Remove fwd ss rub rails, polish
Move all ss to omh for storage
 

Attachments

  • Stbd Eng Oil.pdf
    263.6 KB · Views: 195
  • Before.JPG
    Before.JPG
    100.1 KB · Views: 731
  • Arrival (1).JPG
    Arrival (1).JPG
    83.1 KB · Views: 750
  • MTing boat (5).JPG
    MTing boat (5).JPG
    154.7 KB · Views: 738
  • Stanchions and Bases (13).JPG
    Stanchions and Bases (13).JPG
    169.5 KB · Views: 759
Last edited:
Awesome. Please post more. I did a pretty major refit of a 1973 36 in 2005 after hurricane Dennis.
 
I've always thought those were good looking boats. I'm glad you're bringing that one back.
If you can get it in the Bahamas, try wiping down the stainless rails with a product called Whink. It's sold in grocery and hardware stores to remove rust stains from clothing. It works like magic on stained stainless. It's active ingredient is hydrofloric acid. If you can't find Whink, oxalic acid works pretty good and should be available in hardware and paint stores. How hard is it going to be for you to get the supplies you'll need for this project?
 
Another stainless steel cleaning/polishing product that works as advertised is Flitz Liquid Polish for Metal. We've started using it on our oldest boat and it works a treat. Removes stainless "stains" immediately.
 
Another for Flitz.
Have used it a good bit over the years, and always worked great!:thumb:

That's an awesome looking boat.
Love her lines!

Congrats and good luck on the rebirth.

OD
 
Thanks OD, Plenty more pics of the "new family member" to show. We used Flitz a lot when I was on the Mega Yachts It was and I am sure still is a great product. These days we use Star Clean for a one step but I always finish with Colonite Metal wax (white one) to finish. The Colonite was made for the aeronautical side and is a little expensive but I have found nothing else as good for final hand finishing and protection.
The best thing about the Colonite is that you can put it on and leave it for any period of time, not just S/S, come back and wipe it off and everything is good to show. I always had the crew put it on the hundreds of feet of varnished capping rails before the crossings to the Med or back to the States. Get to the other side wash down and the capping rails had no sun/ salt damage and were still as good as when we left. The deckies loved it.


Capstan
 
Awesome. Please post more. I did a pretty major refit of a 1973 36 in 2005 after hurricane Dennis.

Thanks Doug, Will post just for you. :socool:

Interior is a little daunting. Engines, electrical than aft cabin and we can start using her!

Capstan
 
I've always thought those were good looking boats. I'm glad you're bringing that one back.
If you can get it in the Bahamas, try wiping down the stainless rails with a product called Whink. It's sold in grocery and hardware stores to remove rust stains from clothing. It works like magic on stained stainless. It's active ingredient is hydrofloric acid. If you can't find Whink, oxalic acid works pretty good and should be available in hardware and paint stores. How hard is it going to be for you to get the supplies you'll need for this project?

Thanks Parks,
The guy we bought the boat from is very happy that we are doing it up. Others wanted it but just to anchor and live aboard.
We have Whink and have used a lot over the years but honestly it didn't come close to being of use for these rails and stanchions! So you can guess how bad they were!!:eek:
Didn't think about Oxalic but don't carry it on the Island.
Supplies aren't big deal as we have staff coming and going on planes and boats.
Capstan
 
Thanks for posting your work project. Look forward to seeing the progress. Oh Welcome!
 
Per my last post we were busy removing, cataloguing and prepping everything for its eventual return to the boat.
I’ll cover the following five weeks here as it comes to mind while reading the notes passed on below. This will bring me to halfway through week nine.
During this time I also started to find everything was taking a lot longer then expected. Removing stanchion bases meant taking down or destroying overheads to get to the nuts. I can only say that I am grateful to whomever first installed them that they used good quality hardware and anti-seize.


Week 5
Strip and clean heat exchangers and associated piping. Soaked in barnacle buster.
Purchase screws and bolts to be replaced that aren't in spares.
Find boat to bring new engine room fire extinguisher across
Remove VHF antennas and all other hardware from exterior, Polish and store
Sand and fill all screw holes

When we had removed the heat exchangers, exhaust manifolds and exhaust mixers from the boat, I had known immediately that we were up for new exhaust mixers, was concerned about the exhaust manifolds and that the heat exchanger bundles were blocked. No wonder the oil samples had supplied such a cry for help.
That was in week 2. Finally I got to do some work on them (mostly my good mate Dougy did the work!) along with some research. It had been nagging at me, a lot! Wondering how expensive these items were going to be if they needed to be replaced.
I got the base price for replacement mixers, $750 apiece, not in stainless.
The manifolds were also found to be in poor condition, but maybe salvageable.
In the meantime, ever hopeful, I asked friends all over to ask around for info on 2nd hand ones, or other choices. I had a couple of months before I needed them so I started concentrating on getting the vessel ready for one of my friends Mike to come repair and paint the exterior and hull.

Week 6
Choose and order material for upholsterer.
Order paint and supplies. Awlfair, 545 primer, Stars and Stripes {Blue Hull) with a DC Red for boot stripe, Oyster White for non-skid areas + white. Black antifoul + bonding paint
Remove bow sprit
Remove swim platform
Remove aft step
Cut and sand new teak step pieces
Remove E/R vents from hull
Remove hand rails
Remove windlass
Cut out 3 sections of soft deck on bridge deck and prep ready for repair

Jen couldn’t understand why I wanted the boat exterior done before the interior.
“Make it look good and you’ll be inspired.” She is now a believer in those words!

Week 7
Mikey painter, Sanding and filling all areas of vessel
Another Mike and Andrew 3 days Repairs as below
Bridge Deck repairs
Remove teak rail on house
Remove sliding entrance doors
Remove rotten door frames
Remove port forward window and backing.
Cut new backing, clamp and seal in place
Jet ski rafts used as work platform
Remove rub rails and spray rails from hull

The stainless steel Rub Rails were in need of serious polishing. I believe they are 316 stainless and polished up quite nicely. Unfortunately a lot of work unnecessarily as they won’t be going back on.
While removing the stainless rub rails and spray rails we found the rails had some rot in them and as we began contemplating the job of repairing we were convinced by Mikey the painter to remove them completely. His reasoning was that it will give the vessel a little more modern look, while making everyone’s life a lot easier and, importantly, not hold up the job. He was right in all cases.
The capping rail protrudes enough that it becomes a rubbing rail, so I’m not concerned about that at this stage.
So now I have some good quality, shiny rub rail for sale if anyone is interested!


Week 8
Reinstall port window and seal
Make temp doors
Sanding and filling swim platform
Filling and sanding
Masking
Wrap pontoons in plastic
Complete masking
Wipe down boat with all prep
Prime all repaired areas except starboard hull and transom.
Final skim on port hull. Prime and paint port hull. 3 coats, final with 50% clear. Stars and Stripes Blue
Cover port hull caulk windows, hatches, railing
Turn BM around. Move and cover Carolina skiff
Final Prep sanding and fairing Stbd side hull and transom. Prime Stbd Hull, transom and Swim Platform
Paint Stbd hull and transom.
Prime Bridge. Prime decks,
Paint Bridge, paint swim platform

Week 9
Final prep. Paint deck and house
Sandblast anchor and paint
Paint header tanks
Unwrap and Unmask boat
 

Attachments

  • IMG_0227.JPG
    IMG_0227.JPG
    168.2 KB · Views: 510
  • IMG_0281.JPG
    IMG_0281.JPG
    140.6 KB · Views: 505
  • $# sebt Pics (2).JPG
    $# sebt Pics (2).JPG
    182 KB · Views: 485
  • Prep and Paint (2).JPG
    Prep and Paint (2).JPG
    193.3 KB · Views: 528
  • Prep and Paint (3).jpg
    Prep and Paint (3).jpg
    75.6 KB · Views: 511
  • Prep and Paint (4).JPG
    Prep and Paint (4).JPG
    182.5 KB · Views: 502
  • Prep and Paint (5).JPG
    Prep and Paint (5).JPG
    185.9 KB · Views: 504
  • Prep and Paint (6).jpg
    Prep and Paint (6).jpg
    73.6 KB · Views: 502
  • Prep and Paint (8).jpg
    Prep and Paint (8).jpg
    71.9 KB · Views: 507
  • Prep and Paint (9).jpg
    Prep and Paint (9).jpg
    66.4 KB · Views: 494
More Photos
 

Attachments

  • Prep and Paint (10).jpg
    Prep and Paint (10).jpg
    68.2 KB · Views: 445
  • Prep and Paint (11).jpg
    Prep and Paint (11).jpg
    91.7 KB · Views: 464
  • Prep and Paint (12).JPG
    Prep and Paint (12).JPG
    189.5 KB · Views: 463
  • Prep and Paint (13).jpg
    Prep and Paint (13).jpg
    112.1 KB · Views: 486
  • Prep and Paint (14).JPG
    Prep and Paint (14).JPG
    180.1 KB · Views: 486
  • Prep and Paint (15).JPG
    Prep and Paint (15).JPG
    194 KB · Views: 482
  • $# sebt Pics (6).JPG
    $# sebt Pics (6).JPG
    149 KB · Views: 493
Cool thread. Always have liked these boats. I remember as a kid when they were new I commented how much I liked them every time we passed one in our little runabout. My Dad always shook his head and just said "Really?"
 
Great choice on the stars and stripes. Our Mainship is cream like our old gulfstar, but my wife and I have lately been dreaming of painting the hull. Other than Navy, which is in our humble opinion too dark for the tropics, there are not a lot of colors that work with cream.

We saw a beautiful hinkley with a cream house and a stars and stripes hull. Made up our minds right away. Canvas color? Maybe a dark grey?

Thanks for the pics, I have been really enjoying them and the work looks great so far.
 
Wow so much work in so little time amazing
 
Sorry I meant to post on earlier this week but have been off the grid relaxing!

2nd half Week 9
Reinstall antennas, new running lights, air horns.
Install wheelhouse aluminum combing and seal
Set up new doors and temp install
Tow vessel back to mooring

Weeks 10, 11, 12, 13, 14 guest in and sailing at IOM worlds in San Francisco.

It is good to have had a break from the boat but at by the end of this period was very much looking forward to having it back in ourlives.
On the way back through Lauderdale was able to pick up fabricatedparts and assorted pieces needed for the following weeks,

Week 15
Unable to locate replacement exhaust manifolds.
Pick up fabricated exhaust manifold cover plates and endplates
Remove interior panels surrounding doors
Fabricate bow sprit.
Fabricate door frames

Week 16
Working on bow sprit and door frames
Cetol 1 mahogany sealer, 1st coat cetol 1 followed by 3 xcoats Cetol 23
Finish with 1 coat Cetol Door and Windows
Install door frames,

Such a relief to have doors back on the boat. They stillneed finishing but it makes closing the boat so much easier.
This enabled us to concentrate on the engines and findout exactly what we would need to do to get the engines running.

Week 17
Sand blast inside of exhaust manifolds,
Repair with Belzona 1111 and pressure test. Seems OK
Clean out heat exchanger cores and pressure test
Remove and clean tools and rubbish from interior.
Install aft step
Install bow sprit
Service windlass order new mechanical seal
Quotes for exhaust elbow mixer ridiculous! $1,350 for 1
Quotes for copper pipe for engine cooling system (order)

Work slowed as weather really turned hot and made working inside very uncomfortable.

Week 18
Prep and paint stanchion bases medium metallic silver
Modify anchor chain path on bow
Cut and weld swivel for chain to anchor
Install fwd. stanchion bases and bow f/w outlet
Transfer applied to stern.

Anchor does not fit correctly and I am sure it was like that before! If anyone has a picture of their 43 with the same setup I would appreciate a picture.
Also the anchor windlass is one direction. Never worked with one that you couldn't "drive" out? :banghead:

Shall post some more next week which will almost bring us up to date with where we are with the "Bad Monkey".
Until then:
 

Attachments

  • IMG_0480 - Copy.jpg
    IMG_0480 - Copy.jpg
    99.6 KB · Views: 421
  • IMG_0478.jpg
    IMG_0478.jpg
    122.3 KB · Views: 431
  • IMG_1747.jpg
    IMG_1747.jpg
    137.5 KB · Views: 423
  • IMG_0467.jpg
    IMG_0467.jpg
    63.6 KB · Views: 432
  • Exhaust Manifolds (1).jpg
    Exhaust Manifolds (1).jpg
    119.8 KB · Views: 443
  • Exhaust Manifolds (2).jpg
    Exhaust Manifolds (2).jpg
    128.4 KB · Views: 447
  • Parts for replacement (1).jpg
    Parts for replacement (1).jpg
    115 KB · Views: 481
  • Transom Jen & Stan.JPG
    Transom Jen & Stan.JPG
    112.5 KB · Views: 533
I`d never heard of Belzona 1111. Searched it, sounds good. Come to think of it, I patched leaking exhaust elbows with an epoxy comes in 2 sticks, claimed to set underwater. Very firm, hard to mix, I used a table fork. I certainly did the job, keeping us mobile while I imported new elbows.
It`s a great restoration you are doing. Improving the exterior first was a good motivating idea.
 
Making great progress and looking great
 
Capstan: Just caught up with this thread. Impressive and informative! Please keep it coming.

1970s-vintage Gulfstars emerged from the Lazzara's St. Petersburg factory with good bones, if spartan fittings. Individual sail and power examples have made some convincingly audacious trips. Your 43 is great-looking and may already be better than new. Good on ya!
 
A little time off the rock to visit friends in Wrightsville Beach:)
The boat now registered and with the name on the stern.
For the 1st time I was getting a little cramped for time, and feeling I needed to get the stbd engine running. I didn't want to tow it back to the mooring the next time out. It was time it was able to do the trip with it's own prop turning.
The exhaust mixers were now the problem and so we made the decision to fabricate.

Week 19
1st time Tailgating. This could be my new hobby!
Rolling Stones concert with the Jen, Bill and Mary, Dave & Sarah, Pat & Carol.
Pick up SS elbows, exhaust wrap and pipe etc. for fabrication of exhaust mixers.
Nuts and bolts
Fabricate exhaust mixers. Wrap with mat and west system. Then soak exhaust wrap with west system. Wrap tightly and cover with tape. Let set, remove tape, sand and re-coat with west system.
Install windlass
Copy old piping for both engines cooling system in copper pipe Oil changed both engines.

Week 20
Spray engines, running gear and water filter housings with Fluid Film. Lanolin based product.
Fuel back in boat + Biobor additive
Fuel sender back in.
Exhaust manifold and mixer back on.
Assemble and reinstall header tank, heat exchanger and piping on Stbd engine
4 gallons antifreeze
Anodes replaced on Stbd engines exhaust manifold and header tank.
Primary and secondary Fuel filters changed and bowls cleaned.

Week 21
Oil filter replaced
Recharge and install 1 battery
Connect battery
Open water intake, prime fuel
Start port eng. oil leak from filter, replace seal in oil filter Restart eng.
# 2 and 5 popping
Run for 15 min # 5 cleared
Very little white smoke
Home made exhaust mixer working very well.
Monday run vessel to Warderick Wells on 1 eng.
No issues

Week 22, 23 & 24 vessel on mooring. Guest and Shark Nationals. Brockville, Canada

Week 25
BM back in marina. Ran to 2100 on return. Oil and water temps good.
Take oil sample.
Strip more of port interior - rotten framing removed.
Remove 2 x fuel hoses to port engine for replacement.
Port fuel filters, 10m, 2m and secondary filter replaced.
Housings cleaned.
Oil filter replaced.
Set up sewing machine and online tutorials.
Write Lauren re up-slip.
Port engine.
Exhaust manifold on. Anode in
Heat exchanger and related hose and pipes in place.
Replace fuel tank line port.
Replace 2 x fuel hoses. Prime

The above brings us up to 2 weeks ago. I will be away sailing at the Worlds all next week in, of all places, Ottawa, so will post probably in about another 2 weeks. That should take us right up to where we will be with the refit at that time.
For the last 2 months the interior looks like a war zone with pieces "N" parts strewn all over. It is definitely a "enter at own risk" job site!
September will be electrical, battery bank, and following wire runs etc.
Planning on hauling in October for a bottom job, boot-stripe and a survey.
Late October will see the start of interior work where we concentrate on the Aft cabin first.
Of course this all depends on Hurricanes, friendly interruptions, Murphy and how we feel! ;)
Will post some more pictures tomorrow.
 

Attachments

  • image2.JPG
    image2.JPG
    108.8 KB · Views: 289
  • image4.JPG
    image4.JPG
    80.8 KB · Views: 303
Wow Great prgress
 
It`s a transformation. Doing the exterior first was a good move, it gives pride, and encouragement with the interior, mechanical and other systems you are now working through. Congratulations.
 
Boat is looking great. Can't get over how much you've accomplished in such a short time. I helped a buddy of mine cut off the flybridge on his 1968 Pacemaker Yacht Fish 48 last October. He spent the entire winter and all summer fabricating a new one and he still has several months left to go.
John
390 Mainship
 
She looks good moving under her own power.
 
wow! you are racing through this project. Wish I could get mine to go half of your pace. Keep up the good work. Some of us need all the inspiration we can get!
 

Latest posts

Back
Top Bottom