Manatee Pilothouse Enclosure

The friendliest place on the web for anyone who enjoys boating.
If you have answers, please help by responding to the unanswered posts.

HiDHo

Guru
Joined
Feb 22, 2012
Messages
1,371
Location
USA
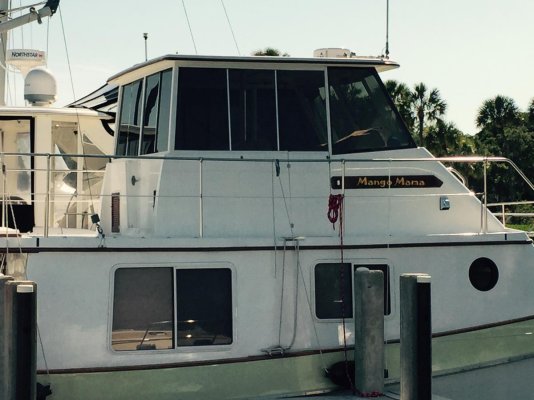
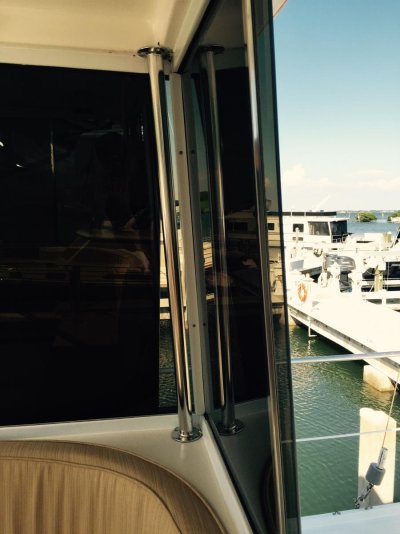
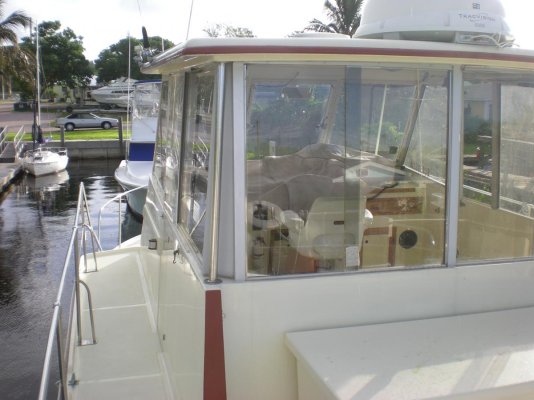
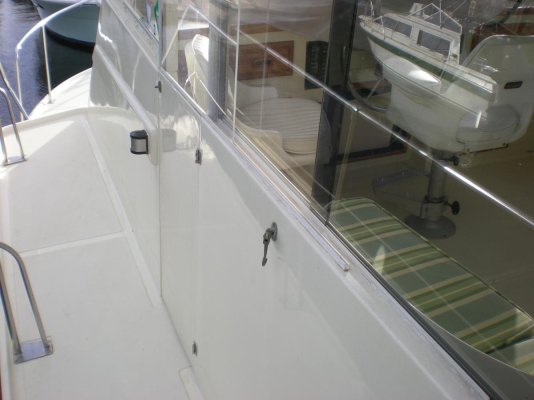
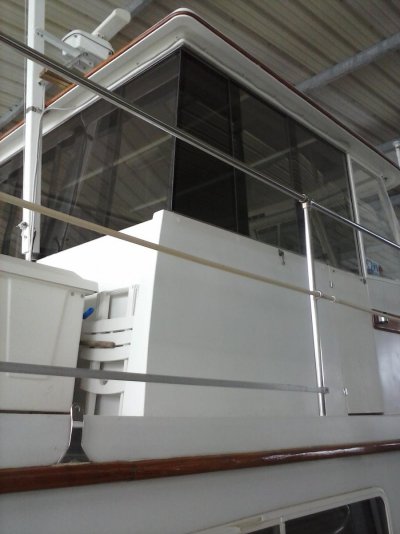
I have used the last bit of life out of the canvas and eisenglass that encloses the after part of our pilothouse, so time to replace them with Lexan sliders which many Manatee's have done.
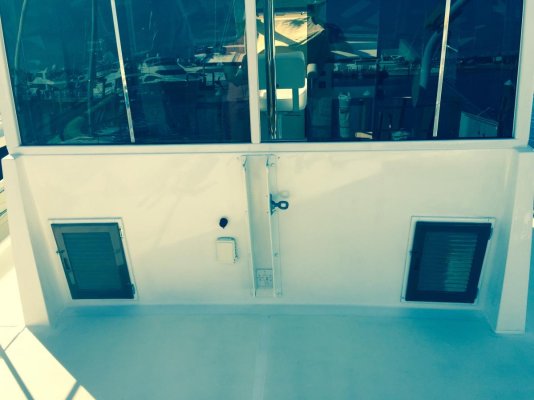
First step was easy, remove the canvas and eisenglass.
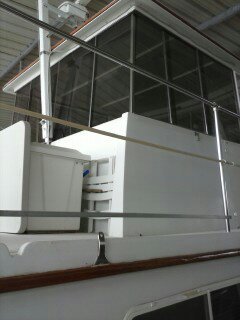
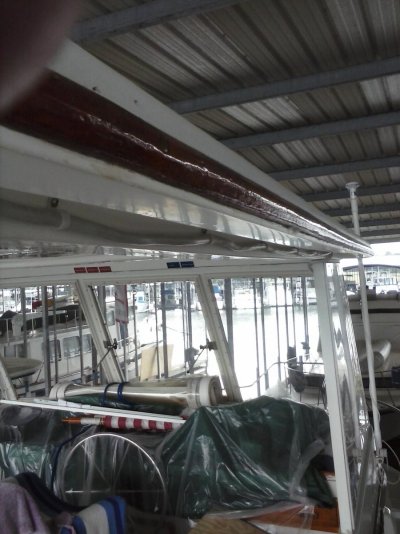
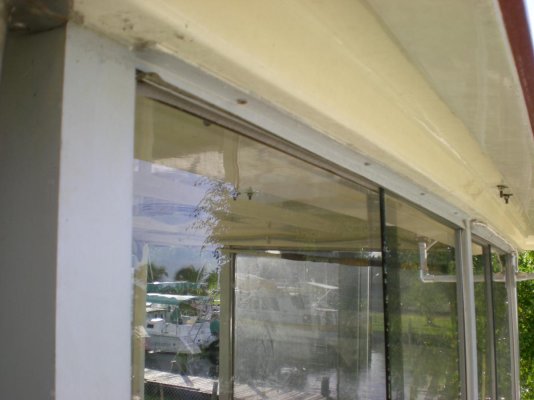
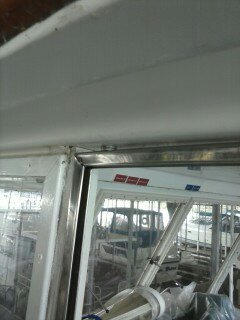
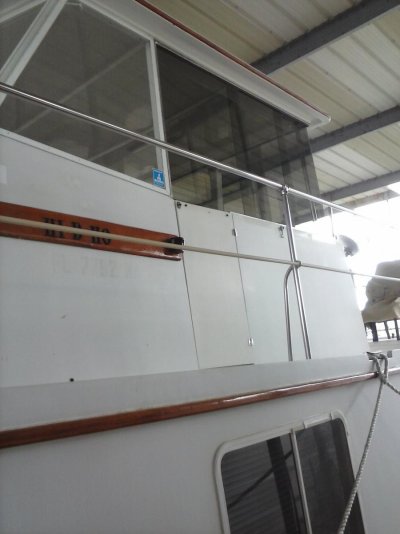
I have filled all the screw holes for all the hardware used to hold the enclosure in place. Next modified the mast bottom bracket and relocate the radar antenna power cord.
I have contacted Beckson and they agreed to send me test strips of the Channel-Mate they sell which looks like a good choice for the Lexan tracks. Other options are aluminum tracks but the thought of attaching the aluminum with stainless screws makes it my last option.
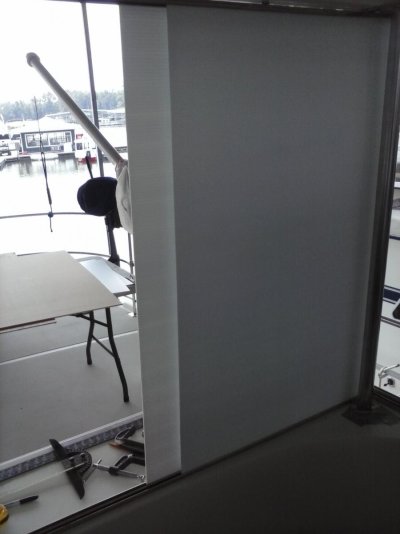
The Lexan thickness I'm thinking of using is 3/16" or 1/4", it is available in dark grey, light grey, bronze and clear, I like the look and visibility of the light grey. I'm looking for ideas for how to handle the half doors and I understand from others that a 4" overlap of the Lexan works well.
Any ideas welcome as there is no set of plan's for doing this enclosure.
Bill
 

Attachments

  • IMG_4177.JPG
    IMG_4177.JPG
    97 KB · Views: 135
Bill: The new Mango Mama owners just installed the Lexan panels this year and the boat is docked here on our compound. I could stop over and snap some photos of the installation if needed. Here's a shot of the back.
 

Attachments

  • image.jpg
    image.jpg
    84.8 KB · Views: 142
Larry that would be great. Looks like they used the tint I'm thinking of, the stainless steel roof supports in the aft corners is another concern. Did they do the enclosure themselves ? The enclosure looks very professional.
Also is that a stainless steel roof support post I see inside ?
Thanks
Bill
 
Yes...the stainless roof supports are inside, as original. It is a very nice looking and very smooth operating enclosure, probably good enough to air condition the pilothouse. The windows are lexan, I think. I'll drop a line to the new owners today to ask for the opportunity to photograph the area.
 
Thanks again for the help Larry. If the owners had the enclosure built locally I would like to get in touch with the company. I believe that the pilothouse is one of the areas that Krogen had constructed the same on all Manatee's. Well almost, we don't have the small doors on the aft bulkhead showing in your photo, wonder what the doors are for ? Air-conditioning and heating the pilothouse sure would be a nice thing to have and this enclosure looks weather tight. How did they do the doors ??
Bill
 
On HEY JUDE the doors you speak of are only wooden (teak) vents for the propane bottles that are stored horizontally under the PH seats. KK36 #99 had common vertical bottles mounted horizontally in the same location. I was told that is unsafe to do so, can allow liquid propane into the piping instead of intended vapor propane.
 
Last edited:
Thanks for the explanation HJ, and yes horizontal propane tanks not good. We have two vertical 10 lb tanks in the port side pilothouse seat locker with gage, solinoid valve and recesses to firmly secure them. Strange that KK3699 had them laying down, we are hull #69 built in 1987 and the short 10 lb tanks work very well and fit nicely into the seat locker. Maybe the larger tanks where a Bahama cruising option although the 10 lb tanks last forever supplying the oven range.
 
Last edited:
I also carry the 10 lb. tanks in that area, although I also keep two 20 lb. tanks in the port forward locker, left over from 4 mo. anchorages in the Exumas with the previous owner. The fridge is 110/propane also.

I took some photos of the pilothouse enclosure on Mango Mama yesterday. He says he uses the doors for access to storage, but I noticed also that he doesn't have a vent area on the side of the port propane locker, so that explains the louvered door. He is converting his 20 lb. tanks to horizontal feed as discussed above. Mango Mama is one sweet boat now.....still with some work to complete according to the owner, but is a boat ever complete? I'll publish the enclosure photos in the next post.
 
Sorry it took so long to get these photos on here, but my new I-phone 6 kept storing and sending the photos in "process" format which gave it a really greenish tint. Took me a chile to realize I had to change the format on the phone instead of through Photoshop. Anyway, here's the shots of Mango Mama and her Pilothouse enclosure.
 

Attachments

  • starboard windows closed.jpg
    starboard windows closed.jpg
    122.4 KB · Views: 120
  • starboard top framing.jpg
    starboard top framing.jpg
    117.2 KB · Views: 112
  • starboard looking forward and up.jpg
    starboard looking forward and up.jpg
    119.8 KB · Views: 116
  • starboard door open showing single track.jpg
    starboard door open showing single track.jpg
    105.2 KB · Views: 111
  • starboard aft quarter view.jpg
    starboard aft quarter view.jpg
    113.2 KB · Views: 113
  • side view.jpg
    side view.jpg
    112.3 KB · Views: 109
  • port door open showing single track.jpg
    port door open showing single track.jpg
    87.7 KB · Views: 118
  • port door closed showing how it mates with track.jpg
    port door closed showing how it mates with track.jpg
    125.4 KB · Views: 103
  • peering inside toward aft starboard.jpg
    peering inside toward aft starboard.jpg
    108.3 KB · Views: 116
  • back windows.jpg
    back windows.jpg
    148.4 KB · Views: 108
Oh, by the way......here's a couple of bonus photos of Mango Mama's spiffy new helm setup. Nice way to install an upright MFD without glare or reflection in the windshield at night. With the helm chair set at 35" height, forward vision over the bow was still very good.
 

Attachments

  • FullSizeRender-1.jpg
    FullSizeRender-1.jpg
    92.7 KB · Views: 108
  • FullSizeRender.jpg
    FullSizeRender.jpg
    144.3 KB · Views: 107
Thanks Larry and Robert for the photos of Mango mama's enclosure, the "how to" handle the doors and corners has been answered. The photos will help a lot constructing our enclosure.
The helm setup is great, Larry I can see another project forming in your mind.
Bill
 
The helm setup is great, Larry I can see another project forming in your mind.
Bill

That's probably not too difficult, Bill, since it seems all I have in my mind is projects. I already have the material for my planned helm upgrade, but after seeing Robert's, I might change my plan. It looks great.
 
Wow. That Mango Mamma pilothouse is slick for sure.
 
Reference post #1 I received the test strips of Beckson's Channel-Mate and after discussing installations with them found out that this product has not much lateral strength and is used in an existing window frame channel as a liners not as a stand alone window track. Also my need for three tracks on each enclosure side does not work well combining two and single track Channel-Mate.
I have decided that I will use StanPro 316 stainless steel window track as in the photos of Mango Mama's enclosure. Next step will be to relocate the aft roof corner posts inboard to clear the Lexan sliders.
Best part about this project on a Manatee is there is plenty of room to work around the upper deck area and being in a covered slip makes it ideal. I have set up chairs for my boater friend's to assist in beer and pondering assessments on what is the next step in this enclosure project.
Bill
 
Last edited:
Corner post have been moved and measurements taken twice or maybe three times. The StanPro tracks have been delivered 6 double and four single in 8' lengths. Most Manatee pilothouse roofs hold water and when laying a straight edge I found the side roof sills where the Lexan tracks would mount had a 1/2" sag front to back that will require a filler piece or I'm thinking spacer washers to keep the tracks plumb. I plan to not use any materials that will need constant upkeep if I can, so the plan is to attach the s/s tracks to the existing fiberglass sills. Anyway it a work in progress and I will do updates in case anyone is thinking of doing this type enclosure.
 

Attachments

  • CAM00028.jpg
    CAM00028.jpg
    68.8 KB · Views: 92
  • CAM00029.jpg
    CAM00029.jpg
    125.9 KB · Views: 101
I'm wondering about starboard spacers... no metal-on-metal, and easy to cut...?
 
Starboard is definitely an option, it would require four 1 1/2" wide fillers with a taper along a 16" long strip with a height from zero to 1/2". I ordered a 3/4" X 24" X 54" piece of starboard for this project, probable not a hard job for a band saw.
Bill
 
Bill: Tried to reach you with PM, but??? Anyway, I wanted to show you these photos I took a couple of years ago on "Swannee", which kept the posts outside the installation.
 

Attachments

  • DSCN6151.jpg
    DSCN6151.jpg
    121.9 KB · Views: 98
  • DSCN6152.jpg
    DSCN6152.jpg
    62 KB · Views: 92
  • DSCN6153.jpg
    DSCN6153.jpg
    73.4 KB · Views: 101
  • DSCN6154.jpg
    DSCN6154.jpg
    83.3 KB · Views: 103
  • DSCN6155.jpg
    DSCN6155.jpg
    67.4 KB · Views: 109
  • DSCN6156.jpg
    DSCN6156.jpg
    88.1 KB · Views: 100
  • DSCN6159.jpg
    DSCN6159.jpg
    125.7 KB · Views: 105
Thanks Larry, this enclosure is definitely worth thinking about. One of my concerns is the after corners with fixed panes, how to join them. Do you recall what product they used for the corner construction ? I saw photos of a west coast Manatee with roof posts moved inboard and the corner panes looked like they joined with glue. My Lexan outlet has a lot of window track items, I'm going to see if the corners can be joined into a stainless steel 90 degree joint using glass tape, probable not as the panes will tilt slightly out at the bottoms. The enclosures I have seen so far are all different which is no surprise, and is fitting because as we all know every Manatee is a little different.
 
Last edited:
Bill....the 2nd photo above is a good shot of the aft port corner. Looks like the windows are boxed with alum C-channel and a triangular alum plate welded between them. Click on photo to enlarge image.
 
The last two days have seen the tracks for the sliding panels of Lexan come together after much measuring and calculations. The use of s/s fender washers to adjust the upper tracks because of the roof sag has worked well. Both entrance half doors will need a filler piece to aline the single track that closes off that area, this will be the next job as all the tracks are now installed. I had a buddy helping with the installation and I would recommend doing this, it makes the job so much easier and two eyes are always better than one. The only problems we ran into where sizing the pilot holes for #5 and #6 brass screws into the fiberglass, and when drilling the s/s tracks the drill bit wanted to snag the felt liner under the nylon slide in the bottom of the tracks. I guess a metal punch might be the answer to avoid the snagging problem. Cutting the s/s tracks was a snap using a multil speed saber saw with metal blade. I also set up a work table which was great for cutting and drilling the s/s tracks.
Bill
 

Attachments

  • 1433446472914.jpg
    1433446472914.jpg
    16 KB · Views: 323
  • 1433595256462.jpg
    1433595256462.jpg
    15.9 KB · Views: 327
Next step is to buy some 4' x 8' sheets of sign board and work up the ten templates that make up the sliding Lexan panes. They will be roughly 37 1/2" tall and 23.5 wide, the 4" over lap on the panes will require some give and take in the width. Since I chose to use fender washers to align the tracks I will need to do some filling on the top tracks with caulk and or two part Marine-Tex and cavasil. I will post the next steps soon.
 
Today template/patterns were cut from sheets of 4' x 8' sign board that's available at sign companies. It is ridgid enough to simulate the Lexan sliding panes in the enclosure. It also shows the aft corner angles because the tracks are not vertically aligned due to the construction of the roof and sills. Also it's a good way to figure out the 4" pane overlaps. There are ten panes total and it looks like four sheets of 4' x 8' Lexan will be needed. Next step will be cutting the Lexan to size and making minor adjustments. It can be cut with a circular saw fitted with a plywood fine toothed blade but I'm going to explore having it cut by a glass company.
 

Attachments

  • CAM00042.jpg
    CAM00042.jpg
    71 KB · Views: 78
Superb report. It's good to see the project coming along, step-by-step. The unique usage of the sign material is something I won't forget in future projects.:thumb::thumb:
 
Thanks Larry on Bucky and Robert on Mango Mama for all the information and photos, with your help the pilothouse enclosure was 95% completed today.
The Lexan panels have been fitted and installed leaving room for thermal expansion. We found out that a sharp block plane can be used to size the panes to the tracks. Now that I can see the enclosure with the sliders installed I'm sorry it toke me this long to do this improvement. I and others said it really is a great improvement to the boat. The last 5% of the job will be caulking and fitting StanPro edge seals to the sliders, and I plan on adding bottom door seals to each door.
And then there's the idea that since the A/c evaporator coil and blower are right close under the steering console why not heat and air the pilothouse, but that will be for another day.
Bill
 

Attachments

  • CAM00048.jpg
    CAM00048.jpg
    92.3 KB · Views: 75
  • CAM00049.jpg
    CAM00049.jpg
    80.4 KB · Views: 78
  • CAM00050.jpg
    CAM00050.jpg
    99.9 KB · Views: 71
Last edited:
I watched this project in the works, Bill and his neighbor Ron did a fantastic job!! Very professional. My help involved staying away and not offering any advice, which they appreciated by giving me beer. I can't wait for their next project.


Ray
 
Great project Bill and nice work .
 
My help involved staying away and not offering any advice, which they appreciated by giving me beer. I can't wait for their next project. Ray

Ray: Drop me a line when you see them putting together a new project. I'd like to come over and not help out. I'm very much looking forward to retiring to this kind of project participation.:thumb::thumb: Like you, many needy boat owners out there could benefit from a lack of my advice and influence.

Seriously though,....the pilothouse looks great.....sort of a contemporary, pillar-less style that smoothes it out a bit, and we all know that Manatees can use some smoothing out. Like Ray, I can't wait for the next project.
 
Yesterday Ron and I completed the pilothouse enclosure installing the corner pieces and edge seals which had to be ordered on line. I used StanPro single and double track material, the edge seals are from the same mfg, all being 316 stainless steel. The StanPro rubber edge seal tape # 75000081 laps over the pane edges after lubricating with Windex and the s/s edge seal crimp is then seated using a rubber mallet and wooden block. The four panes that make up the aft corners where joined using 1" x 1" x 36" 20 gage s/s metal and 3M 20 lb extreme double sided tape. I chose not to build teak corner pieces and time will tell in use if my corner construct method will be reliable.
Many thanks again to everyone, Larry, Robert, Ron, my First Mate for provided help and information, photos, and yes Ray too. :):):)
 

Attachments

  • 1435600997692.jpg
    1435600997692.jpg
    20.8 KB · Views: 210
  • 1435601524555.jpg
    1435601524555.jpg
    16.3 KB · Views: 206
Bill


Your lack of beverage during the final stages of your project had a huge impact of my "no assistance or advice".
Great job be proud.


Ray
 
Back
Top Bottom