2 issues with wood on boat

The friendliest place on the web for anyone who enjoys boating.
If you have answers, please help by responding to the unanswered posts.

6-Pack

Senior Member
Joined
Jan 16, 2012
Messages
205
Vessel Name
The 6-Pack
Vessel Make
1974 Custom Aluminum Pilothouse
I have two issues I need some suggestions on.

#1-my kids are hard on all of the door pulls, locks, etc. and I have a bunch of wood screws pulling out on these things all of the time. I have tried wood glue but it is not creating enough of a bite for the screws. What should I inject into the holes when they are stripped so that I can repair these stripped screws?

#2-I have the start of a sagging floor in the galley of the main salon. It is the spot everyone wants to stand and it is starting to be an issue. The spot is about an 8' span right above the front end of the engines. There is not a place to insert a jack stud so I am thinking I may need to have a piece of metal fabricated to carry the floor. Has anyone had this issue and how have you solved it?

image-3527288750.jpg

You can see the cabinet gap with the floor. It is about an inch out but extends to more when people stand there.
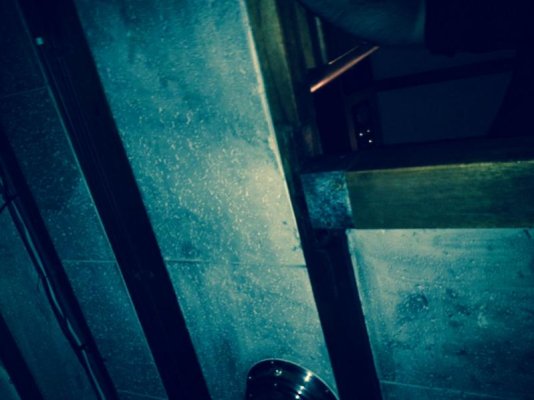
image-540915052.jpg

The under side of the joint.

image-3748939586.jpg

The spot that needs to remain clear so no jack stud.
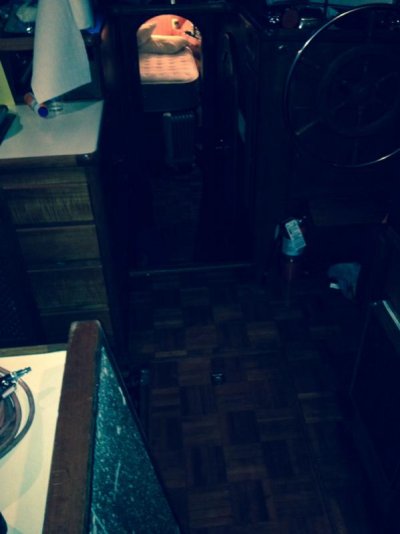
image-3928337593.jpg

Spot where all areas collide in main salon galley area.
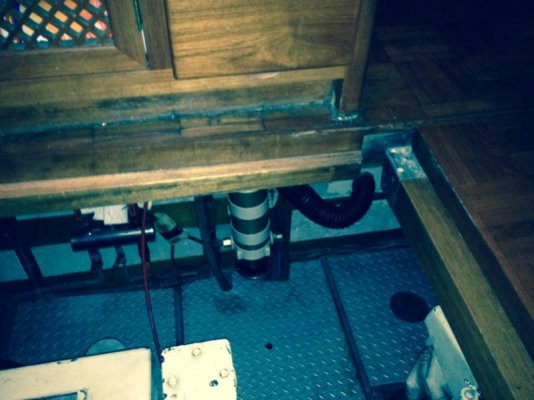
image-2723325429.jpg

Gap up close...
 
#1. Drill out the stripped area and glue in a wooden plug. Used to do that restoring old casework and it worked well.
#2. Jack stud it for now and find where the stringer is broken or cracked. Siamese, glue and screw a new one next to the existing. Probably have to span the entire length.
#3. Stand by for other opinions!
 
I break toothpicks off flush in screw holes with stripped or nearly stripped holes with great results.

Strut channel can be purchased in 10 foot lengths at any electrical or plumbing wholesaler. It cuts easily with even a hacksaw and comes in a variety of thicknesses from 7/8" to nearly 4" on the double side sizes. 1 5/8" is fairly standard. Spanning the distance with this from underneath may be all it takes to reinforce the floor for low cost.
 

Attachments

  • image-3319902721.jpg
    image-3319902721.jpg
    21.1 KB · Views: 427
  • image-1382795413.jpg
    image-1382795413.jpg
    12.3 KB · Views: 414
Regarding the screw holes. I tried hammering in and gluing a tapered chopstick, packed in small pieces of wood, even filled holes with polyester filler (we call it bog), but nothing works long term like a tight wood plug epoxied into a freshly drilled hole, as Bob says. A plastic grooved plug for woodwork could work, but may have moisture susceptible crevices.
 
Dowels

Wooden dowels are available in 1/16 increments, glue and drive into the existing hole the proper size dowel and cut or break off flush. This works well with out the need to drill a new hole. Your best bet is to jack up your existing deck timber and glue and screw a sister to your failing timber. You may need to use a larger size timber to handle your current load. If the kids insist on ripping off door knobs you could consider leaving them home.
 
For stripped screw holes, I use bamboo skewers dipped in wood glue or epoxy and cut flush--very strong, simple, and holds quite well.
 
If you can get to the inside simply replace the screws with a machine screw and a - Sex Bolt-

These are actually nuts with a head that looks like the top of a screw .

Usually used to install ports so the nuts look OK.

Images of sex bolts

bing.com/images

 
#1. Drill out the stripped area and glue in a wooden plug...

Fine , but to do it so it will hold a screw a 1/4 pluf wont do.

The hole needs to be enlarged with a 1/2 or larger Fostner bit and a proper plug glued in.

These bits drill flat bottomed holes ,

Forstner 10 Piece Bit Set
$49.99
Woodcraft...
 
Last edited:
Thanks for the ideas. I will get some plugs and go at it. I need more ideas on #2!
 
#2 Depending on the room , sistering with wood or metal is best choice.

If it can be drilled and you can get to the screw or bolts that would work.

IF there is no room to work a sister rib can simply be glued in place IF you can clean the mount surface well.

Pre fit it , use gloves and PL glue with as many clamps as you can borrow. BE QUICK!!! and stay off it for 24 hours.
 
I had the same problem but right at the port door. I found the stringer was cracked so I sistered it with west epoxy and 403 thickened plus silicon bronze screws. It's more solid than new now. I'd check to see if you have the same problem.
 
Great suggestions thanks. I am curious if I should try to jack the floor proud of the stringer before I glue it so that when it settles it lays flat. I am worried about putting too much pressure on the stringer in the boat. Maybe that is not an issue?
 
I think I would but not a great amount.
 
I am curious if I should try to jack the floor proud of the stringer before I glue it so that when it settles it lays flat.

IT took a long time to sag , so go slow and wait a week as you push it back up.

With a robust sister rib it will sag back very little.
 
Go slow lifting as FF said.
If a stringer is cracked put a sister on both sides and make the sisters a bit deeper. It's possible the original simply had a flaw, knot ot whatever, but maybe it was on the inadequate side. Sistering both sides and adding some depth should eliminate that permanently.
 
I`m interested why you would jack the floor above where you want it to finish. I thought you`d get it where you want it, and fix it there. Is it necessary to go higher to allow fallback?
 
Also bolting a aluminum angle the length can help support the beam. The thicker and larger the angle the more strength.

Sent from my iPad using Trawler
 
Let me get some measurements and I could cut some stringers on my CNC for ya Jeff. With the right material choice, you could sister onto the stringer beam without even being visible.
 
Thanks Mike - that is a generous offer! I am going to go down to the boat later after the Seahawks game and check it out. I also want to start into my rear hatch cover as well so I am going to take some pictures to get comments on as well. I am going to start borrowing clamps:)
 
Must've just missed ya. Was down this morning pulling the upper instrument panel. Maybe I'll catch ya down there this week some time and take a look.
 
Bummer! Sound good:)
 

Latest posts

Back
Top Bottom