Friends were seriously in peril a couple of years ago when their 55ft motorsailer was hit suddenly by a "rogue" wave that came out of nowhere, while heading south from Bermuda. Boat was pretty near incapacitated with smashed windows and fried electronics. They are experienced sailors with several transatlantic crossings. You just can not predict what will happen out there. Trying to pick a "window" for 2 weeks or so of "good" weather is a "fool's game" IMO. Kind of like gambling. You might be lucky, but then you might not. I think very few 50ft vessels are suited to this adventure, and despite owning a 50ft long range trawler, I think such a trip is best undertaken in a large sailing vessel with small portholes and very good scuppers. Also, I prefer my martinis shaken, not stirred!!
You are using an out of date browser. It may not display this or other websites correctly.
You should upgrade or use an alternative browser.
You should upgrade or use an alternative browser.
Circumnavigating
- Thread starter Wataworld
- Start date
The friendliest place on the web for anyone who enjoys boating.
If you have answers, please help by responding to the unanswered posts.
If you have answers, please help by responding to the unanswered posts.
I'm thinking about crossing the Pacific, using my 'coastal trawler'. Right now I'm thinking just once, one way and the shortest practical route at the best times of the year for each sector. If you do even just a little bit of a bit of research you will come to agree with Beebe's figure for range: 2400nm is enough. Unless you plan on getting lost or driving in circles.
My key unresolved concerns are green water - vulnerable windows and down-flooding, and flooding engine room via its ventilation system. Sure I'll get weather-routing, but in planning the 'what-ifs' need to be asked. People do get caught in storms.... I've no intention of dying while I'm doing it.
Anyone who thinks its cheaper and easier to ship a 50' trawler across oceans has not got an actual shipping quote recently.
When we crossed the Pacific to Australia, in 2000 and 2001 (on a 42.5' sailboat) we never saw winds over 30 knots or seas over 4 meters. The only green water we saw was between Tonga and New Zealand and you aren't going that way. Those years were average weather years. The weather in Pacific is defined by seasons. We left in early March before the trade winds were established and arrived at the end of cyclone season in the Pacific. A transition period. Our first landfall was in the Marquesas where fuel is available.
Last year, in Panama, we watched a 49' Defever get ready to go via the Galapagos. He was doing stability tests with 10-55 gallon drums lashed on board. He wanted the extra fuel capacity. We know of a 53' Selene leaving this spring also from Panama. When are you leaving?
sunchaser
Guru
- Joined
- Apr 9, 2008
- Messages
- 10,196
- Location
- usa
- Vessel Name
- sunchaser V
- Vessel Make
- DeFever 48 (sold)
I'm thinking about crossing the Pacific, using my 'coastal trawler'. .
Many "coastal" vessels venture far offshore for fishing, fun and deliveries. It sounds like a wonderful experience to work your through the various issues and planning.
Five reads that are current, if you've not done so:
- Brian Calvert's blog for his crossing from NA to Australia on his 48' Selene. Communicate with Brian, he is very open.
- Tony Athen's trips across both Pacific and Atlantic on 65' Fleming
- Various logs on Nordhavn's website
- Dashew's WIndhorse
- Dahew's "Surviving the Storm" It is specific for the worst waters you will see.
MurrayM
Guru
What's the longest crossing? If it's North America to Hawaii then a circumnavigation by sea kayak should be possible by a suitably motivated individual, because Ed Gillette did it...solo...before GPS. Viking longboats got around a bit too. Bigger isn't necessarily better ")
Last edited:
markpierce
Master and Commander
- Joined
- Sep 25, 2010
- Messages
- 12,557
- Location
- USA
- Vessel Name
- Carquinez Coot
- Vessel Make
- penultimate Seahorse Marine Coot hull #6
I'm thinking about crossing the Pacific, using my 'coastal trawler'. Right now I'm thinking just once, one way and the shortest practical route at the best times of the year for each sector. If you do even just a little bit of a bit of research you will come to agree with Beebe's figure for range: 2400nm is enough. Unless you plan on getting lost or driving in circles.
Will you be able to take advantage of favorable currents?
Tad Roberts
Guru
110 degrees in my Krogen 42, according to their specs. I hope to never prove that.
I really doubt that...It's possible, but unlikely. I'll believe it if whoever did the calculations inclined the boat to establish a real life VCG (not a guesstimate) and measured floatation to establish real life displacement. The difference in stability between full and empty tanks will also be substantial.
Most average "trawler yachts" will run out of positive stability at between 70 and 80 degrees heel. A few years back I did studies of a DD44 and Nordhavn 55 and that was the conclusion.
The good news is that heeling more than about 50 degrees is very rare in modern motor yacht cruising. The exception being in bar crossing situations. When was the last time you heard of a motor yacht being capsized by a wave? Downflooding is the greater danger, via broken windows or open vents.
Will you be able to take advantage of favorable currents?
Brian Should have favorable currents with the exception of right at the equator. Since he is heading to OZ and leaving maybe from MX, he'll be in the NE trades after he leaves NA but with most of his time in the SE trades. The main cause of surface currents is the direction of the winds, which the majority of the time, will be aft of the beam. There's a reason his most likely trip is referred to as the Coconut Milk Run.
A good book for passage planning is Jimmy Cornell's, World Cruising Routes. He gets in to good discussions of over 500 routes around the word, which include the best time of year, currents, weather, etc.
- Joined
- Mar 17, 2012
- Messages
- 4,280
- Location
- Australia
- Vessel Name
- Insequent
- Vessel Make
- Ocean Alexander 50 Mk I
Last year, in Panama, we watched a 49' Defever get ready to go via the Galapagos. He was doing stability tests with 10-55 gallon drums lashed on board. He wanted the extra fuel capacity. We know of a 53' Selene leaving this spring also from Panama. When are you leaving?
Larry
Undecided on departure date, there are no deadlines to meet. First will be some shakedown cruises in the PNW this coming Spring and Summer. Once I'm happy with all the new systems - which is pretty much everything - then if its still a reasonable time of the year to head to San Fran I'll do that to get a taste for what the trip might be like. Plan B is Dockwise ex: Costa Rica. Or I could wait another year, and visit SE Alaska in the interim.
I'm not keen on lashing a lot of drums of fuel on board. I have 5000 litres in my new, enlarged tanks. I'll have the range - but don't know the speed yet...
. If speed is a bit low after sea trials/cruising tests then I'll add temporary fuel, but in bladders.- Joined
- Mar 17, 2012
- Messages
- 4,280
- Location
- Australia
- Vessel Name
- Insequent
- Vessel Make
- Ocean Alexander 50 Mk I
Many "coastal" vessels venture far offshore for fishing, fun and deliveries. It sounds like a wonderful experience to work your through the various issues and planning.
Five reads that are current, if you've not done so:
I'd guess you already have talked directly with experienced Pacific voyagers for tips, hints and reality checks? Storm windows, necessary fuel, no schedule and good weather routing via weather fax and SSB will help fill out the list. The worst part of the trip may well be the West Coast of the US. After all the work you've done, you should have a very good feel for the vessel's soundness and range. Maybe a trip to Barkley Sound will help get you, crew and your vessel tested.
- Brian Calvert's blog for his crossing from NA to Australia on his 48' Selene. Communicate with Brian, he is very open.
- Tony Athen's trips across both Pacific and Atlantic on 65' Fleming
- Various logs on Nordhavn's website
- Dashew's WIndhorse
- Dahew's "Surviving the Storm" It is specific for the worst waters you will see.
I've only read part of these - thanks for the list. I definitely want some miles logged in PNW before leaving.
- Joined
- Mar 17, 2012
- Messages
- 4,280
- Location
- Australia
- Vessel Name
- Insequent
- Vessel Make
- Ocean Alexander 50 Mk I
Will you be able to take advantage of favorable currents?
Definitely, and likely wind as well. The plan is to travel when and where I get the benefits but to assume zero benefit for trip planning in order to have a bit extra margin.
- Joined
- Mar 17, 2012
- Messages
- 4,280
- Location
- Australia
- Vessel Name
- Insequent
- Vessel Make
- Ocean Alexander 50 Mk I
Most average "trawler yachts" will run out of positive stability at between 70 and 80 degrees heel. A few years back I did studies of a DD44 and Nordhavn 55 and that was the conclusion.
The good news is that heeling more than about 50 degrees is very rare in modern motor yacht cruising. The exception being in bar crossing situations. When was the last time you heard of a motor yacht being capsized by a wave? Downflooding is the greater danger, via broken windows or open vents.
Tad
I'll likely try and find you in a few months, to engage you to do an inclining test for me. And to look hard at my plans for window protection, which is not getting done at present.
But one thing I will grapple with right now is the inlet and outlet engine room ventilation openings. They are 24.5" x 6.5", four in total and about 3' above waterline and 1' below the shear. I'm contemplating a flap or 'check valve' on the outflow vents at the rear. For intakes, I'm thinking of a manually operated closure that is set if weather is poor, and then locking the engine room access door open for air intake from the master stateroom. A bit noisy, perhaps a bit of unwanted heat but it should not be needed very often. I would still be vulnerable to a rogue wave knockdown. But I cant conceive an automatic shutter for the intake vent.
Last edited:
markpierce
Master and Commander
- Joined
- Sep 25, 2010
- Messages
- 12,557
- Location
- USA
- Vessel Name
- Carquinez Coot
- Vessel Make
- penultimate Seahorse Marine Coot hull #6
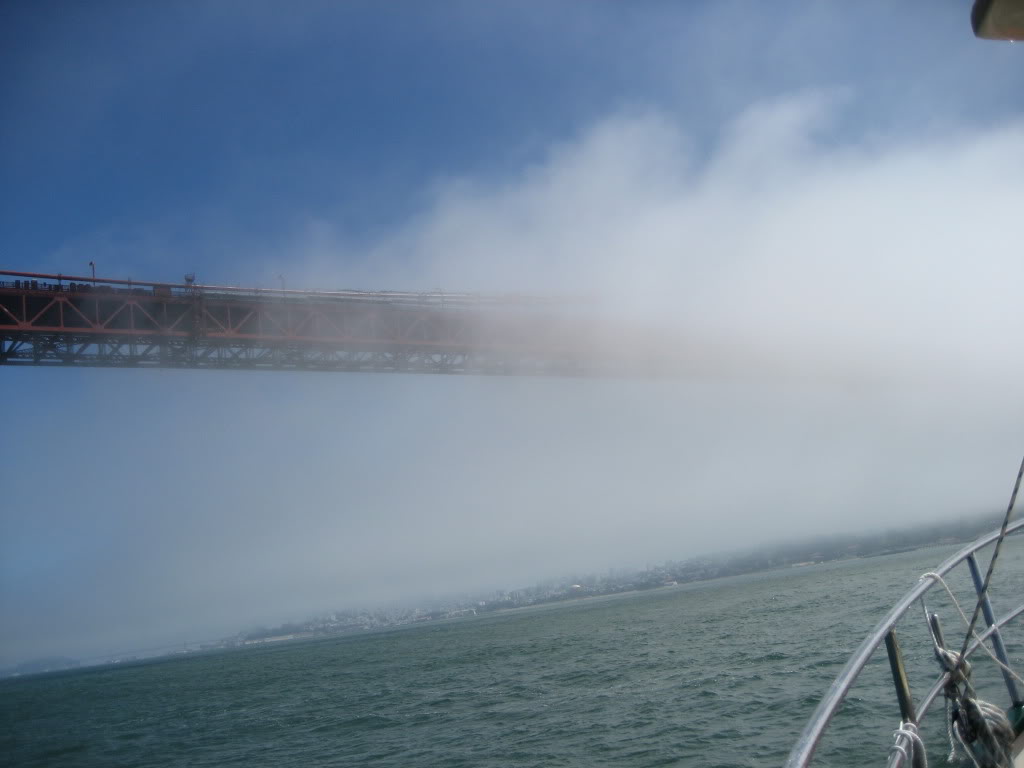
... then if its still a reasonable time of the year to head to San Fran ..
Open your Golden Gate!
Tad Roberts
Guru
Tad
I'll likely try and find you in a few months, to engage you to do an inclining test for me. And to look hard at my plans for window protection, which is not getting done at present.
But one thing I will grapple with right now is the inlet and outlet engine room ventilation openings. They are 24.5" x 6.5", four in total and about 3' above waterline and 1' below the shear. I'm contemplating a flap or 'check valve' on the outflow vents at the rear. For intakes, I'm thinking of a manually operated closure that is set if weather is poor, and then locking the engine room access door open for air intake from the master stateroom. A bit noisy, perhaps a bit of unwanted heat but it should not be needed very often. I would still be vulnerable to a rogue wave knockdown. But I cant conceive an automatic shutter for the intake vent.
Brian,
Don't think I'm turning down work cause I'm not, but I can pretty much talk you through doing your own inclining. As this is (I'm assuming) for your information rather than any regulatory agency, there's no real reason for me to witness it. It's a simple mechanical procedure that provides part of the information to establish real stability figures.
To create a stability curve showing righting arm lengths at various heel angles we also need flotation measurements and the hull lines.
Storm windows can be various materials, light aluminum plate works nicely, plywood (cheap) and plexiglass (expensive) are often used, some of the new sheet plastics would work as well. One method of fastening is to epoxy nuts in place (either flush or proud) and just thread bolts through your cover and into the nut. Other folks have used posts or brackets around the edge with a latch of some sort(a bit ugly).
Are the engine vents in the house or the bulwark? Any chance of building outside extensions on them to raise the downflooding angle? You could fit bolt on covers for them just like the storm windows.
markpierce
Master and Commander
- Joined
- Sep 25, 2010
- Messages
- 12,557
- Location
- USA
- Vessel Name
- Carquinez Coot
- Vessel Make
- penultimate Seahorse Marine Coot hull #6
The over-built Coot has provision for storm windows, but screwing them down probably would strip paint in the screw holes, requiring touch-up paint to prevent corrosion.
I ought to query the builder to find out the proper screw/bolt size.
I ought to query the builder to find out the proper screw/bolt size.
Last edited:
- Joined
- Mar 17, 2012
- Messages
- 4,280
- Location
- Australia
- Vessel Name
- Insequent
- Vessel Make
- Ocean Alexander 50 Mk I
Brian,
Don't think I'm turning down work cause I'm not, but I can pretty much talk you through doing your own inclining. As this is (I'm assuming) for your information rather than any regulatory agency, there's no real reason for me to witness it. It's a simple mechanical procedure that provides part of the information to establish real stability figures.
To create a stability curve showing righting arm lengths at various heel angles we also need flotation measurements and the hull lines.
Storm windows can be various materials, light aluminum plate works nicely, plywood (cheap) and plexiglass (expensive) are often used, some of the new sheet plastics would work as well. One method of fastening is to epoxy nuts in place (either flush or proud) and just thread bolts through your cover and into the nut. Other folks have used posts or brackets around the edge with a latch of some sort(a bit ugly).
Are the engine vents in the house or the bulwark? Any chance of building outside extensions on them to raise the downflooding angle? You could fit bolt on covers for them just like the storm windows.
Tad - if you are too busy that's fine. Lets see in a couple of months.
On my 'to do' list is to measure the hull lines .... Doesn't seem too difficult, just a bit painstaking so I'm procrastinating.
I think for the big saloon windows some aly plate with a stiffener or two would be good. Nuts epoxied in place would be fine, and they could have a short bolt in them to keep thread clean when not in use. They might also be able to be used for fixing sun shades in place.
For the pilothouse windows I had in mind a two part solution. First replacing with thicker laminated glass and second being able to fit a removable bracket that has a 4-6" pressure pad in the center of the window that can be tensioned up to a suitable level. It would absorb deflection of the glass when hit by a wave.
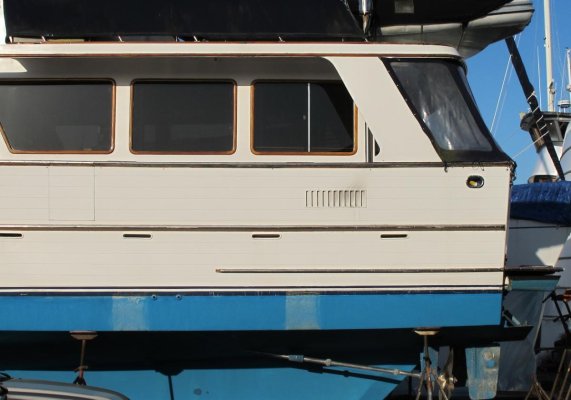
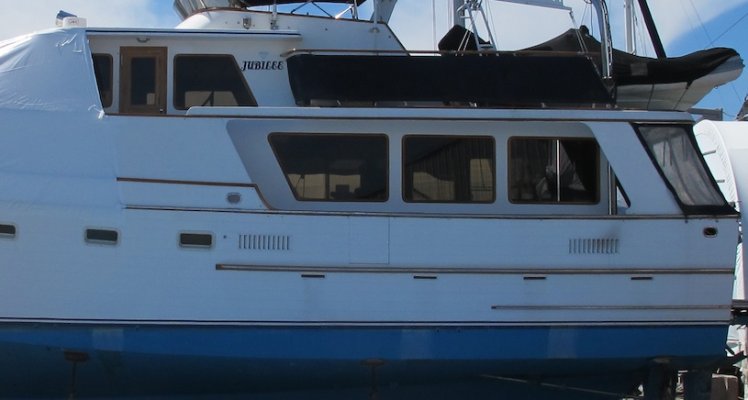
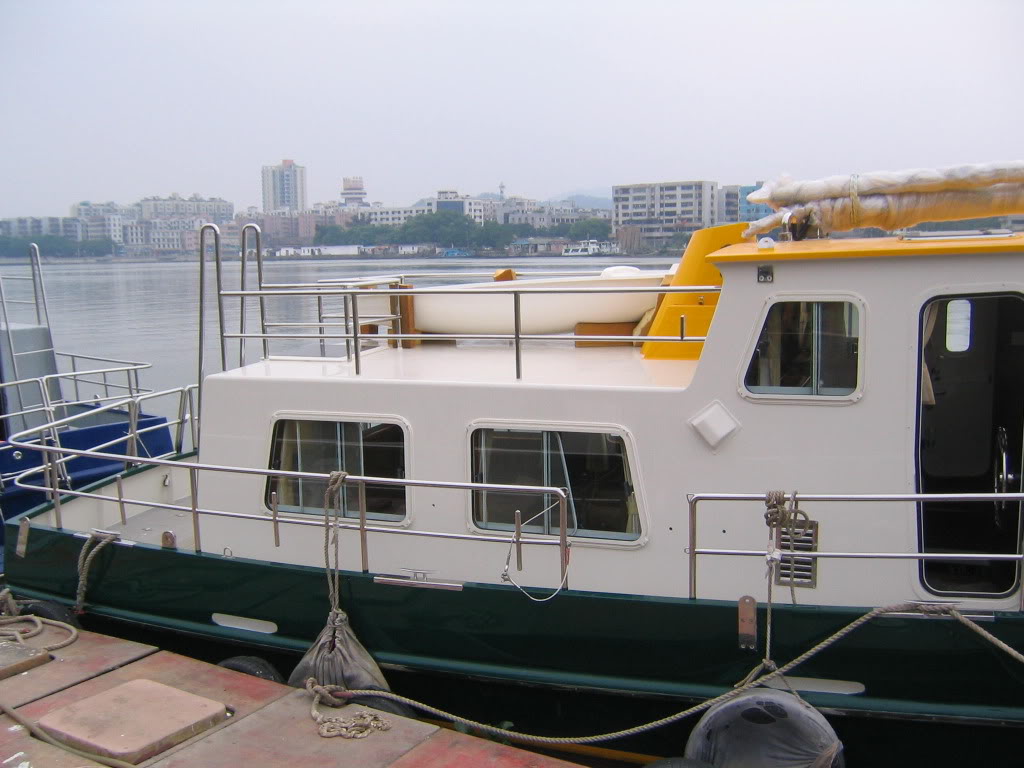
My engine vents are in the bulwark, not easy to extend in an elegant way at least. See pic. I could seal those and have the openings on the inside, along the deck walkway, or even on the portuguese bridge wraparound, near the pilothouse door for the intake vent. That way the shear has to be submerged to get flooding. Maybe I should have a cover plate that can be used to cover the walkway side openings for normal use, and for bad weather reposition those cover plates onto the outside vent openings.
Attachments
Last edited:
Phil Fill
Guru
- Joined
- Oct 11, 2007
- Messages
- 2,919
- Location
- US
- Vessel Name
- Eagle
- Vessel Make
- Roughwater 58 pilot house
Stabilization might be needed more the last leg of the trip when the boat is the lightest and the tanks are empty. Estimate 5 to 10,000 lbs less at or below the center of gravity. However, it is my believe a boat should be stable with out stabilizers, which most pleasure boats are not. Many blue water sail boats and power boat do not have stabilization. Stabilization makes the ride more comfortable, decrease the angle of the roll, but does NOT increase the boats stability. For a blue water better to increase the boat stability, than to add stabilization.
Flooding maybe more of a concern than max roll angle. Vents and/or ports should be water tight and/or high above the water line. Large windows should be strong and/or additional protected from the out side. Every winter I screw/fasten 3/8” plexaglass to the salon windows teak wood frame with weather stripping to keep the rain off the windows and reduce the air draft, so they are air/water tight.
Most ocean crossing vessels have a rounded stern, so the following seas will pass around/under the hull with no or slotted swim deck the water can pass through. The stern should have reasonable size scuppers to take away/ drain the deck. The helm/pilot house should be protected by a high bow, Portuguese bridge and/or back toward the stern. The ride is better if the pilot house/helm is low and/or back toward the stern.
Range of 2,400 NM if crossing the Pacific is a concern. Not many motor boats under 60 ft have the range, so additional fuel would have to be carried. The fuel should be stored low, secure so it does not effect the stability. There should be back up for major systems, engines/get home, electronics, gen sets, sanitation, refrigeration, bilge pumps, water etc. Most boats do not have the redundancy and back up.
Like I said the first step for me is to get weaned away from the dock.
FF
Guru
- Joined
- Oct 12, 2007
- Messages
- 22,552
Few trawler style boats will worry about being knocked over.
Its that big wave flopping on the deck and smashing into the PH that is a worry.
Its that big wave flopping on the deck and smashing into the PH that is a worry.
sunchaser
Guru
- Joined
- Apr 9, 2008
- Messages
- 10,196
- Location
- usa
- Vessel Name
- sunchaser V
- Vessel Make
- DeFever 48 (sold)
I've only read part of these - thanks for the list. I definitely want some miles logged in PNW before leaving.
The reason I suggest going to Barkley Sound Via Straits of Juan de Fuca is it is more akin to doing the West Coast run south as to compared to the usually more benign conditions through the inner channels. Once you make it to Barkley, you can then decide if you want to go further North on the outside to test the boat and crew and end up at the Cape Scott juncture across Queen Charlotte Sound into the inner channels.
A great blog site in this regard is James Hamilton's first major ride North in his new, at that time, N52. He said "lets see what it can do" and went straight up the outside from Seattle to Prince William Sound. He and his N52 are now in Hawaii. Hamilton's cruising guides for the lesser known parts of the PNW are quite good.
sunchaser
Guru
- Joined
- Apr 9, 2008
- Messages
- 10,196
- Location
- usa
- Vessel Name
- sunchaser V
- Vessel Make
- DeFever 48 (sold)
Few trawler style boats will worry about being knocked over.
Its that big wave flopping on the deck and smashing into the PH that is a worry.
A big following sea and losing rudder control is more of a concern IMHO. Storm windows and/or thicker glass can alleviate the points you bring up.
Tad Roberts
Guru
Tad - if you are too busy that's fine. Lets see in a couple of months.
On my 'to do' list is to measure the hull lines .... Doesn't seem too difficult, just a bit painstaking so I'm procrastinating.
Not difficult at all, just requires a bit of care. You need a string that's longer than the boat, some painters masking tape, 25' tape measure, a medium length carpenters level, sharpi marker, plumb bob, and a clipboard with pen and paper. A nice tool is a self-leveling cross-line laser level. Some places rent these or you can buy one for about $150 plus a mounting pole. A nice afternoon and a willing helper....you're set.
On your boat you have two surfaces to measure, the bottom (horizontal) and the topsides and bow (vertical). Two separate methods are used. The string is stretched out tight parallel to the keel at 18" off centerline on the side you will measure (only do one side of the boat). It can be at any height that's convenient but at least 10-12" below the hull bottom. Use the tape to mark stations every 2.5' or 3' from bow to stern. Mark those stations "A" through whatever.
The string is your "base" line and positioned at "base" vertical height. You will measure everything relative to the baseline and base height. I usually set up level planks or blocking beyond the ends of the boat and just drive some nails in these to tie the string to. The base string will move outboard in even increments (say 12 or 18") after each buttock line measurement.
So to start the measuring you work along your base string from one end to the other, taking measurements from the string (baseline) up vertically to the hull surface and recording them (this is part of the reason for the helper). The hand level or plumb bob are used in conjunction with the tape measure to get a vertical measurement. If you like you can mark the stations on the hull using the hand level, eyeball, and sharpi.
Do three or four buttock lines in this way, moving the base string outboard after each series of measurements along the boat. The last series of bottom measurements will be of the chine or chines. Use the plumb bob to get widths of the chine from your base line, and then have the helper hold the tape on the chine while you use the level to get chine height above base.....
Then switch to horizontal measure mode. In this case the string moves vertically outside the boat (still parallel with the keel line) in steps that represent waterlines. Using the level and tape measure from the string to hull surface at each station and work your way up to the sheer. Again use the plumb bob held by your helper along the sheer to get width and height from the base line. The topsides is where the cross line laser is nice, it projects a line of light horizontally (waterline) and vertically (base line) at the same time. Due to the hull curve you need to set it up twice, beyond the bow and stern, and raise it in increments just like the string.
That's a start.......
You still need an emergency cover if the window is blown out. The usual thing is an aluminum plate with a small cutout to look through. The hole can be pretty small, say 5" by 8" and you can still see, depending on how close you can get to the window. Use a piece of paper or cardboard to check.For the pilothouse windows I had in mind a two part solution. First replacing with thicker laminated glass and second being able to fit a removable bracket that has a 4-6" pressure pad in the center of the window that can be tensioned up to a suitable level. It would absorb deflection of the glass when hit by a wave.
Higher and closer to the centerline is better. If they can go inside the bulwark and higher that's better than where they are. Downside is hot air/noise coming out into the cockpit which may be nasty.My engine vents are in the bulwark, not easy to extend in an elegant way at least. See pic. I could seal those and have the openings on the inside, along the deck walkway, or even on the portuguese bridge wraparound, near the pilothouse door for the intake vent. That way the shear has to be submerged to get flooding. Maybe I should have a cover plate that can be used to cover the walkway side openings for normal use, and for bad weather reposition those cover plates onto the outside vent openings.
markpierce
Master and Commander
- Joined
- Sep 25, 2010
- Messages
- 12,557
- Location
- USA
- Vessel Name
- Carquinez Coot
- Vessel Make
- penultimate Seahorse Marine Coot hull #6
My (louvered) engine vents are on the pilothouse sides. I suppose a thin, bottomless "boxes" could be installed to reduce possible water entering during heavy seas.
magicbus
Senior Member
- Joined
- Nov 14, 2010
- Messages
- 460
It is interesting that your air intakes are located outboard and not inboard along the existing walkaround.
Dave
Dave
caltexflanc
Guru
Just scanned this thread, didn't notice mention on Ben Gray and his Diesel Duck that pulled it off a few years ago, using an unusual route;
Home
Home
Tidahapah
Guru
- Joined
- Oct 7, 2007
- Messages
- 1,859
- Location
- Australia
- Vessel Name
- Flora
- Vessel Make
- Timber southern cray boat
Guys,
I have made a copy of Jims book Nordlys around the world.
It is 92 PDF pages so a bit big to transport electronically.
I could probably put it on disc and post it out or does anyone know a way to reduce the size of the files to send it electronically.
Cheers
benn
I have made a copy of Jims book Nordlys around the world.
It is 92 PDF pages so a bit big to transport electronically.
I could probably put it on disc and post it out or does anyone know a way to reduce the size of the files to send it electronically.
Cheers
benn
- Joined
- Mar 17, 2012
- Messages
- 4,280
- Location
- Australia
- Vessel Name
- Insequent
- Vessel Make
- Ocean Alexander 50 Mk I
Not difficult at all, just requires a bit of care. You need a string that's longer than the boat, some painters masking tape, 25' tape measure, a medium length carpenters level, sharpi marker, plumb bob, and a clipboard with pen and paper. A nice tool is a self-leveling cross-line laser level. Some places rent these or you can buy one for about $150 plus a mounting pole. A nice afternoon and a willing helper....you're set.
On your boat you have two surfaces to measure, the bottom (horizontal) and the topsides and bow (vertical). Two separate methods are used. The string is stretched out tight parallel to the keel at 18" off centerline on the side you will measure (only do one side of the boat). It can be at any height that's convenient but at least 10-12" below the hull bottom. Use the tape to mark stations every 2.5' or 3' from bow to stern. Mark those stations "A" through whatever.
The string is your "base" line and positioned at "base" vertical height. You will measure everything relative to the baseline and base height. I usually set up level planks or blocking beyond the ends of the boat and just drive some nails in these to tie the string to. The base string will move outboard in even increments (say 12 or 18") after each buttock line measurement.
So to start the measuring you work along your base string from one end to the other, taking measurements from the string (baseline) up vertically to the hull surface and recording them (this is part of the reason for the helper). The hand level or plumb bob are used in conjunction with the tape measure to get a vertical measurement. If you like you can mark the stations on the hull using the hand level, eyeball, and sharpi.
Do three or four buttock lines in this way, moving the base string outboard after each series of measurements along the boat. The last series of bottom measurements will be of the chine or chines. Use the plumb bob to get widths of the chine from your base line, and then have the helper hold the tape on the chine while you use the level to get chine height above base.....
Then switch to horizontal measure mode. In this case the string moves vertically outside the boat (still parallel with the keel line) in steps that represent waterlines. Using the level and tape measure from the string to hull surface at each station and work your way up to the sheer. Again use the plumb bob held by your helper along the sheer to get width and height from the base line. The topsides is where the cross line laser is nice, it projects a line of light horizontally (waterline) and vertically (base line) at the same time. Due to the hull curve you need to set it up twice, beyond the bow and stern, and raise it in increments just like the string.
That's a start.......
You still need an emergency cover if the window is blown out. The usual thing is an aluminum plate with a small cutout to look through. The hole can be pretty small, say 5" by 8" and you can still see, depending on how close you can get to the window. Use a piece of paper or cardboard to check.
Higher and closer to the centerline is better. If they can go inside the bulwark and higher that's better than where they are. Downside is hot air/noise coming out into the cockpit which may be nasty.
Thanks for your comments and directions Tad. I will return to the boat in early March and get busy then!
- Joined
- Mar 17, 2012
- Messages
- 4,280
- Location
- Australia
- Vessel Name
- Insequent
- Vessel Make
- Ocean Alexander 50 Mk I
Guys,
I have made a copy of Jims book Nordlys around the world.
It is 92 PDF pages so a bit big to transport electronically.
I could probably put it on disc and post it out or does anyone know a way to reduce the size of the files to send it electronically.
Cheers
benn
its very difficult to reduce the size of a pdf. If scanning, set a low resolution and if given options do black & white, text only. Test some settings first. If converting text files to pdf there is less flexibility but that works well where there are few pictures.
The other option is to upload it onto a site designed for file sharing. There are various business oriented solutions, but I've not used them. I'll pm you my address, if you can post it that's great.
Northern Spy
Guru
- Joined
- Feb 5, 2012
- Messages
- 4,075
- Location
- Canada
- Vessel Name
- Northern Spy
- Vessel Make
- Nordic Tug 26
Guys,
I have made a copy of Jims book Nordlys around the world.
It is 92 PDF pages so a bit big to transport electronically.
I could probably put it on disc and post it out or does anyone know a way to reduce the size of the files to send it electronically.
Cheers
benn
Adobe X Pro has a function in which you can save as a "small" pdf.
Similar threads
- Replies
- 1
- Views
- 476
- Replies
- 39
- Views
- 2K
Latest posts
-

-

-

-
-
 Dedicated autopilot control or operate with MFD?
- Latest: HeadedToTexas
-
-

-
-
-