OP
OP
Waterant
Senior Member
Genuine vs OEM
Just an update on this rebuild.
The camshaft is in the shop, waiting to be polished.
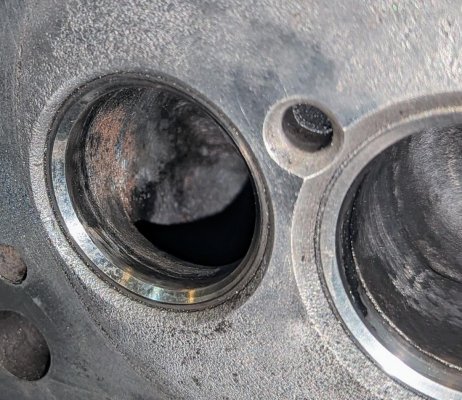
The crankshaft had a couple of main channels damaged by the corrosion. The shop suggested grinding 0.5mm out to remove those imperfections. There are just a few dips, and one option was to polish and use them as is, but the machinist said those dips would eat new main bearings much faster than a perfectly smooth surface, so i opted for grinding and ordered a new 0.5 US main bearings. It's kind of scary. What if they grind too much? i guess i have to trust other people with my things at some point. There is one more size for main bearings (1.00 US) but i really do not want to order another set.
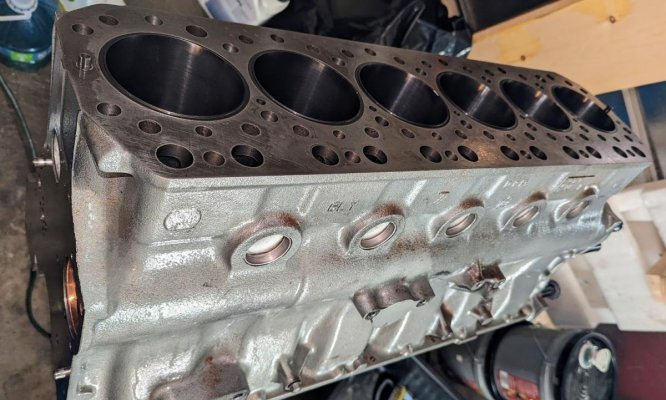
New sleeves are in the cylinders. I cleaned the sleeves and cylinders with Varsol and brake cleaner until the towels came out clean. I put the sleeves into the freezer overnight and installed them the next morning without much force. I will measure the inside diameters and protrusion to see if they match the specs in the next few days.
Assembled, tested and adjusted injectors came from the shop. At first, they scared me, claiming many Yanmar parts from Asia are fake even if they appear in the original packaging and are sealed. It would be a huge bummer, but later they confirmed new nozzles are genuine Yanmar, so this is good news.
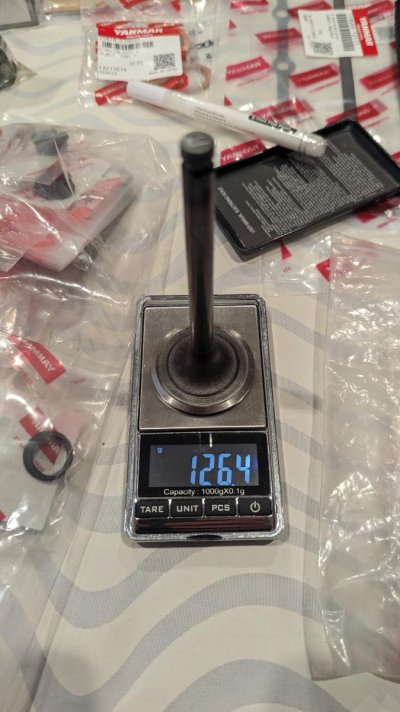
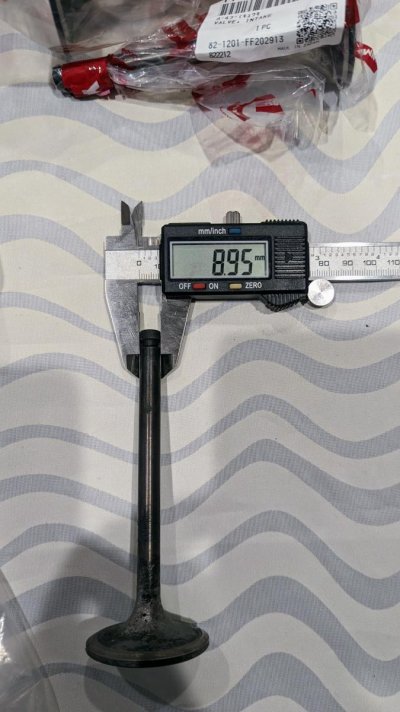
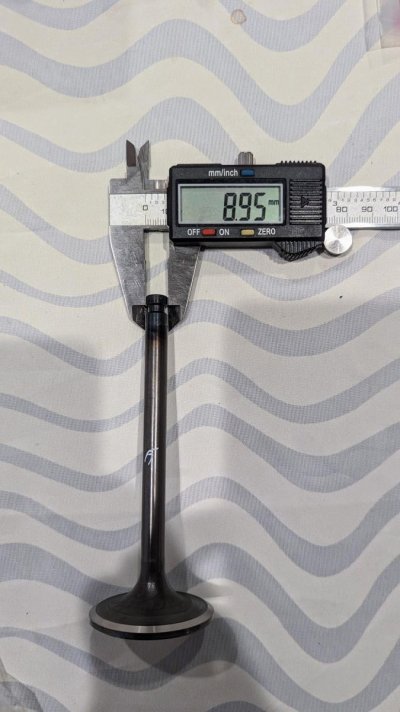
I compared Genuine and "OEM" exhaust valves to see if OEM is truly the same part from the same factory but without Yanmar packaging.
.. short answer - they are not.
Price from this supplier:
119593-11110, EXHAUST VALVE
Genuine from US supplier: $123
Genuine from Asian supplier: $70
OEM from Asian supplier: $20
And there are 6 of them in each engine.
The similar difference for intake valves so, if OEM is usable, it will save a few $$ on the rebuild.
Packaging:
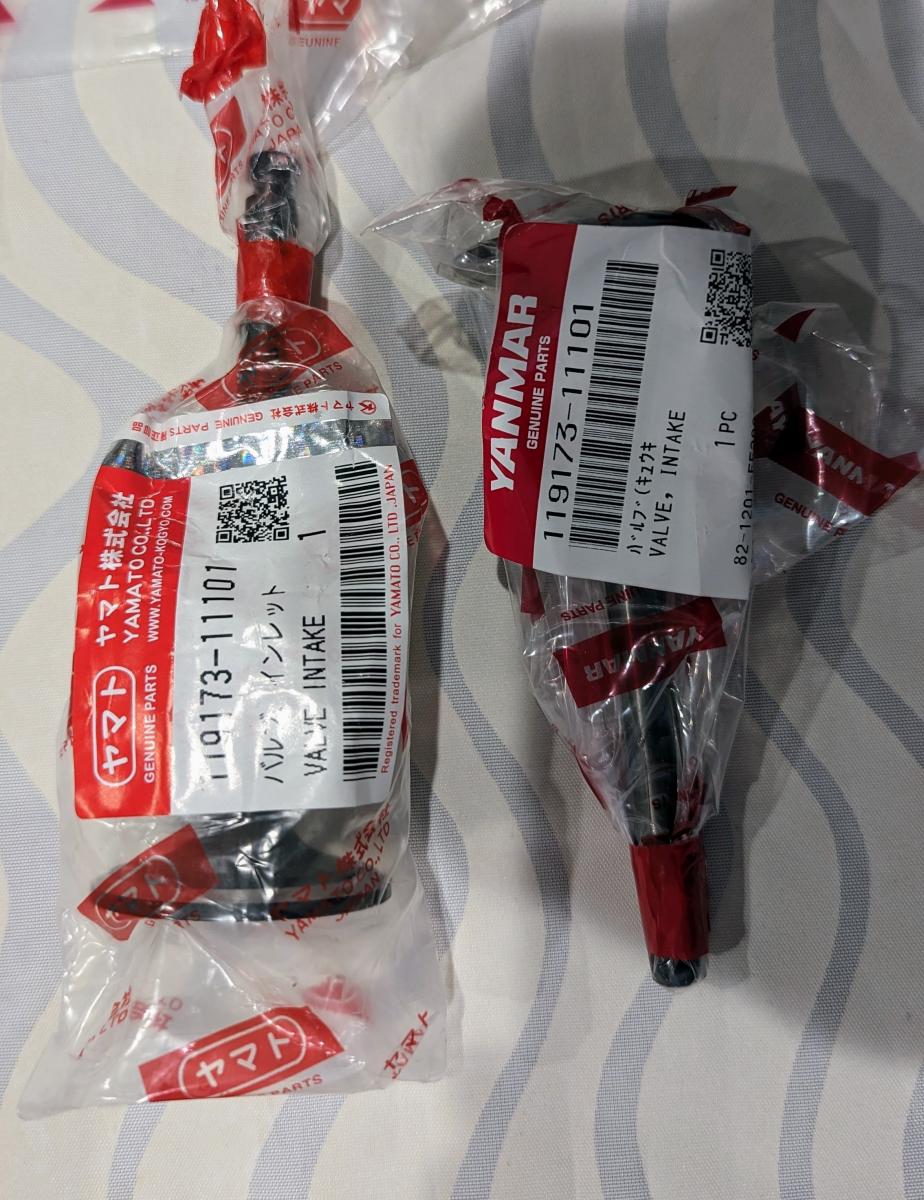
Original:

OEM:

Genuine:

Original:
OEM:
Genuine:
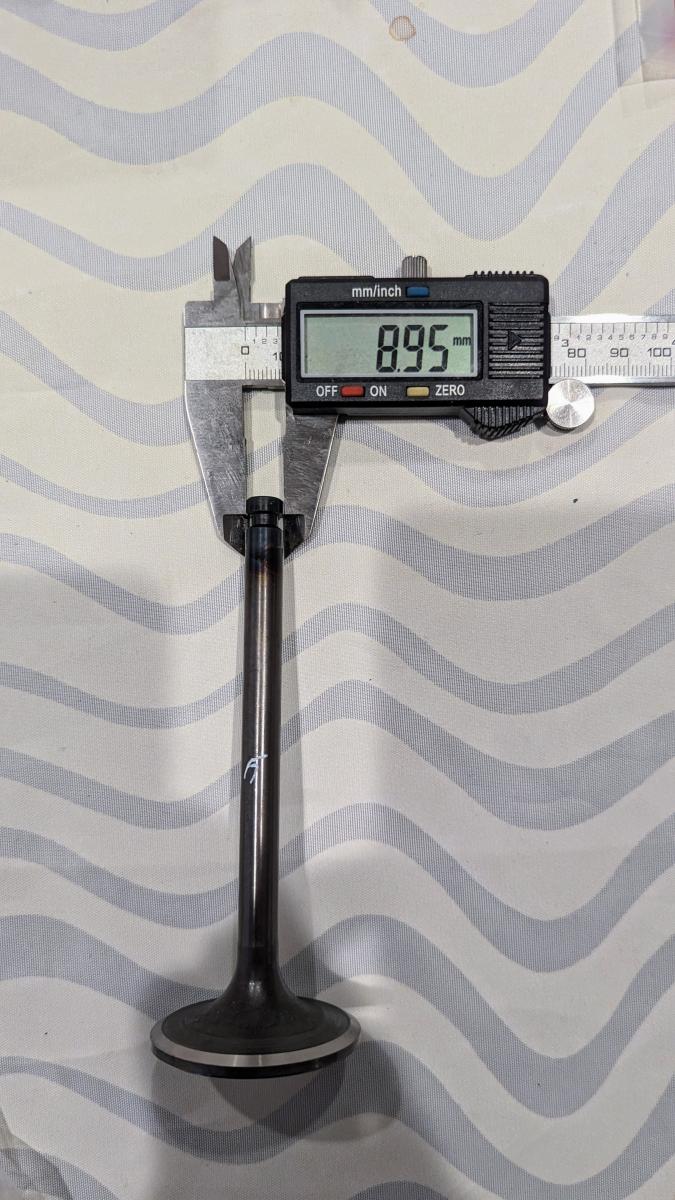
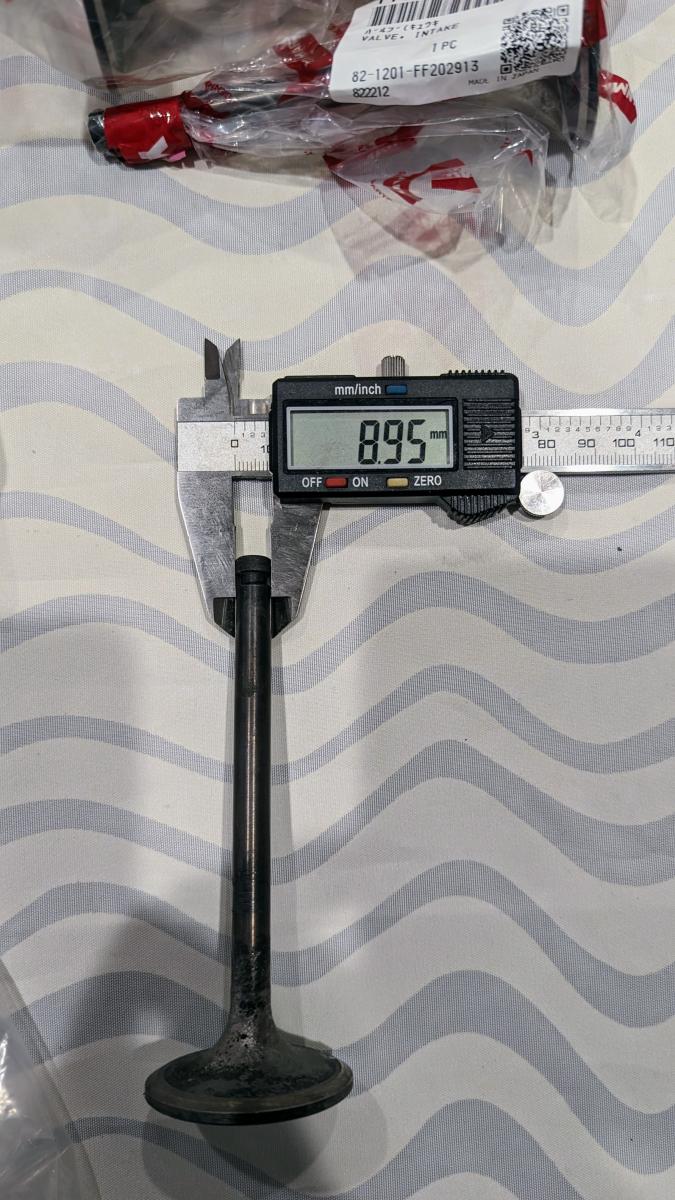
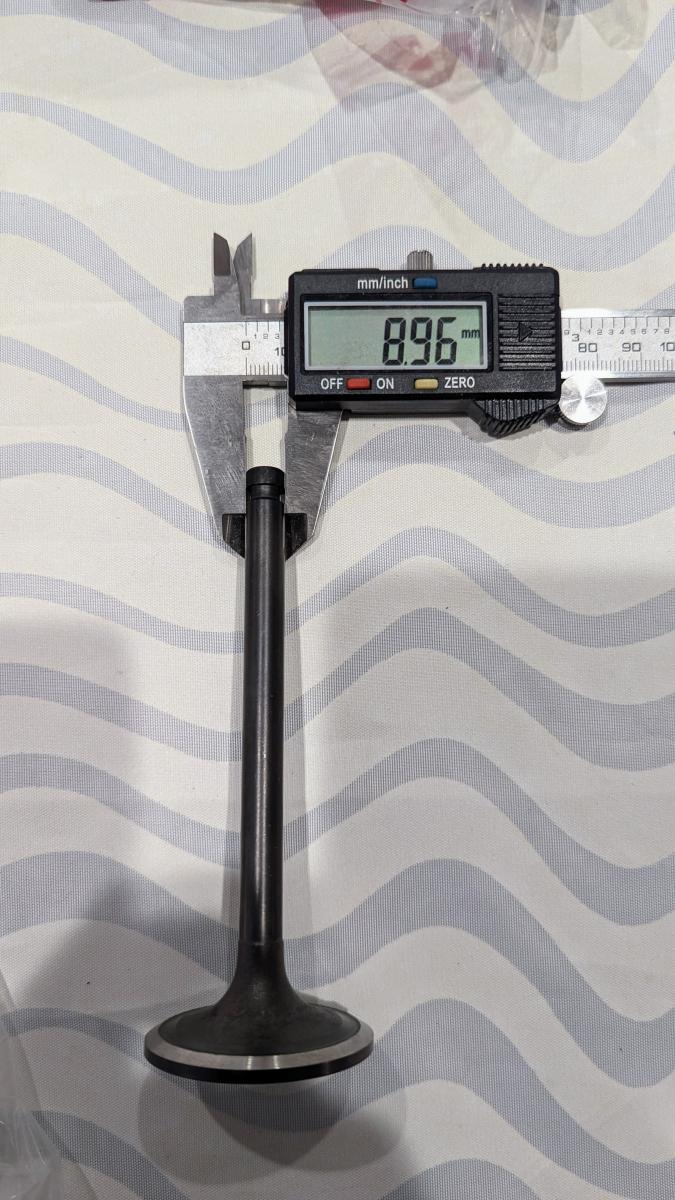
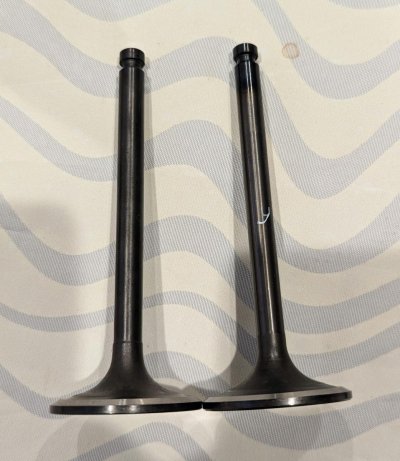
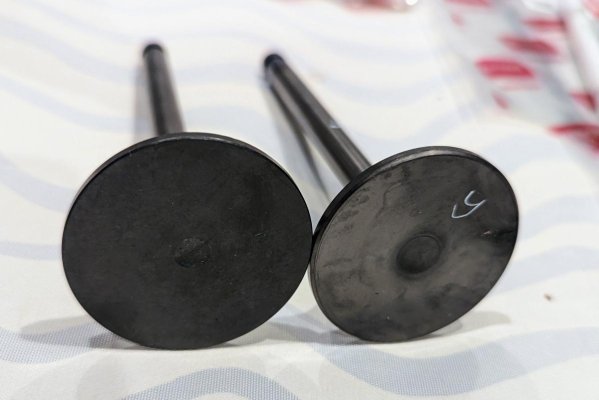
Side view (genuine is on the right):

Front view (genuine is on the right):

so, the OEM is not the same as genuine, and the difference is enough for me not to mess with OEM, but it may work fine with significant cost savings.
I hope it helps someone.
Just an update on this rebuild.
The camshaft is in the shop, waiting to be polished.
The crankshaft had a couple of main channels damaged by the corrosion. The shop suggested grinding 0.5mm out to remove those imperfections. There are just a few dips, and one option was to polish and use them as is, but the machinist said those dips would eat new main bearings much faster than a perfectly smooth surface, so i opted for grinding and ordered a new 0.5 US main bearings. It's kind of scary. What if they grind too much? i guess i have to trust other people with my things at some point. There is one more size for main bearings (1.00 US) but i really do not want to order another set.
New sleeves are in the cylinders. I cleaned the sleeves and cylinders with Varsol and brake cleaner until the towels came out clean. I put the sleeves into the freezer overnight and installed them the next morning without much force. I will measure the inside diameters and protrusion to see if they match the specs in the next few days.
Assembled, tested and adjusted injectors came from the shop. At first, they scared me, claiming many Yanmar parts from Asia are fake even if they appear in the original packaging and are sealed. It would be a huge bummer, but later they confirmed new nozzles are genuine Yanmar, so this is good news.
I compared Genuine and "OEM" exhaust valves to see if OEM is truly the same part from the same factory but without Yanmar packaging.
.. short answer - they are not.
Price from this supplier:
119593-11110, EXHAUST VALVE
Genuine from US supplier: $123
Genuine from Asian supplier: $70
OEM from Asian supplier: $20
And there are 6 of them in each engine.
The similar difference for intake valves so, if OEM is usable, it will save a few $$ on the rebuild.
Packaging:
Original:
OEM:
Genuine:
Original:
OEM:
Genuine:
Side view (genuine is on the right):
Front view (genuine is on the right):
so, the OEM is not the same as genuine, and the difference is enough for me not to mess with OEM, but it may work fine with significant cost savings.
I hope it helps someone.
Attachments
-
 packaging.jpg165.9 KB · Views: 206
 -
 original-weight.jpg75.6 KB · Views: 204
 -
 OEM-weight.jpg112.4 KB · Views: 203
 -
 Genuine-weight.jpg109.6 KB · Views: 200
 -
 original_shaft.jpg127.5 KB · Views: 197
 -
 oem_shaft.jpg121.2 KB · Views: 195
 -
 yanmar_shaft.jpg117.8 KB · Views: 205
 -
 side_view.jpg191.7 KB · Views: 194
 -
 front_view.jpg68.7 KB · Views: 196
Last edited:


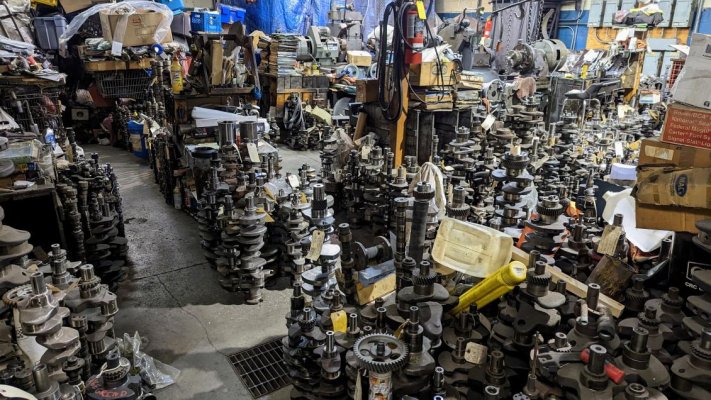
 no wonder he has a gazillion of cranks waiting.