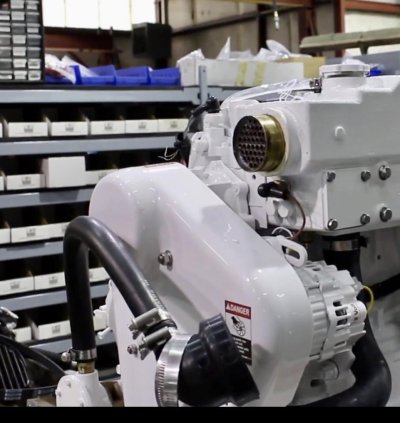
Northern Lights 6KW heat exchanger cleaning

The friendliest place on the web for anyone who enjoys boating.
If you have answers, please help by responding to the unanswered posts.

DFlucker

Member
Joined
Jan 8, 2013
Messages
6
Location
Canada
Vessel Name
Chantilly Lace
Vessel Make
Morgan 36
My impeller is in pieces so I have replaced it with a new one. I would like to pull out the heat exchanger tube but in the sound enclosure there is not enough room. I am wondering if I could clean out the tubes with it in place. any thoughts. I know now to replace the impeller every year.
 
If all you’re trying to do is clear the heat exchanger bundle of impeller bits, you do not have to take it out, you only need to access the end closest to the raw water pump.

To do that, you need to first drain at least 1/2 the antifreeze, then remove the double clamped “cap” from the end closest to the raw water pump.

Ken
 
If you can get the hose to it a shop vac may suck the pieces out.
 
blow back through the heat exchanger and collect the pieces. Reassemble put the antifreeze back in or take time to put in new antifreeze, bleed the system, start the generator and bleed until no more bubbles. To be sure, run it for a while bleed again.
 
Changed the impeller. cleaned out the heat exchanger end. Lots of impeller pieces. Cleaned and checked the anti-siphon valve. New antifreeze and bled the system. It started up OK but shut down again after 5 minutes. Won't start without glow plugs engaged. I am thinking possibly a faulty selinoid?
 
Generators usually have a safety circuit that includes oil pressure, coolant temp, and exhaust temp. When you press the start button, it bypasses the sensors. One of the sensors could be failing. You might not be getting enough water out the exhaust and the safety is shutting it off. Make sure there aren't other blockages that are reducing the water flow. Some engines are wired to always use the glow plugs when starting.
 
I have told there is an error fault light flashing sequence .... maybe on your NL gen but not on my NL 6KW gen.
 
You don’t need to remove the tube bundle. Remove the rubber boot from the tube bundle/heat exchanger at the front end by the raw water pump. Drain the antifreeze and shut off the raw water. There are two hose lamps. Remove those and and the black rubber boot and the missing impeller bits/parts will be at the face of the tubes.
 
I might be missing something particular to the NL heat exchanger but why would you need to drain the coolant to clean the tube bundle as long as you aren't removing it? You should only be opening up the raw water side right?
 
I might be missing something particular to the NL heat exchanger but why would you need to drain the coolant to clean the tube bundle as long as you aren't removing it? You should only be opening up the raw water side right?

You are only opening up the raw water side but the tube bundle isn’t gasketed to the heat exchanger The end cap is held on by two clamps. One is for the heat exchanger and the other goes around the tube bundle. This keeps raw water from mixing with your coolant. If you took off both end caps and had the clearance, the tube bundle would just slide out. Here’s a picture of the end cap by the raw water pump taken off and the tube bundle.

If you take off both end caps, make sure you get the tube bundle oriented so the 2 large holes are down at 6 o’clock. That’s in the shop manual.

Good luck with it. :thumb:
 

Attachments

  • 9F580F35-E5E8-4BCB-B013-181E937A8406.jpg
    9F580F35-E5E8-4BCB-B013-181E937A8406.jpg
    90.4 KB · Views: 26
You are only opening up the raw water side but the tube bundle isn’t gasketed to the heat exchanger The end cap is held on by two clamps. One is for the heat exchanger and the other goes around the tube bundle. This keeps raw water from mixing with your coolant. If you took off both end caps and had the clearance, the tube bundle would just slide out. Here’s a picture of the end cap by the raw water pump taken off and the tube bundle.

If you take off both end caps, make sure you get the tube bundle oriented so the 2 large holes are down at 6 o’clock. That’s in the shop manual.

Good luck with it. :thumb:

Great picture and explanation, thank you.
 
Yep it was the elbow totally plugged. Lots of rust. I have ordered a new stainless one 295.00 CDN + 3.95 for the gasket. UPS from Seattle in 3-4 days to BC. How the heck are you supposed to get the bottom inside bolt back in. I gave it a dry run with the old elbow only 1 1/4 inches of room. Any suggestions?
 
Yep it was the elbow totally plugged. Lots of rust. I have ordered a new stainless one 295.00 CDN + 3.95 for the gasket. UPS from Seattle in 3-4 days to BC. How the heck are you supposed to get the bottom inside bolt back in. I gave it a dry run with the old elbow only 1 1/4 inches of room. Any suggestions?

Not sure if I had the exact same issue as you and I forget the specifics however I had to purchase a "sacrificial" box wrench. I took a grinder to it and ground it until it fit. I kept the wrench with the hope of never needing it again. :)
 
Well the new SS elbow arrived this morning. I installed it in about 25 minutes, a little awkward bur got it done. It started up OK But had a small leak on the exhaust hose so shut down and tightened it upI went to start up and no go. Disconnected the sensors one at a time. No go.
Changed all 4 relays no go. It Wil only run with the glow plug switch engaged.What could I be missing?
 
Does it shut down immediately after a cold start, or only after it has warmed up?


There are three safety shutdown switches, all wired in parallel to ground. If any one of the safety switches closes, it grounds the gray wire and shuts down the generator. When the glow plug switch is held on, the safeties are bypassed and ignored, but as soon as you release the switch, they become enabled and will shut down the generator if active. You ca see how this works in the wiring diagram in the manual, which is available from NL online.


To figure out which switch is shutting down the generator, you need to disconnect them one at a time and see if the generator keeps running. The switches are:


Start with the exhaust temp switch. You will have had to move it from the old exhaust elbow to the new elbow, and it might have been damaged in the process. Disconnect one of the white wires and see if the generator will now keep running. If it does, you need to make sure that your exhaust isn't actually overheating, especially since you just trashed an impeller and may not have a fully fixed raw water cooling system. Be careful checking, but when running, the exhaust hose coming off the elbow should be cool to the touch, or at most warm. You should also have good water flow out of the exhaust. If the hose is hot, stop the generator immediately. You have inadequate raw water flow and need to fix it. The safety switch is doing it's job and saving you.


If that isn't the problem, then try the other two switches which are coolant temp and oil pressure. Don't confuse the safety switches with the coolant temp sensor and oil pressure sensor. The safety switches both have a gray wire on them. If either is stopping the engine then you need to figure out if you have a real overheat or low oil pressure problem. But since you have been recently working on the raw water cooling system, including the safety switch, the overwhelming probability is that it's the problem, not the oil or coolant switches.
 
Just went through this with mine, Under the heat exchanger is the temp safety switch, Pull off the wire and see if it will run, They go bad,
 
One other comment about the NL heat exchangers. Make sure you watch the NL video and follow the instructions EXACTLY as outlined in the video. It matters what order you tighten the hose clamps around the end boots. Do it in the wrong order and you could loose coolant to the raw water. Also (as someone else noted) you need to have the 2 large holes in the side of the bundle pointed down.

I had problems with my NL generator and spoke with Bob Senter. Bob said that they rarely see a need to replace heat exchanger cores. He said they were pretty much bullet proof.
 

Latest posts

Back
Top Bottom