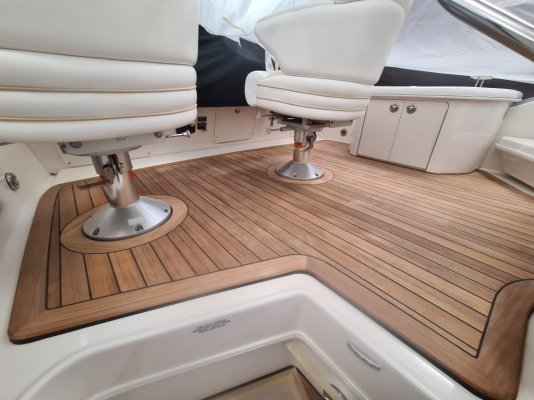
Pulling up the teak

The friendliest place on the web for anyone who enjoys boating.
If you have answers, please help by responding to the unanswered posts.

SimonBryan

Veteran Member
Joined
Jan 17, 2016
Messages
65
Location
Australia
Vessel Name
Monesk
Vessel Make
Island Gypsy 32
Hi all
Seriously thinking of pulling up the old, worn and heavily delignated(?) teak decking and putting diwn the product from https://www.topteak.com.au/
RMYC Broken Bay has it installed in their tenders and it looks and feels really good.
My main hesitation is I have no idea where to start removing teak decking! Would do the Pulpit first as it is a definite confined area.
Anybody removed the teak and give me some pointers?
 
If the deck is bad enough....crowbar/prybar for breaking up the deck, vice grips for the screws with bad heads for power driver extraction, good scraper to get most of the adhesive/caulk up and a good sander for final prep.
 
Hi all
Seriously thinking of pulling up the old, worn and heavily delignated(?) teak decking and putting diwn the product from https://www.topteak.com.au/
RMYC Broken Bay has it installed in their tenders and it looks and feels really good.
My main hesitation is I have no idea where to start removing teak decking! Would do the Pulpit first as it is a definite confined area.
Anybody removed the teak and give me some pointers?

That is my first priority next spring..LOL. As soon as the snow melts, I will be getting at it!!

It's my first priority while the boat is in the boatyard, so I need to work fast.

My wife has also researched vinyl(ish) "teak". Basically there are two types- Indoor and Outdoor. Make sure whatever you get is outdoor rated.
Everyone also says the same: "it feels good underfoot"

I will be starting at the bow and working my way to the rear. Given we have some leaking to resolve, I dont think I can get all the work done in one season.

So this year, all I plan to do is remove the teak, fix the holes (my boat has screwed-on teak! :( :( ) and then I will probably give it a coat of resin and grit and call it done for this year.
Looking at my boat, the only logical place to start (for me!), is to start at the bow and work my way to the rear.

The TopTeak or Plas-Teak or whatever its called ;) will have to wait until the following year
 
Hi all

Seriously thinking of pulling up the old, worn and heavily delignated(?) teak decking and putting diwn the product from https://www.topteak.com.au/

RMYC Broken Bay has it installed in their tenders and it looks and feels really good.

My main hesitation is I have no idea where to start removing teak decking! Would do the Pulpit first as it is a definite confined area.

Anybody removed the teak and give me some pointers?
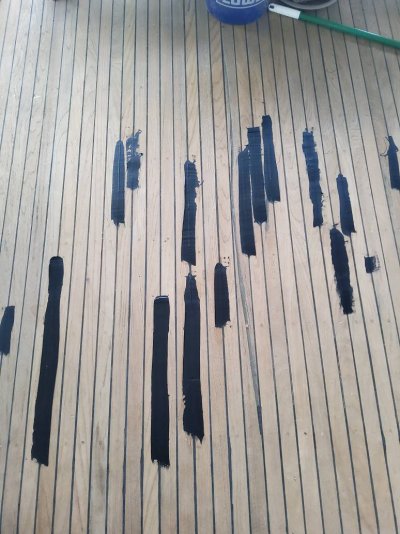
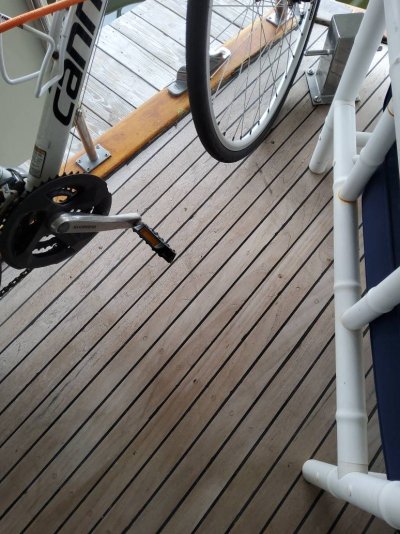
If by delignate you mean the teak is worn and cupped toward the center and the grain is raised along the lengths of the boards and the wood is filthy and gray, here is an alternative. Sand it smooth. If the deck has never been sanded, and even maybe if it has been, there should be plenty of wood left to sand it down to new wood. Doing so does require that any compromised caulking be removed and replaced (leaks). Last Spring I did just that. The deck looks almost new. Unfortunately, I do not have any before pictures but, trust me, my aft deck was UGLY. Yes, a lot of work but far less work and far less expensive than ripping out the old deck. The black caulk you see in the picture sands off easily. 20211011_102714.jpg20210429_112708.jpg
 
Thanks Ted! I hope I don't have to use a planer on mine!!! :eek:


You may get uncountable suggestions.... it all depends on what is easiest based on how your deck was laid, with what and how deteriorated it is.


I did mine and had down 3 layers of glass cloth and epoxy (to strengthen and waterproof) in just a couple weeks using good weather as the guide.


The boat was in the water so it was less than convenient on several levels.
 
A lot of work to remove. Has no one just applied a new top finish. I mean glass over it or put the OP product on top. Why not?
 
Once bad enough the teak deck is not a stable enough base to really do it.


Sure. there are possibilities...but costly if they fail in the furture and probably not much less work.


The truck bed liner type paints may work (some have reported at least temporary success...but I have also seen them fail and the results are not a lot of fun to correct.
 
If by delignate you mean the teak is worn and cupped toward the center and the grain is raised along the lengths of the boards and the wood is filthy and gray, here is an alternative. Sand it smooth. If the deck has never been sanded, and even maybe if it has been, there should be plenty of wood left to sand it down to new wood. Doing so does require that any compromised caulking be removed and replaced (leaks). Last Spring I did just that. The deck looks almost new. Unfortunately, I do not have any before pictures but, trust me, my aft deck was UGLY. Yes, a lot of work but far less work and far less expensive than ripping out the old deck. The black caulk you see in the picture sands off easily.View attachment 123939View attachment 123940

Looks nice. Did you caulk before and / or after the initial sanding?
 
If by delignate you mean the teak is worn and cupped toward the center and the grain is raised along the lengths of the boards and the wood is filthy and gray, here is an alternative. Sand it smooth. If the deck has never been sanded, and even maybe if it has been, there should be plenty of wood left to sand it down to new wood. Doing so does require that any compromised caulking be removed and replaced (leaks). Last Spring I did just that. The deck looks almost new. Unfortunately, I do not have any before pictures but, trust me, my aft deck was UGLY. Yes, a lot of work but far less work and far less expensive than ripping out the old deck. The black caulk you see in the picture sands off easily.View attachment 123939View attachment 123940

That does look terrific, Jack! Was moisture getting through to the sub-deck before you tackled that project, or did you catch it in time? How did you deal with the teak screw-head bungs? Replace all, treat selectively, or just sand them down along with the surrounding wood?
 
Hi all
Seriously thinking of pulling up the old, worn and heavily delignated(?) teak decking and putting diwn the product from https://www.topteak.com.au/
My main hesitation is I have no idea where to start removing teak decking! Would do the Pulpit first as it is a definite confined area.
AndyG at RMYC did his. I did too(well, I had it done). Just replacing the teak is possible if what`s under it is sound, if water has been wicking down the myriad screws it can be degraded even to "wet weetbix" and need replacing before you get to the decorative stuff on top.. Some IGs from 1981 or thereabouts had foam sandwiched between top and bottom layers of f/g, others have teak offcuts; the former may be undamaged, the latter, well....
You may get a look at the sandwich material around the lazarette, poking it with a fine skewer even. Among my foam were 2 square teak areas fwd of the fwd steps,they were black and soft.
Other than that, the topteak sounds good.
After removing all teak, I went with 2 layers(replacing lost stiffness from the removed teak) of fibreglass painted in non skid fwd, and redid the side decks and cockpit in fresh teak, over 1 layer of f/g.
Every old screwhole into the "real deck" needs epoxying. Also the new surface needs fairing with epoxy.
Sorry for this, it can be a major job. Start with discovering what`s really under the teak. Starting at the bow section sounds a good idea.
 
That does look terrific, Jack! Was moisture getting through to the sub-deck before you tackled that project, or did you catch it in time? How did you deal with the teak screw-head bungs? Replace all, treat selectively, or just sand them down along with the surrounding wood?
My subdeck is solid fiberglass. The caulking was gone in a few places and in other places it was just cracked and dried out. So, yes, water was likely getting underneath some but it never threatened the structure of the boat - no wood core there. The sanding did reveal some prior work on the screws. I found a few bungholes that no longer had bungs. Instead, a few screws had been replaced and sit flush with the deck. There was no need to do anything with the screwheads. They were unseen because, before I undertook the sanding, dirt had obscured all. I am very happy with the result. It was butt ugly beforehand.
 
Sand it smooth. If the deck has never been sanded, and even maybe if it has been, there should be plenty of wood left to sand it down to new wood.

Yeah the problem is that it is very worn down if I sande it smooth and level there would not be nearly nothing left. The good plugs over the screws are only a couple o mm thick

Part of its' problems as that as new owners 10 years ago we did not look carefuly enough into how to maintain teak decks and blasted away with a power washer and scrubbed solidly, i beleive now what I thougth was dirt coming out was in fact the timber.
 
OK, optionj I hadn't considered going to fibreglass has some attaractions as well. As per above advice the first part of the project plan will be to clearly identify what is below the teak. So will check around the lazarette and also have a good look from below.
Thnaks All
 
If you do remove the teak, I would absolutely go with fiberglass instead. Then paint it with nonskid. We painted the deck of our last boat with Kiwigrip and really liked it. The decks were fiberglass to begin with but the gel coat was in bad condition.
 
[B said:
SimonBryan;1061299]Hi all
Seriously thinking of pulling up the old, worn and heavily delignated(?) teak decking and putting diwn the product from https://www.topteak.com.au/
RMYC Broken Bay has it installed in their tenders and it looks and feels really good.
My main hesitation is I have no idea where to start removing teak decking! Would do the Pulpit first as it is a definite confined area.
Anybody removed the teak and give me some pointers?
[/B]

HI Simon,

As Bruce said we did our main decks about 10 years ago now. We had a few bouncy sections in the deck, so decided to investigate. Talk about opening a can of worms.

Removing the teak decking is relatively easy,unless a PO has decided to epoxy sections of the deck down for god knows what reason, as happened to us. We stripped the starboard the deck in about 6 hours and the port in approximately 3 weeks! Inch by inch with a hammer and chisel.Tough stuff epoxy.

Unlike Bruce's previous IG36 our boat had teak block below the fiberglass deck. They were mush. We replaced them with Klegisel foam bedded in with epoxy. Then we glassed all back down and fared the deck in preparation for the new 8mm teak. This part we left to professionals. A couple of guys came down from Queensland in their ute and cut and glued the teak down on site.

We have not done the half deck or flybridge yet, too busy fitting a new anchoring/retrival system.

We did think about synthetic teak , however I find it can get very hot in high summer, and am not convinced of its longevity, although the dockmasters at the club are very happy with it.

I think it boils down to are you a teak man, with all the potential issues that that involves or are you a low maintenance type. Personally, I feel Teak is the surest underfoot, especially when the decks are wet.

If you want to pop over for a chat Sarawana is on B4

Cheers,

Andy
 
You really need to know if the core is saturated and any weak spots before contemplating anything further. If the plywood or balsa core is saturated/rotting (which is the most likely scenario) then you will be removing the teak, outer FRP skin & core. Have a look at Andy’s deck replacement vids on Boatworks today. To see what you are in for.
 
removing teak decks

Simon,

You may be interested to check out this link: https://sailingmillennialfalcon.com

A young Australian couple bought a 42' sailboat in Florida with the intention to sail around the world, and they have posted 150 or so video episodes; in one of the early ones they document replacing their teak decking, and replacing it with a good-quality non-stick finish. They show a surprising amount of detail in terms of working around railings, stanchions, winches, etc. They were on the hard when they did the work, which probably made it easier, but it is quite a job! They had zero experience doing a job like this, so you get to see what NOT to do as well as the right way, which I always think is pretty useful.
Good luck, whatever you wind up deciding.
 
I just had my decks done with teak. I was never a fan of teak but had no choice as the faux teak laminates were not guaranteed to go the distance either.

What I found interesting was the shipwrights bonded the teak plank’s to a single piece of marine ply sheet and then bonded the ply to the FG decks

Perhaps this can be done over old dilapidated teak too?

35C72FDD-43AC-40F9-9857-C7EA3FB503F2.jpg

61A9DA73-E0B8-46F4-8E38-E688AE0AA25B.jpg

0D66C941-5358-4C1E-BB68-4D8C8219E239.jpeg
 
Last edited:
Hi all
Seriously thinking of pulling up the old, worn and heavily delignated(?) teak decking and putting diwn the product from https://www.topteak.com.au/
RMYC Broken Bay has it installed in their tenders and it looks and feels really good.
My main hesitation is I have no idea where to start removing teak decking! Would do the Pulpit first as it is a definite confined area.
Anybody removed the teak and give me some pointers?
I have started this process on my 1973 GB36. I saw several methods on Youtube but have found the fastest is pry bars and hammers. One trick I have developed is for the flat bladed srews. Take apiece of 3/4 wood of any type and drill a hole about the size of the screw heads. Buy a cheap screw driver of the appropriate size and cut the handle off. Put the blade in a regular cordless drill and slide the blade through the wood and onto the screw head. Hold the wood flat on the deck. As you back the screw out the wood holds the blade in the screw slot. You can have 5 screws out in the time it took you to read this explanation. Good luck it's still a lot of work.
 
You really need to know if the core is saturated and any weak spots before contemplating anything further. If the plywood or balsa core is saturated/rotting (which is the most likely scenario) then you will be removing the teak, outer FRP skin & core. Have a look at Andy’s deck replacement vids on Boatworks today. To see what you are in for.

My 1979 teak deck is in good shape. The PO (over 20+ years) painted it with some kind of a heavy stain that seems to have protected it, although it has deteriorated and not so pretty. I've test sanded areas, easily done, and there is plenty of wood to work with. I'm planning the 2022 spring/summer project with one of them being to recaulk all the stanchion screws, bungs, etc.

Problem is that there is moisture leaking that is coming into the v-berth and evidenced with Cetol - coming through the seams in the v-berth bulkhead with heavy rains. I've sanded off the railings' cetol and the only place that it could be coming from (gravity-wise) is from the windlass structure which I haven't got to yet. How do I troubleshoot?
 
Last edited:
My 1979 teak deck is in good shape. The PO (over 20+ years) painted it with some kind of a heavy stain that seems to have protected it, although it has deteriorated and not so pretty. I've test sanded areas, easily done, and there is plenty of wood to work with. I'm planning the 2022 spring/summer project with one of them being to recaulk all the stanchion screws, bungs, etc.

Problem is that there is moisture leaking that is coming into the v-berth and evidenced with Cetol - coming through the seams in the v-berth bulkhead with heavy rains. I've sanded off the railings' cetol and the only place that it could be coming from (gravity-wise) is from the windlass structure which I haven't got to yet. How do I troubleshoot?

Most likely it isn’t Cetol coming through it is from the core being wet and rotted. The wood core turns into a brown mush and you get brown stains from the core. If you are getting brown water leaking into the cabin then you can pretty much assume the core is bad. Maybe you can see elevated levels of moisture in the deck with a meter but the top of the deck will need to come off to get to the wet core and remove it.
 
Most likely it isn’t Cetol coming through it is from the core being wet and rotted. The wood core turns into a brown mush and you get brown stains from the core. If you are getting brown water leaking into the cabin then you can pretty much assume the core is bad. Maybe you can see elevated levels of moisture in the deck with a meter but the top of the deck will need to come off to get to the wet core and remove it.
I drilled some 1/2"holes in the lower edge of the aft cabin top. brown water poured out as if from a faucet. I cut a 2' x 6' section of the fiberglass and the core was rotted. That brown liquid is a sign that some extensive work needs doing. Good luck.
 
A lot of work to remove. Has no one just applied a new top finish. I mean glass over it or put the OP product on top. Why not?

IMHO, it is unlikely that anyone’s teak overlayed deck does not have water between the teak and the fiberglass sub-deck, whether it looks good of not. Seems to me that putting some kind of waterproofing on top of it will just extend your problem.

Easy for me to say now as I spent a lot of time over the past two winters, (in the frozen North) stripping my deck of the teak, allowing the core to dry where needed, then re-glass, paint and nonskid. The results are very satisfying and a long term fix.

The first year I had the boat I tried fixing seams but it was clear that that was going to be an annual and recurring nightmare, so I woke up.

I won’t argue that a nice teak deck feels nice, but the outlook of constant maintenance was too much for me. Besides, it was good pandemic therapy!

If you are stripping ur deck and you don’t think you can accomplish it in one stint, I would suggest starting with the side decks as they are generally lower. If you just do bow or stern you may form dams where water will catch and stand, bringing more potential issues.

My first winter of renewal I only did one side deck, not that hard a job and gave me a good idea of what I was up against the next year when I did the fore, aft and other side.

I also removed almost all the screws as I went, and saved most of the teak which is very handy for other trim projects.

Dan
 
Last edited:
I drilled some 1/2"holes in the lower edge of the aft cabin top. brown water poured out as if from a faucet. I cut a 2' x 6' section of the fiberglass and the core was rotted. That brown liquid is a sign that some extensive work needs doing. Good luck.

Thank you ronobrien and comodave for your responses, that all makes sense. I'm getting the same brown liquid on the stern coming down from the fly. I want to do some drilling but given the freezing weather (I'm on the Olympic Peninsula), I'll control the urge for the moment. Rather, I'll check the balance on my 401K, rethink the 2022 projects...nix-nay on the galley upgrade, back pedal on the AC/DC wiring re-engineering. This doesn't sound like a DIY project...gosh, I love my boat!

Although reading Dan's post, maybe I could do some of the work. I'm pretty good at demo (for a girl ;=). I'll check around for some deck guys and try and get on their schedule for assessment.
 
Last edited:
It depends on your desire to DIY it. This type of work isn’t that tough technicality but it can be hard physically. Lots of time on your knees. Have good knee pads. It is mostly grunt work. Cut the top glass, dig out the wet, rotted core. Clean it up and lay in new core with thickened epoxy. Put the deck glass back on or lay on new glass. If you use a nonskid paint like Kiwigrip you don’t have to finish it perfectly since the Kiwigrip will hide a lot of small flaws and it wears like iron. You can save a ton of money by DIY but it will be hard physically. My back has been a big issue for me in the last 3 years so I can only work about 2 to 3 hours a day before it gives out. Tomorrow we will be almost done adding the extended swim platform on our Formula. So far this winter we have added both bow and stern thrusters and the swim platform extension along with ongoing electronics replacement. We have dozens of other smaller projects to finish up this winter. Good luck with the decks.
 
Thank you ronobrien and comodave for your responses, that all makes sense. I'm getting the same brown liquid on the stern coming down from the fly. I want to do some drilling but given the freezing weather (I'm on the Olympic Peninsula), I'll control the urge for the moment. Rather, I'll check the balance on my 401K, rethink the 2022 projects...nix-nay on the galley upgrade, back pedal on the AC/DC wiring re-engineering. This doesn't sound like a DIY project...gosh, I love my boat!

Although reading Dan's post, maybe I could do some of the work. I'm pretty good at demo (for a girl ;=). I'll check around for some deck guys and try and get on their schedule for assessment.


I agree with Comodave. I am doing the demo and rough core repair and re-glassing myself. A few hours on Youtube and you will get it figured out. It is simply a lot of hard/dirty work. I will defer to more talented people than myself for the finish glass & paint, which can be expensive in and of itself. I find the rough work rewarding once it is done and you can save a bunch of $$$. Side note, I glass bead blasted the lazarette on mine on 12/31/21. It cleaned up nicely. I intend to try blasting the deck after the teak is removed as opposed to sanding/grinding. I have access to equipment, but experience helps immensely. I will let the forum know how it comes out as others may consider hiring to have it done. I think it may be cheaper overall than sanding/grinding. Good luck.
 

Latest posts

Back
Top Bottom