Hi Gary. The enclosure removal may be in my future. Did you cut off the stern upper horizontal frame member at the electrical panel? Did you see any issues doing that? Thanks. Paul
Hi Paul,
I recommend you proceed like so if you want the whole enclosure removed:
-Stock up on your favorite mind-numbing substance, booze, weed, whatever.
-Secure these tools: Socket set, wrench set (metric and SAE), huge screwdriver or prybar, hack saw blade with handle (not the frame handle, the other kind), bottle jack, 15" or so long 2x4, side cutters, vise grips, headlamp/small flashlight
-Take a hit
-Remove the battery and remove or move aside the strainer.
-Remove as many screws as you can that hold the pillars/frame together. That wont be nearly enough to get it apart, but it helps loosen things up.
-Look up at the lid from underneath. You'll see four 2 inch machine screws that hold the lid to the frame. The only way I could get them out was by grabbing the screw itself from underneath with vise grips. Once you get them loose a bit they will unscrew easily, but they are so long you may not be able to remove them from the lid. The ones you can't remove will be in your way for the rest of the operation unless you can cut them off.
-Take another hit
-Start removing what I call the frame. This is comprised of the corner pillars and the top header piece. You will probable have to break them apart as the screws that hold them together are blind to you. (The pillars and top frame are aluminum, the lid is steel.) I did remove this frame piece from where it connects to the member at the electrical panel, mainly by breaking it. I think it needs to be removed to get the lid out, but if you have a couple millimeters of extra clearance maybe you'll be lucky and can leave the frame intact. I think the lid is the issue, if you can get that off without tearing the whole enclosure apart that might be the way to go.
-If you can get the frame off in less that a couple hours you are doing better than me. I spent half the time staring at the damn thing wondering what to do next.
-I also unbolted the lower side panel on the right side and tossed it. It screws into threaded inserts in the starboard base which is underneath the genny and on top of the shelf.
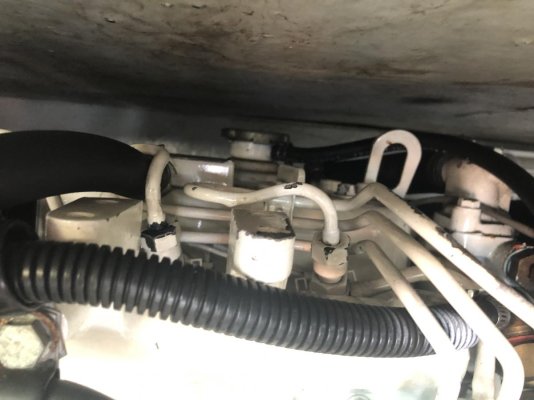
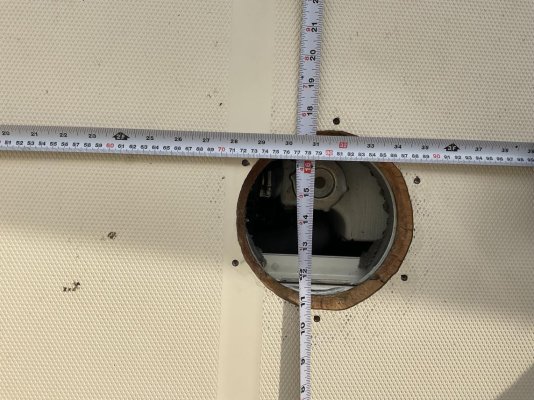
-I had about 1/4 inch of clearance above the lid so I couldn't raise the lid enough to clear some hoses and the lifting brackets. You might be able to get the lid off now if you jack the deck up. I put a 1x6 on the hull and used a 2x4 about 15 inches long and was able to jack up the deck enough to get the lid off. I didn't figure this out until I spent a couple hours to remove the lifting lugs and the top, horizontal frame member closest to the bulkhead.
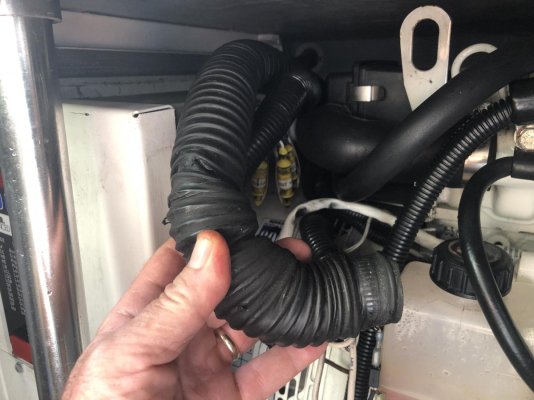
I also spent a good deal of time trying to rip out the insulation in the lid so as to clear the hoses on top of the engine, but you might not need to do that. That rear top frame was a bear to get off. I ended up using brute force and broke the ears that was holding it on.
-Take a big hit
I did some things that maybe I didn't have to do, not knowing about the whole jacking idea and not knowing how the enclosure was put together. If it had to do it over, I would try this first:
-Remove the 3 panels, and the 4 screws holding down the lid to the frame.
-Apply the jack and see if I can get the lid off. If you can, you probably don't need to remove the other frame components.
I still wanted the frame off as well to give better access to everything, but I was a major effort and I probably would have left it alone as long as I got the lid off. Now that I say that, I don't think the lid would have come off with the front, top frame in place though; not enough clearance.


")