Our 34 classic maintenance & upgrades

The friendliest place on the web for anyone who enjoys boating.
If you have answers, please help by responding to the unanswered posts.
Gel coat restoration is depensant on condition. One step works for surfaces in very good condition but not for ones beyond that.
You'll need to try several approaches and choose the least aggressive one that works and provides sn acceptable finish.
A real bad gelcoat may need fine wet- dry sanding followed by xn aggressive compound and then a polish / swirl remover before a final coat of wax or polymer to protect the shiney surface.
The final coat provides protection but you have to get the surface where you want it before the last step.
Lots of videos online for good how to.

Admittedly, I just don't have the time or gumption to tackle the process that you've described above. We really did want to seal the gelcoat with a good wax though because the raw gelcoat gets looking so bad in a short time. I threw in the towel after my polishing attempt and got the yard to give it a professional compounding/polishing/waxing treatment. I have to say, we're quite happy with the way they rejuvenated the antique gelcoat! I might not look as good as new but I guarantee it looks better than it has for many years and the best thing is, it'll stay looking like that longer than out first trip out of the creek!
 

Attachments

  • IMG-1335.jpg
    IMG-1335.jpg
    119.9 KB · Views: 13
  • IMG-1336 (2).jpg
    IMG-1336 (2).jpg
    98.4 KB · Views: 12
In other news, there is no other news. I'm still waiting on the mechanic to get well from his bout with pneumonia and come back to work so he can rebuild my clutch! I swear I'm about ready to do it myself and get the program back on the road. Or back in the water...
 
Clutch or transmission ? I'm confused, where's the clutch.
 
Clutch plate is in the transmission. Clutch cable from helm or the control box in the case of electronic throttle/clutch levers pushes the transmission clutch lever back and forth to make the boat go some place other than where it sits when you start it up.:)
 
Last edited:
Damn if I know what the proper term is, if there is a proper term. I've always called it a clutch. Throttle control and clutch control at the helm. Transmission just doesn't sound right to me in a boat application. Whatever floats your boat. All I care about is getting the darned thing...transmission, clutch...the thing that makes the boat go frontwards and backwards... rebuilt so I can get our boat overboard!
 
I keep looking for the pedal !!!! I've been watching Tim B at Sea on YouTube. Real tug boat Capt. He talks about clutching in and out of gear.

I know the feeling about getting the boat shipshape. I dropped the Injection pump off today to get it looked at. Only took 3 hours to get it off the Perkins...

This year is a 'hole in the water' year. Not much cruising..
 
We'll ,just so y'all know our haul out hasn't come to a complete halt, I'll check in here and report what progress has been made, although it seems like not much, we really are close to being done with this years big on-land projects.
The clutch (OK, transmission, Solly) has been rebuilt. The clutch discs had a slight amount of wear so as long as it was apart, they got replaced, as did the seals. The shaft coupling was getting a bit worn where the seal mates so the whole thing was replaced. I haven't asked but I swear it looks like it's stainless steel. Maybe it's just the newly machined metal, I don't know. Anyway, I'm hoping we won't have to worry about any problems with the clutch for a few more years!
The engine is pretty much reassembled and ready to be set back in the boat Tuesday. I replaced the raw water pump impeller (I still removed the pump so I could work on it. Even with the engine out and sitting in front of me, it's so much easier to work on the pump with it off of the engine) and cleaned up the engine mounts and loosely installed them in their approximate old position so ,hopefully, the engine will sit back on the bed close to where it needs to be.
I know I've been going on about how happy we are with the buffing & polishing job the yard did for me (yes, the owner felt sorry for me after working so hard trying to make it shine so he offered his detailer guy to me at a bargain price) but I had to stick in one more picture showing how good the old hull looks!
 

Attachments

  • 102_0282.jpg
    102_0282.jpg
    105.8 KB · Views: 10
  • 102_0283.jpg
    102_0283.jpg
    133.7 KB · Views: 11
  • 102_0284.jpg
    102_0284.jpg
    130.5 KB · Views: 11
  • 102_0286.jpg
    102_0286.jpg
    128.1 KB · Views: 10
  • 102_0289.jpg
    102_0289.jpg
    92.5 KB · Views: 10
  • waxed boat ladder.jpg
    waxed boat ladder.jpg
    156.9 KB · Views: 9
Getting close !! I agree on replacing wear items if it's apart. Only way to go. I hope to get the injector pump back this week. Cooler weather, be a great time to be on the water....
 
Wow, just looking at your post thread regarding your MS 34 engine removal project! Looks like quite a job for sure. Sure hope our engine issue does not come to pulling the engine. Just purchased the boat last Oct with only 285 hrs on the rebuilt engine.

Also interesting to see how the engine bay and helm station are quite different than ours...I guess a lot of DIY customized tinkering can happen on these babies over 40+ yrs. Good luck!
 

Attachments

  • MS1.jpg
    MS1.jpg
    94.1 KB · Views: 16
  • MS2.jpg
    MS2.jpg
    111.1 KB · Views: 19
  • MS3.jpg
    MS3.jpg
    86.9 KB · Views: 16
  • MS4.jpg
    MS4.jpg
    96.5 KB · Views: 20
Wow, just looking at your post thread regarding your MS 34 engine removal project! Looks like quite a job for sure. Sure hope our engine issue does not come to pulling the engine. Just purchased the boat last Oct with only 285 hrs on the rebuilt engine.

Also interesting to see how the engine bay and helm station are quite different than ours...I guess a lot of DIY customized tinkering can happen on these babies over 40+ yrs. Good luck!

Yes indeed, it is interesting to see the differences between others boats of the same model. I don't recall seeing your 34 ever listed for sale on any of the usual venues like yachtworld. I might've missed it, though. We're certainly not in the market for another 34 but it is fun for me to see what's out there. Yours has definitely been well maintained by the previous owner, hopefully saving you some of the headaches and anxieties like we've experienced over the years while rebuilding ours. I say that after you had to get towed in due to engine troubles! Hopefully you caught it in time and maybe it's something simple like a turbo oil seal or something.
Your lower helm has had an extensive modification, giving you somewhere to actually mount your electronics! Nice. I'm interested in knowing more about your house bank, too. It's definitely not the standard setup Mainship had!
 
Shawn,
It is a little reassuring to know that I am not the only one who continues to watch the market for these boats. It is a bit masochistic at times when I see something that appears to have been a better deal but mostly it is just curiosity, similar to looking at a neighbors real estate listing.

There is certainly a lot of variation among boats as they have been modified to various degrees. They were pretty sparse to begin with but also pretty easy to customize as very little of the interior is build into larger molded panels with hidden chases and every cubic foot already accounted for. The don't use volume as efficiently as newer designs but they are also pretty easy to access systems.

There are a couple boats with pretty extensive interior reconfigurations and woodwork. One on facebook is beautiful but also kind of strange to me. i saw another sonewhere in South America that was absolutely stunning in pictures.
 
Last edited:
Shawn,
It is a little reassuring to know that I am not the only one who continues to watch the market for these boats. It is a bit masochistic at times when I see something that appears to have been a better deal but mostly it is just curiosity, similar to looking at a neighbors real estate listing.

There is certainly a lot of variation among boats as they have been modified to various degrees. They were pretty sparse to begin with but also pretty easy to customize as very little of the interior is build into larger molded panels with hidden chases and every cubic foot already accounted for. The don't use volume as efficiently as newer designs but they are also pretty easy to access systems.

There are a couple boats with pretty extensive interior reconfigurations and woodwork. One on facebook is beautiful but also kind of strange to me. i saw another sonewhere in South America that was absolutely stunning in pictures.

In the past I used and enjoyed the facebook Mainship group since Yahoo stopped supporting groups but haven't been on for probably over a year because...well, because it's facebook. I'm probably cutting my proverbial nose off to spite my face because there was a lot of good info shared but oh well. I'll survive I guess. The Mainship owners website can be described in one word... sad.
 
Yes indeed, it is interesting to see the differences between others boats of the same model. I don't recall seeing your 34 ever listed for sale on any of the usual venues like yachtworld. I might've missed it, though. We're certainly not in the market for another 34 but it is fun for me to see what's out there. Yours has definitely been well maintained by the previous owner, hopefully saving you some of the headaches and anxieties like we've experienced over the years while rebuilding ours. I say that after you had to get towed in due to engine troubles! Hopefully you caught it in time and maybe it's something simple like a turbo oil seal or something.
Your lower helm has had an extensive modification, giving you somewhere to actually mount your electronics! Nice. I'm interested in knowing more about your house bank, too. It's definitely not the standard setup Mainship had!
Yeah, 2 owners back out here on Lopez was a retired coast guard guy and he really did all the major mods I believe. Very detailed wiring diagrams, number coded wiring, and manuals for every single system in 3-ring binders! Honestly, were very new to this kind of boat and still learning all the systems. I think the battery systems were modified extensively with house bank, starter battery, and bow thruster batteries. Has an emergency cutover to use house bank as starter which saved our butt once this season due to dead starter battery. It has some kind of charge monitoring setup and detailed writeup on how the charging sequence works when on shore power...I'll try to dig up the papers and shoot you some info. Boat has never gone out listed for sale that I know of or with a broker. Always just local Lopez Island owner/buyer transactions as far as I know.
 
It certainly seems like you've located an exceptionally nice classic 34. You'll have to be sure to share some pictures of it in the future. I'm intrigued with what (from your profile pic) looks like to be a radar and mast behind the bridge.

We basically started from the bottom & worked our way up to the condition the boat is in now. There's always work in progress & wish list!
 
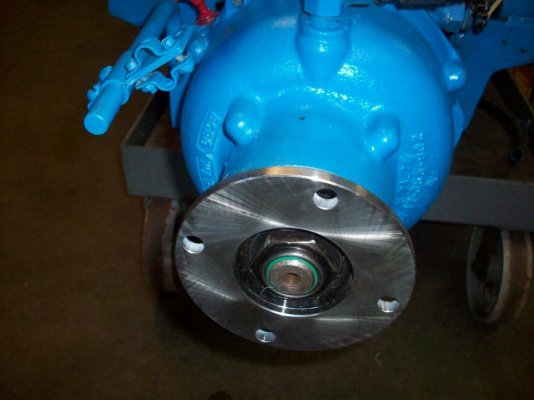
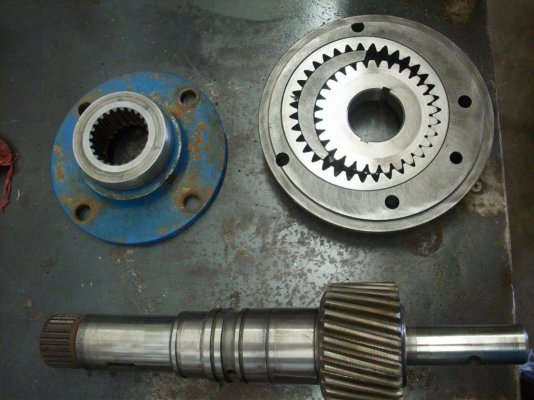
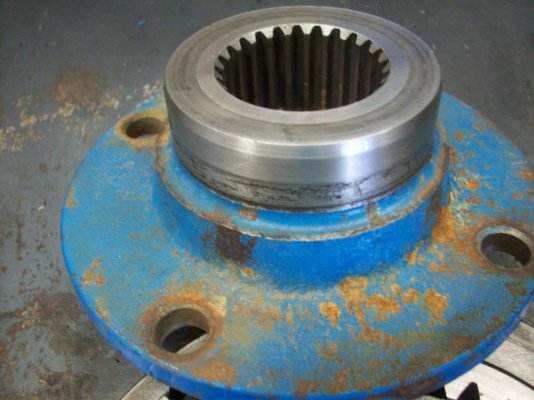
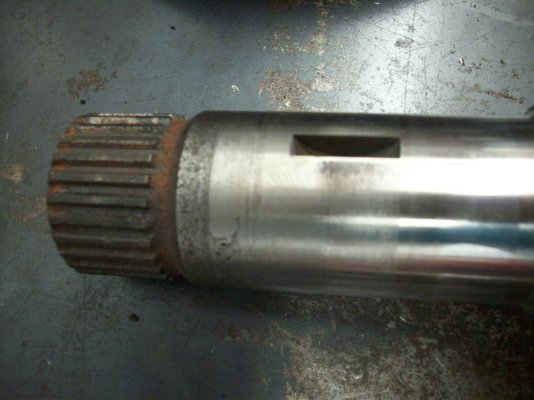
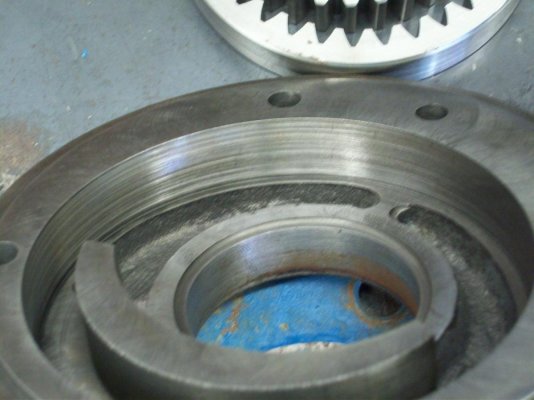
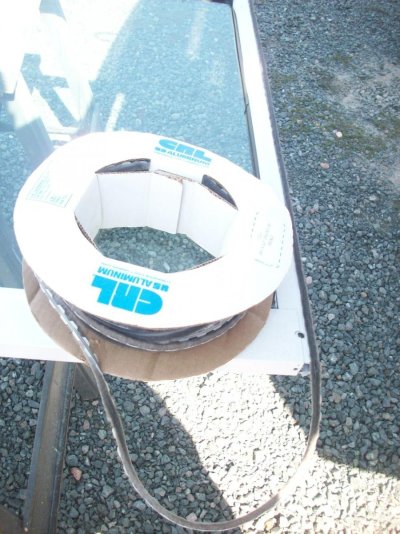
clutch parts pictures

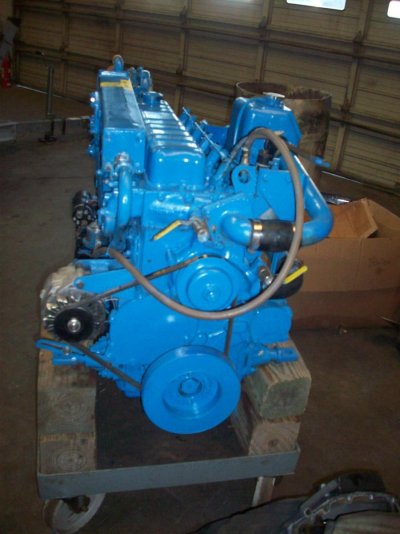
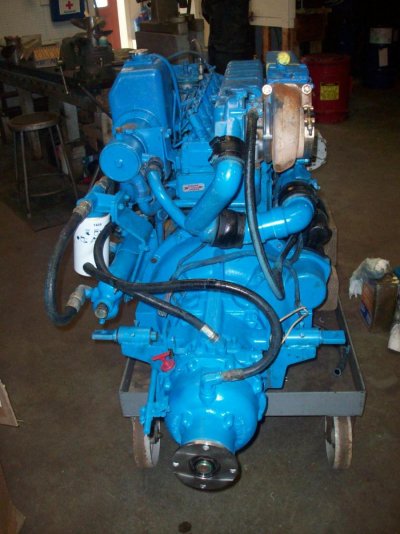
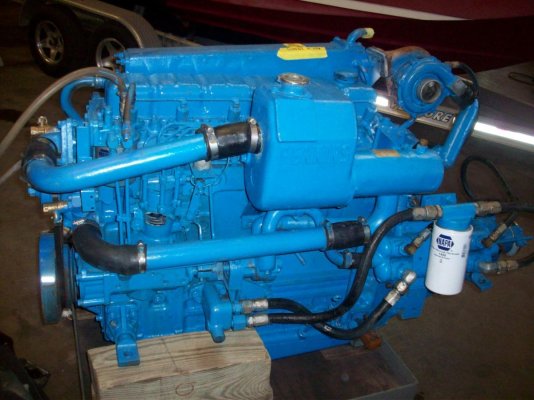
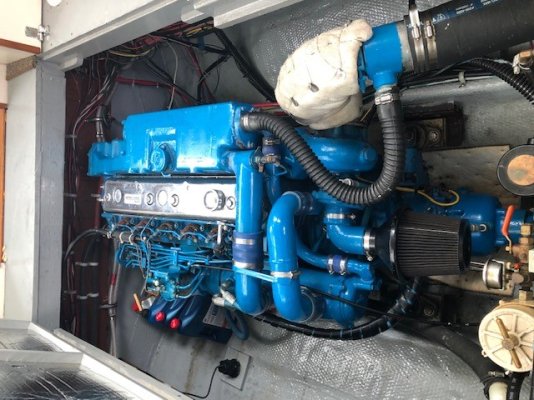
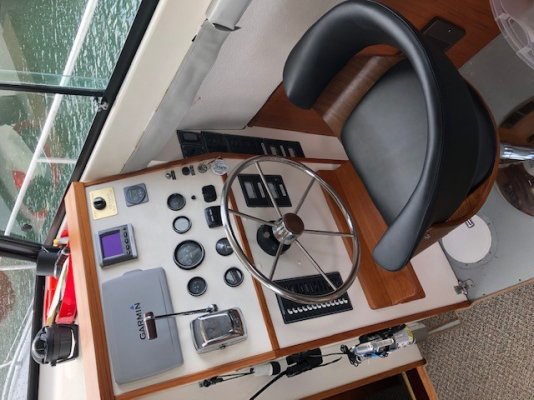
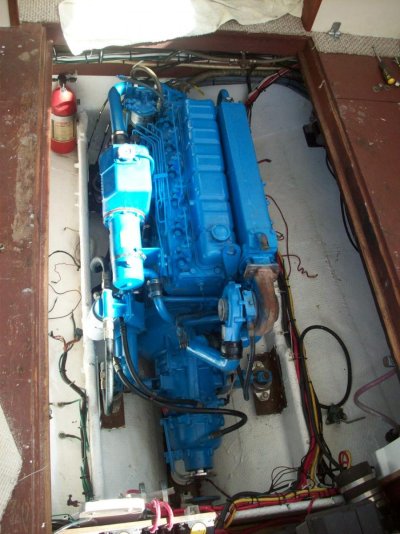
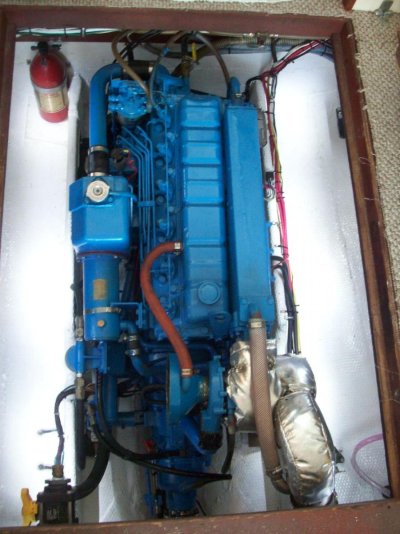
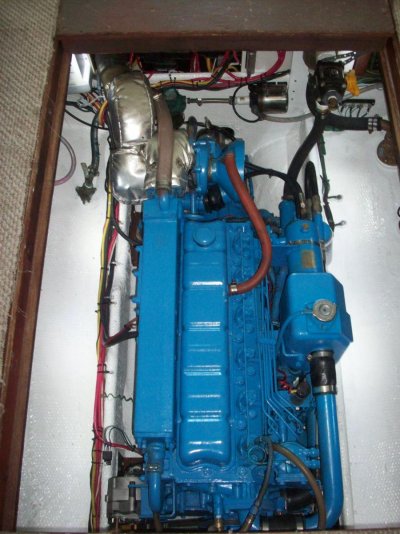
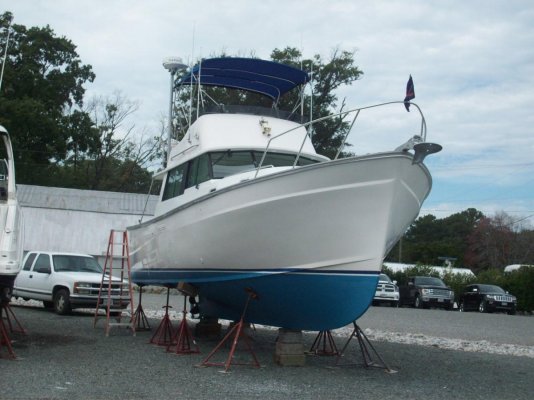
Well fudge! I went to the yard today with plans of reinstalling the engine in the boat. This morning ,my friend who owns the yard, had a couple of his mechanics run the engine in the shop. After a total clutch rebuild they wanted to make sure it was good before it went back in the boat. The clutch was great but dang if there wasn't a tiny coolant leak where the heat exchanger slips into the coolant expansion tank. :banghead:
I'll cut my mechanic a little slack because he did work me into his busy schedule and although he did have the exchanger out to have it acid dipped & the tubes rodded, he never ran it because he didn't have the time.
After trying to tighten the cooler assembly to stop the leak, the threads in the aluminum expansion tank gave up. Out came the antifreeze and apart came the whole newly assembled heat exchanger so a healicoil thread replacement insert could be installed (gotta love those things). Trans Atlantic shipped me a new gasket and I got a new pressure cap gasket while I was at it since the guys said they saw a bubble of antifreeze come past the gasket when the engine came up to temperature in the shop. The gasket was shot when I took the radiator cap assembly off of the expansion tank. I was thinking about replacing the whole cap and neck assembly but Sheri at T A said they would have to build one and it was $150! The old assembly started looking better to me after that quote anyway.
Ahh, the joys of a 40 year old engine...
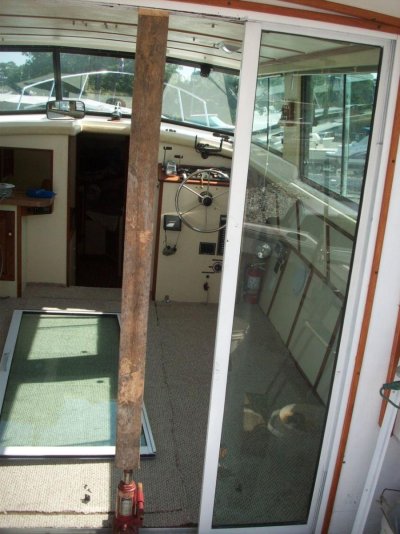
That's OK. Another couple of days won't kill me and it's so much easier to work on the engine when it's out.
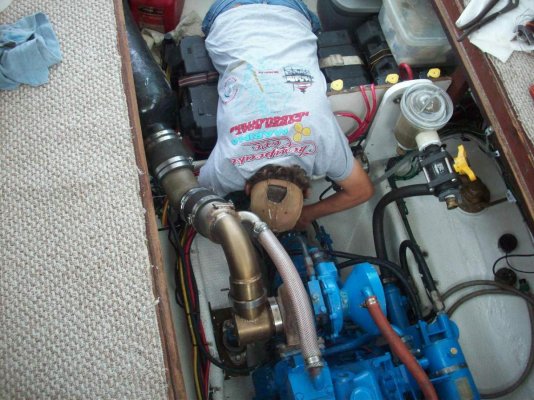
Oh, also, after talking with Todd the mechanic, I found out that we basically have a new clutch! I originally just wanted to replace the seals as preventative maintenance but they thought it prudent to replace the clutch discs. When Todd was in there to replace them, he noticed the shaft coupling was pretty etched and replaced it. Not bad but not cheap. He also checked the oil pump, nothing but 3 pieces...the pump body with 2 "gears" inside that move in an eccentric motion to pump the oil. The gears looked ok but the body was scored horribly. He said it was about the worst he had seen. You can easily see the scored housing in the picture. Again ,not bad but not cheap. Then...geez, I'm glad there's not but so many parts in the thing...then the input shaft had some etching at the spline so it got replaced too. That thing was REALLY not cheap. I think all that was reused was the housing and a couple of washers! I'll be glad when this years preventative maintenance phase is over!
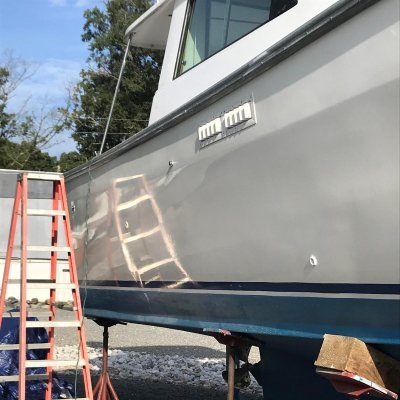
Again, the joys of owning a 40 year old boat. We do enjoy the boat, though. Good thing.
 

Attachments

  • 102_0291.jpg
    102_0291.jpg
    134.9 KB · Views: 5
  • 102_0290.jpg
    102_0290.jpg
    115.3 KB · Views: 5
  • 102_0295.jpg
    102_0295.jpg
    106.6 KB · Views: 8
  • 102_0293.jpg
    102_0293.jpg
    97.5 KB · Views: 4
My CAV pump leaked at throttle lever before rebuild. Since rebuild, not leaking with Walbro electric pump at 6 to 8 psi pressure

I have to happily admit that I seem to have been wrong. I was convinced the Cav pump needed an o-ring or similar seal somewhere because of the need to place a piece of absorbent diaper under the pump. I never saw an actual leak but I recall the throttle lever shaft always being damp with fuel. When the engine came out, I was able to inspect things in more detail and I found one of the tubing fittings was loose! I ,no doubt, forgot to securely tighten it after bleeding the system at some point. While the engine was on the shop floor & being test run, the fuel pump remained dry. Another money-saving happy outcome, of which we were glad to see!
Yesterday marked the 2 month time we've been hauled out. I'm going back today and reassemble the cooling system and ,if they have an hour or 2 to work me in, I'm going to set the motor back where it belongs!
 
Just a heads up in case you need it. Perkins uses a special grommet on the fuel lines. Perkins calls them an 'olive'. Link... https://www.amazon.com/gp/product/B071F413ZS/ref=ppx_yo_dt_b_asin_title_o07_s00?ie=UTF8&psc=1

Don't keep tightening the fitting to much. Just snug or the threads will strip. The olive is what keeps it from leaking. If you have to replace one make sure the fitting is pushed in hard so more than 1 thread catches when you go to tighten it.

When I pulled mine 2 weeks ago I found somebody previously gooped up the bottom fitting with silicone. Showed the diesel shop and the guy just shook his head and said "Oh Lord"
 
I have to happily admit that I seem to have been wrong. I was convinced the Cav pump needed an o-ring or similar seal somewhere because of the need to place a piece of absorbent diaper under the pump. I never saw an actual leak but I recall the throttle lever shaft always being damp with fuel. When the engine came out, I was able to inspect things in more detail and I found one of the tubing fittings was loose! I ,no doubt, forgot to securely tighten it after bleeding the system at some point. While the engine was on the shop floor & being test run, the fuel pump remained dry. Another money-saving happy outcome, of which we were glad to see!
Yesterday marked the 2 month time we've been hauled out. I'm going back today and reassemble the cooling system and ,if they have an hour or 2 to work me in, I'm going to set the motor back where it belongs!

Fingers crossed for you.
 
Just a heads up in case you need it. Perkins uses a special grommet on the fuel lines. Perkins calls them an 'olive'. Link... https://www.amazon.com/gp/product/B071F413ZS/ref=ppx_yo_dt_b_asin_title_o07_s00?ie=UTF8&psc=1

Don't keep tightening the fitting to much. Just snug or the threads will strip. The olive is what keeps it from leaking. If you have to replace one make sure the fitting is pushed in hard so more than 1 thread catches when you go to tighten it.

When I pulled mine 2 weeks ago I found somebody previously gooped up the bottom fitting with silicone. Showed the diesel shop and the guy just shook his head and said "Oh Lord"

Thank you! I've kind of learned over the years to err on the side of caution and really take my time with delicate fittings and small fastening hardware. I'm not sure why I loosened a fuel line at the pump to bleed it, if I in fact did. It was definitely loose,tough. I normally (the few times I've had to bleed the system) loosen the bleeding screws on side of the pump and a couple of the return lines at the injectors until the air is purged.
 
The Perkins is finally where it belongs!

We'll I've been waiting for this day. While we like seeing progress on the boat and the mechanical work done was definitely progress, it bugged the heck out of me not having the engine in the boat. I've got a little ways to go yet, reconnecting all of the electrical , fuel & various plumbing components but at least it went back onto the engine bed without a hitch.
This weekend should make a big difference towards getting the boat back home.
I suppose I'll line the shaft couplings up on land but not be to awful concerned with a super-close tolerance and then, after it's home and a week or so has gone by and the boat has settled into her normal shape, realign it to a higher standard.
Way back in the day I repowered a 29' Wellcraft flybridge sportfish I owned. I lined it up on land to .003-.004 and never had to touch it again. At one subsequent haul out, one of the yard employees remarked how well they were lined up. You could spin either wheel by hand and it would freewheel 2 or 3 turns! I'll be happy with this one as long as it doesn't vibrate.
 

Attachments

  • 102_0297.jpg
    102_0297.jpg
    146.4 KB · Views: 7
Looking good. I have done alignments on the hard and they were fine once launched and rechecked. Good luck.
 
Looking good. I have done alignments on the hard and they were fine once launched and rechecked. Good luck.

That sure would be nice if I did luck out & I didn't need to realign it. I guess it depends on how the boat is blocked.
At least this time it should be a little easier since I made sure all of the mounts were clean & oiled. Maybe I'll extend a little more effort and get the alignment pretty close the first time, just in case.
 
reassembly time!

Saturday, I washed and roughed up the glass frame paint for the salon bulkhead door and glass panels that I had to remove to reinstall the engine. While they were drying, I reconnected the electrical , fresh water plumbing to the cabin heater & domestic water heater, fuel supply & return lines, clutch/throttle cables & exhaust parts. I taped & put a fresh coat of paint on all of the bulkhead glass frames. While they were drying, I ran a water supply to the engine and ran it for 10-15 minutes on land to make sure everything was good. It sure sounded good hearing the old Perkins after it had been out for so long!
Sunday I went back and put the glass back in the bulkhead. I cut a notch in the top of a 2 x 4 with a bottle jack on the floor to "stretch" the height of the opening so the doors would lift up and over the frame track. The notch made it so much easier this time. Last time ,removing them, I didn't cut a notch and the 2 x 4 kept falling out plus I was concerned about bending the frame since I was pushing on the thin aluminum that the glass panels slide up into.
I also have a couple of rolls of the felt stuff used in the salon window track slides (I still need to do the back windows but new felt in the front made a huge difference) and had a roll of .250-thickness felt that I used to replace the old stuff in the doors. Hopefully the new stuff will help with the drafts and maybe make the panels & doors tighter in the frame.
We like the white frame color better than the brown that Mainship used. It kind of brightens up the salon and cockpit.
I gave the boat a good, much needed , washing too, since the temperature was in the 80's.
This morning I rough-aligned the engine. I solicited some help because having someone with a feeler gauge at the shaft couplings really makes it easier rather than climbing in and out about 100 times adjusting the 4 engine mounts and feeler-gauging the couplings! I replaced the turbo blankets, installed the shaft & rudder zincs and replaced the water intake hose with 1 1/2" wire hose to accommodate the new seacock I replaced. After that, we launched it & put her in a slip where I'll let it sit for a day & then recheck the shaft alignment. After that, she's coming home and this thread will have come to a long-awaited close!
 

Attachments

  • 102_0309.jpg
    102_0309.jpg
    159.3 KB · Views: 3
  • 102_0311.jpg
    102_0311.jpg
    170.3 KB · Views: 4
  • 102_0316.jpg
    102_0316.jpg
    163.8 KB · Views: 5
  • 102_0318.jpg
    102_0318.jpg
    147.3 KB · Views: 3
  • 102_0319.jpg
    102_0319.jpg
    64.5 KB · Views: 3
  • 102_0322.jpg
    102_0322.jpg
    123.4 KB · Views: 5
  • 102_0323.jpg
    102_0323.jpg
    111.2 KB · Views: 5
My shaft alignment assistant and the completed engine with everything installed. The white paint in the engine compartment had better stay white with all of the new seals and gaskets the motor now has!
Launching and a slip to make sure it still floats.
 

Attachments

  • 102_0324.jpg
    102_0324.jpg
    186.4 KB · Views: 7
  • 102_0330.jpg
    102_0330.jpg
    129.8 KB · Views: 2
  • 102_0327.jpg
    102_0327.jpg
    147.3 KB · Views: 3
  • 102_0325.jpg
    102_0325.jpg
    126.4 KB · Views: 5
  • 102_0326.jpg
    102_0326.jpg
    145.3 KB · Views: 5
  • IMG-1393.jpg
    IMG-1393.jpg
    163.6 KB · Views: 4
Don’t you love a nice white engine room? It sure looks nice.
 
Don’t you love a nice white engine room? It sure looks nice.

Thank you! It used to be gray but I think the white just makes more sense in that area. If a leak develops it's easier to spot. I'm just glad it's back together. It was a bit depressing with the thing pulled apart like it was.
 
Congratulations! Great job. Thanks for sharing your experience with us.
 
Back
Top Bottom