Classic 34 spring projects

The friendliest place on the web for anyone who enjoys boating.
If you have answers, please help by responding to the unanswered posts.

boomerang

Guru
Joined
Apr 29, 2016
Messages
1,398
Location
united states
Vessel Name
Wandering Star
Vessel Make
PSN40
Every year we try to do renovations & upgrades to make our old Mainship more reliable for us. This year I might have gotten overly ambitious but we'll keep plugging away until Liz gets out of school for the summer and we start using it.

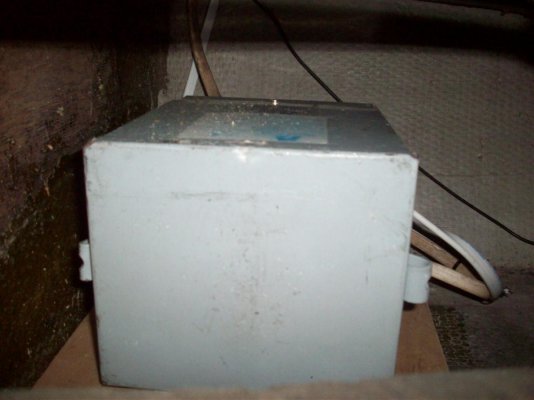
I did get to add the isolation transformer I've been wanting as a precaution against the dreaded tripped breaker at marinas with GFI pedestals. We've never had excessive anode loss but it didn't hurt to have it for that,either. Like I mentioned in another thread, I found it on ebay for less than $150 shipped. It was advertised as used because it was bent and scratched but it was never used. New ,they go for well over $450.

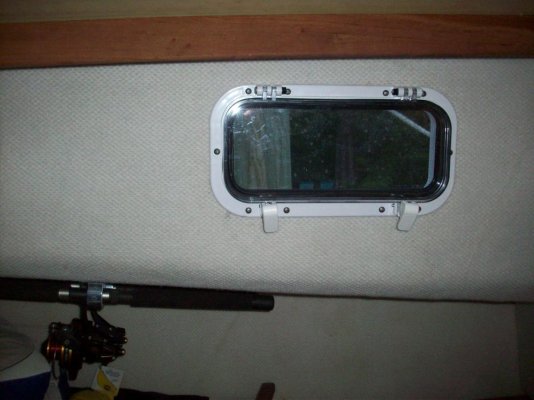
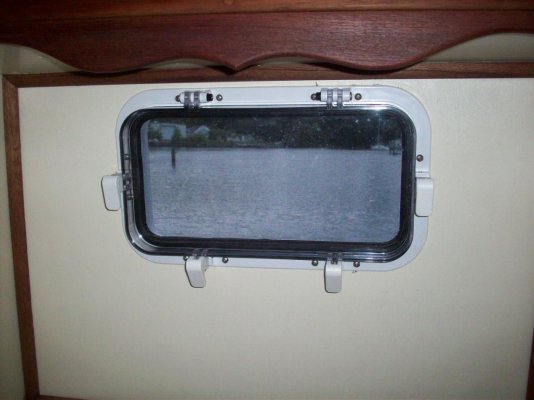
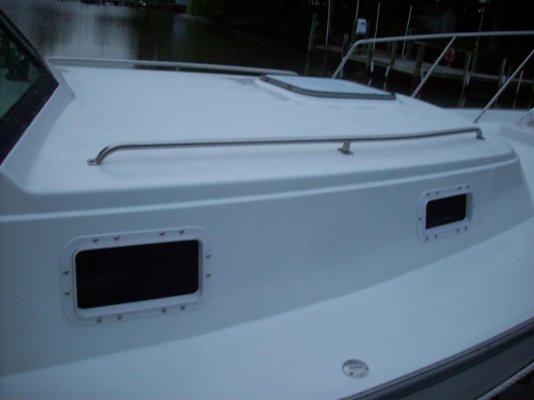
We'd been wanting to replace the Beckson portlights because the old ones had seen their usefulness come and go. They were cracked, leaking and cloudy plus the screens were shot or missing. I was able to find one 714 port on ebay for $35 but the rest I had to buy new. The nice thing is they fit the existing cutouts. They were a pain to install & definitely a 2 person job. The stainless hardware was kind of expensive but the barrel nuts alone were over $80! They kind of made for a cleaner installation in our case so I guess they were worth it.

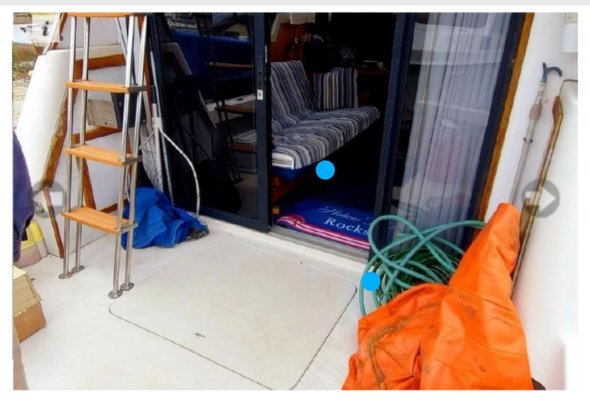
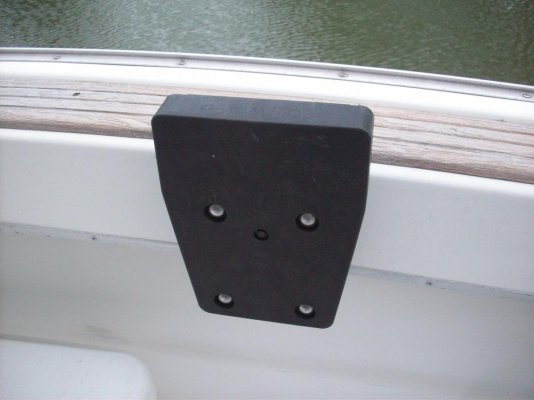
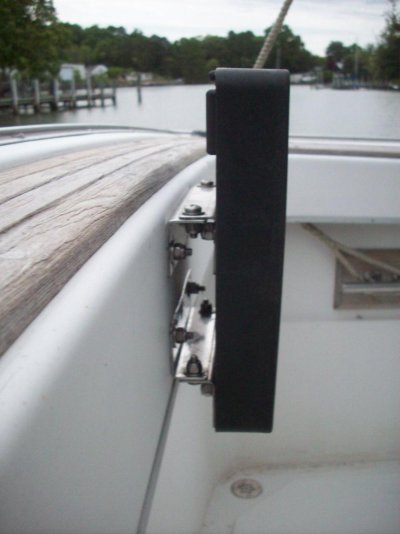
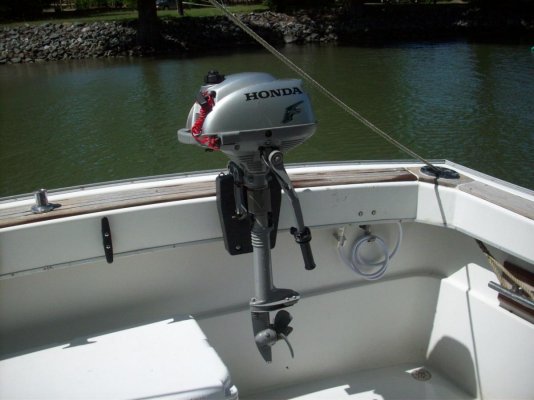
I bought a Chinese outboard motor bracket for $60 and modified it by removing the spring -loaded kick-up parts to hang our tender motor in the cockpit. It looks like it will work out ok.

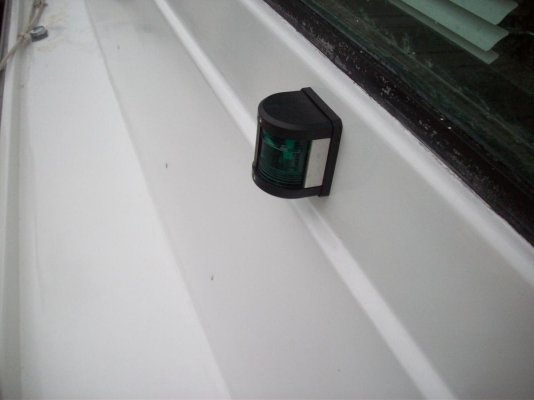
Three weekends of sanding and filling the decks plus multiple coats of Interlux perfection paint. After the final coat, we took one last look at the paint job before heading up the hill. We were so happy with our roll and tip application! Damn if a dew didn't settle on it overnight and turn the shine on the horizontal surfaces to a no-gloss flat. We threw in the towel and decided to be happy with it like it was. Thats one of the benefits of owning an old boat,I suppose. Good enough can sometimes do just fine. With the paint done, we were able to install the portlights plus replace the running lights.

I really wanted to relocate the water tank to under the cockpit but that turned into a bigger project than we wanted to take on right now so it'll have to wait until later on.

The engine still needs to be pulled when we go to the boatyard next month so we can replace the seals that are weeping. I think we'll just take a break for now & recharge for that project.
 

Attachments

  • 102_0113.jpg
    102_0113.jpg
    82.8 KB · Views: 16
  • 102_0108.jpg
    102_0108.jpg
    107.1 KB · Views: 12
  • 102_0102.jpg
    102_0102.jpg
    98 KB · Views: 12
  • 102_0098.jpg
    102_0098.jpg
    63.3 KB · Views: 11
  • 102_0119.jpg
    102_0119.jpg
    58.2 KB · Views: 11
  • 102_0100.jpg
    102_0100.jpg
    81.5 KB · Views: 9
  • 102_0101.jpg
    102_0101.jpg
    77.1 KB · Views: 13
  • 102_0093.jpg
    102_0093.jpg
    102.4 KB · Views: 16
Last edited:
Looks good. My 34 had brightside paint from the deck up, and it looked good for ten years.

There will be lots to do with the motor out... good chance to clean and paint the bilge!
 
You're right, with the engine out, it'll be a whole bunch easier to get in there and spruce things up. Everything is actually pretty tidy down there already, since after every big trip I have to get in there with a wet/dry vac and suck the oil out then scrub like mad to remove the residue. :facepalm:
We used brightside on the bridge & bridge floor/cabin top 4 years ago when we re-cored the top. It's already starting to show wear so I'm hoping the 2-part perfection will be a little more durable.
 
New portlights and navigational lights look great as well as the outboard bracket. When you find a suitable placement for another water tank lets me know, I've been looking for years!
 
It's something how MS changed things over the years. I have a 200 gallon fuel tank under the cockpit with 2 water tanks under the port side decks. Batteries and water heater are under the starboard side.
I'd like to mount an outboard on the back of the flybridge ladder somehow. Out of the way. Another project.
Going to try and seal the portlights on ours. The Beckson's look nice but pricey !!
And absolutely sometimes you have to say enough is enough and just enjoy !!
 
I'd like to mount an outboard on the back of the flybridge ladder somehow. Out of the way. Another project.


Solly, my dad's old MK3 had a outboard mount to the bullhead just forward of the flybridge ladder. There is more rood here on the MK3 thank the MK1 so it would work for you. Here is a pick , the boat is back on the market (not his anymore, he has a 390 now).
 

Attachments

  • Screenshot_20210510-114817.jpg
    Screenshot_20210510-114817.jpg
    92.6 KB · Views: 19
[QUOTE really wanted to relocate the water tank to under the cockpit but that turned into a bigger project than we wanted to take on right now so it'll have to wait until later on.

The engine still needs to be pulled when we go to the boatyard next month so we can replace the seals that are weeping. I think we'll just take a break for now & recharge for that project.][/QUOTE]

Where is your water tank now?
I had a 78 Model 1 and it was under the cockpit up against the bulkhead under the slider.
With the engine out it would also be a good time to replace the stinky old water hose with pvc or pex if you have not already done that. I redid mine with PVC and made sure it was angled so I could gravity drain the system for winter.
 
Where is your water tank now?
I had a 78 Model 1 and it was under the cockpit up against the bulkhead under the slider.

Yeah, mine too.
 
[QUOTE

Where is your water tank now?
I had a 78 Model 1 and it was under the cockpit up against the bulkhead under the slider.
With the engine out it would also be a good time to replace the stinky old water hose with pvc or pex if you have not already done that. I redid mine with PVC and made sure it was angled so I could gravity drain the system for winter.

That's a good idea to replace the water lines with pex or similar while access is easy. Thanks.
I added 2- 2 x 4 support braces directly under the door threshold that are fastened to the 2 inboard stringers. The braces, being under the door, pushed the 40 gallon poly tank back 8-10" from the bulkhead. It's not a terrible situation and access is still good but I would love to do away with the tank in that area completely.
 
It's something how MS changed things over the years. I have a 200 gallon fuel tank under the cockpit with 2 water tanks under the port side decks. Batteries and water heater are under the starboard side.
I'd like to mount an outboard on the back of the flybridge ladder somehow. Out of the way. Another project.
Going to try and seal the portlights on ours. The Beckson's look nice but pricey !!
And absolutely sometimes you have to say enough is enough and just enjoy !!

We ended up using the area behind the ladder for a propane locker. I lamented over where to store the motor and where it is now actually works pretty well. The cooler is always in the center and there's still plenty of room for the cockpit chairs in each corner. The dingy is on Weaver mounts so when I lower it into the water, I stand on the swim platform & just reach right over ,grab the motor from it's mount in the cockpit and mount it on the transom of the dingy.
 
Shawn how do you secure your motor ? I want to leave it out and thought running a chain through the ladder would be good. We put the propane tank in the locker on the side. On the Mk III the rear sides and transom are cut down and with the door it's pretty easy to move it around. I wish they were full height. Looks funny I think.
 
Shawn how do you secure your motor ? I want to leave it out and thought running a chain through the ladder would be good. We put the propane tank in the locker on the side. On the Mk III the rear sides and transom are cut down and with the door it's pretty easy to move it around. I wish they were full height. Looks funny I think.

Honestly, I haven't secured our motor with a lock, yet. We just installed the motor and dingy setup last year and the temporary contraption I made to mount the motor could've been torn loose by a 6 year old criminal. We keep the boat at our dock so not too much worry there but when cruising, we prefer to anchor out in secluded areas as opposed to marinas so that helps to reduce the motor theft anxiety level. When we did stay at a marina, I have to admit that each morning I was always happy to see the motor was still where I left it. I have a canvas cover for the motor and feel that keeping it out of sight doesn't hurt.

On the new mount I just installed, I'll put a lock through the motor clamps & hope for the best.
 
The engine still needs to be pulled when we go to the boatyard next month so we can replace the seals that are weeping. I think we'll just take a break for now & recharge for that project.

Are you planning to pull the motor completely out and reseal or raise to saloon level and work on it in the boat?

I'm still working on getting my oil leaks located and haven't figured out the extent of my leaks or the repairs required but I'm hoping to make it through the season with vigilant use of oil diapers and address the leaks in the fall. I believe the valve stem seals are in need of replacement so I will probably pull the head at the same time and do a top end overhaul. It would be nice to have someone to compare notes with.
 
It's not that difficult to raise in place. I've done it in my 34. Built A frame supports for a steel beam close to the ceiling and used an electric hoist. If you're taking it out of the boat it gets a little more complicated.FB_IMG_1479008650907.jpegFB_IMG_1479008632086.jpeg
 
The boatyard I'm using has a shooting boom truck so ,in theory, I'm going to remove the glass from the back bulkhead of the salon, stick the boom in over the engine and lift it up and out that way. I really don't see that we'll have any issues with the height of the salon but we might have to wrestle the engine over the transom since the cockpit has the extended roof over it. Once out, I'll either take the engine to TAD (they're only 30 minutes away) for them to go over or put it in the shop where I'm hauling (Chesapeake Cove in Deltaville VA) and let one of their competent mechanics go over it. Either way, it's way easier to work on it while it's sitting outside of the boat than while it's in. I'll post the progress as it happens. It'll probably be another week or two before I can get the boat there to be hauled.
 
When I did my repower on my 78 model I the yard used a boom truck also to remove/replace the engine.
However it did not have the reach to do it without taking a second hook up.
So, I laid plywood on the cockpit deck so they could set the engine down for a second lift to get it over the transom.
You may want to do something similar.

Thanks for the FYI. I'll be sure to have have some scraps close by in case we need to get another bite on the engine. Gone are the days where I could use a couple of sheets of 3/4 sheathing ply for something like that. Plywood and lumber in general is like gold now!
 
Although it's probably going to be hotter than heck, we've decided to wait until after the 4th to remove & spruce up the engine. Labor day was a washout here on the lower Chesapeake so we're hoping the July 4th holiday will cooperate.
 
I am coming out next week apply a couple coats of bottom paint and take care of a couple project on my newly acquired 34 MK1.

I am trying to keep the project list short but I will be replacing my garboard drain under the engine, a few years ago when launching my father's 1985 MK3, it would not stop seeping, after several applications of pipe tape, I realized that the threaded portion of the fitting was breaking apart and I had to pull the boat back out to replace it. Of course the replacement casting was different so some minor glass work was required, my boat is 5 years older than his so I imagine it is due. My apologies if this is considered a thread jacking.
 
Last edited:
I am coming out next week apply a couple coats of bottom paint and take care of a couple project on my newly acquired 34 MK1.

I am trying to keep the project list short but I will be replacing my garboard drain under the engine, a few years ago when launching my father's 1985 MK3, it would not stop seeping, after several applications of pipe tape, I realized that the threaded portion of the fitting was breaking apart and I had to pull the boat back out to replace it. Of course the replacement casting was different so some minor glass work was required, my boat is 5 years older than his so I imagine it is due. My apologies if this is considered a thread jacking.

This is just unbelievable !!!
Pulled ours ( 85 Mk III ) out yesterday because we had a leak around the drain. When the yard tried to remove the drain to re-bed it, it disintegrated ! I was thinking stray current corrosion or something. Maybe Mainship used a cheap garboard drain, got a bad batch, or just 36 years old..... ??
I'm replacing ours too. Should of had them glass it closed.

Check your Mainship drains if you have one !!
I almost lost the whole fitting after grinding around on a rock for a while. I asked the glass guys to close it off but they were reluctant due to oil contamination and lack of access on the inside.

http://boatingadventures.ca/2018/09/19/aground-part-4/
 
I'm assuming the drain in the keel of ours is original but maybe it's been replaced. It gets pulled every time we're on the hard. I'll scrutinize it a little closer when we haul to make sure it's sturdy but I can guarantee you one thing... I'll always have one in the bottom of any boat I own! It's nice to know that if any water gets in, it'll run back out while it's on land. It's one less thing to worry about. I can shut everything off or even remove the batteries and just walk away!
 
I replaced the drain on my father's MK3 with a T handle Sea Dog 3/4", the bronze casting was much more substantial than the original. I tried to order another for my boat and the vendor didn't have one, had to cancel my order so I got a Perko unit which looks identical from Defender (I love them even after my credit card data was hacked during their recent data breach).
 
Back
Top Bottom