DIY rebuilding of diesel engine Yanmar 6LY

The friendliest place on the web for anyone who enjoys boating.
If you have answers, please help by responding to the unanswered posts.
Are you going to get the crankshaft ground?
If not how are you going to address the journal finish?

btw I have taken injectors apart, cleaned, and reassembled them with no noticeable problems. Both times they were VWs (Bosch injectors).

EDIT: here are the tips and my home-made puller and getting ready to celebrate that they are finally out. Cleaning and reinstallation tomorrow LOL
 

Attachments

  • 12309961_10205733256190810_6871695717302517991_o.jpg
    12309961_10205733256190810_6871695717302517991_o.jpg
    121 KB · Views: 29
Last edited:
My humblest apologies if I mis-advised you on the purchase of the Princess 1/2" impact wrench I though would easily remove your stubborn pulley.

It was a valid idea and i appreciate it. all those micro-vibrations from the impact gun could help to get a pulley out.
just did not work for my case as well as many other things i tried. i did not have any issues returning it because it's way too powerful for my inexperienced hands. it looks like it's easy to break M10 or maybe even larger bolts with it which will introduce a whole new level of problems.

Awesome job. Almost makes me want to go out and rebuild another engine somewhere..... but alas, I'm enjoying things that run properly and will savor the moment....

uh, some day i hope to get to such a wonderful place of serenity when everything on the boat is working the way i want and no projects are nagging at the back of my head.
is this even a remote possibility?


Are you going to get the crankshaft ground?
If not how are you going to address the journal finish?

There are no visible damages, they just need some polishing.
I'll measure them with a micrometer to ensure they meet the specs.

btw I have taken injectors apart, cleaned, and reassembled them with no noticeable problems. Both times they were VWs (Bosch injectors).

EDIT: here are the tips and my home-made puller and getting ready to celebrate that they are finally out. Cleaning and reinstallation tomorrow LOL

Nice. Congrats. :thumb:
I see the same possible mistake I made with disassembling the injectors - all the insides have to be paired, so they go back to the same body and the same cylinder. the service manual mentions this and it makes sense because the shims inside can be different sizes to calibrate the injector at the factory.
 
Greetings,
Mr. W. Returns at Princess are the BEST in that class of store. You can return with NO time limit what-so-ever. I think Harbor Freight requires returns within a month.
 
uh, some day i hope to get to such a wonderful place of serenity when everything on the boat is working the way i want and no projects are nagging at the back of my head.
is this even a remote possibility?


I was ONLY referring to the engines. There's lot of other stuff that needs work, all the time.
 
I was ONLY referring to the engines. There's lot of other stuff that needs work, all the time.

but just imagine if it was not! everything is done! this would be such a wonderful time. i do believe. I've heard stories ...
 
Cleaning

Cleaning

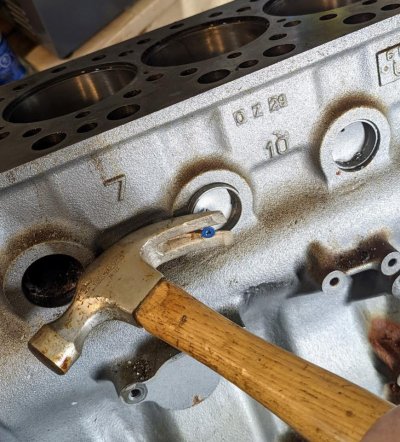
I removed freeze or core plugs from the block and the head. The manual says to hit the plug with a screwdriver below the top to tip it over to remove it. That worked for the head plugs but not for the block plugs. Block plugs just got ripped apart without tipping over.

One trick i found is to drill a small hole in the plug between the center and the rim, put a screw in it and use a hummer for leverage to remove it with the plug. Works like a charm.

attachment.php


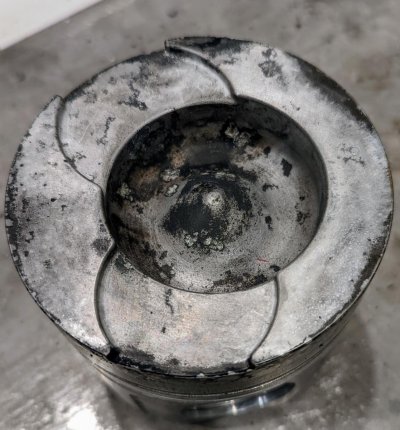
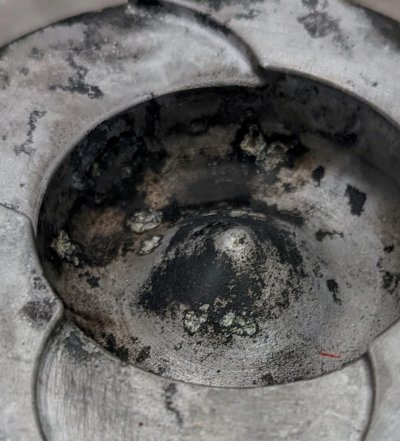
After removing the plugs, I sprayed oven cleaner for a nice thick coat, waited for 10 minutes, and power-washed with a "gentle" nozzle. I would not use a high-pressure nozzle because I saw one guy pushed out camshaft bearings with it, and I will not be replacing them.

After power washing, i wiped with a rug and used compressed air to air-dry and blow all the holes and cranks.
The last step is to give everything a nice coat of wd40 to prevent the flush rust.

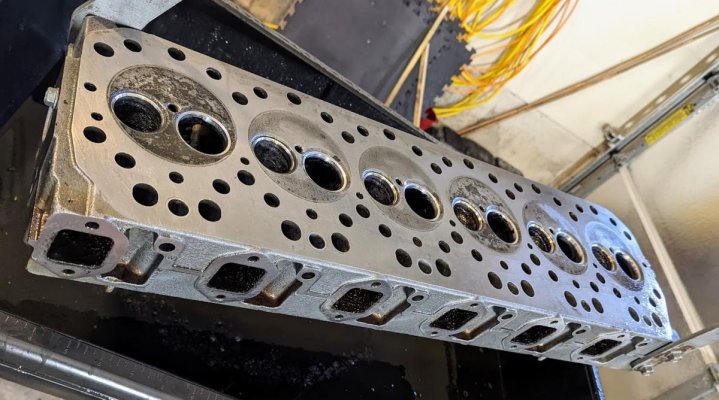
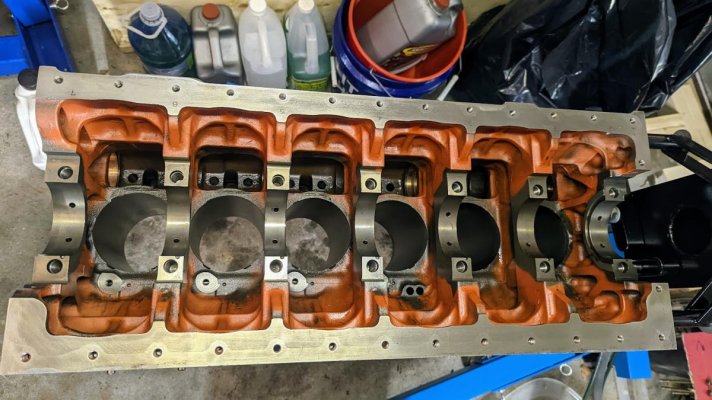
For the gasket surfaces on cast iron parts, i used a metal blade, and on aluminum, i used a plastic blade. Scotch Brite and Vasol (mineral spirit) to super clean everything.
Bronze brushes for cleaning nozzles worked well to get all the sealant out of the bolt holes.

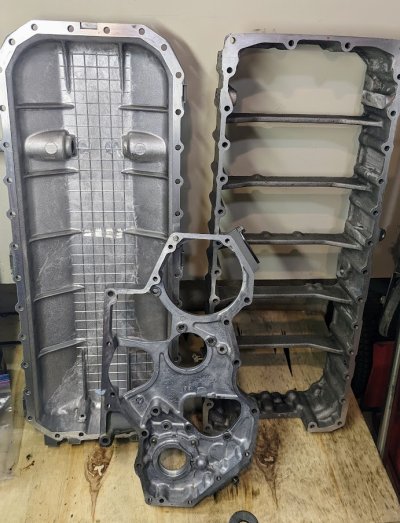
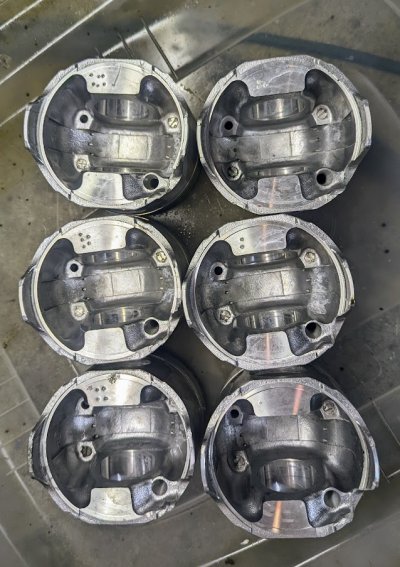
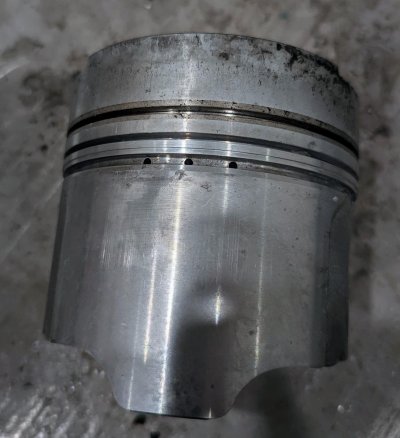
The same procedure is for all large parts: head, block, oil pan, intermediate insert for the oil pan, and gear housing.

I will not be sending the block to a shop to boil it in a hot tank because it will destroy the cam bearings, which are in good condition and I do not plan to replace, and I did not find any rust or other crap inside the engine walls if I look around the core plugs.

If you block in a worse shape and you see the rust and blockage inside the water passages, hot-tanking could be a good option.

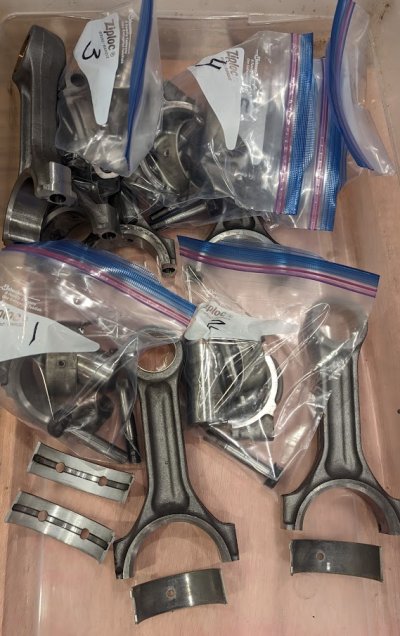
Small parts went to the ultrasonic cleaner with distilled water/Simple Green HD 70/30 mixture, and if anything was rusted, i did a cycle in Evaporust.

Check the oil pan...

attachment.php


attachment.php


attachment.php


attachment.php


attachment.php


Cleaning fluids of my choice:

  • Oven cleaner (only for a quick spray - it's corrosive)
  • Simple Green HD (none-corrosive)
  • Evaporust (to clean rusted parts)
  • Vasol/Mineral Spirit (the smell is terrible but no risk of corrosion)
  • WD40 to coat everything after cleaning

Next... parts inspection, the problems i found so far, and preparing the replacement parts order
 

Attachments

  • plug_removing.jpg
    plug_removing.jpg
    169.2 KB · Views: 237
  • washed head 2.jpg
    washed head 2.jpg
    130.5 KB · Views: 239
  • washed block.jpg
    washed block.jpg
    135.1 KB · Views: 242
  • washed oil pan.jpg
    washed oil pan.jpg
    178.7 KB · Views: 239
  • washed pistons.jpg
    washed pistons.jpg
    166.7 KB · Views: 243
  • washed parts.jpg
    washed parts.jpg
    138.8 KB · Views: 236
Looks like Yanmar applies a 'Glyptal"-like coating to the inside block surfaces.
I had to do that myself to my Landcruiser's 6-cyl block and head.
 

Attachments

  • IMG_0637.jpg
    IMG_0637.jpg
    130.3 KB · Views: 17
Looks like Yanmar applies a 'Glyptal"-like coating to the inside block surfaces.
I had to do that myself to my Landcruiser's 6-cyl block and head.

Considering that my Yanmar had water in the oil and was sitting still for over 10 years, it looks pretty decent inside , probably thanks to that coating.
 
Be very careful with scotch brite in an engine, Good Year banned the use of it in their stores when my mechanic son was working there years ago.
Nationally GY had to replace too many engines because of failures attributed to using scotch brite and not getting all the fibers cleaned out properly.
Double check everything.

Good point. Thanks.
I'll do all the holes again with an air compressor before I start to assemble.
 
Be very careful with scotch brite in an engine, Good Year banned the use of it in their stores when my mechanic son was working there years ago.
Nationally GY had to replace too many engines because of failures attributed to using scotch brite and not getting all the fibers cleaned out properly.
Double check everything.
Jay,
Can you say what was the failure modes for Scotch Brite fibers in engines? Curious.
Thanks,
Al

Edit: found stuff!
http://www.saturnfans.com/forums/showthread.php?t=53086
Short story is aluminum oxide abrasive particles in the pad eats the motor.
 
Last edited:
Jay,
Can you say what was the failure modes for Scotch Bite fibers in engines? Curious.
Thanks,
Al

Edit: found stuff!
SaturnFans.com Forums
Short story is aluminum oxide abrasive particles in the pad eats the motor.

It can find it's way in between journal bearings and surfaces that ride on them (crank and cam shafts). They are pretty tough to get rid of, but I think the OP can be diligent in cleaning enough to above trouble here. I would just double or triple the cleanings before assembly. I wouldn't use them in engine cleaning but it can be recovered from.

I think the most common occurrences of scotch pad abrasive contamination is during head gasket jobs where the abrasive pad sheds off material down the return oil passages. It is safer to use scrapers for the surface of the cylinder block.
 
Here's another post rather than adding to the one above.
I'll take the side of the injector service shop. What they told you sounds OK.
Don't forget that your precise injectors bathed in salt water for a long time.

The nozzles are certainly beyond saving. Removing the rust hasn't fixed them.
Be very cautious where the new ones come from. Avoid Chinese knock-offs!
The injector bodies may or may not be salvageable. This is no place to cheap out.

I've been around heavy equipment for most of my working life.

The shop that I use doesn't mess with injectors or injection pumps. And they have a couple of lead hands with more than 30 years each of experience with diesel engines. They take injectors and pumps to a trusted local shop with the proper testing equipment (and cleanliness).

As far as replacing versus repairing, I know it's a tough pill to swallow, but new is often more economical.

I helped one of their guys replace the exhaust system on an excavator. He bought everything new, including all of the clamps, nuts and bolts. We started disassembly with a big impact wrench and a grinder with a cutting wheel. Most fasteners were either broken with the wrench or cut with the grinder.

We were done in less than 2 hours. One broken clamp or bolt would have stopped the job and resulted in a new parts order and a new visit to the job site. And down time for the machine. A site visit, which is a 50 mile round-trip, with an experienced hand and mileage in a heavy field service truck starts at around $300.

So the $100 worth of "unnecessary" hardware expedited the job and ensured that it was completed in one trip.
 
Can you say what was the failure modes for Scotch Brite fibers in engines? Curious.
Thanks,

It can find it's way in between journal bearings and surfaces that ride on them (crank and cam shafts). They are pretty tough to get rid of, but I think the OP can be diligent in cleaning enough to above trouble here. I would just double or triple the cleanings before assembly. I wouldn't use them in engine cleaning but it can be recovered from.

I think the most common occurrences of scotch pad abrasive contamination is during head gasket jobs where the abrasive pad sheds off material down the return oil passages. It is safer to use scrapers for the surface of the cylinder block.


Here is the answer
 
Cleaning and inspection

so, my first big disappointment after the cleaning.
When i removed the pistons, they looked pretty good and I was hoping only the rings would have to be replaced.

attachment.php


there is some minor scoring on the sizes, but they pass the "nail test" and are probably caused by rusty cylinder liner during the piston removal.

attachment.php


3 of the pistons have nasty pitting in the piston bowl, which i found after cleaning a lot of carbon on top of them.

Below is the worse of them. Another has a few small pits and the third has one large crater ~ 1/4" in dia and 1/8" deep.

attachment.php


attachment.php


Do you know if this is from the rust (the engine got water into the cylinders at some point) or was this caused by melting because of an incorrect injector spray pattern?
If this is from the rust, strange why those were covered by a layer of very strong carbon, which took a few days to remove in different chemicals.

Can this be repaired by aluminum welding and sanding or those are junk?
Each piston is $670 USD, and this, so far, will be the biggest expense in the whole rebuild.
 

Attachments

  • cleaned piston.jpg
    cleaned piston.jpg
    103.2 KB · Views: 193
  • piston side.jpg
    piston side.jpg
    126.5 KB · Views: 196
  • piston pitting 1.jpg
    piston pitting 1.jpg
    186.4 KB · Views: 191
  • piston pitting 2.jpg
    piston pitting 2.jpg
    144.7 KB · Views: 193
Greetings,
Mr. W. The pits MAY be able to be repaired using spray coating of Al (Just off the top of my head) but that's just a WAG. Might be better than welding as welding will change the crystalline structure and thus the homogeneous-ness/strength of the casting. You might just have to bite the bullet on that one?????
 
Each piston is $670 USD, and this, so far, will be the biggest expense in the whole rebuild.


Wow I had no idea it would be that expensive. Maybe I don’t hate my old Jimmies so much anymore. I think my entire rebuild kit was maybe three times that at most
 
Wow I had no idea it would be that expensive. Maybe I don’t hate my old Jimmies so much anymore. I think my entire rebuild kit was maybe three times that at most

Marine Yanmar parts are very expensive compared to other engines or even Yanmar industrial engines.

For example, injectors for my Yanmar 6LY marine diesel cost $485 each,
Very similar injectors for Yanmar 4TN100 industrial diesel with the same cylinders are $65 each. The slight difference is just enough not to make them fit into my engine. why!? WHY?! :banghead:

Someone on a tractor forum told me Yanmar used to have marine and industrial parts interchangeable and cross-reference was very available for everyone. Not any longer. i guess they decided to make a bit more on the boat engines because they consider them as luxury items and super-rich people like us can afford that. :mad:

I wonder if there is a different price available for commercial fishery vessels but i did not find any source of such.
 
I would find a performance diesel shop and pick their brain. There is probably a suitable alternative out there, perhaps even a forged upgrade.
 
I would find a performance diesel shop and pick their brain. There is probably a suitable alternative out there, perhaps even a forged upgrade.

This is a good idea, but I also can't tell much from the pictures. I might be tempted t clean them a little more and maybe the worst pits will come out.
Perfect is nice, but not always necessary.
 
I would be seriously worried about the pitting around the OD of the crown as well, and any pitting in the bowl is equally dangerous as that is the primary area of fuel/gas combustion in the engine and those pits have sharp edges, and sharp edges create hot spots.

As for welding a cast piston, I wouldn't recommend that course of repair.

As bad as it feels to spend the money on new pistons think of all the money you are saving elsewhere. Or, in more plain terms Don't trip over a dollar to save a dime.
 
Last edited:
I would be seriously worried about the pitting around the OD of the crown as well, and any pitting in the bowl is equally dangerous as that is the primary area of fuel/gas combustion in the engine and those pits have sharp edges, and sharp edges create hot spots.

this is what I'm thinking. those pistons are not solid and have some oil passages inside. if one piston will fail, the whole engine will probably be junked.
why oh why i cleaned them!? the hard carbon was hiding those pits perfectly :)

but I'll go to a rebuild shop today and see what they will say. i have to arrange the crankshaft polishing anyway.
 
There are coatings that you can apply on the top of pistons to reduce friction, noise, and scuffing, If the pitting could be smoothed out without removing too much material or reshaping it, you could apply a coating over top to mitigate the damage. As Pacopico points out, you can't have any sharp edges, but if you can smooth them down and polish to a smooth surface you may be able to salvage them.

Keep in mind that your injector does not fire straight down, it fires sideways and hits the walls of the bowl in the top of the piston. That surface is critical.

The precision that high rpm diesels require with regard to tolerances and balance is a whole different ballgame than an old Detriot or Lehman.
 
If the pitting could be smoothed out without removing too much material or reshaping it, you could apply a coating over top to mitigate the damage.

thanks. the pitting in at least 2 of the pistons seems to be too deep to smooth out (1/8" or so)
I'll check with the shop.
 
thanks. the pitting in at least 2 of the pistons seems to be too deep to smooth out (1/8" or so)
I'll check with the shop.

Yeah, that sounds like too much material, I was thinking more along the lines of smoothing out the rim of the pit, polishing but letting the divot and then applying a coating over it.

This is probably a case where you appreciate the money you saved elsewhere but bite the bullet and buy new pistons. For all of the sweat equity you have invested, you deserve some piece of mind when it is back together.

I would call TADiesel, they have a great reputation for perkins support but are also vendors for yanmar.
 
You would only need to replace the bad ones, right?


I don't think I'd do any welding or spray welding build up for fear of distorting the piston shape. I think I'd belly up for 3 new pistons.
 
Do you buy just the piston or does it come with a new liner?
 
I went to a rebuild shop today and the guy told me I pretty much have to replace the pistons any time I replace the cylinder sleeves in the diesel engine. I'm not sure if this is accurate information but he was absolutely positive about that.

Because I will be getting all the new sleeves, I'll get the new pistons as well. Just have to fly coach instead of business class on my trip to Paris for the new year dinner this year and will have to skip the black caviar this time...

That "replacement everything to new" thing is getting old very fast. Feels different from all those certified YouTube mechanics who take the old rusty engine apart, clean the large dirt from the crankshaft, change the rings, spray some wd40, put everything back together and call it a day.
 
Back
Top Bottom