DHeckrotte
Guru
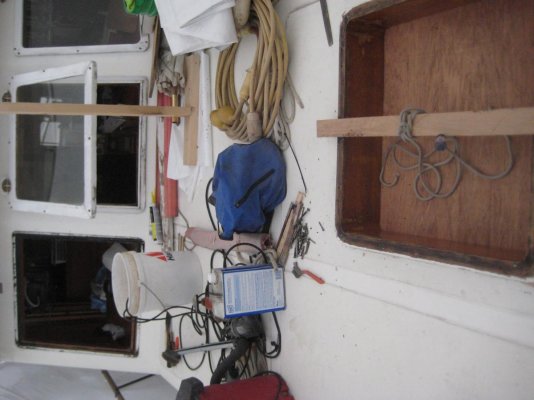
I'm rebedding our forehatch. I've got it nearly clean enough to think about refinishing the Teak, paint outside and varnish inside.
The Teak coaming is apparently in fine shape. I've removed 34 years of exterior paints (no varnish remaining) and many applications of various sealants between the coaming and the house top.
The interior of the coaming is about 3/4" thick, glued to an exterior piece of trim, forming, I presume, an 'L'-shaped piece of wood on the four sides. The four sides are glued together and the interior corner has a nice solid Teak cove. I presume 'L'-shaped because there are bungs concealing fasteners which affix the coaming to the fiberglass below. I presume the housetop is a 1" oa thick balsa cored structure like the decks and saloon top.
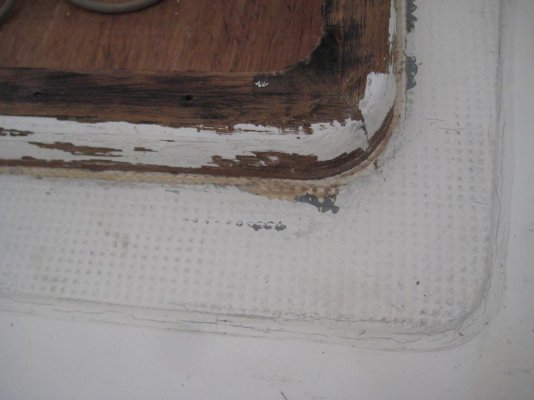
There are 6 'patches' of raised nonskid on the house top and similar raised patches on the flybridge. Those on the house top are caulked around their perimeters and have been painted several times. The whole surface has been painted as well.
The paint on the nonskid is in poor condition and the sealants have shrunk under the paint making an unsightly mess. The flybridge patches of nonskid look fine, have not been sealed, but have also been painted.
So the question of the day is: what is this nonskid? It appears as though it was glued down to the fiberglass. It appears as though it has lifted at the edges so that a PO attacked it with his caulk gun. I dug a bit along one edge and it appears to be a thin patterned layer of fiberglass glued down to a layer of something else and then glued down to the fiberglass deck/housetop. Alternative is that it is actually moulded in with the 'glass but the sharp change in shape and the 3/16" +/- thickness would suggest otherwise. More often, it seem to me, that the nonskid is sprayed on, glued on in a thinnish layer, or moulded in almost flush.
All this would be of no real interest now except that I will want to replace the run of caulk where the nonskid seems to have been fitted around the coaming. There is no damage to the overhead below, nor to the Teak surround below.
(I'd post a pic but I forgot the camera-computer cord.)
The Teak coaming is apparently in fine shape. I've removed 34 years of exterior paints (no varnish remaining) and many applications of various sealants between the coaming and the house top.
The interior of the coaming is about 3/4" thick, glued to an exterior piece of trim, forming, I presume, an 'L'-shaped piece of wood on the four sides. The four sides are glued together and the interior corner has a nice solid Teak cove. I presume 'L'-shaped because there are bungs concealing fasteners which affix the coaming to the fiberglass below. I presume the housetop is a 1" oa thick balsa cored structure like the decks and saloon top.
There are 6 'patches' of raised nonskid on the house top and similar raised patches on the flybridge. Those on the house top are caulked around their perimeters and have been painted several times. The whole surface has been painted as well.
The paint on the nonskid is in poor condition and the sealants have shrunk under the paint making an unsightly mess. The flybridge patches of nonskid look fine, have not been sealed, but have also been painted.
So the question of the day is: what is this nonskid? It appears as though it was glued down to the fiberglass. It appears as though it has lifted at the edges so that a PO attacked it with his caulk gun. I dug a bit along one edge and it appears to be a thin patterned layer of fiberglass glued down to a layer of something else and then glued down to the fiberglass deck/housetop. Alternative is that it is actually moulded in with the 'glass but the sharp change in shape and the 3/16" +/- thickness would suggest otherwise. More often, it seem to me, that the nonskid is sprayed on, glued on in a thinnish layer, or moulded in almost flush.
All this would be of no real interest now except that I will want to replace the run of caulk where the nonskid seems to have been fitted around the coaming. There is no damage to the overhead below, nor to the Teak surround below.
(I'd post a pic but I forgot the camera-computer cord.)