Swimgrid re-do

The friendliest place on the web for anyone who enjoys boating.
If you have answers, please help by responding to the unanswered posts.

koliver

Guru
Site Team
Joined
Nov 23, 2007
Messages
5,662
Location
BC, canada
Vessel Name
Retreat
Vessel Make
C&L 44
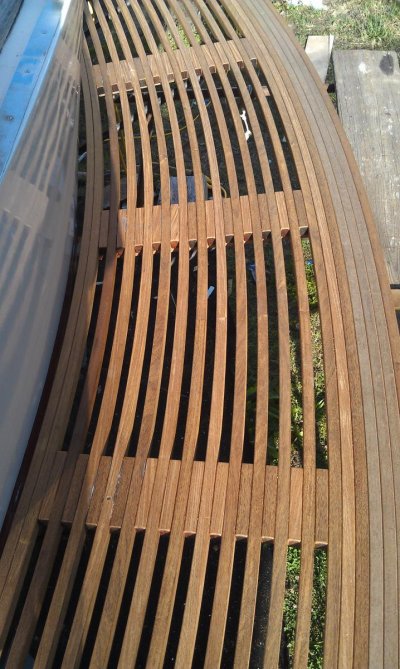
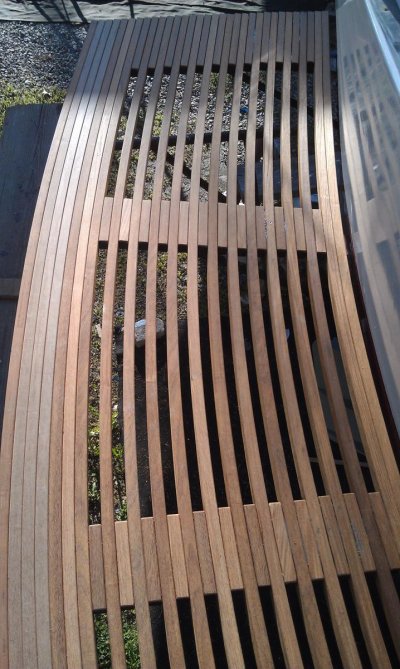
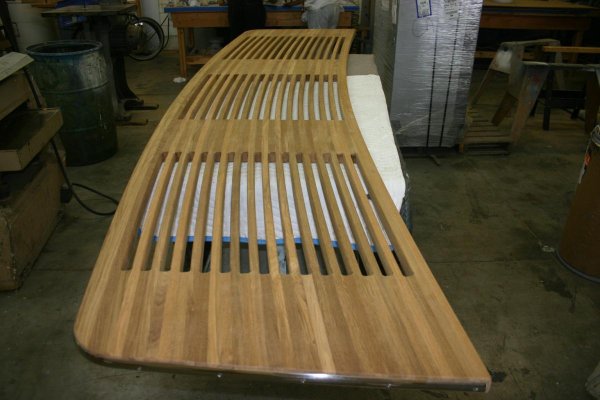
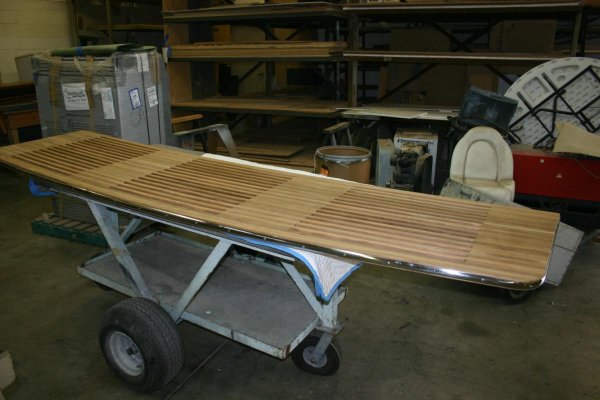
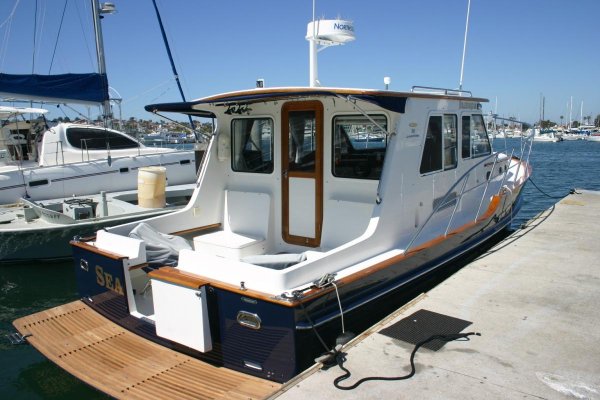
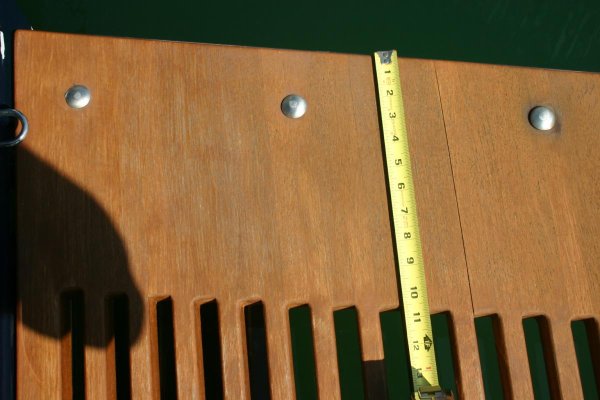
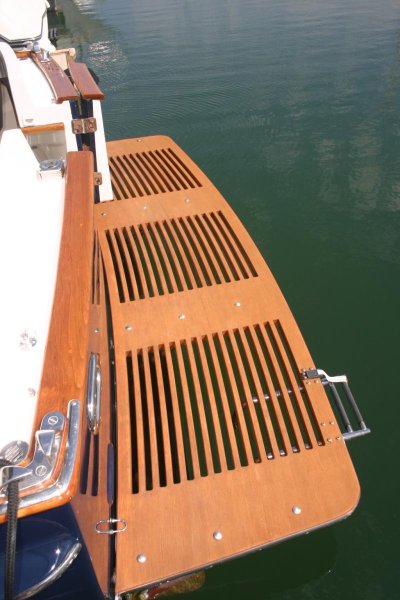
Several years ago I rebuilt my swimgid, adding 13" depth to the inside. At the time I chose to let the upper surface go grey and I varnished the underside. The ladder position that i chose was to through bolt the ladder at the port end, so that, flipped up, the ladder stood against the transom and flipped down it hung over the aft edge of the swimgrid. This location created a lot of torque when heavier swimmers climbed up and the epoxied joint between the last of the old boards and the first of the new boards at this location sprug apart. It is now time to repair and redesign. I will not be putting the ladder back in the same place, but will turn it so that it hangs over the end of the swimgrid and when flipped up, will no longer be against the transom, but will be against the back of one of the tubes of the dinghy. this location will also enable launching the ladder while the dinghy is raised, something I have been missing since going to a larger dinghy.

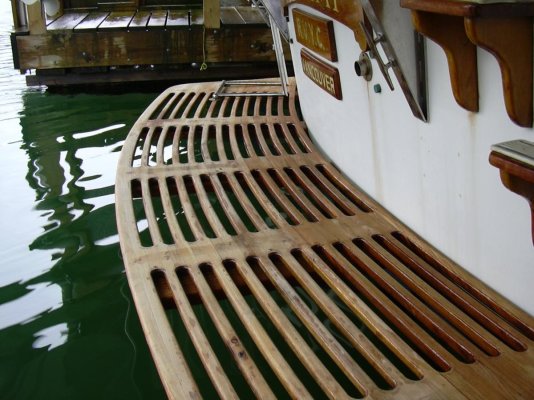
Close inspection of the teak reveals that "going grey" does nothing for the deterioration of the teak from the sun, salt and wear, which has taken a considerable toll in the years since I did the SG last, so I am considering a finish for the top surface. The varnished underside is in need of a recoat, but has survived quite well, with no green algae, as it had when left unprotected. I don't want to use varnish, unless it turns out to be the best option, as I like the great traction unprotected teak provides. I don't like the look of Cetol, but again, if it turns out to be the vest option... Others use Deks Olje, but I have a little experience with that product and don't think it is durable enough, as it would require recoating several times a year in order to provide both traction and good looks.

Are there other options I should consider?
 
I use Deks Olje No.1,the oil not the No.2 gloss, on the swim platform, it`s easy to use, you`re right it`s not durable, but it is non slippery and safe. I`d like something better too.
 
I use Cetol on the top surface, but I add some non-skid sand for traction. Works good.
 
Just refinished my swim platform ( original 35-year old platform on a Marine Trader 44) with the 3-part product...(1) cleaner, (2) brightener, (3) teak oil. Looks great, but you're right, it needs regular re-coating with teak oil to keep the good looks. My understanding is the teak oil treatment helps preserve the wood. Is this not correct? Would appreciate hearing from others on this.
 
Mike: Thanks for the note. Is Rochepoint kept in a shelter? I know she was and had been for many years back in 94 when we were looking. Has she been kept outside at all since then? How many years do you go between refreshing coats of Cetol?

JL: Is Attitude Adjustment kept in a shelter? If outside, how many years do you get between re-coatings.

Bruce: I used Deks one season on a previous boat. It looked good for a matter of days or weeks, but I am looking for something that will go years. Thanks for your comment.
 
After spending sometime on the wooden boat site, I left my swim grid unfinished. It is about 50 years old and looks great when wet, very gray when dry, but the wood is sound. From what I read on that site, teak needs nothing, and any coating is for aesthetics.
 
Rochepoint is in a shed, but we only redo the swim-grid once ever 8 years and with Cetol is is easy to re-coat anytime.
 
I'm waiting for someone to use starboard on a swim grid - has anyone done that? Is it good in UV?
 
I'm waiting for someone to use starboard on a swim grid - has anyone done that? Is it good in UV?

Took a Starboard one off. It had a zillion spider cracks running every which way and it didn't have enough support so it sagged like limp spaghetti in a couple of places.

Built a new one out of PlasTeak last winter. So far, so good. No sag and easy to keep clean. Not slippery. Gets even grippier when wet.

see:

Trawler Forum - View Single Post - Alternative Swim Platform Materials
 
After spending sometime on the wooden boat site, I left my swim grid unfinished. It is about 50 years old and looks great when wet, very gray when dry, but the wood is sound. From what I read on that site, teak needs nothing, and any coating is for aesthetics.

Mine is similar age and shape un coated but the dry color cheesed me off and I now coat it quarterly with teak oil for aesthetics.
 
JL: Is Attitude Adjustment kept in a shelter? If outside, how many years do you get between re-coatings.
.

Always outside in the New England area. Under shrink wrap in the winter (on land).
I usually re-coat every year, and about every 4 years I strip (sand) and re do it all.
 
I tossed our old one and built a new one last year out of IPE. Much stronger than teak. Looks like teak. Lasts like teak and a fraction of the price.
 

Attachments

  • IMAG1493.jpg
    IMAG1493.jpg
    181.3 KB · Views: 120
  • IMAG1494.jpg
    IMAG1494.jpg
    167.8 KB · Views: 113
I had one built about 2.5 years ago. Used plantation teak. I oil it about every 6 months (Top only) and it's still looking good.
 

Attachments

  • IMG_2805.jpg
    IMG_2805.jpg
    101.5 KB · Views: 120
  • IMG_2804.jpg
    IMG_2804.jpg
    104.7 KB · Views: 113
  • IMG_2821.jpg
    IMG_2821.jpg
    126.8 KB · Views: 134
I tossed our old one and built a new one last year out of IPE. Much stronger than teak. Looks like teak. Lasts like teak and a fraction of the price.

You did a great job on that platform. I like the depth from the transom. I never would have thought about Ipe, but it looks fantastic!
 
I tossed our old one and built a new one last year out of IPE. Much stronger than teak. Looks like teak. Lasts like teak and a fraction of the price.

On my list! What is IPE? (I will Google it, but where is it best found?)

My swim platform is too short and too cracked/chipped. I need to re-do into a nice large bed for a lazy Labrador and dingy.
 
What's IPE...?

Very strong wood, from Brazil I believe. It has become very polular over the past years for building docks. Very hard to work with in that it dulls saw blades and drills quickly, and it's a pia to sand. Forget nailing thru it unless you drill it. Our marina builds docks and I've used some scraps in the past to build mounting blocks, etc. Nice stuff.
I remember our marina guys talking about the first time they built with it...they lost their shirts on that job as they didn't know how different it is to work with.
 
I tossed our old one and built a new one last year out of IPE. Much stronger than teak. Looks like teak. Lasts like teak and a fraction of the price.

OK, I count 32 strip layers. Do you buy it in those strips? Do you drill alternating screw placement locations to avoid splitting? Man, I can see a morning on YouTube coming...
 
I had one built about 2.5 years ago. Used plantation teak. I oil it about every 6 months (Top only) and it's still looking good.

Hi Walt, I count 34 strips. How much time did you have invested?

Guess-timates?
1. Designing.
2. Procuring.
3. Prepping wood.
4. Cutting/Assembling.
5. Sanding
6. Banding
7. Coating
8. Attaching
 
Hi Walt, I count 34 strips. How much time did you have invested?
Time invested? Me? :lol: As I said, I had one built and all I did was make a "rubbing" of the old one and sent it to Wilkes-Barre, PA where I had it built. Wish I could remember the name of the shop but I can't. All they needed was a sketch or rubbing and the thickness of the teak. (Mine is 1.5" thick.) These guys in Wilkes-Barre were about $3K less than 3 West Coast shops that bid it. When they shipped it to San Diego, it came in a beautiful wooden crate with the rubbing laying on top. All n all, it cost $4.5K, including mounting at the yard. How much time did I have in the project? About 2-3 hours looking for the right shop. (Price) Here's a few pics that may help. (Note: Were I to do it again, I'd do what dwhatty did only I would have someone else build it as I don't have the skills or tools need to do a great job.)
 

Attachments

  • IMG_3981.jpg
    IMG_3981.jpg
    148.1 KB · Views: 85
  • IMG_3986.jpg
    IMG_3986.jpg
    95.1 KB · Views: 83
  • IMG_3990.jpg
    IMG_3990.jpg
    143.7 KB · Views: 80
  • IMG_3993.jpg
    IMG_3993.jpg
    97.5 KB · Views: 76
  • IMG_3996.jpg
    IMG_3996.jpg
    110.3 KB · Views: 80
OK, I count 32 strip layers. Do you buy it in those strips? Do you drill alternating screw placement locations to avoid splitting? Man, I can see a morning on YouTube coming...

I paid the lumber supplier I think about $40 to rip the boards into those strips (do not skip this as ripping these slats would have been a major PITA!!). I put a radius on all four edges with a router. I then took several of the strips and cut them to length using a stop block on my miter box for the short blocks. I put a radius on all of the ends as well. I mounted 4' wide planks to the tops of the SS brackets. Put blocks against the transom and bent the first board into place. I counter sunk and ran screws up from the bottom thru the planks and into the slat. Took the next slat and did the same as well as face drilling and screwing into the previous slat. I repeated this process for the first few slats. Disassembled all of them and mixed up some medium set thickened epoxy. Put a nice thick bed of epoxy on top of the planks and reassembled. Repeated this process with about 5 long slats per mixing. Limited the under mounted screws to every 3-4 slat. On the outer several slats I epoxied the face of each one so they were screwed and epoxied together to form a solid mass. I then wetted all the ends with thinned epoxy to help eliminate any checking or splitting. Thru bolted through the outer SS hole using a good sized fender washer to further sandwich the mass to the SS brackets. Next and I haven't got around to it yet is trim the ends if desired and add a rub stake around the perimeter.
Total cost
About $500
Time was two days (immensely satisfying project)
 
Last edited:
Here is a picture of my swimgrid after I extended it. You can differentiate the new wood from the old, by its slightly darker colour. The new part is the part closest to the transom.

$500 for the teak, cut strips to match the existing Swim grid and attached with epoxy and lots of clamping. 1/2" radius roundover after attaching, each strip 1.25 square, and fit to the existing supports with a 2x6 oak plank on top, which I replaced the next year with new, longer and stronger SS supports ($1000). The original extension was done in the winter of 05/06, so having left unfinished for 8 years, summers outside, winters in a shelter, the gray teak look is in need of refreshing.

So far I have sanded off most of the gray ridges, but there is still some gray showing, as the teak wears unevenly, the soft wood between the ridges wears first, so with sanding that wood stays gray. So far I haven't reduced the thickness significantly.

Thanks guys, for your suggestions. SWMBO has seen the sanded surface and has suggested she would be happier to have the surface go gray again and be refreshed with sanding every 8 years than have a slippery finish on top, so that being the easiest solution, that may be where I stop.
 

Attachments

  • April 3rd 014.jpg
    April 3rd 014.jpg
    143.1 KB · Views: 83
Don't varnish or Deks Ole.
On my previous boat I used that, D.O., and it was slippery as the dickens. I hurt myself although didn't go in the water when I stepped on the wet surface..
Same for varnish unless you put in a grit.

Any glossy surface will be very slippery when wet.
 
All - excellent photos! I am really inspired now. I have an 18-inch grey teak platform with cracks and patches. You guys are measuring 30-inch solid and tough, well-coated work. Thank you for all the pics and measurements. I need to go wood-shopping tomorrow. Once I get some other things settled (moving). I need to embark on a project.
 
Total cost
About $500
Time was two days (immensely satisfying project)

I won't re-quote all, but this post and many others are a much-appreciated textbook. Thank you for posting all of that detail. I hope I can replicate that work in the coming months. The next couple months we'll be tied up with a house move. Ugh.
 
Back
Top Bottom