 |
05-24-2011, 09:59 AM
|
#1
|
Guru
City: Everett, WA
Vessel Model: Ocean Alexander 38'
Join Date: Oct 2007
Posts: 763
|
Removing Portlights
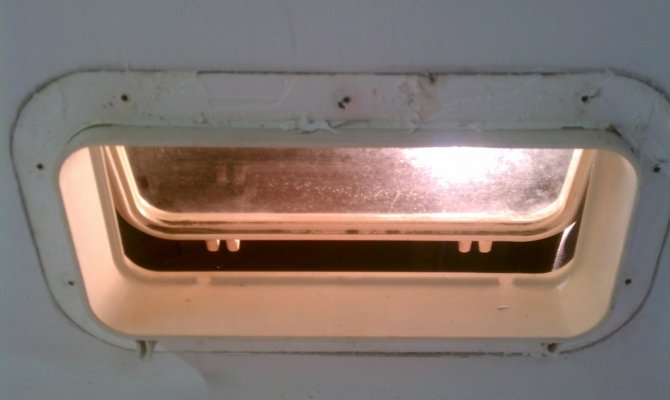
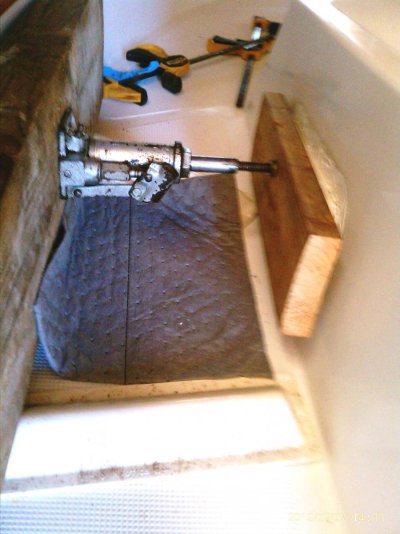
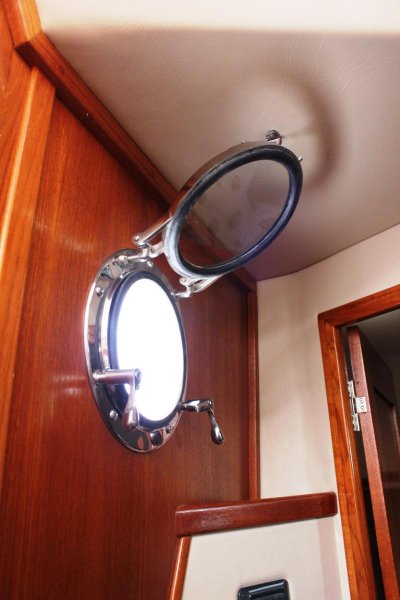
I am planning on removing 4 portlights around the v-berth and head.* started to get into it last weekend, removed trim pieces and thought I could easily pop out the portlight.* Wrong!* They were installed with 5200 or similar material and stuck in good.* I am concerned about damaging the interior Teak so want to remove gingerly.* Suggestions?* I was wondering if a heat gun may loosen it up?* May also try sawzall around frame and take it out in pieces?*
|
|
|
05-24-2011, 10:33 AM
|
#2
|
Grand Vizier
Join Date: Jan 2010
Posts: 3,599
|
Removing Portlights
Heat and patience will help, but I am told this works:
http://www.bluecoraltowers.com/ACCES...ve-remover.htm
West Marine sells it.
-- Edited by Delfin on Tuesday 24th of May 2011 11:35:37 AM
|
|
|
05-24-2011, 10:57 AM
|
#3
|
Guru
Join Date: Jun 2008
Posts: 4,872
|
RE: Removing Portlights
A thin sharpened putty knife and a little patience and you can cut thru the sealant and not destroy anything. *. WD 40 also helps.
|
|
|
05-24-2011, 03:05 PM
|
#4
|
Moderator Emeritus
City: Home Port: Buck's Harbor, Maine
Vessel Name: "Emily Anne"
Vessel Model: 2001 Island Gypsy 32 Europa (Hull #146)
Join Date: Sep 2008
Posts: 2,846
|
RE: Removing Portlights
Quote:
jleonard wrote:
A thin sharpened putty knife and a little patience and you can cut thru the sealant and not destroy anything. *. WD 40 also helps.
|
*And heat the putty knife well with your heat gun as you go along. I've had good results doing this in breaking epoxy joints. At least worth a try.
|
|
|
05-26-2011, 02:39 AM
|
#5
|
Guru
Join Date: Oct 2007
Posts: 22,553
|
RE: Removing Portlights
Time and pressure work best.
A couple of items , chisels , whatever, pushed in to create force in the removal direction and time for the goop to give up will usually do it.
DO NOT BE IN A BIG HURRY!
|
|
|
05-27-2011, 05:39 AM
|
#6
|
Guru
City: Cruising East Coast US
Vessel Name: Grace
Vessel Model: DeFever 48
Join Date: Apr 2008
Posts: 2,420
|
RE: Removing Portlights
buy a package of wood shims and Lowes or HD. Drive them in a little at a time all around the frame. Piece of cake. Use a painters 5-1 tool and a heat gun to get the rest off then acetone.
|
|
|
05-28-2011, 02:57 AM
|
#7
|
Guru
Join Date: Oct 2007
Posts: 22,553
|
RE: Removing Portlights
When you reinstall or replace them IF they are new style the RV shop will have rolls of sealant that are a snap to use.
Otherwise for older style DOLPHINITE , not a glue like 5200 is a far better choice.
IF they were installed with Dolphinite , you probably would not have made the first posting.
|
|
|
05-29-2011, 05:22 AM
|
#8
|
Senior Member
City: Spring Lake, MI
Vessel Name: Great Laker
Vessel Model: American Tug 34
Join Date: Jan 2011
Posts: 346
|
RE: Removing Portlights
I am preparing to remove plastic ports and replace with stainless steel. I've been told that use of a paring knife and mineral spirits will help loosen the port from the fiberglass.
|
|
|
06-16-2011, 06:18 AM
|
#9
|
Guru
City: Cary, NC
Vessel Name: Skinny Dippin'
Vessel Model: Navigator 4200 Classic
Join Date: Jul 2009
Posts: 5,841
|
RE: Removing Portlights
Mike, do you have a picture of this process? I have having trouble getting a mental picturing where things go.
Thanks.
|
|
|
06-16-2011, 11:22 AM
|
#10
|
Guru
City: Cary, NC
Vessel Name: Skinny Dippin'
Vessel Model: Navigator 4200 Classic
Join Date: Jul 2009
Posts: 5,841
|
RE: Removing Portlights
WOW! That's quite a cool way to do it. Thanks.
|
|
|
07-11-2012, 04:37 PM
|
#11
|
Guru
City: Everett, WA
Vessel Model: Ocean Alexander 38'
Join Date: Oct 2007
Posts: 763
|
Finally got around to replacing the portlights this last weekend (before battery issued took my attention). Anyway, this is how I ended up removing them and it worked pretty slick. I had a small hydraulic jack sitting around so I set a small timber up on the deck blocked against the outside rail, removed all the screws holding the portlight in, placed a chunk of 2x6 over the opeing and placed the jack between this and the timber. Just a few gentle pumps to put pressure on the portlight. Worked on the inside with a sharp putty knifie went back and forth a few times putting a little more pressure on and within maybe 10 minutes had it out.
And, to my pleasant surprise, the core all looks good.
|
|
|
07-11-2012, 06:07 PM
|
#12
|
Guru
City: Diberville Mississippi
Vessel Name: KnotDoneYet
Vessel Model: 1983 42' Present Sundeck
Join Date: Oct 2007
Posts: 2,450
|
Great approach! Who's port lights did you go with?
|
|
|
07-11-2012, 06:18 PM
|
#13
|
Guru
City: Everett, WA
Vessel Model: Ocean Alexander 38'
Join Date: Oct 2007
Posts: 763
|
Beckson rain drains. I've had then sitting here for over a year. If I did it again, I'd go with one of the stainless steel units. Oh well, plastic worked OK for the last 28 years.
|
|
|
07-11-2012, 06:57 PM
|
#14
|
Guru
City: Diberville Mississippi
Vessel Name: KnotDoneYet
Vessel Model: 1983 42' Present Sundeck
Join Date: Oct 2007
Posts: 2,450
|
I'm sure they will be fine. It's on my list as well....
|
|
|
07-11-2012, 08:25 PM
|
#15
|
Senior Member
City: Spring Lake, MI
Vessel Name: Great Laker
Vessel Model: American Tug 34
Join Date: Jan 2011
Posts: 346
|
The issue with the plastic ports that were on my AT is that the plastic expands at a different rate than the siding and it was difficult to get an adhesive that will grab and hold well to both under these conditions. So eventually, they leaked. Several owners removed and re caulked them with the same result.
The port removal was time consuming on the first one until I got the knack. Using a paring knife and mineral spirits, I was able to break the seal between the port and the sidewall and slide them out.
I went with new stainless ports from New found Metals and they have an excellent video on how to do the installation. The butyl calk is easy to work with and makes an excellent seal.
The new ones are gorgeous!
|
|
|
07-12-2012, 10:15 PM
|
#17
|
Newbie
Join Date: Jul 2012
Posts: 2
|
I had good luck driving cedar shims used to install doors and windows between a hatch frame and the mounting surface. Tap them in, go do something else for a while, and tap them in more. The cedar won't hurt your gelcoat. Worked well on two large hatches and six ports bedded with something like 5200.
Randy (1st post)
|
|
|
 |
Thread Tools |
Search this Thread |
|
|
Display Modes |
Linear Mode
|
Posting Rules
|
You may not post new threads
You may not post replies
You may not post attachments
You may not edit your posts
HTML code is Off
|
|
|
|
» Trawler Discussions |
|
|
|
|
|
|
|
|
|
|
|
|
|
|
|
|
|
|