Krogen 42 Fuel Tank Replacement

The friendliest place on the web for anyone who enjoys boating.
If you have answers, please help by responding to the unanswered posts.
Thanks Steve. I'll try the unscientific method next. :)

What is tough for me, is that part was bought at one of the premier chandleries in the PNW and it was clearly labeled as bronze. We had just come from an early 1980's boat and had replaced most of the fittings because they were in fact brass so I was sensitive to what I was installing on Hobo.
 
Thanks for sharing all the great info

Question on one of your pics - what are you using as a coupler in exhaust run in engine picture? I am looking at changing out old ss steel elbows for silicone similar to your setup.
 

Attachments

  • Engine_looking_forward.jpg
    Engine_looking_forward.jpg
    182 KB · Views: 202
We're back at it and starting to put things back together. Here's what's been going on:

I was camera-less for a week after dropping my trusty Cannon into the bilge sump so we're missing a few pictures. :facepalm:

The engine rebuild has been delayed about 10 days to 2 weeks. One of the lobes on the cam for the number 5 cylinder was out of spec, so off it went to a specialist.

The tanks should be ready by the end of next week or the beginning of the following week. It took a little longer to get the drawings approved.
When we reduced the capacity from ~700 gallons to 620 gallons, the deck fills needed to get relocated. Fortunately, we caught that just before they went into production, or we'd have been going thru a deck beam.

We're done grinding fiberglass. :dance: 
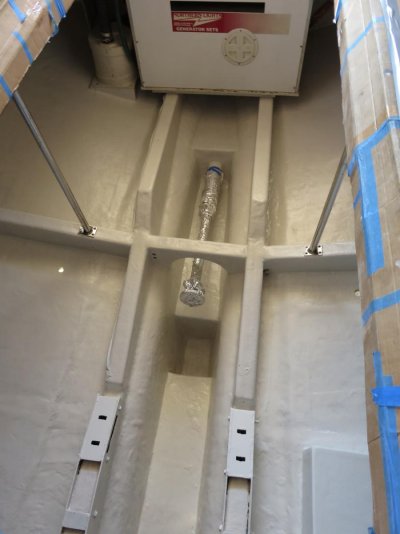
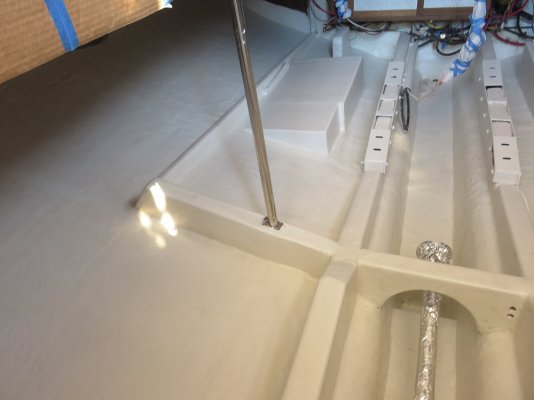
I don't care how carefully you tent, dust is going to find it's way into other spaces. We cleaned, cleaned, then cleaned some more and there's still dust. :eek:

In the engine compartment, after the grinder/sanders were put down and after vacuuming and wiping down everything at least 3 times there was still dust. :mad: I think this is one of those projects you only do once. I'm still scratching. We should finish rolling on the epoxy this weekend. I want a maximum cure time before we start the full-on reassembly. More next week. :)
 

Attachments

  • IMG_0013.jpg
    IMG_0013.jpg
    83.6 KB · Views: 110
  • IMG_0032.jpg
    IMG_0032.jpg
    76.3 KB · Views: 118
  • IMG_0033.JPG
    IMG_0033.JPG
    166.6 KB · Views: 130
  • IMG_0034.JPG
    IMG_0034.JPG
    141.5 KB · Views: 132
Greetings,
Mr. LM. That bilge is GORGEOUS! Seems a shame you're going to have to start putting stuff back in BUT a necessary shame I expect. Oh, the camera?

giphy.gif
 
Larry,
Despite the expense and troubles I know those changes are going to bring a smile to your face each trip to the ER. Might even want to have morning coffee down there? Glad you seem back on track with your project and allowing us to observe and learn.
Congrats!!

Glen
 
Larry, that really does look good! Lots of effort but definitely worth it.
 
Man that looks nice . Would love to see mine like it someday.
 
OH Boy is that a sweet bottom from any perspective. Could I suggest forgetting about bronze stuff and go with chrome, lots of chrome.
 
Larry

Echoing others, great DIY project you're doing. It will end up better than a yard job by virtue of the fact that you care more than the yard guys as to outcome.

I missed it, what white bilge coating did you select?
 
Larry

Echoing others, great DIY project you're doing. It will end up better than a yard job by virtue of the fact that you care more than the yard guys as to outcome.

I missed it, what white bilge coating did you select?

We're trying Sherwin-Williams Sea Guard 5000 HS Epoxy based on the yard's recommendation and talking to Sherwin-Williams. I've tried enamels and gelcoat in the past and after 4-5 years the paint has worn through or the gelcoat is dirty and doesn't clean. A 2 part polyurethane is too glossy for us. The Sea Guard is an off white and has more of a satin finish. A potential down side is that it may yellow slightly. Time will tell if we made the right decision.

SeaGuard 5000HS Epoxy - Protective & Marine

After all that work, there is no way I'd use anything but a 2 part poly.

If you don't like the gloss look, just flatten it. :D

Awlgrip Home
 
Larry, the word is overused these days, but nothing else will do. What you've done is literally awesome. You set the bar high for any who would undertake a similar engine compartment project. Saludos!
 
Thanks for sharing all the great info

Question on one of your pics - what are you using as a coupler in exhaust run in engine picture? I am looking at changing out old ss steel elbows for silicone similar to your setup.

KneeDeep: Better forget it. If I know Larry, the extra two weeks in the engine shop isn't for nothing. We've already seen plenty of evidence that he tends to over-do things .....even leans a bit toward the exotic. But he promised to leave the valve cover breather cap red!
 

Attachments

  • image.jpg
    image.jpg
    152.1 KB · Views: 121
Last edited:
After all that work, there is no way I'd use anything but a 2 part poly.

If you don't like the gloss look, just flatten it. :D

Awlgrip Home

Bill: If I had an engine room like the boats you drive, I probably would. By the time I put everything back, most of floor, bilge and horizontal surfaces, you won't see much. I'm looking at the bling factor from the powdered coated perforated aluminum walls, ceiling and engine. See Larry's/Healhustlers post. :)
 
Last edited:
Lena and I picked up the fuel tanks this morning. Thanks Sailor of Fortune for the trailer. This afternoon we attached the GPO3 (thanks Mark Bevins for the GPO3) to the outboard side of the starboard tank before we lost the sun. We used 4 tubes of Satin's Glue (5200). I won't need to wear gloves for a week. :lol:

We degreased the Al using acetone then denatured alcohol and then scuffed up the areas with some 80 grit and wiped again. We ran the GPO3 through a sander and then wiped that down. Pretty messy but happy with the results. We ended up using 1/8" x 3" GPO3 strips cut to length. We had some 1/4" GPO3 but felt it may be too thick and could affect the fit. We dry fitted the 1/8" and it looks like it will gives enough air space so the tanks won't have any contact point with the hull.

For orientation, the GPO3 in the pictures will go against the hull. Pictures of the inboard sides (which are on the pallets) tomorrow.

FYI: The tanks are constructed of 1/4" Al grade 5052-H32 and each tank is baffled so there are 8 chambers. I did have a clean out port added in the lowest forward inboard part of the tank. Cost: $5,229/tank including tax.
 

Attachments

  • 1.jpg
    1.jpg
    137.8 KB · Views: 199
  • 2.jpg
    2.jpg
    167.7 KB · Views: 206
  • 4a.jpg
    4a.jpg
    135.6 KB · Views: 219
  • 5.jpg
    5.jpg
    106.7 KB · Views: 247
New Fuel Tanks

Lookin' good! Nice to have that certifciation sticker too.

Nice to have that job behind you.
 
Ya know, Lar: That 5052 polishes up nice with 400 grit and some rouge with a soft wheel......just sayin.:popcorn:
 
Congratulations Larry.
 
Looks really nice Larry. What is the purpose of the GP03 again? I presume it is to prevent mechanical damage against the hull?
 

Latest posts

Back
Top Bottom