Cap separation repair

The friendliest place on the web for anyone who enjoys boating.
If you have answers, please help by responding to the unanswered posts.

hjorgan

Senior Member
Joined
Jan 15, 2016
Messages
150
Location
USA
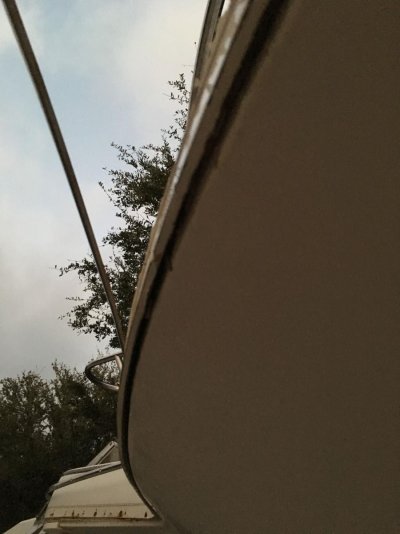
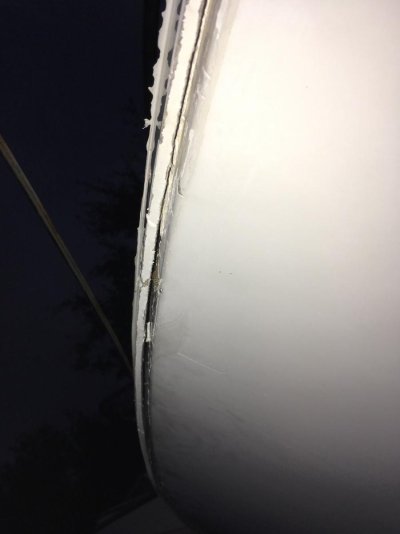
Boat is on the hard to do some general maintenance. She's a project boat. Noticed the rub rail on the port side was a bit loosey goosey. Pulled it off and found that the cap was built with an up to 1/2" gap betwixt the cap and the hull. So now I gotta fix it. Options?

-- mix up some epoxy and filler, stuff the gap and seal it off, let it cure then redrill for rub rail?

-- shoot 5200 in the gap, stuff with filler, cure, redrill and caulk.

-- do what the previous owner (or manufacturer) did and caulk the crap out of it.

I like the idea of fiber and epoxy, or even the 5200. But I'm concerned that the cap needs to "flex" a bit. New territory for me. Ideas appreciated.
 
Can you post a picture of it? Would be easier to understand :)
 
Wood boat? Glass? Metal? Just a leetle more info, if you please? And a photo or two!
 
OK fellas got the message...

fiberglass hull. Rub rail is plastic with an aluminum cap.
Pics follow.
The gap is at most 1/2".
 

Attachments

  • capgap1.jpg
    capgap1.jpg
    51.1 KB · Views: 200
  • capgap3.jpg
    capgap3.jpg
    93.1 KB · Views: 196
  • capgap2.jpg
    capgap2.jpg
    46.3 KB · Views: 189
Xsbank what was the movie re your avatar? Driving me nuts ... not a long trip.
 
sounds like you are describing the hull/deck being joined as a shoebox style. A gap between the two is very common and usually filled with marine joint compound or 5200. I would use the 5200.
 
sounds like you are describing the hull/deck being joined as a shoebox style. A gap between the two is very common and usually filled with marine joint compound or 5200. I would use the 5200.

Yes it is a shoebox cap. I like the ease (not the cost) of 5200 just keeping it from drooping is the challenge. Might just have to mix some West Systems epoxy thick like putty, then front it with 5200. Essentially need to fill the gap.
 
Greetings,
Mr. hj. I am not a big proponent of 5200 but at least you're not using Silicon...Just a thought here....IF there is no structural needs for the filler and the space seems so large, would it be feasible to partially fill the void with backer rod? Backer Rod Products
It might serve 2 purposes: Lessen the total amount of caulk/sealant and make the joint much easier to clean out again, if necessary (and it probably will be).

Thanks! Never seen the backer rod thing before. Looks like a good way to close the gap and reduce the expensive sealants.
 
One thing would be good to understand is why the gap between the rail and the hull... I doubt it was built as is. Is the gap because fasteners went loose? Anyway trying to fill a 1/2 inch gap will, in my sense, never give nice result. Maybe you will be better to remove ut, clean sand the hull and put a nice new rail of your choice.
 
The joint is separating because the hull and/or deck are moving, whether from hitting the piling too hard, or working in the seas, or bad engineering, or whatever. I see lots of this near cleats.
I can tell you from experience that 5200 will only be a temporary repair, and you will soon have a leaky joint again.
You need to try and determine what is causing the flexing, and do some real structural repair before worrying about caulking the joint. This may involve some glasswork to reinforce the joint from the inside, and possibly some gusseting if large flat areas lead into joint.
Once the pieces are stabilized and properly fastened together, Then the overlap can be filled, hopefully with epoxy putty that will keep the fasteners from crushing the joint. Don't apply putty or 5200 against glossy gelcoat and expect that it will stick under duress.
 
+1. Need to make it structural. Don't just 5200 it.
 
Boat was most likely not delivered new with the gap you are seeing.

You need to refasten it before you caulk. I would install a few fasteners to see how well it draws back together. Space them according to what it takes to draw the hull and deck together without causing it to have a wavy shaped seam. You should dry fit it then withdraw the fasteners caulk and put back together.

If the old holes can be reused with the same or larger sized fasteners use them. Use additional fasteners as needed to make sure it pulls back together straight. If the holes are stripped out too large to reuse then you will need to fill or repair them to avoid leaks and possibly weakening the structure with too many perforations.

Look over the interior to see if tabbing is broken loose from bulkheads or cabinets that are tying it all together inside. That should also be repaired if any is loose. The seam may need that help to stay fastened once the job is complete.

Hull structure is a system. Look forward, aft and inside to make sure its complete integrity is restored so you do not have to repeat the same repair again.
 
Is it possible that the structural attachment is done at the top not the visibly open side gap? Are there any screws through the side gap?
 
As suggested above, this is likely a structural issue in need of proper repair. The boat builder can provide details on how this deck to hull connection was originally done. On FRP boats, this connection is near the top of the list regarding need for solidly built.

Whatever boat brand you have, go to that owner's forum and ask for comments. This is not the best site for brand specific build issues.
 
OK so I think I fingered out what happened
The cap appears to have been put on at build about 1/2 inch too high on the hull.
I remember the previous owner (AKA Captain Silicone) said they got caught out in some rough stuff and took a pounding.

All the screws in the bow section were sheared off. So the cap is now flush with the hull.

I re-drilled the holes and used thru-bolts where I could. Was able to pull the cap back into 1/8 in of the hull.

Next step is to calk and replace the rub rail. Thanks trawler forum brain trust!
 
Greetings,
Mr. h. IF that cavity was ever in contact with silicone you're going going to have to clean the void SUPER well, possibly to the point of removing your new thru-bolts and sanding the whole area. You will be wasting time, effort and materials if not scrupulously clean.
 
Back
Top Bottom