You are using an out of date browser. It may not display this or other websites correctly.
You should upgrade or use an alternative browser.
You should upgrade or use an alternative browser.
Bleuvet rejuvenation
- Thread starter Lou_tribal
- Start date
The friendliest place on the web for anyone who enjoys boating.
If you have answers, please help by responding to the unanswered posts.
If you have answers, please help by responding to the unanswered posts.
Lou_tribal
Guru
Comodave
Moderator Emeritus
- Joined
- Jul 2, 2015
- Messages
- 21,284
- Location
- Au Gres, MI
- Vessel Name
- Black Dog
- Vessel Make
- Formula 41PC
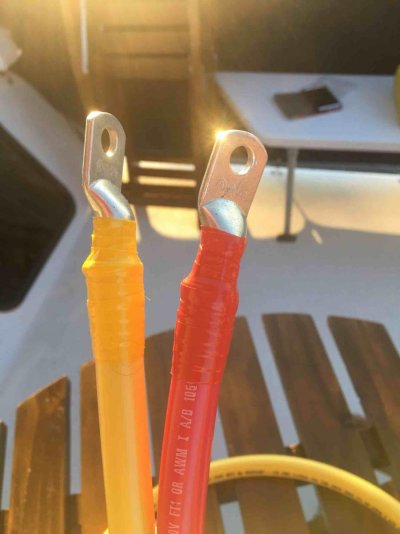
Looks good. I use Promariner chargers which are the same as Sterling I believe. Really like them. Nice battery cables.
dhays
Guru
- Joined
- May 26, 2015
- Messages
- 9,045
- Location
- United States
- Vessel Name
- Kinship
- Vessel Make
- North Pacific 43
They look good. I admit to never having crimped battery cables. I know I could spend the money on good tools and do it myself but... I just pay to have someone make them for me. I’m impressed with your initiative!
Lou_tribal
Guru
They look good. I admit to never having crimped battery cables. I know I could spend the money on good tools and do it myself but... I just pay to have someone make them for me. I’m impressed with your initiative!
Well in fact I dis not invest so much for the tools. I gave a chance to an hydraulic crimping tool. I saw good and bad feedback and for the price I thought it was a limited risk. Must admit I am nicely surprised. For my 0 AWG wires the crimp is nice.
As I measure as I go it was easier for me to make my own cable instead of ordering them.
L
Comodave
Moderator Emeritus
- Joined
- Jul 2, 2015
- Messages
- 21,284
- Location
- Au Gres, MI
- Vessel Name
- Black Dog
- Vessel Make
- Formula 41PC
I make my own battery cables because it is easier to get them the correct length and get the lugs in the correct alignment. If you are using 4/0 cable it is important to get the lugs lined up correctly since the cables won’t twist much to let the lug go on the stud if it isn’t lined up on the cable.
Lou_tribal
Guru
Well the job is not entirely done yet, I have yet to connect the charger and 2 cables between fuse and batteries. Time is going to fast we we have fun!
Some picture of the work:
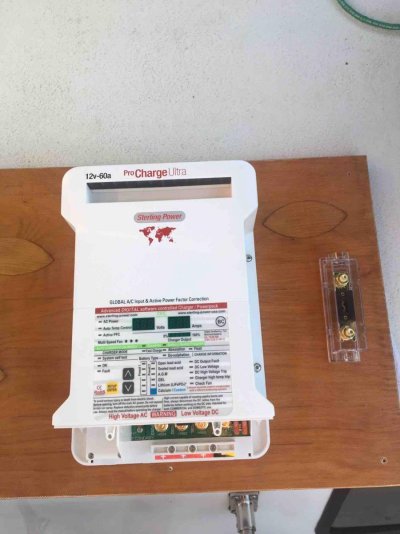
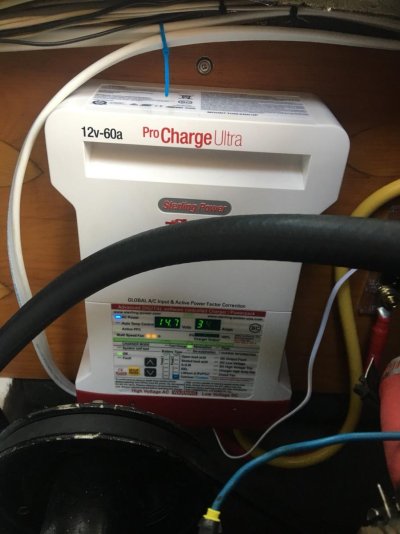
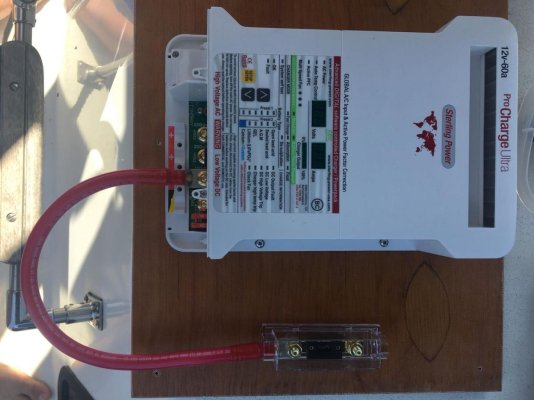
Charger on its supporting plate and wired to the fuse. The supporting plate will be screwed on a bulkhead with spacers as not to squeeze the sound insulation cover.
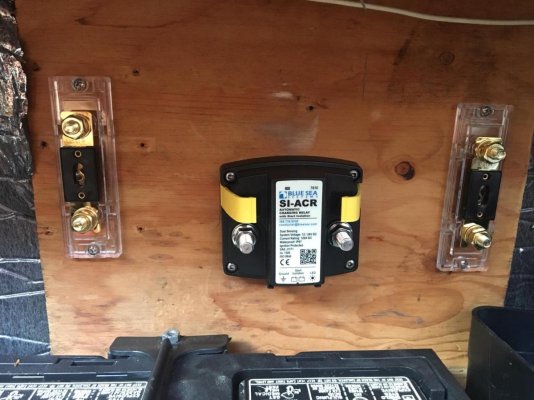
The ACR installed in place of the old battery isolator. For now the install is temporary and done on an existing plate. I will change it a bit when I will do new batteries installation, but this will be fine for the few weekends left before haul out.
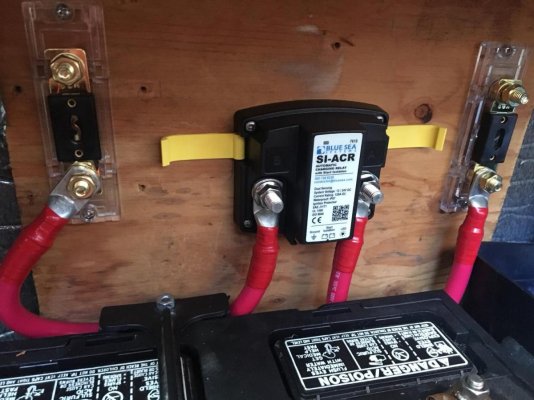
Same wired
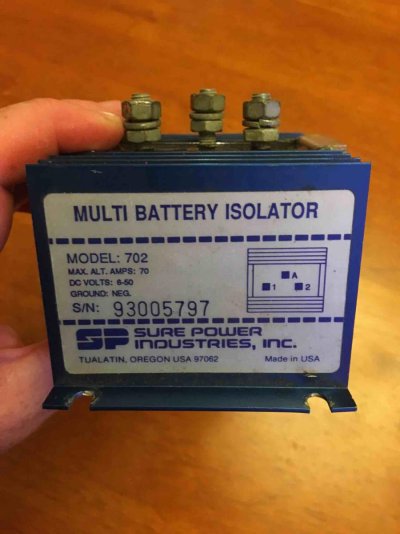
The old battery isolator that will be reused later (even if not optimal it will be fine to feed alt to 2 battery bank for my usage)
L
Some picture of the work:
Charger on its supporting plate and wired to the fuse. The supporting plate will be screwed on a bulkhead with spacers as not to squeeze the sound insulation cover.

The ACR installed in place of the old battery isolator. For now the install is temporary and done on an existing plate. I will change it a bit when I will do new batteries installation, but this will be fine for the few weekends left before haul out.

Same wired

The old battery isolator that will be reused later (even if not optimal it will be fine to feed alt to 2 battery bank for my usage)

L
Comodave
Moderator Emeritus
- Joined
- Jul 2, 2015
- Messages
- 21,284
- Location
- Au Gres, MI
- Vessel Name
- Black Dog
- Vessel Make
- Formula 41PC
Good so far, I like doing electrical work because when you are done it works not like plumbing that always leaks when I am done.
Lou_tribal
Guru
Lou_tribal
Guru
Last weekend was time to unwrap the boat and start working on it.
We removed all batteries, ditched cables that will not be used anymore, clean the area to prepare for painting.
While my beloved wife painted the area, I took care of some other dirty tasks.
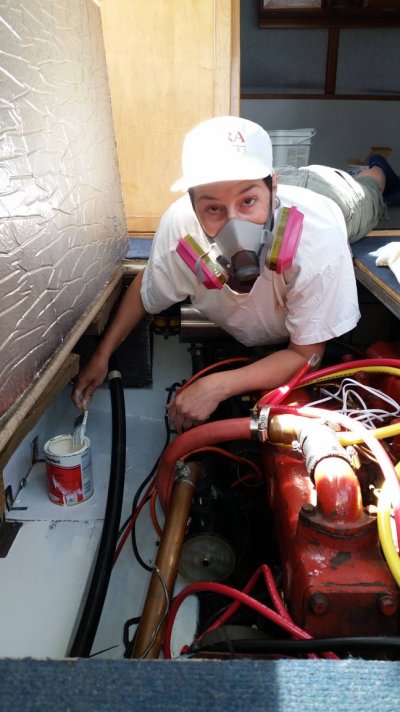
On my side I removed the rudder actuator cylinder to redo hydraulic lines and fittings, cleaned the aft bilge in preparation of the new bilge pump installation, removed oil hose to/from oil filter for replacement and finally remove fresh water hose between the pump and coolers for replacement and rerouting.
Next steps are to get new oil lines, new hydraulic hoses and fittings and finish my homemade battery box before going back to the boat to reinstall everything.
So much fun!
L
We removed all batteries, ditched cables that will not be used anymore, clean the area to prepare for painting.
While my beloved wife painted the area, I took care of some other dirty tasks.

On my side I removed the rudder actuator cylinder to redo hydraulic lines and fittings, cleaned the aft bilge in preparation of the new bilge pump installation, removed oil hose to/from oil filter for replacement and finally remove fresh water hose between the pump and coolers for replacement and rerouting.
Next steps are to get new oil lines, new hydraulic hoses and fittings and finish my homemade battery box before going back to the boat to reinstall everything.
So much fun!
L
Comodave
Moderator Emeritus
- Joined
- Jul 2, 2015
- Messages
- 21,284
- Location
- Au Gres, MI
- Vessel Name
- Black Dog
- Vessel Make
- Formula 41PC
We launched last Tuesday, finally. Just got done Saturday with refinishing the teak deck in our sundeck, never again.
Lou_tribal
Guru
At least this is an issue I do not have, no teak on deck except 3 ladder steps.We launched last Tuesday, finally. Just got done Saturday with refinishing the teak deck in our sundeck, never again.
L
Comodave
Moderator Emeritus
- Joined
- Jul 2, 2015
- Messages
- 21,284
- Location
- Au Gres, MI
- Vessel Name
- Black Dog
- Vessel Make
- Formula 41PC
Yes, I wish there weren’t any teak decks but they are only under the hardtop for the sundeck. The caulking was failing so about 250 hours on my knees later it is finally done.
Lou_tribal
Guru
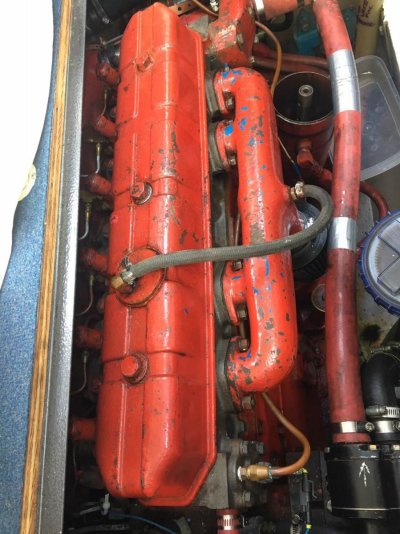
Finally just got my raw water line redone with my new tranny oil cooler setup. It was looking very simple to do and finally was a real headache to be able to route properly the hoses without chafing issue or other PIA.
Another finding is that the fitting on the exhaust manifold was 1 5/8 but water pump fitting was 1 1/4 so I needed a reducer but I have been only able to find 1 1/2 to 1 1/4. Fortunately the 1 1/2 hose was elastic enough to be able to fit it on the 1 5/8 fitting.
Anyway it is done and should not bother me for some time.
Below some pictures.
First before:
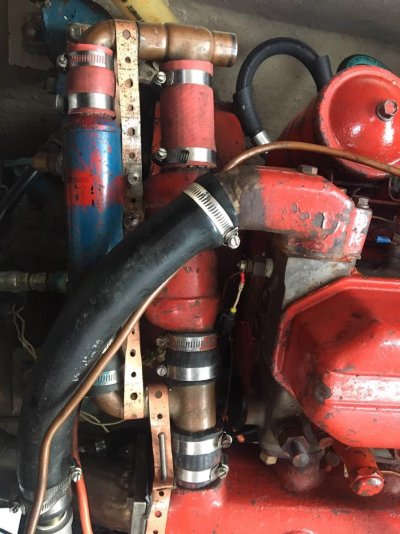
And after:
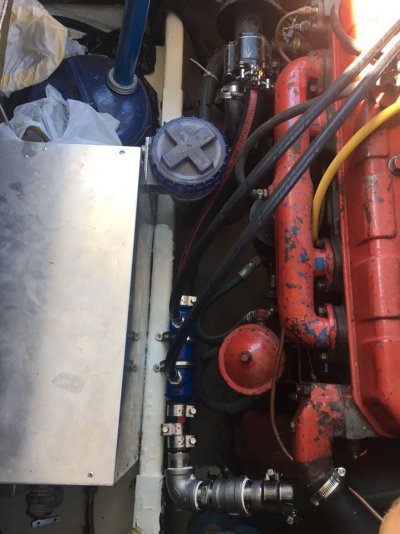
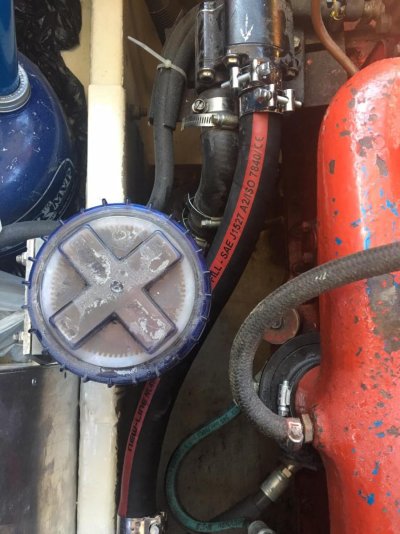
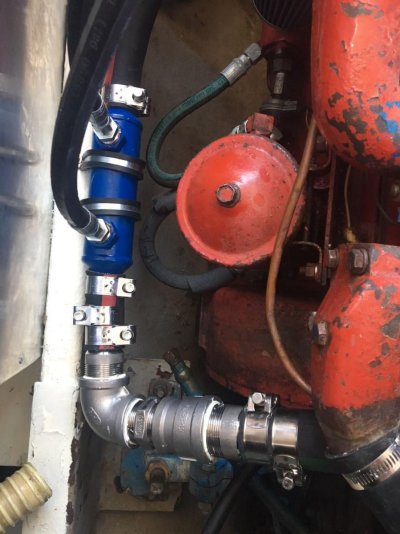
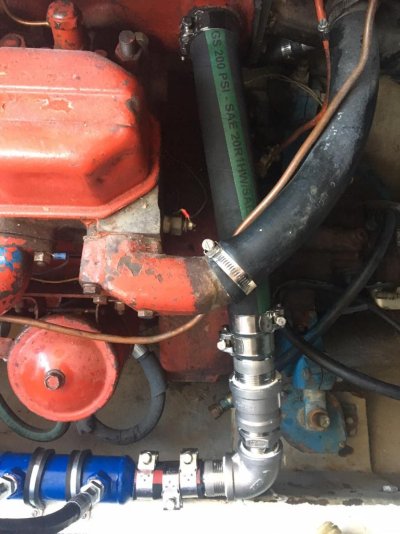
Next is to do my tranny oil change and reconnect the oil lines. I will need to add a bit more oil as I used longer lines.
L
Another finding is that the fitting on the exhaust manifold was 1 5/8 but water pump fitting was 1 1/4 so I needed a reducer but I have been only able to find 1 1/2 to 1 1/4. Fortunately the 1 1/2 hose was elastic enough to be able to fit it on the 1 5/8 fitting.
Anyway it is done and should not bother me for some time.
Below some pictures.
First before:


And after:


Next is to do my tranny oil change and reconnect the oil lines. I will need to add a bit more oil as I used longer lines.
L
Lou_tribal
Guru
Comodave
Moderator Emeritus
- Joined
- Jul 2, 2015
- Messages
- 21,284
- Location
- Au Gres, MI
- Vessel Name
- Black Dog
- Vessel Make
- Formula 41PC
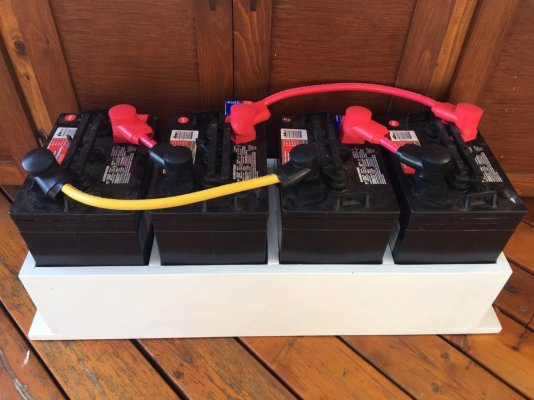
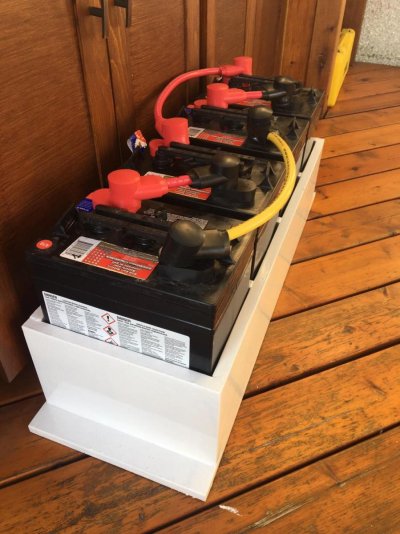
Looking good, glad to see the covers on the battery terminals.
dhays
Guru
- Joined
- May 26, 2015
- Messages
- 9,045
- Location
- United States
- Vessel Name
- Kinship
- Vessel Make
- North Pacific 43
Looking good, glad to see the covers on the battery terminals.
Agreed. That looks really nice!
Lou_tribal
Guru
Now that my boat is in my backyard, it is time to start serious work. I have about 5 months to do all I will be able to do before moving it back to the shed for winter.
First thing to tackle, front portholes. The plastic windows are toasted showing yellowish aging. The rubber join is leaking.
So today I removed them:
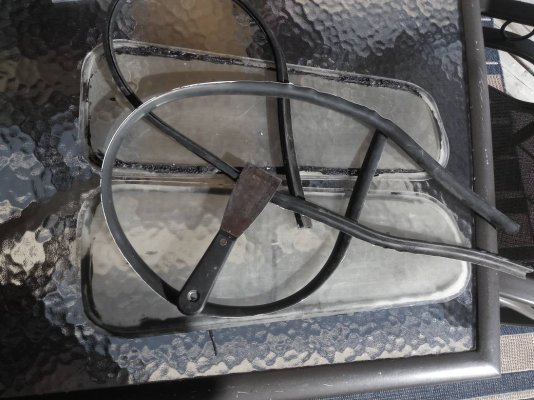
After a post about how to remove the rubber join, it was easier than expected. Just start at the rubber end and pulled a small section with a knife then pulled it by hand. Was firmly set but I have strong arms [emoji3]
Next will be to clean-out the urethane sealant that the PO generously spread everywhere to try to stop a leak.
This is the bridge to m question... Does anybody has a miracle recipe to remove caulking?
I heard about a product named DeBond but I cannot find it in Canada.
L
First thing to tackle, front portholes. The plastic windows are toasted showing yellowish aging. The rubber join is leaking.
So today I removed them:

After a post about how to remove the rubber join, it was easier than expected. Just start at the rubber end and pulled a small section with a knife then pulled it by hand. Was firmly set but I have strong arms [emoji3]
Next will be to clean-out the urethane sealant that the PO generously spread everywhere to try to stop a leak.
This is the bridge to m question... Does anybody has a miracle recipe to remove caulking?
I heard about a product named DeBond but I cannot find it in Canada.
L
Comodave
Moderator Emeritus
- Joined
- Jul 2, 2015
- Messages
- 21,284
- Location
- Au Gres, MI
- Vessel Name
- Black Dog
- Vessel Make
- Formula 41PC
Amazon shows Debond but it is currently unavailable. I have not used it but it is said to work well. I sharpen a putty knife and use it to slice off the caulk.
Lou_tribal
Guru
Tomorrow I will try with an old wood chisel that I sharpened and honed to see if this does it.Amazon shows Debond but it is currently unavailable. I have not used it but it is said to work well. I sharpen a putty knife and use it to slice off the caulk.
I am pretty sure to have some nice intimate moment with that caulk [emoji3]
L
OldDan1943
Guru
- Joined
- Oct 2, 2017
- Messages
- 10,595
- Location
- USA
- Vessel Name
- Kinja
- Vessel Make
- American Tug 34 #116 2008
Tomorrow I will try with an old wood chisel that I sharpened and honed to see if this does it.
I am pretty sure to have some nice intimate moment with that caulk [emoji3]
L
Instead of metal, I suggest softening the stuff with a heat gun and then a wooden or plastic tool to remove the stuff. You don't want to score the metal.
Last edited:
Lou_tribal
Guru
Today was time to tear apart the horrible carpet from the forward V.
View attachment 118525
Not a difficult job, just add to remove all lights, coat hanger, outlets etc before ripping out he carpet.
Now I got a pile of trash.
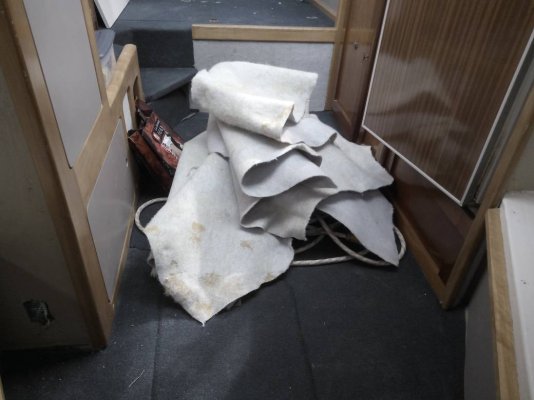
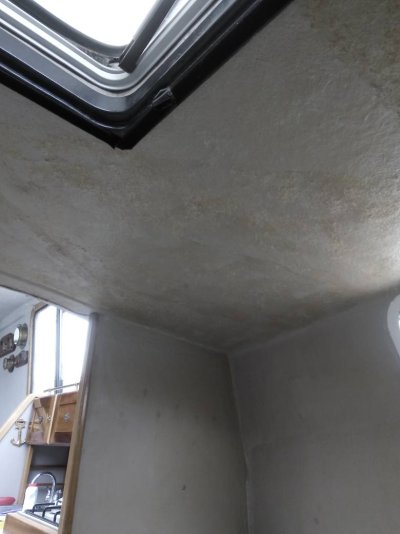
Next is to sand glue residue that stick to the fiberglass and to decide what to do.
I first wanted to cover walls with cork but now I am thinking to paint them. However before painting I will need to fair the whole surface as finish under he carpet is not clean. It is glass mat so not very soft.
L
View attachment 118525
Not a difficult job, just add to remove all lights, coat hanger, outlets etc before ripping out he carpet.
Now I got a pile of trash.

Next is to sand glue residue that stick to the fiberglass and to decide what to do.
I first wanted to cover walls with cork but now I am thinking to paint them. However before painting I will need to fair the whole surface as finish under he carpet is not clean. It is glass mat so not very soft.

L
Lou_tribal
Guru
Today I tried to clean the carpet glue residues.
I tried the following:
1. Turpentine: it dissolves somewhat but make it tacky and as it is the smell stay a lot in the air. Not a vey good solution.
2. Mineral spirit: not strong enough.
3. Acetone: Does the work BUT as very volatile, need to spend a lot of it for a small surface. One good aspect about its volatility is that the strong smell goes away pretty quickly though.
But I must admit that, doing this is a most boring stupid and overly long job. In 2h and almost 1L of acetone I only cleaned the surface on the picture below, so about 3 square feet, and I need to clean 6 times more just for the V-dining!

Tomorrow I will go to he hardware shop to get a boat load of acetone and to check if I can find something more appropriate. Would need something gelly/foamy to stick to the ceiling and dissolve that @$%&$!! glue. Maybe a kind of paint stripper?
L
I tried the following:
1. Turpentine: it dissolves somewhat but make it tacky and as it is the smell stay a lot in the air. Not a vey good solution.
2. Mineral spirit: not strong enough.
3. Acetone: Does the work BUT as very volatile, need to spend a lot of it for a small surface. One good aspect about its volatility is that the strong smell goes away pretty quickly though.
But I must admit that, doing this is a most boring stupid and overly long job. In 2h and almost 1L of acetone I only cleaned the surface on the picture below, so about 3 square feet, and I need to clean 6 times more just for the V-dining!

Tomorrow I will go to he hardware shop to get a boat load of acetone and to check if I can find something more appropriate. Would need something gelly/foamy to stick to the ceiling and dissolve that @$%&$!! glue. Maybe a kind of paint stripper?
L
OldDan1943
Guru
- Joined
- Oct 2, 2017
- Messages
- 10,595
- Location
- USA
- Vessel Name
- Kinja
- Vessel Make
- American Tug 34 #116 2008
Hmmmm, I suggest you call a company that sells carpet. They may give you great advice if you ask nicely.
Lou_tribal
Guru
Not a bad idea!Hmmmm, I suggest you call a company that sells carpet. They may give you great advice if you ask nicely.
L
Lou_tribal
Guru
Program of today was to first sand the portholes glass bed after having cleaned out the caulking yesterday. I will seal the bed with epoxy reinforced fiberglass before painting it clean.
Second task was to remove the capstan to clean it, rewire it and make a new support.
The old support is made of laminated pieces of mahogany and was starting to rot badly.
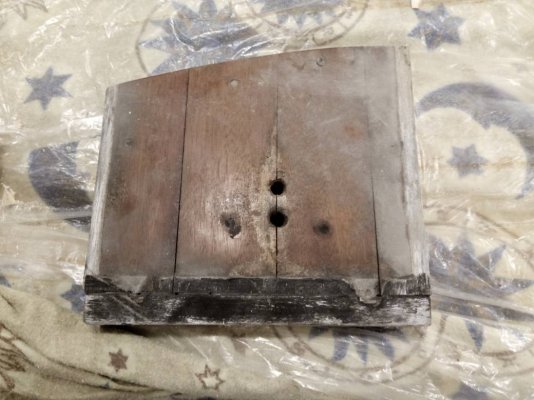
The PO was not a fan of varnish so left it pretty much decaying as is.
I will replace it with a sandwich of wood and fiberglass that I will paint same color as the hull.
I started with a piece of bone dry pine wood that I marked with the form and roughly cut the forward curve.
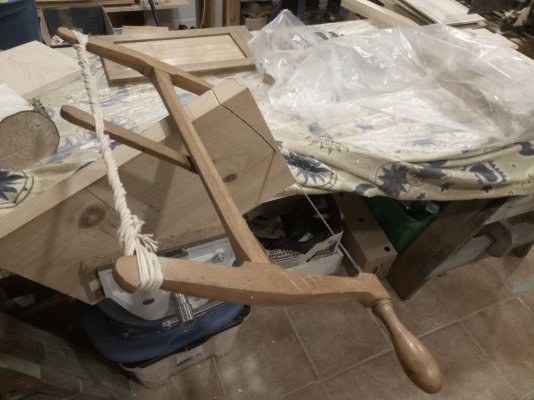
I cleaned the cut with a spokeshave...
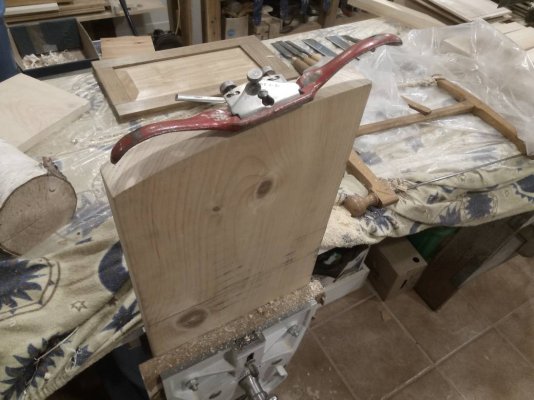
And round the bottom angle to match the deck lip.
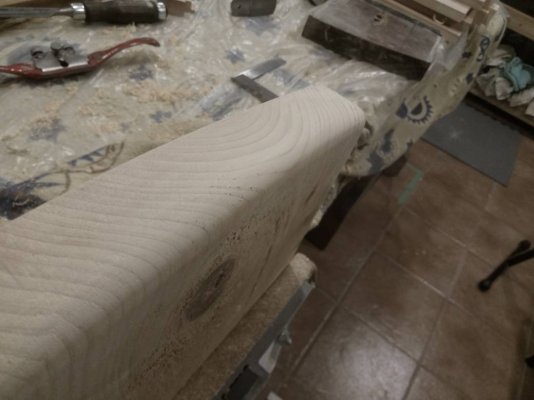
Finally cut to length and clean the cut with a plane.
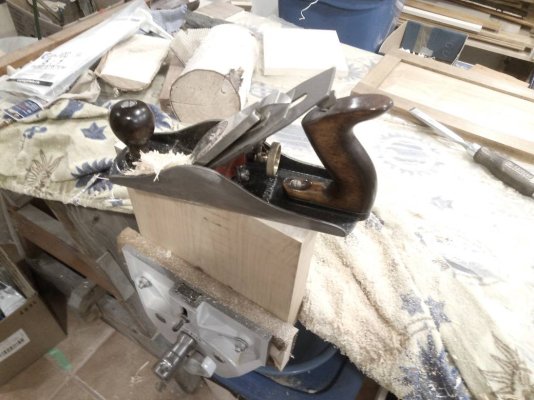
This will follow the rounded bow and the deck lip.
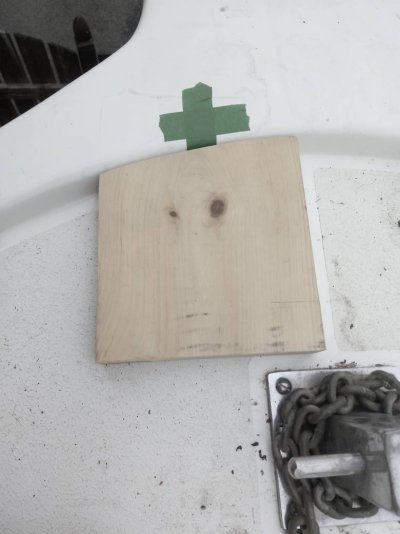
Next will be to epoxy it, cover it with fiberglass, paint and install it.
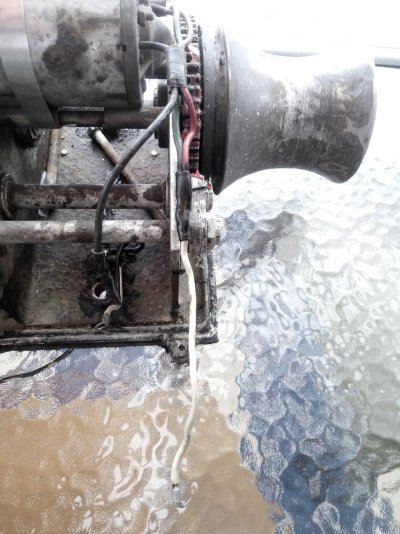
Speaking of the capstan I am wondering if anybody would know that model and how many amps it draws, I found the wires on he small size.
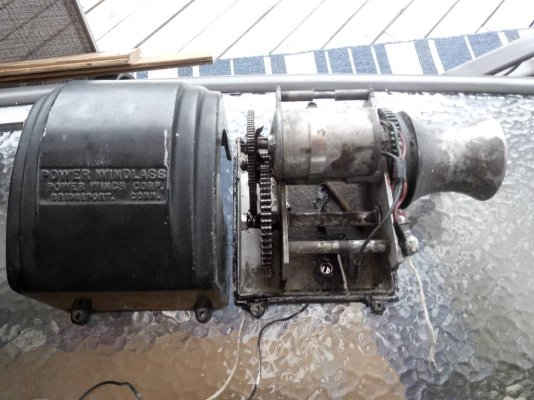
I also wonder why there are 3 wires coming out from the motor and two wires from the motor (the red and the green) wired together on the positive???
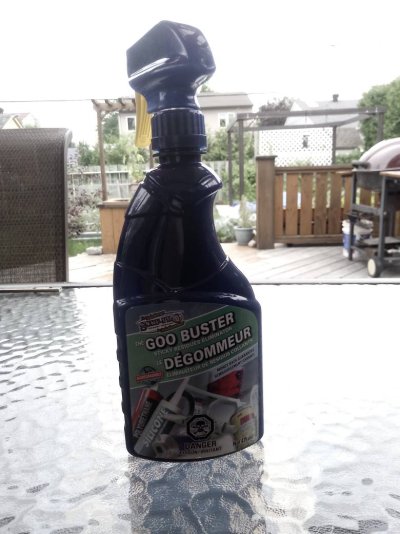
Finally for today I found a nice product to remove goo/glue. The name does not sound very serious but it works well (in fact better than acetone in my case, is natural based (limonene) and the odor is not repulsive as acetone.
L
Second task was to remove the capstan to clean it, rewire it and make a new support.
The old support is made of laminated pieces of mahogany and was starting to rot badly.

The PO was not a fan of varnish so left it pretty much decaying as is.
I will replace it with a sandwich of wood and fiberglass that I will paint same color as the hull.
I started with a piece of bone dry pine wood that I marked with the form and roughly cut the forward curve.

I cleaned the cut with a spokeshave...

And round the bottom angle to match the deck lip.

Finally cut to length and clean the cut with a plane.

This will follow the rounded bow and the deck lip.

Next will be to epoxy it, cover it with fiberglass, paint and install it.
Speaking of the capstan I am wondering if anybody would know that model and how many amps it draws, I found the wires on he small size.

I also wonder why there are 3 wires coming out from the motor and two wires from the motor (the red and the green) wired together on the positive???

Finally for today I found a nice product to remove goo/glue. The name does not sound very serious but it works well (in fact better than acetone in my case, is natural based (limonene) and the odor is not repulsive as acetone.

L
RT Firefly
Enigma
Greetings,
Mr. L_t. Ah, the lucky day THAT humble piece of pine came into your possession. You've saved it from becoming a floor joist in the new McDonald's in St. Louis de Ha Ha. Nice work.
Good tip on the "Goo Buster". Acetone works but somehow I end up in the 60's after a while...

St. Louis de Ha Ha? Nope didn't make it up. Been there. Nice place.
https://en.wikipedia.org/wiki/Saint-Louis-du-Ha!_Ha!
Mr. L_t. Ah, the lucky day THAT humble piece of pine came into your possession. You've saved it from becoming a floor joist in the new McDonald's in St. Louis de Ha Ha. Nice work.
Good tip on the "Goo Buster". Acetone works but somehow I end up in the 60's after a while...
St. Louis de Ha Ha? Nope didn't make it up. Been there. Nice place.
https://en.wikipedia.org/wiki/Saint-Louis-du-Ha!_Ha!
Last edited:
Lou_tribal
Guru
Greetings,
Mr. L_t. Ah, the lucky day THAT humble piece of pine came into your possession. You've saved it from becoming a floor joist in the new McDonald's in St. Louis de Ha Ha. Nice work.
Good tip on the "Goo Buster". Acetone works but somehow I end up in the 60's after a while...

St. Louis de Ha Ha? Nope didn't make it up. Been there. Nice place.
https://en.wikipedia.org/wiki/Saint-Louis-du-Ha!_Ha!
Hi my dear Mr RTF, hope you are doing well!
I love pine wood, nice scent when you work it, and often considered as the poor man wood but this is underestimating it.
I was very surprised by Goo Buster, just tried it without much confidence and was like wow. Only thing is that is on the pricey range at about 50$ a gallon.
With Acetone, beyond the fumes that make you see stars in daylight, it is so volatile that when you pour it on a rag, the time you need to turn and use the rag it is already dry!
Never been to St Louis de HaHa! But was always amused by the name, maybe his is a place for revelations... AhAh!
L
RT Firefly
Enigma
Greetings,
Mr. L_t. "Never been to St Louis de HaHa! But was always amused by the name, maybe his is a place for revelations... AhAh!"

Mr. L_t. "Never been to St Louis de HaHa! But was always amused by the name, maybe his is a place for revelations... AhAh!"
Jeff F
Guru
- Joined
- Nov 5, 2015
- Messages
- 2,435
- Location
- Canada
- Vessel Name
- Escapade
- Vessel Make
- 50` US Navy Utility trawler conversion
Lou, you might try this stuff. It's cheap and non-toxic, and remarkably effective on some types of glue. Maybe it will do nothing, but worth testing.
https://www.homehardware.ca/en/250ml-wallpaper-remover/p/1676118
https://www.homehardware.ca/en/250ml-wallpaper-remover/p/1676118

